In this guide, you will learn how to install VirtualBox guest additions on Ubuntu 24.04. If you have installed Ubuntu 24.04 on VirtualBox, you realize that it is not in fullscreen or some other features do not work.
If you installed Ubuntu 24.04 via unattended installation on VirtualBox 7, chances are you enabled auto Guest additions installation. As such, you may not need the procedure outlined here!
Table of Contents
Installing VirtualBox Guest Additions on Ubuntu 24.04
Guest Additions Features
Apart from enabling the virtual machine to have a full screen view, guest additions offers many other features;
- Mouse pointer integration
- Shared folders for easy sharing of files between the host and the guest
- Ensures better and accelerated video performance.
- Seamless windows integration
- Generic host/guest communication channels that enables you to control and manage guest execution.
- Provides Host-Guest time synchronization.
- Shared clipboard between host and guest vm.
- Automated logins.
You can read more about these features on the VirtualBox User Manual.
Install Required Packages
Before you can proceed with Guest Addition installation, you first need to install required build tools, the Linux kernel headers and the support modules, if not already installed.
Run the command below to verify if these requirements have already been installed.
sudo dpkg -l | grep -E "dkms|linux-headers-$(uname -r)|build-essential"
ii  build-essential                               12.10ubuntu1                             amd64        Informational list of build-essential packages
ii  linux-headers-6.6.0-14-generic                6.6.0-14.14                              amd64        Linux kernel headers for version 6.6.0 on 64 bit x86 SMP
The ii means that the package is installed. As you can see from the output, dkms is not installed. If none if these packages is installed, you can simply use the APT package manager to install them.
sudo apt update -y
sudo apt upgradesudo apt install dkms linux-headers-$(uname -r) gcc make perl
Reboot the vm is restart is required!
[ -f /var/run/reboot-required ] && sudo systemctl rebootAdd Empty IDE Storage Controller to the VM
Note that before you can insert the ISO file, you need to have at least one empty IDE storage controller.
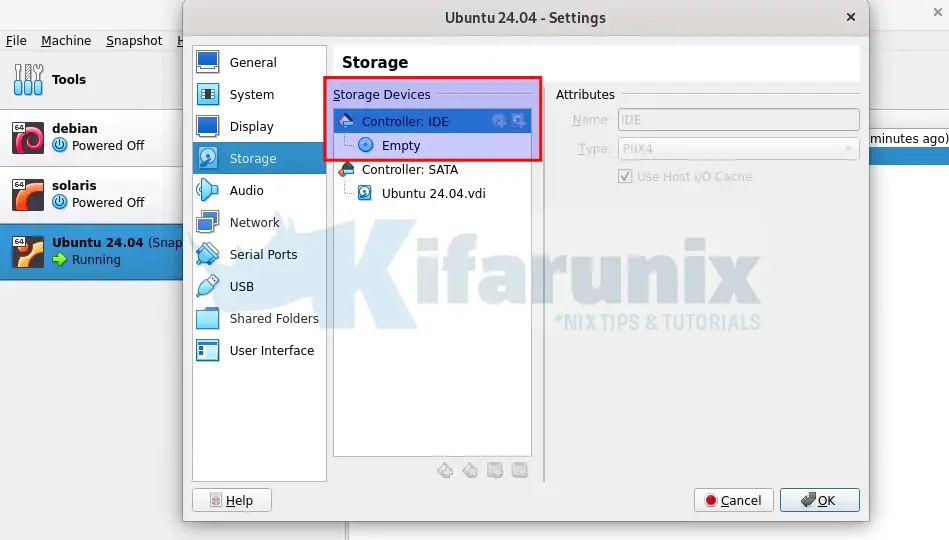
If there is no free IDE controller, then you have to power off the virtual machine to be able to add an IDE controller.
Insert Guest Additions ISO
In order to install VirtualBox Guest Additions, you need to have the Guest Additions ISO file.
Guest Addition ISO file can be inserted into the VM in two ways;
- Insert Guest Additions ISO File Manually
- Install Guest Additions ISO Automatically from Ubuntu Repositories Package manager.
Insert Guest Additions ISO File Manually
To manually insert the VirtualBox Guest Additions ISO file on your Ubuntu 24.04 VM, navigate to Menu bar on your VM and click Devices > Insert Guest Additions CD image.
Installing Guest Additions ISO from Ubuntu Repositories
It is also possible to install the Guest Additions ISO file from Ubuntu repos. Guest Additions ISO file is provided by the virtualbox-guest-additions-iso package.
sudo apt-cache policy virtualbox-guest-additions-iso
If it is available, simply run the command below to install it.
sudo apt install virtualbox-guest-additions-iso
Install VirtualBox Guest Additions
You can install VirtualBox Guest Additions in different ways depending on how you inserted the Guest additions ISO file to the VM.
Install Guest Additions with Manually Inserted Guest Additions ISO file
When you insert Guest additions ISO file into the VM manually, this may or may not launch a dialog box that prompts you to run or cancel the Guest Additions installer.
If dialog box is launched and you chose to run it, it will launch the installation of Guest additions on Ubuntu 24.04.
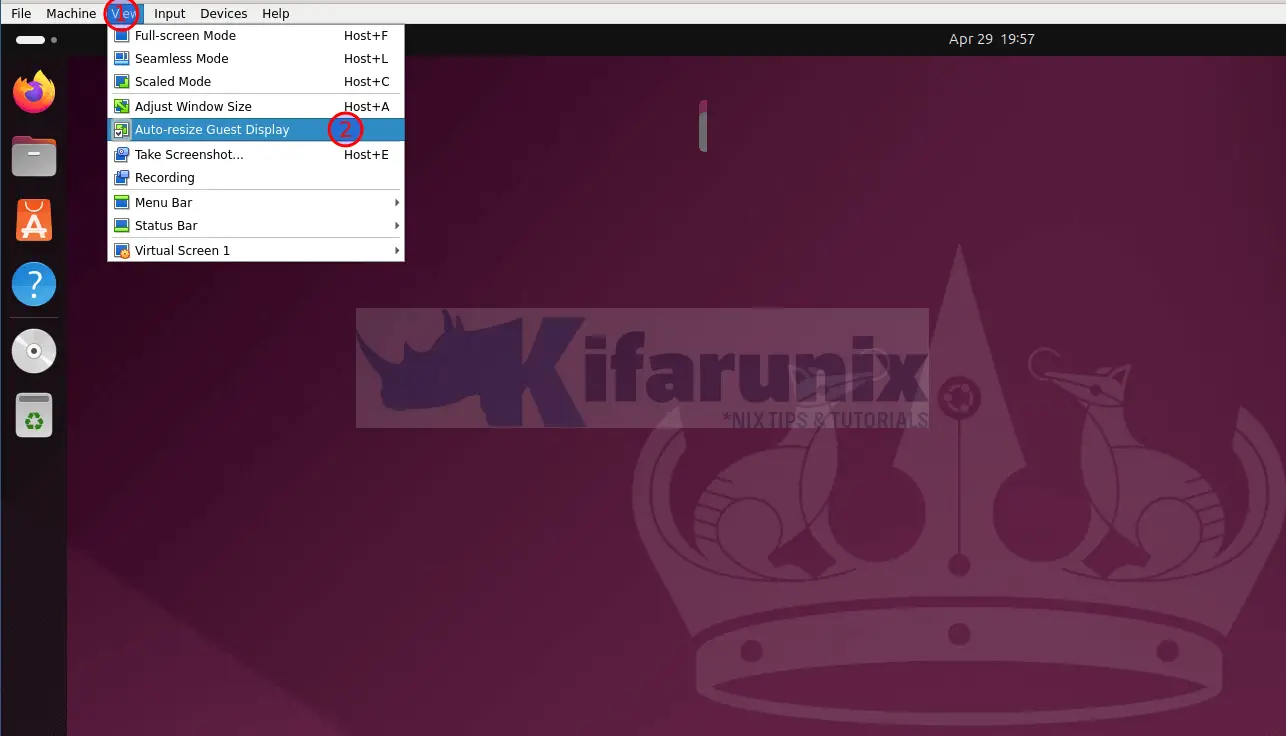
Once the Guest Additions are installed, the screen may automatically resizes itself. If the screen doesn’t auto-resize automatically, be sure to toggle (off/on, so to say) View -> Auto-resize Guest Display on the VM menu bar to set right VM resolution.
You can as well restart your virtual machine to reload the Kernel modules.
If the dialog box is launched and you chose to cancel the installer, then you can manually install the Guest Additions using the installer provided by the ISO file is inserted. The ISO file is usually mounted on /media/$USER/VBox_GAs_x.x.x. Where x.x.x is the release version of VirtualBox.
ls -1 /media/$USER/VBox_GAs_*AUTORUN.INF
autorun.sh
cert
NT3x
OS2
runasroot.sh
TRANS.TBL
VBoxDarwinAdditions.pkg
VBoxDarwinAdditionsUninstall.tool
VBoxLinuxAdditions.run
VBoxSolarisAdditions.pkg
VBoxWindowsAdditions-amd64.exe
VBoxWindowsAdditions.exe
VBoxWindowsAdditions-x86.exe
windows11-bypass.reg
Then navigate to the mount point of the guest additions and run the command below;
cd /media/$USER/VBox_GAs_*
sudo ./VBoxLinuxAdditions.runor simply run;
sudo /media/$USER/VBox_GAs_*/VBoxLinuxAdditions.run
Install Guest Additions using Guest Additions ISO file from Package Repos
When installed, the VirtualBox Guest Additions ISO is now available as /usr/share/virtualbox/VBoxGuestAdditions.iso.
To install it, you need to mount it.
sudo mount -o loop /usr/share/virtualbox/VBoxGuestAdditions.iso /media/
Next, run the installation.
sudo /media/VBoxLinuxAdditions.run
Verifying archive integrity...  100%   MD5 checksums are OK. All good.
Uncompressing VirtualBox 7.0.14 Guest Additions for Linux  100%
VirtualBox Guest Additions installer
Copying additional installer modules ...
Installing additional modules ...
VirtualBox Guest Additions: Starting.
VirtualBox Guest Additions: Setting up modules
VirtualBox Guest Additions: Building the VirtualBox Guest Additions kernel
modules.  This may take a while.
VirtualBox Guest Additions: To build modules for other installed kernels, run
VirtualBox Guest Additions:   /sbin/rcvboxadd quicksetup
VirtualBox Guest Additions: or
VirtualBox Guest Additions:   /sbin/rcvboxadd quicksetup all
VirtualBox Guest Additions: Building the modules for kernel 6.6.0-14-generic.
update-initramfs: Generating /boot/initrd.img-6.6.0-14-generic
VirtualBox Guest Additions: Running kernel modules will not be replaced until
the system is restarted or 'rcvboxadd reload' triggered
VirtualBox Guest Additions: reloading kernel modules and services
VirtualBox Guest Additions: kernel modules and services 7.0.14 r161095 reloaded
VirtualBox Guest Additions: NOTE: you may still consider to re-login if some
user session specific services (Shared Clipboard, Drag and Drop, Seamless or
Guest Screen Resize) were not restarted automatically
If the screen doesn’t auto-resize automatically, be sure to toggle (off/on, so to say) View -> Auto-resize Guest Display on the VM menu bar to set right VM resolution.
Otherwise, you can reload the kernel modules;
sudo rcvboxadd reloadOr simply restart your system to reload kernel modules;
sudo systemctl reboot -iYou should now be on full screen
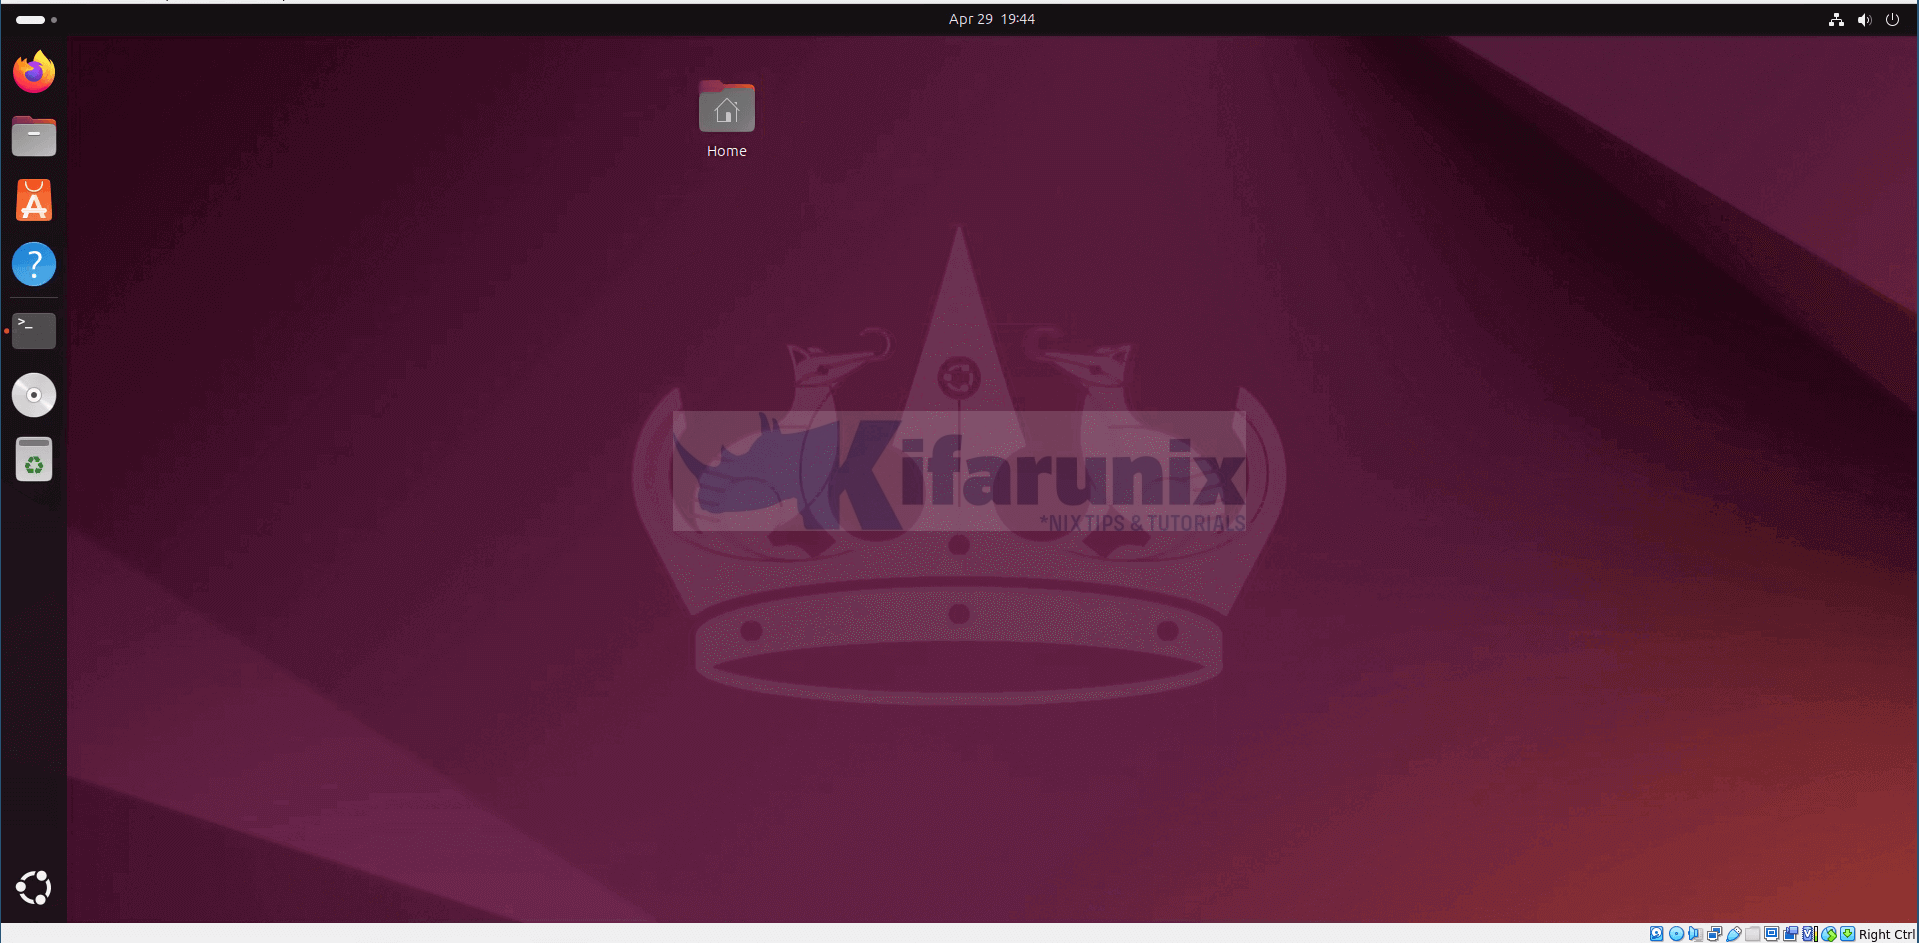
and can be able to enable shared clipboard, shared folders, drag and drop…
You can enable these options from the vm settings;
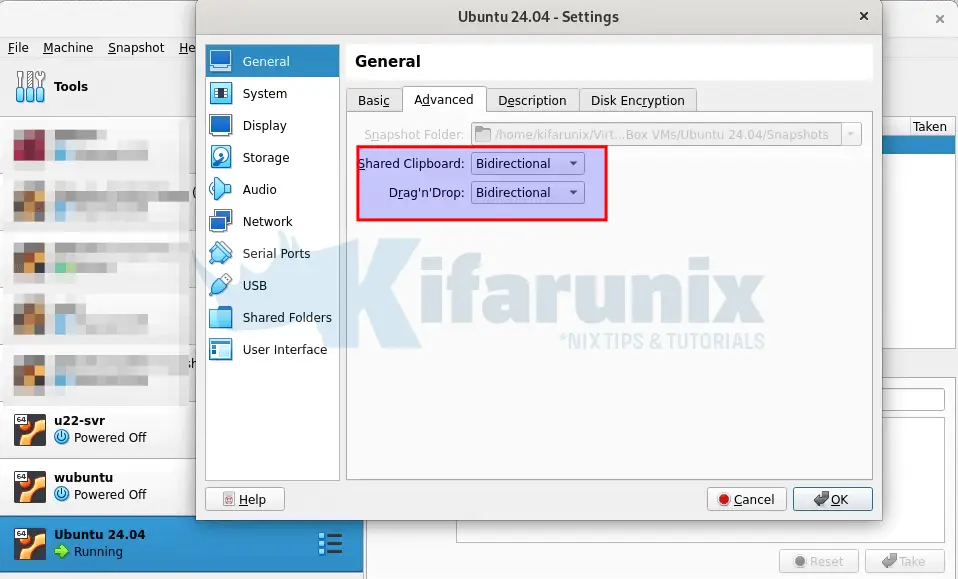
Or
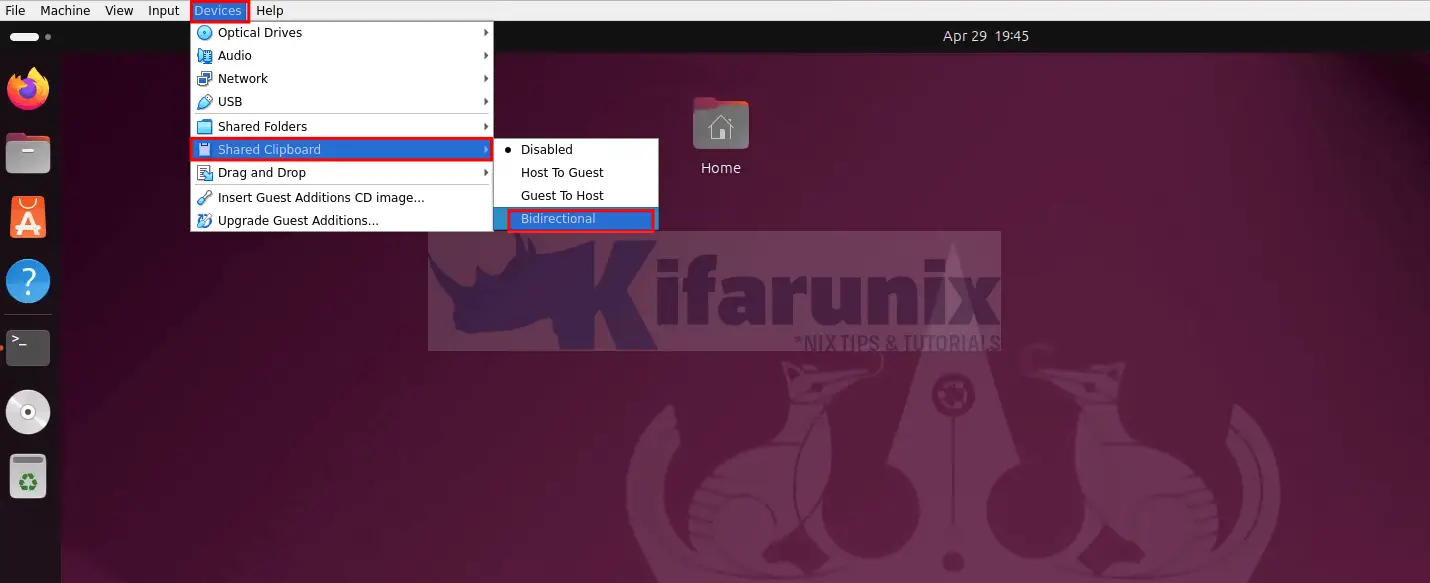
You can enable these options, log out and re-login and you should be able to utilize them!
If upon system reboot the screen doesn’t auto-resize automatically, be sure to toggle (off/on) View -> Auto-resize Guest Display on the VM menu bar to set right VM resolution.
That is all on our guide on how to install VirtualBox Guest Additions on Ubuntu.

