If you have installed Ubuntu 21.04 on VirtualBox, you realize that it is not in fullscreen. In this guide, you will learn how to install VirtualBox guest additions on Ubuntu 21.04. Apart from enabling the virtual machine to have a full screen view, guest additions offers many other features;
- Mouse pointer integration
- Shared folders for easy sharing of files between the host and the guest
- Ensures better and accelerated video performance.
- Seamless windows integration
- Generic host/guest communication channels that enables you to control and manage guest execution.
- Provides Host-Guest time synchronization.
- Shared clipboard between host and guest vm.
- Automated logins.
You can read more about these features on the VirtualBox User Manual.
Follow the link below to learn how to install Ubuntu 21.04 on VirtualBox.
Install Ubuntu 21.04 Desktop on VirtualBox
Installing VirtualBox Guest Additions on Ubuntu 21.04
Install Required Build tools and Kernel Headers
Before you can proceed to install VirtualBox Guest Additions, you first need to install required build tools, the Linux kernel headers and the support modules, if not already installed.
Run the command below to verify if these requirements have already been installed.
sudo dpkg -l | grep -E "dkms|linux-headers-$(uname -r)|build-essential"ii linux-headers-5.11.0-11-generic 5.11.0-11.12 amd64 Linux kernel headers for version 5.11.0 on 64 bit x86 SMPThe ii means that the package is installed. As you can see from the output, dkms and build-essential are not installed.
You can then install the missing tools by running the command;
apt updateapt install dkms build-essentialIf none if these packages is installed, you can simply use the APT package manager to install them.
sudo apt update -ysudo apt upgradesudo apt install dkms linux-headers-$(uname -r) build-essentialInstall VirtualBox Guest Additions
In order to install VirtualBox Guest Additions, you need to have the Guest Additions ISO file. Guest Addition ISO file can be inserted into the VM in two ways;
- Insert Guest Additions ISO File Manually
- Install Guest Additions ISO Automatically from Ubuntu Repositories using APT package manager.
Insert Guest Additions ISO File Manually
To manually insert the VirtualBox Guest Additions ISO file on your Ubuntu 21.04 VM, navigate to Menu bar on your VM and click Devices > Insert Guest Additions CD image. Note that before you can insert the ISO file, you need to have at least one empty IDE controller.
Install VirtualBox Guest Additions from UI
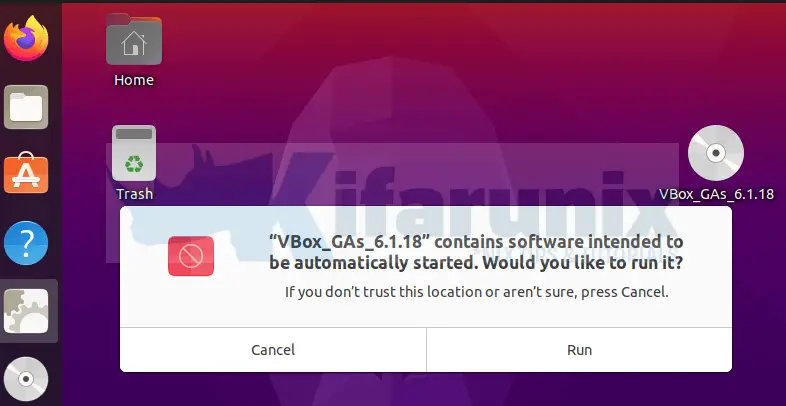
When inserted, a dialog box which prompts you to run or cancel the Guest Additions installer is launched.

Click Run to launch the installation of Guest additions on Ubuntu 21.04. You will be prompted to enter your password to authenticate the installation.
Upon successful authentication, the Guest Addition installation will now run.
Once the Guest Additions are installed, Press Enter to close the installation wizard.
Reboot your system to reload the Kernel modules.
If upon reboot the screen do not auto adjust upon login, click on the VM menu View > Auto-resize Guest Display and toggle the option to put the vm on full screen.
Install VirtualBox Guest Additions from Terminal
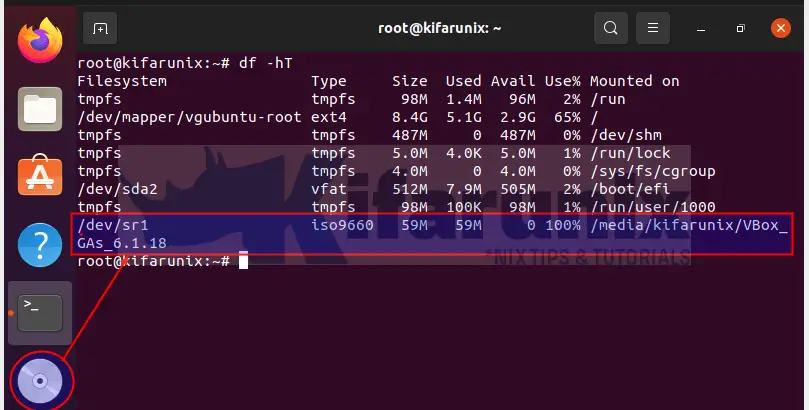
You can also install the Guest Additions from the terminal. Therefore press cancel when the installer dialog box opens up and the iso image will be mounted on the system.
When the Guest Addition ISO file is inserted, it is mounted on /media/$USER/VBox_GAs_6.x.x. Where x is the build version of VirtualBox.

To install guest additions from the terminal, navigate to the mount point of the guest additions and run the command below;
cd /media/$USER/VBox_GAs_6.1.18sudo ./VBoxLinuxAdditions.run
or simply run;
sudo /media/$USER/VBox_GAs_6.1.18/VBoxLinuxAdditions.runReboot your system to reload the Kernel modules.
Installing Guest Additions ISO from Ubuntu Repositories
It is also possible to install the Guest Additions ISO file from Ubuntu repos.
Guest Additions ISO file is provided by the virtualbox-guest-additions-iso package.
sudo apt-cache policy virtualbox-guest-additions-isovirtualbox-guest-additions-iso:
Installed: (none)
Candidate: 6.1.18-1
Version table:
6.1.18-1 500
500 http://ke.archive.ubuntu.com/ubuntu hirsute/multiverse amd64 Packages
500 http://ke.archive.ubuntu.com/ubuntu hirsute/multiverse i386 PackagesIf it is available, simply run the command below to install it.
sudo apt install virtualbox-guest-additions-isoWhen installed, the VirtualBox Guest Additions ISO is now available as /usr/share/virtualbox/VBoxGuestAdditions.iso.
To install it, you need to mount it.
sudo mount -o loop /usr/share/virtualbox/VBoxGuestAdditions.iso /media/Next, run the installation.
sudo /media/VBoxLinuxAdditions.runOnce the installation is done, restart your system to reload kernel modules.
You should now be on full screen and can be able to enable shared clipboard, shared folders, drag and drop…

NOTE: If upon system reboot the screen doesn’t auto-resize automatically, be sure to toggle (off/on, so to say) View -> Auto-resize Guest Display on the VM menu bar to set right VM resolution.
Other Tutorials
Install VirtualBox Guest Additions on Kali Linux 2020.3

