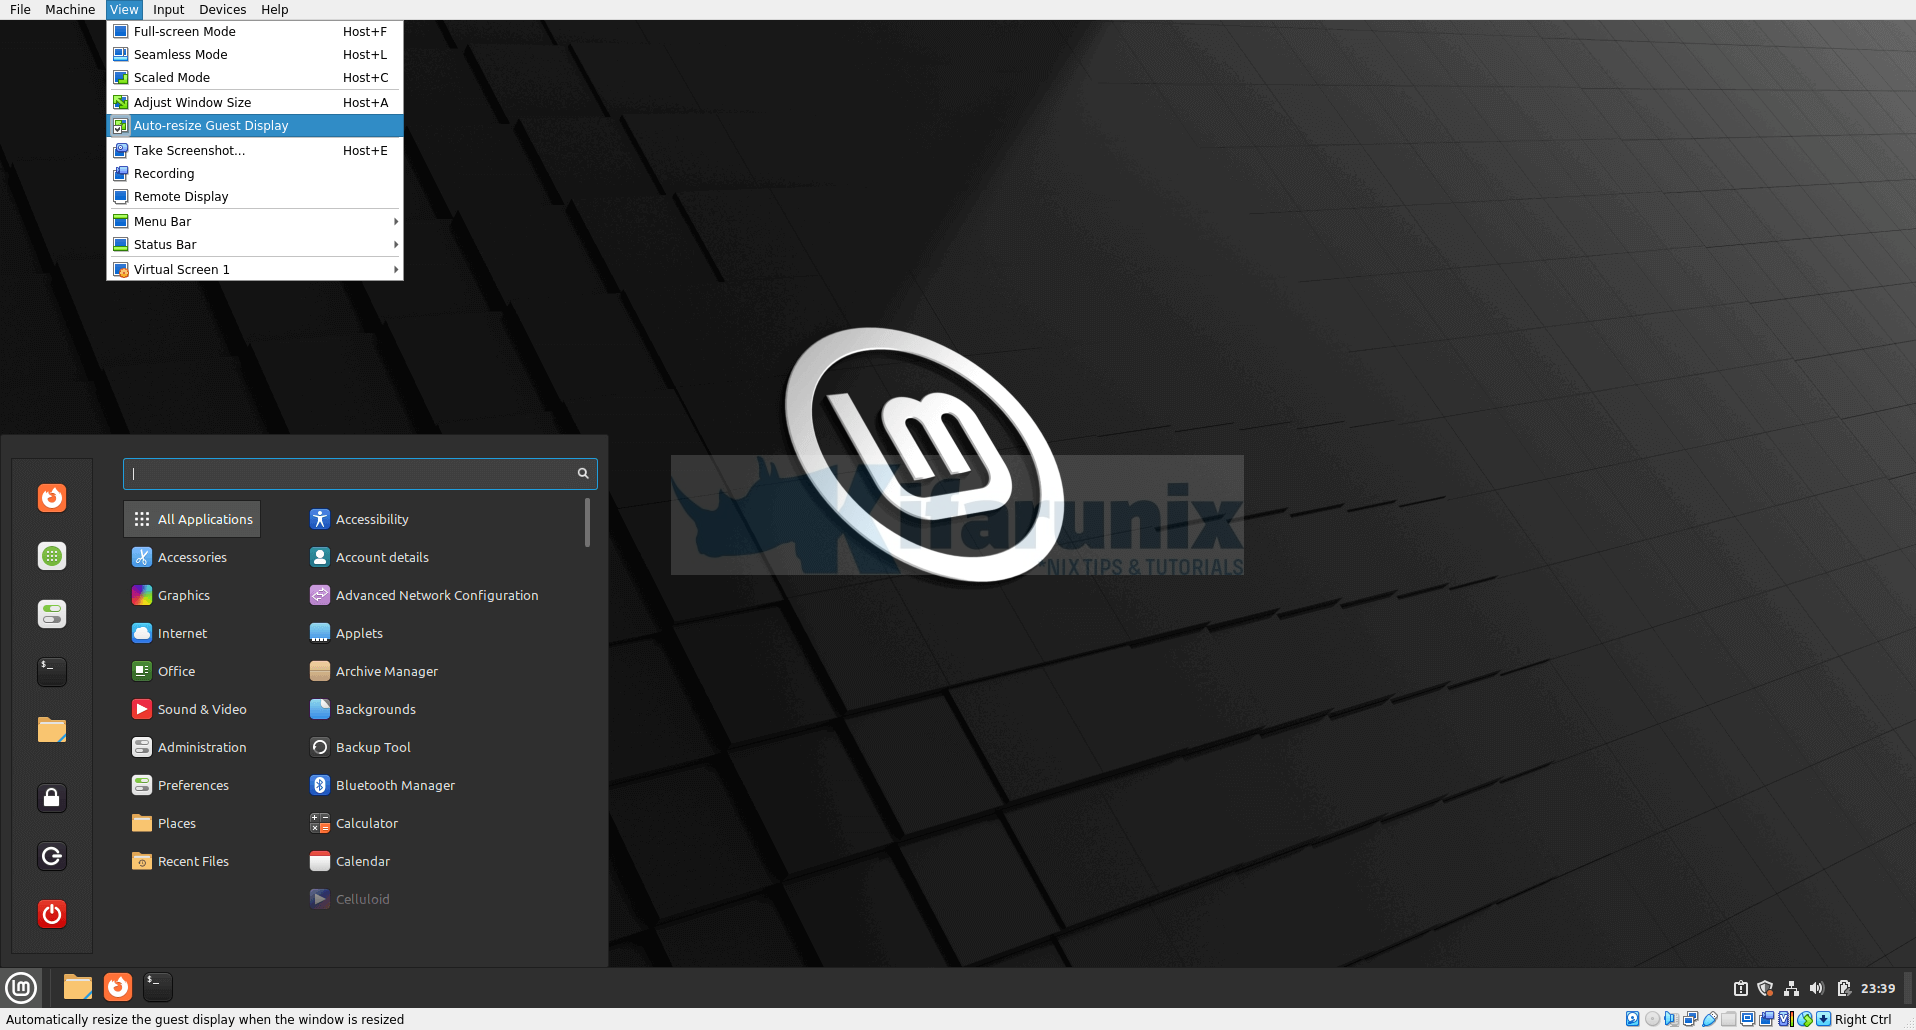
Follow through this tutorial to learn how you can easily install VirtualBox guest additions on Linux Mint 21. VirtualBox guest additions consist of device drivers and system applications that optimize the guest operating system for better performance and usability.
Table of Contents
Installing VirtualBox Guest Additions on Linux Mint 21
Guest Additions Features
VirtualBox guest additions enhances the performance and usability of the virtual machine in various ways;
- Mouse pointer integration.
- Shared folders.
- Better video support.
- Seamless windows mapping on the host’s desktop
- Generic host/guest communication channels for controlling and monitoring guest execution.
- Time synchronization.
- Shared clipboard.
- Automated logins/credentials passing.
Install Kernel Headers and Required Build Tools
To begin with, install required build tools, the Linux kernel headers and the support modules, if not already installed.
Run the command below to verify if these requirements have already been installed.
sudo dpkg -l | grep -E "dkms|linux-headers-$(uname -r)|build-essential"
ii  dkms                                       2.8.7-2ubuntu2mint2                        all          Dynamic Kernel Module Support Framework
ii  linux-headers-5.15.0-56-generic            5.15.0-56.62                               amd64        Linux kernel headers for version 5.15.0 on 64 bit x86 SMP
The ii means that the package is installed. As you can see from the output, dkms is not installed. If none if these packages is installed, you can simply use the APT package manager to install them.
sudo apt update -ysudo apt upgradesudo apt install dkms linux-headers-$(uname -r) build-essentialMount and Install Guest Additions ISO file on the Virtual Machine
To proceed, you need to have the Guest Additions ISO file mounted on the virtual machine.
Guest Addition ISO file can be inserted into the VM in two ways;
- Insert Guest Additions ISO File Manually from Virtual Machine menu
- Install Guest Additions ISO from Linux Mint Repositories
Insert Guest Additions ISO File Manually
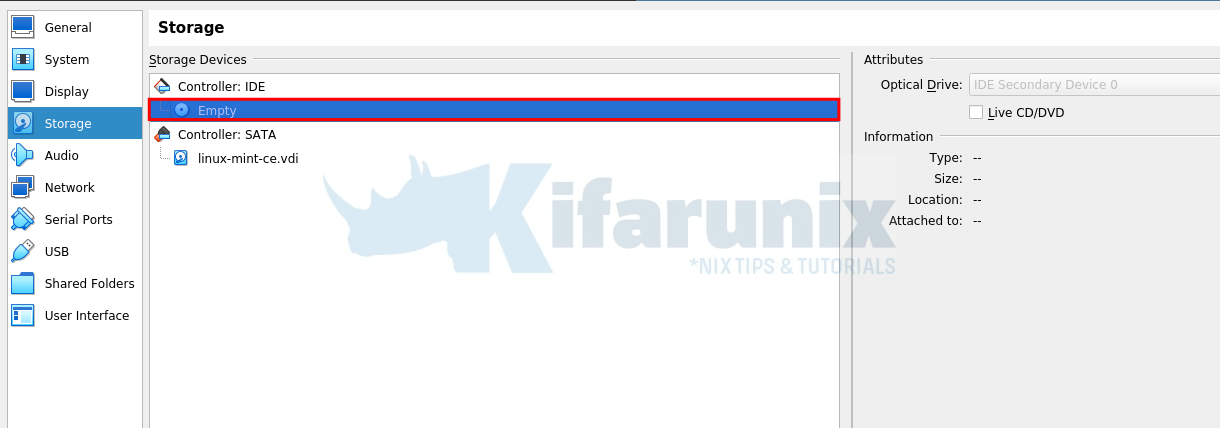
Before you can insert Guest additions ISO file, ensure that your VM has an empty optical drive attached. You can check this from the storage settings, Controller:IDE.
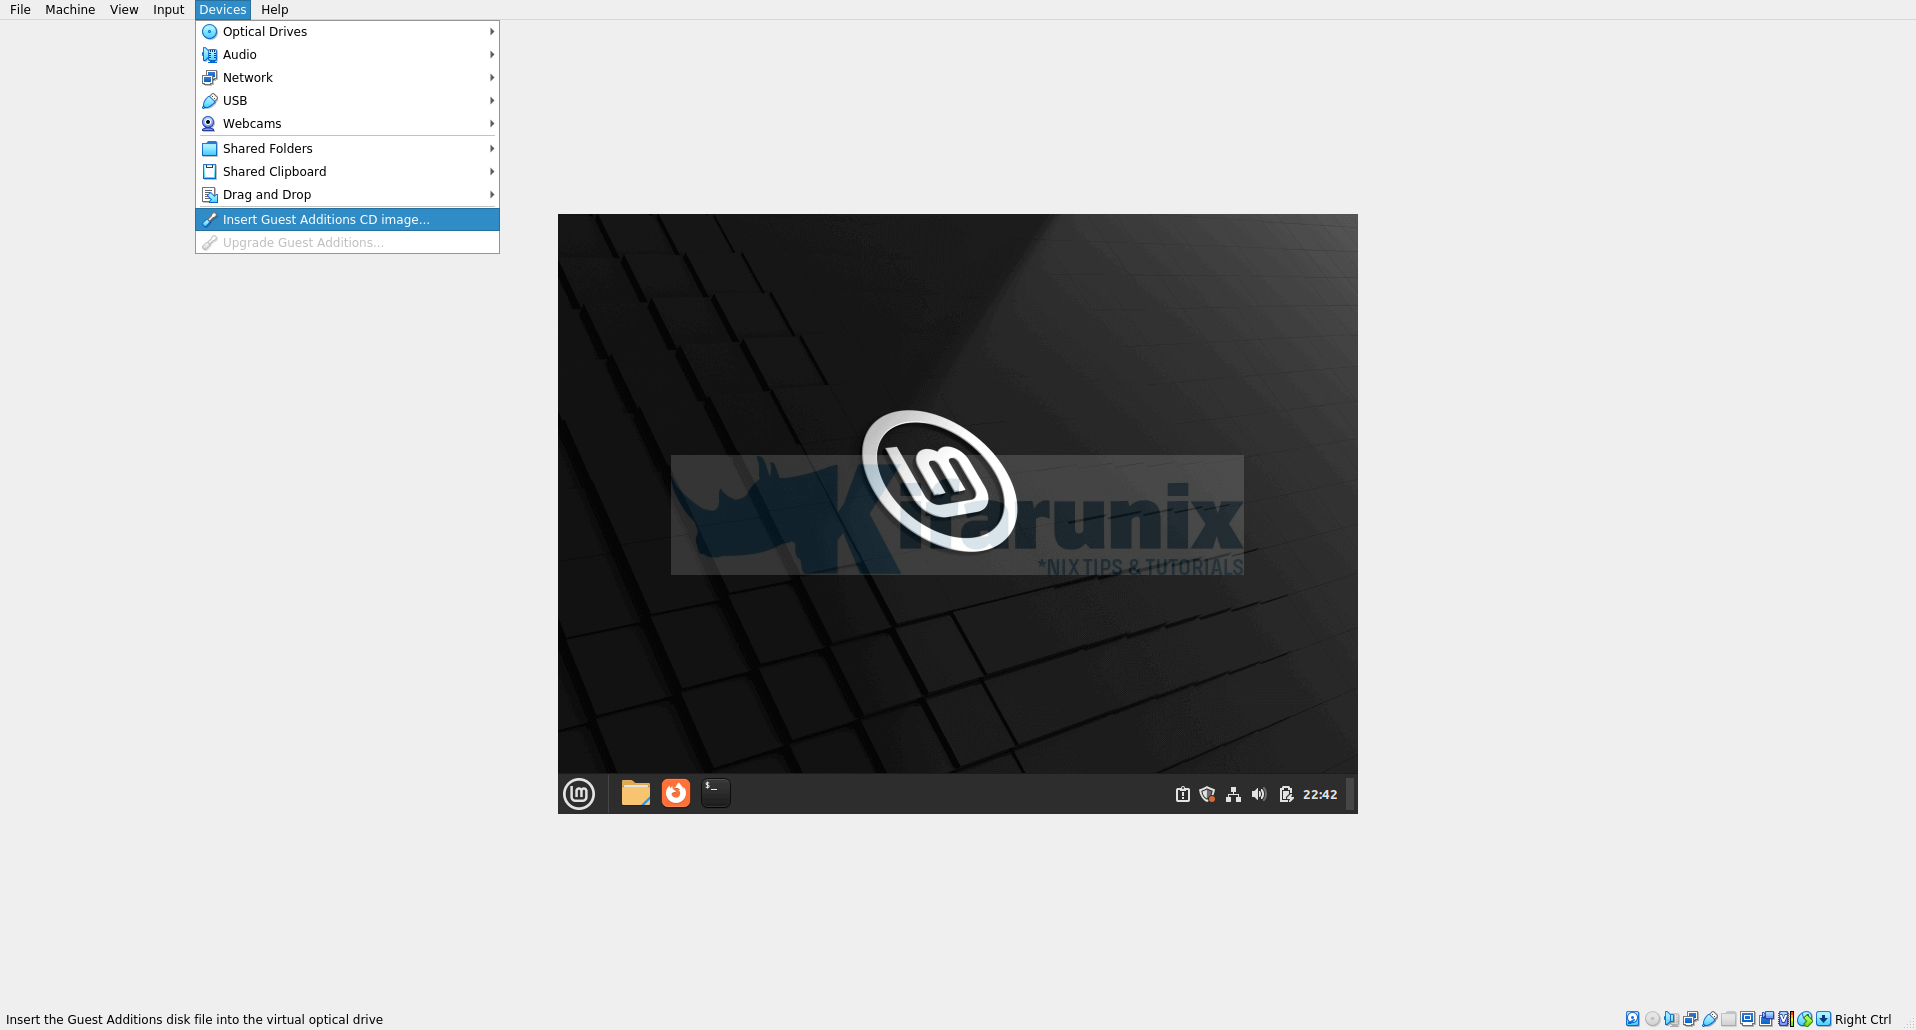
Next, navigate to Menu bar on your VM and click Devices > Insert Guest Additions CD image.
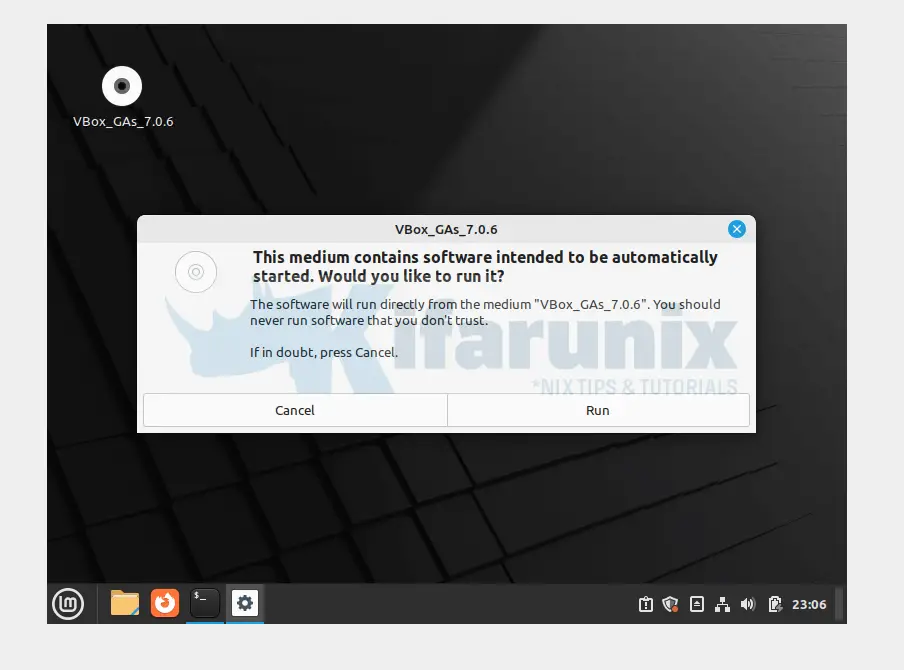
When you insert the Guest additions ISO file, a dialog box is launched which prompts you to run or cancel the Guest Additions installer.
Click Run to launch the installation of Guest additions on Linux Mint 21. You will be prompted to enter your password to authenticate the installation.
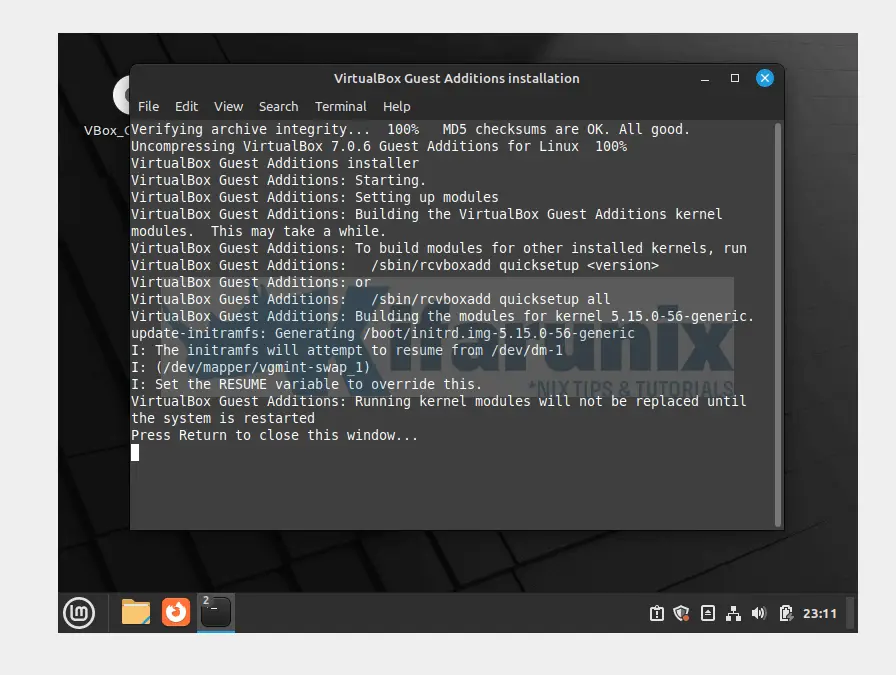
Upon successful authentication, the Guest Additions installation will now run.
Press Enter to close the installation screen.
Restart your virtual machine to reload the Kernel modules.
sudo systemctl reboot -iYou can also install the Guest Additions from the terminal. When the Guest Addition ISO file is inserted, it is mounted on /media/$USER/VBox_GAs_x.x.x. Where x.x.x is the build version of VirtualBox.
Therefore press cancel when the installer dialog box opens up.
Then navigate to the mount point of the guest additions and run the command below replacing the version number accordingly;
cd /media/$USER/VBox_GAs_7.0.6
sudo ./VBoxLinuxAdditions.run
or simply run;
sudo /media/$USER/VBox_GAs_7.0.6/VBoxLinuxAdditions.runInstalling Guest Additions ISO from APT Repositories
It is also possible to install the Guest Additions ISO file from APT repos. Guest Additions ISO file is provided by the virtualbox-guest-additions-iso package.
sudo apt-cache policy virtualbox-guest-additions-isoThe available version maybe a bit dated!
See sample output of the command above as of this writing;
virtualbox-guest-additions-iso:
  Installed: (none)
  Candidate: 6.1.38-1~ubuntu1.22.04.1
  Version table:
     6.1.38-1~ubuntu1.22.04.1 500
        500 http://archive.ubuntu.com/ubuntu jammy-updates/multiverse amd64 Packages
     6.1.34-1 500
        500 http://archive.ubuntu.com/ubuntu jammy/multiverse amd64 Packages
As you can see, we have guest additions for VirtualBox 6.1.38 while we are running VirtualBox 7.0.6;
If the right version is available, simply run the command below to install it.
sudo apt install virtualbox-guest-additions-isoOtherwise, if it is a must that you use this method of installing Guest additions, then download the DEB binary from Debian SID repos;
wget http://ftp.de.debian.org/debian/pool/non-free/v/virtualbox-guest-additions-iso/virtualbox-guest-additions-iso_7.0.6-1_all.deb -P /tmpThe install the Guest additions ISO;
sudo apt install /tmp/virtualbox-guest-additions-iso_7.0.6-1_all.debWhen installed, the VirtualBox Guest Additions ISO is now available as /usr/share/virtualbox/VBoxGuestAdditions.iso.
To install it, you need to mount it.
sudo mount -o loop /usr/share/virtualbox/VBoxGuestAdditions.iso /media/Next, run the installation.
sudo /media/VBoxLinuxAdditions.run
Verifying archive integrity...  100%   MD5 checksums are OK. All good.
Uncompressing VirtualBox 7.0.6 Guest Additions for Linux  100%
VirtualBox Guest Additions installer
VirtualBox Guest Additions: Starting.
VirtualBox Guest Additions: Setting up modules
VirtualBox Guest Additions: Building the VirtualBox Guest Additions kernel
modules.  This may take a while.
VirtualBox Guest Additions: To build modules for other installed kernels, run
VirtualBox Guest Additions:   /sbin/rcvboxadd quicksetup <version>
VirtualBox Guest Additions: or
VirtualBox Guest Additions:   /sbin/rcvboxadd quicksetup all
VirtualBox Guest Additions: Building the modules for kernel 5.15.0-56-generic.
update-initramfs: Generating /boot/initrd.img-5.15.0-56-generic
I: The initramfs will attempt to resume from /dev/dm-1
I: (/dev/mapper/vgmint-swap_1)
I: Set the RESUME variable to override this.
VirtualBox Guest Additions: Running kernel modules will not be replaced until
the system is restarted
Once the installation is done, restart your system to reload kernel modules;
sudo systemctl reboot -iYou should now be able to utilize the features brought about by the Guest additions on your virtual machine.
For example, you should now be on full screen and can be able to enable shared clipboard, shared folders, drag and drop…
For full screen feature, if your VM doesn’t resize after reboot, then under view menu, click Auto-resize guest display, to disable and re-enable.
That is all on our guide on how to install VirtualBox Guest Additions on Linux Mint 21.

