In this tutorial, you will learn how to install Velociraptor Client on Linux and Windows Systems. Velociraptor endpoint agents are called clients. Clients connect to the server and wait for instructions, which mostly consist of VQL statements, then run any VQL queries and return the result to the server.
Table of Contents
In our previous tutorial (link provided below), we covered how to install and setup Velociraptor Linux systems;
Install and Setup Velociraptor on Ubuntu 18.04
Install and Setup Velociraptor on Debian 10
Install and setup Velociraptor on Ubuntu 20.04
Velociraptors client-server communication is based on GRR’s protocol where it implements zero registration clients method. This means no a-prior knowledge of clients is required hence making the enrollment of the client from packages a simple process.
Installing Velociraptor Client on Linux and Windows
There are two ways in which you can install Velociraptor client;
- Install Velociraptor client using Velociraptor Binary: This method involves using Velociraptor binary and client configuration file generated from the server. The client configuration file has to be copied to the client machine. This method is ideal for testing purposes, for large deployment the second method, below, is preferred.
- Install Velociraptor using Velociraptor client packages: This method packages the client configuration file on a Linux package or Windows installer which are then distributed to the clients target machines. This type of deployment is ideal for large deployments since it only requires distribution of one package.
Linux: Install Velociraptor client Using Velociraptor Binary
Velociraptor binary used for Server and Client is the same, the usage is differentiated by config options.
Step 1: Get velociraptor binary on client machine
On the target Linux Velociraptor client system, create a directory where to store the binary.
mkdir velociraptorNavigate to the binary directory created above and download the Velociraptor binary for Linux systems.
Get the current release version from their Github repository release page.
cd velociraptorwget https://github.com/Velocidex/velociraptor/releases/download/v0.73/velociraptor-v0.73.1-linux-amd64Make the Binary executable;
chmod +x velociraptor-v0.73.1-linux-amd64Rename the binary to remove the versions and move it to binary path;
mv velociraptor-v0.73.1-linux-amd64 /usr/local/bin/velociraptorConfirm;
which velociraptor/usr/local/bin/velociraptorStep 2: Copy the Velociraptor client configuration file from the server to client
Login to the Velociraptor server and generate the client configuration file.
Once you have generated the configuration file, copy it to the respective client system.
scp client.config.yaml [email protected]:~/velociraptorSample Client configuration file;
cat ~/velociraptor/client.config.yamlversion:
name: velociraptor
version: 0.73.1
commit: 69c4fac
build_time: "2024-10-14T02:35:03Z"
ci_build_url: https://github.com/Velocidex/velociraptor/actions/runs/11320014012
compiler: go1.23.2
system: linux
architecture: amd64
Client:
server_urls:
- https://10.0.1.16:8000/
ca_certificate: |
-----BEGIN CERTIFICATE-----
MIIDSzCCAjOgAwIBAgIQCQxjInoY8UEgKQ18lkMpdzANBgkqhkiG9w0BAQsFADAa
MRgwFgYDVQQKEw9WZWxvY2lyYXB0b3IgQ0EwHhcNMjUwMjAzMDYzNDQ0WhcNMzUw
MjAxMDYzNDQ0WjAaMRgwFgYDVQQKEw9WZWxvY2lyYXB0b3IgQ0EwggEiMA0GCSqG
SIb3DQEBAQUAA4IBDwAwggEKAoIBAQDjjj01BKMn74WAOLYzzNOyLR87nqW13+dJ
DlPE+hG5Q4OeJkH6YEwe7lrDYFhpjnvWBYeijXJVU6Upbk6v5Eueft8sf5+kNoEP
rB57UF4T/LDbqXjgH/fyCZf/NEVjxdGCk47pbQhom7+QrjxhEqKc+HoszaCxK9rz
eOJFRnguWkgjcTA+nwah4cGs5DkJAVQK3qn4ZpiJro+5j0MzMA9mKAS7r3Mpjo/8
hQzswMkkYhJOX1Ug4+oJRXQ7q/g4Y3Xfsol6F4d1y4YxIcKbnnoaTI+XEqT/xzlS
8HTAPghJAW0U2mYL0xELVA8ZKmqaFDgntM1kVG9RhbP35tu+AExTAgMBAAGjgYww
gYkwDgYDVR0PAQH/BAQDAgKkMB0GA1UdJQQWMBQGCCsGAQUFBwMBBggrBgEFBQcD
AjAPBgNVHRMBAf8EBTADAQH/MB0GA1UdDgQWBBTlYbUCNyHHmGQnt5Lj9ckwaF0w
KzAoBgNVHREEITAfgh1WZWxvY2lyYXB0b3JfY2EudmVsb2NpZGV4LmNvbTANBgkq
hkiG9w0BAQsFAAOCAQEAXFBFs3spUU+jzkUro/2UHR0zTv10QK4zr0Vy3SfS7BXn
oPU2LHlCRpz8LvW4VQoF/YPWbcl4T6cbVKTnVbbk21C6SoVkR85ZRM1xZNtDh6FN
hBPRRA/3/LlKTB3jv3Rvo77DquMzL4jARe3QoewPlfDPrTzIMGVdNcYcx5JBmeST
L3KJPxji1v0O5r+OAT4S2M24kZ1q/T7gc6O6eozpSA2wSbFncxjhP8oPSepeuqc5
ZVQui3/uClO8PIx/R+ZGsFBTe0jIzgxGqhPpZgrLacgQQTAy3tHryotTdXOUMz3x
KRLTiqFYVAL7H3dtoQB/Z9NFW5j6Cmt4xarU6B0ZbA==
-----END CERTIFICATE-----
nonce: +QtnnVlnEfQ=
writeback_darwin: /etc/velociraptor.writeback.yaml
writeback_linux: /etc/velociraptor.writeback.yaml
writeback_windows: $ProgramFiles\Velociraptor\velociraptor.writeback.yaml
level2_writeback_suffix: .bak
tempdir_windows: $ProgramFiles\Velociraptor\Tools
max_poll: 60
nanny_max_connection_delay: 600
windows_installer:
service_name: Velociraptor
install_path: $ProgramFiles\Velociraptor\Velociraptor.exe
service_description: Velociraptor service
darwin_installer:
service_name: com.velocidex.velociraptor
install_path: /usr/local/sbin/velociraptor
server_version:
version: 0.73.1
commit: 69c4fac
build_time: "2024-10-14T02:35:03Z"
use_self_signed_ssl: true
max_upload_size: 5242880
local_buffer:
memory_size: 52428800
disk_size: 1073741824
filename_linux: /var/tmp/Velociraptor_Buffer.bin
filename_windows: $TEMP/Velociraptor_Buffer.bin
filename_darwin: /var/tmp/Velociraptor_Buffer.bin
Next, create Velocirator client and move the config;
sudo mkdir /etc/velociraptorsudo mv ~/velociraptor/client.config.yaml /etc/velociraptorStep 3: Start the Velociraptor client
To start the Velociraptor client in standalone mode using the client configuration file generated, run the command below
sudo velociraptor --config /etc/velociraptor/client.config.yaml client -vTruncated Sample Output:
[INFO] 2025-02-03T07:18:09Z  _    __     __           _                  __
[INFO] 2025-02-03T07:18:09Z | |  / /__  / /___  _____(_)________ _____  / /_____  _____
[INFO] 2025-02-03T07:18:09Z | | / / _ \/ / __ \/ ___/ / ___/ __ `/ __ \/ __/ __ \/ ___/
[INFO] 2025-02-03T07:18:09Z | |/ /  __/ / /_/ / /__/ / /  / /_/ / /_/ / /_/ /_/ / /
[INFO] 2025-02-03T07:18:09Z |___/\___/_/\____/\___/_/_/   \__,_/ .___/\__/\____/_/
[INFO] 2025-02-03T07:18:09Z                                   /_/
[INFO] 2025-02-03T07:18:09Z Digging deeper!                  https://www.velocidex.com
[INFO] 2025-02-03T07:18:09Z This is Velociraptor 0.73.1 built on 2024-10-14T02:35:03Z (69c4fac)
[INFO] 2025-02-03T07:18:09Z Loading config from file /etc/velociraptor/client.config.yaml
[INFO] 2025-02-03T07:18:09Z Writeback Manager: Unable to read writeback (open /etc/velociraptor.writeback.yaml: no such file or directory) - will reset
Generating new private key....
[INFO] 2025-02-03T07:18:09Z Setting temp directory to /tmp
[INFO] 2025-02-03T07:18:09Z Starting Org Manager service.
[INFO] 2025-02-03T07:18:09Z Starting services for Org  (root)
[INFO] 2025-02-03T07:18:09Z Starting Journal service for Org  (root).
[INFO] 2025-02-03T07:18:09Z Starting the notification service for Org  (root).
[INFO] 2025-02-03T07:18:09Z Installing Dummy inventory_service. Will download tools to temp directory.
[INFO] 2025-02-03T07:18:09Z Starting repository manager for Org  (root)
[INFO] 2025-02-03T07:18:09Z Starting nanny with MaxConnectionDelay 10m0s and MaxMemoryHardLimit 0
[INFO] 2025-02-03T07:18:10Z Loaded 408 built in artifacts in 181.94732ms
[INFO] 2025-02-03T07:18:10Z Starting Crypto for client C.5014d5fc071df53e
[INFO] 2025-02-03T07:18:10Z Expecting self signed certificate for server.
[INFO] 2025-02-03T07:18:10Z FileBasedRingBuffer: Creation {"filename":"/var/tmp/Velociraptor_Buffer.bin1309212536","max_size":1073741874}
[INFO] 2025-02-03T07:18:10Z Starting HTTPCommunicator: HTTP Connector to [https://10.0.1.16:8000/]
[DEBUG] 2025-02-03T07:18:10Z Sending client info update hostname:"backup"  fqdn:"backup"  system:"linux"  release:"ubuntu24.04"  architecture:"amd64"  client_version:"0.73.1"  client_name:"velociraptor"  build_time:"2024-10-14T02:35:03Z"  build_url:"https://github.com/Velocidex/velociraptor/actions/runs/11320014012"  install_time:1738567089
[INFO] 2025-02-03T07:18:10Z Received PEM for VelociraptorServer from https://10.0.1.16:8000/
[INFO] 2025-02-03T07:18:10Z Receiver C.5014d5fc071df53e: Connected to https://10.0.1.16:8000/reader after waiting for limiter for 4.228µs
[DEBUG] 2025-02-03T07:18:10Z Connection Info {"IdleTime":1889868,"LocalAddr":{"IP":"10.0.1.14","Port":58602,"Zone":""},"Reused":true,"WasIdle":true}
[INFO] 2025-02-03T07:18:10Z Receiver C.5014d5fc071df53e: sent 931 bytes, response with status: 406 after 20.013057ms, waiting for server messages
[INFO] 2025-02-03T07:18:10Z Enrolling
[INFO] 2025-02-03T07:18:10Z Ring Buffer: Enqueue {"item_len":925,"total_length":925}
[INFO] 2025-02-03T07:18:11Z Ring Buffer: Leased {"leased_length":925,"total_length":925}
[INFO] 2025-02-03T07:18:11Z Sender: Connected to https://10.0.1.16:8000/control after waiting for limiter for 1.536µs
[DEBUG] 2025-02-03T07:18:11Z Connection Info {"IdleTime":919782157,"LocalAddr":{"IP":"10.0.1.14","Port":58602,"Zone":""},"Reused":true,"WasIdle":true}
[INFO] 2025-02-03T07:18:11Z Sender: sent 1395 bytes, response with status: 406 after 20.878344ms, waiting for server messages
[DEBUG] 2025-02-03T07:18:11Z Waiting for enrollment for -59.060272047s
[INFO] 2025-02-03T07:18:11Z Ring Buffer: Commit {"leased_length":925,"total_length":925}
[INFO] 2025-02-03T07:18:11Z Ring Buffer: Truncate {"total_length":0}
[INFO] 2025-02-03T07:18:11Z Receiver C.5014d5fc071df53e: Connected to https://10.0.1.16:8000/reader after waiting for limiter for 4.483µs
[DEBUG] 2025-02-03T07:18:11Z Connection Info {"IdleTime":82143069,"LocalAddr":{"IP":"10.0.1.14","Port":58602,"Zone":""},"Reused":true,"WasIdle":true}
[INFO] 2025-02-03T07:18:11Z Receiver C.5014d5fc071df53e: sent 658 bytes, response with status: 200 after 16.839259ms, waiting for server messages
[INFO] 2025-02-03T07:18:11Z Receiver C.5014d5fc071df53e: received 14995 bytes in 17.039056ms
[INFO] 2025-02-03T07:18:11Z Closing EventTable
[INFO] 2025-02-03T07:18:11Z Starting monitoring query $96ca8cd4ec8bd8e1d907a3d6cbeddd6f493469d082237051dbfe16700508e067
[INFO] 2025-02-03T07:18:11Z Starting monitoring query $96ca8cd4ec8bd8e1d907a3d6cbeddd6f493469d082237051dbfe16700508e067
[INFO] 2025-02-03T07:18:11Z Starting query execution for $96ca8cd4ec8bd8e1d907a3d6cbeddd6f493469d082237051dbfe16700508e067.
[INFO] 2025-02-03T07:18:11Z Starting query execution for $bf9d708ba69502bae7a96d0816bed9a2b6ffcb3c9d51e2e68241f8dfa476e153.
[INFO] 2025-02-03T07:18:11Z Starting query execution for $96ca8cd4ec8bd8e1d907a3d6cbeddd6f493469d082237051dbfe16700508e067.
[INFO] 2025-02-03T07:18:11Z Starting query execution for $bf9d708ba69502bae7a96d0816bed9a22025ef3ad8597eb6deb6b75c76b1eda1b87ffd2e280d77d77942df77b491b283.
[INFO] 2025-02-03T07:18:11Z Starting query execution for $bf9d708ba69502bae7a96d0816bed9a227e4217509bf895a7f6b5d0331640370a4a6fd05ecc741cd3700c4ed65cc5531.
[INFO] 2025-02-03T07:18:11Z Starting query execution for $bf9d708ba69502bae7a96d0816bed9a2f138ff9ddb8581a632fde07152a242d0.
[INFO] 2025-02-03T07:18:11Z Starting query execution for $bf9d708ba69502bae7a96d0816bed9a2670396e4b2e92173d36a3c8896bcccb6.
[INFO] 2025-02-03T07:18:11Z $bf9d708ba69502bae7a96d0816bed9a2b6ffcb3c9d51e2e68241f8dfa476e153: Skipping query due to preconditions
[INFO] 2025-02-03T07:18:11Z Collection $bf9d708ba69502bae7a96d0816bed9a2b6ffcb3c9d51e2e68241f8dfa476e153 is done after 5.01823ms
[DEBUG] 2025-02-03T07:18:11Z Query Stats: {"RowsScanned":1,"PluginsCalled":1,"FunctionsCalled":0,"ProtocolSearch":0,"ScopeCopy":4}
[INFO] 2025-02-03T07:18:11Z $96ca8cd4ec8bd8e1d907a3d6cbeddd6f493469d082237051dbfe16700508e067: Skipping query due to preconditions
[INFO] 2025-02-03T07:18:11Z Collection $96ca8cd4ec8bd8e1d907a3d6cbeddd6f493469d082237051dbfe16700508e067 is done after 5.164797ms
[DEBUG] 2025-02-03T07:18:11Z Query Stats: {"RowsScanned":1,"PluginsCalled":1,"FunctionsCalled":0,"ProtocolSearch":0,"ScopeCopy":4}
[INFO] 2025-02-03T07:18:11Z Finished monitoring query $96ca8cd4ec8bd8e1d907a3d6cbeddd6f493469d082237051dbfe16700508e067
[INFO] 2025-02-03T07:18:11Z $bf9d708ba69502bae7a96d0816bed9a2670396e4b2e92173d36a3c8896bcccb6: Skipping query due to preconditions
[INFO] 2025-02-03T07:18:11Z Collection $bf9d708ba69502bae7a96d0816bed9a2670396e4b2e92173d36a3c8896bcccb6 is done after 2.784377ms
[DEBUG] 2025-02-03T07:18:11Z Query Stats: {"RowsScanned":1,"PluginsCalled":1,"FunctionsCalled":0,"ProtocolSearch":0,"ScopeCopy":4}
[INFO] 2025-02-03T07:18:11Z Collection $bf9d708ba69502bae7a96d0816bed9a22025ef3ad8597eb6deb6b75c76b1eda1b87ffd2e280d77d77942df77b491b283 is done after 6.795161ms
[DEBUG] 2025-02-03T07:18:11Z Query Stats: {"RowsScanned":4,"PluginsCalled":2,"FunctionsCalled":0,"ProtocolSearch":33,"ScopeCopy":13}
[INFO] 2025-02-03T07:18:11Z File Ring Buffer: Enqueue {"header":"{\"ReadPointer\":50,\"WritePointer\":783,\"MaxSize\":1073741874,\"AvailableBytes\":725,\"LeasedBytes\":0}","leased_pointer":50}
[INFO] 2025-02-03T07:18:11Z Collection $bf9d708ba69502bae7a96d0816bed9a2f138ff9ddb8581a632fde07152a242d0 is done after 6.003767ms
[DEBUG] 2025-02-03T07:18:11Z Query Stats: {"RowsScanned":6,"PluginsCalled":5,"FunctionsCalled":3,"ProtocolSearch":4,"ScopeCopy":21}
[INFO] 2025-02-03T07:18:11Z File Ring Buffer: Enqueue {"header":"{\"ReadPointer\":50,\"WritePointer\":1431,\"MaxSize\":1073741874,\"AvailableBytes\":1365,\"LeasedBytes\":0}","leased_pointer":50}
[INFO] 2025-02-03T07:18:11Z Collection $bf9d708ba69502bae7a96d0816bed9a227e4217509bf895a7f6b5d0331640370a4a6fd05ecc741cd3700c4ed65cc5531 is done after 19.3288ms
[DEBUG] 2025-02-03T07:18:11Z Query Stats: {"RowsScanned":41,"PluginsCalled":2,"FunctionsCalled":0,"ProtocolSearch":18,"ScopeCopy":86}
[DEBUG] 2025-02-03T07:18:11Z Sending final message for F.CUG6RCRI5IEJC: {"session_id":"F.CUG6RCRI5IEJC","request_id":981,"flow_stats":{"query_status":[{"duration":28481000,"last_active":1738567091351024,"first_active":1738567091322543,"log_rows":4},{"duration":21233000,"last_active":1738567091351026,"first_active":1738567091329793,"names_with_response":["$bf9d708ba69502bae7a96d0816bed9a22025ef3ad8597eb6deb6b75c76b1eda1b87ffd2e280d77d77942df77b491b283"],"log_rows":4,"result_rows":1},{"duration":20256000,"last_active":1738567091351028,"first_active":1738567091330772,"names_with_response":["$bf9d708ba69502bae7a96d0816bed9a227e4217509bf895a7f6b5d0331640370a4a6fd05ecc741cd3700c4ed65cc5531"],"log_rows":4,"result_rows":20},{"duration":19639000,"last_active":1738567091351029,"first_active":1738567091331390,"names_with_response":["$bf9d708ba69502bae7a96d0816bed9a2f138ff9ddb8581a632fde07152a242d0"],"log_rows":4,"result_rows":1},{"duration":19236000,"last_active":1738567091351031,"first_active":1738567091331795,"log_rows":4}],"flow_complete":true}}
[INFO] 2025-02-03T07:18:11Z File Ring Buffer: Enqueue {"header":"{\"ReadPointer\":50,\"WritePointer\":2502,\"MaxSize\":1073741874,\"AvailableBytes\":2428,\"LeasedBytes\":0}","leased_pointer":50}
[INFO] 2025-02-03T07:18:11Z File Ring Buffer: Enqueue {"header":"{\"ReadPointer\":50,\"WritePointer\":6233,\"MaxSize\":1073741874,\"AvailableBytes\":6151,\"LeasedBytes\":0}","leased_pointer":50}
[INFO] 2025-02-03T07:18:11Z File Ring Buffer: Enqueue {"header":"{\"ReadPointer\":50,\"WritePointer\":6676,\"MaxSize\":1073741874,\"AvailableBytes\":6586,\"LeasedBytes\":0}","leased_pointer":50}
[INFO] 2025-02-03T07:18:11Z Compiled all artifacts.
[INFO] 2025-02-03T07:18:12Z Sender: Connected to https://10.0.1.16:8000/control after waiting for limiter for 5.196µs
[DEBUG] 2025-02-03T07:18:12Z Connection Info {"IdleTime":880701094,"LocalAddr":{"IP":"10.0.1.14","Port":58602,"Zone":""},"Reused":true,"WasIdle":true}
[INFO] 2025-02-03T07:18:12Z Sender: sent 2579 bytes, response with status: 200 after 1.241481ms, waiting for server messages
[INFO] 2025-02-03T07:18:12Z Sender: received 626 bytes in 2.454347ms
[INFO] 2025-02-03T07:18:12Z Receiver C.5014d5fc071df53e: Connected to https://10.0.1.16:8000/reader after waiting for limiter for 5.214µs
[DEBUG] 2025-02-03T07:18:12Z Connection Info {"IdleTime":120302900,"LocalAddr":{"IP":"10.0.1.14","Port":58602,"Zone":""},"Reused":true,"WasIdle":true}
[INFO] 2025-02-03T07:18:12Z Receiver C.5014d5fc071df53e: sent 674 bytes, response with status: 200 after 1.524056ms, waiting for server messages
[INFO] 2025-02-03T07:18:12Z Receiver C.5014d5fc071df53e: received 626 bytes in 1.853531ms
[INFO] 2025-02-03T07:18:13Z Receiver C.5014d5fc071df53e: Connected to https://10.0.1.16:8000/reader after waiting for limiter for 4.805µs
[DEBUG] 2025-02-03T07:18:13Z Connection Info {"IdleTime":1001119591,"LocalAddr":{"IP":"10.0.1.14","Port":58602,"Zone":""},"Reused":true,"WasIdle":true}
[INFO] 2025-02-03T07:18:13Z Receiver C.5014d5fc071df53e: sent 674 bytes, response with status: 200 after 2.284418ms, waiting for server messages
[INFO] 2025-02-03T07:18:15Z File Ring Buffer: Enqueue {"header":"{\"ReadPointer\":50,\"WritePointer\":944,\"MaxSize\":1073741874,\"AvailableBytes\":886,\"LeasedBytes\":0}","leased_pointer":50}
[INFO] 2025-02-03T07:18:15Z Sender: Connected to https://10.0.1.16:8000/control after waiting for limiter for 5.447µs
[DEBUG] 2025-02-03T07:18:15Z Connection Info {"IdleTime":0,"LocalAddr":{"IP":"10.0.1.14","Port":58602,"Zone":""},"Reused":true,"WasIdle":false}
[INFO] 2025-02-03T07:18:15Z Sender: sent 979 bytes, response with status: 200 after 1.592363ms, waiting for server messages
[INFO] 2025-02-03T07:18:15Z Sender: received 626 bytes in 1.972695m
From the output above, the client is enrolled to the Velociraptor server.
Step 4 (Optional): Install systemd Service
Additionally you can create systemd service file for Velociraptor client:
sudo vim /etc/systemd/system/velociraptor.serviceAdd the content below (edit ExecStart file paths with regards to your files location):
[Unit]
Description=Velociraptor linux amd64
After=syslog.target network.target

[Service]
Type=simple
Restart=always
RestartSec=120
LimitNOFILE=20000
Environment=LANG=en_US.UTF-8
ExecStart=/usr/local/bin/velociraptor --config /etc/velociraptor/client.config.yaml client -v

[Install]
WantedBy=multi-user.target
Reload systemd daemon:
sudo systemctl daemon-reloadStart and enable velociraptor to start at boot time:
sudo systemctl enable --now velociraptor Check the status of velociraptor.
systemctl status velociraptor● velociraptor.service - Velociraptor linux amd64
Loaded: loaded (/etc/systemd/system/velociraptor.service; enabled; preset: enabled)
Active: active (running) since Mon 2025-02-03 07:20:31 UTC; 5s ago
Main PID: 28304 (velociraptor)
Tasks: 6 (limit: 1130)
Memory: 46.1M (peak: 47.3M)
CPU: 1.814s
CGroup: /system.slice/velociraptor.service
└─28304 /usr/local/bin/velociraptor --config /etc/velociraptor/client.config.yaml client -v
Feb 03 07:20:31 backup velociraptor[28304]: [INFO] 2025-02-03T07:20:31Z Received PEM for VelociraptorServer from https://10.0.1.16:80>
Feb 03 07:20:31 backup velociraptor[28304]: [INFO] 2025-02-03T07:20:31Z Receiver C.5014d5fc071df53e: Connected to https://10.0.1.16:8>
Feb 03 07:20:31 backup velociraptor[28304]: [DEBUG] 2025-02-03T07:20:31Z Connection Info {"IdleTime":1720902,"LocalAddr":{"IP":"10.0.>
Feb 03 07:20:31 backup velociraptor[28304]: [INFO] 2025-02-03T07:20:31Z Receiver C.5014d5fc071df53e: sent 947 bytes, response with st>
Feb 03 07:20:33 backup velociraptor[28304]: [INFO] 2025-02-03T07:20:33Z Compiled all artifacts.
Feb 03 07:20:36 backup velociraptor[28304]: [INFO] 2025-02-03T07:20:36Z File Ring Buffer: Enqueue {"header":"{\"ReadPointer\":50,\"Wr>
Feb 03 07:20:36 backup velociraptor[28304]: [INFO] 2025-02-03T07:20:36Z Sender: Connected to https://10.0.1.16:8000/control after wai>
Feb 03 07:20:36 backup velociraptor[28304]: [DEBUG] 2025-02-03T07:20:36Z Connection Info {"IdleTime":0,"LocalAddr":{"IP":"10.0.1.14",>
Feb 03 07:20:36 backup velociraptor[28304]: [INFO] 2025-02-03T07:20:36Z Sender: sent 979 bytes, response with status: 200 after 2.066>
Feb 03 07:20:36 backup velociraptor[28304]: [INFO] 2025-02-03T07:20:36Z Sender: received 626 bytes in 2.304992ms
Step 5: Confirm Client is Added on GUI
On the server GUI, navigate to homepage and select SHOW ALL next to the magnifying Glass to view connected clients:
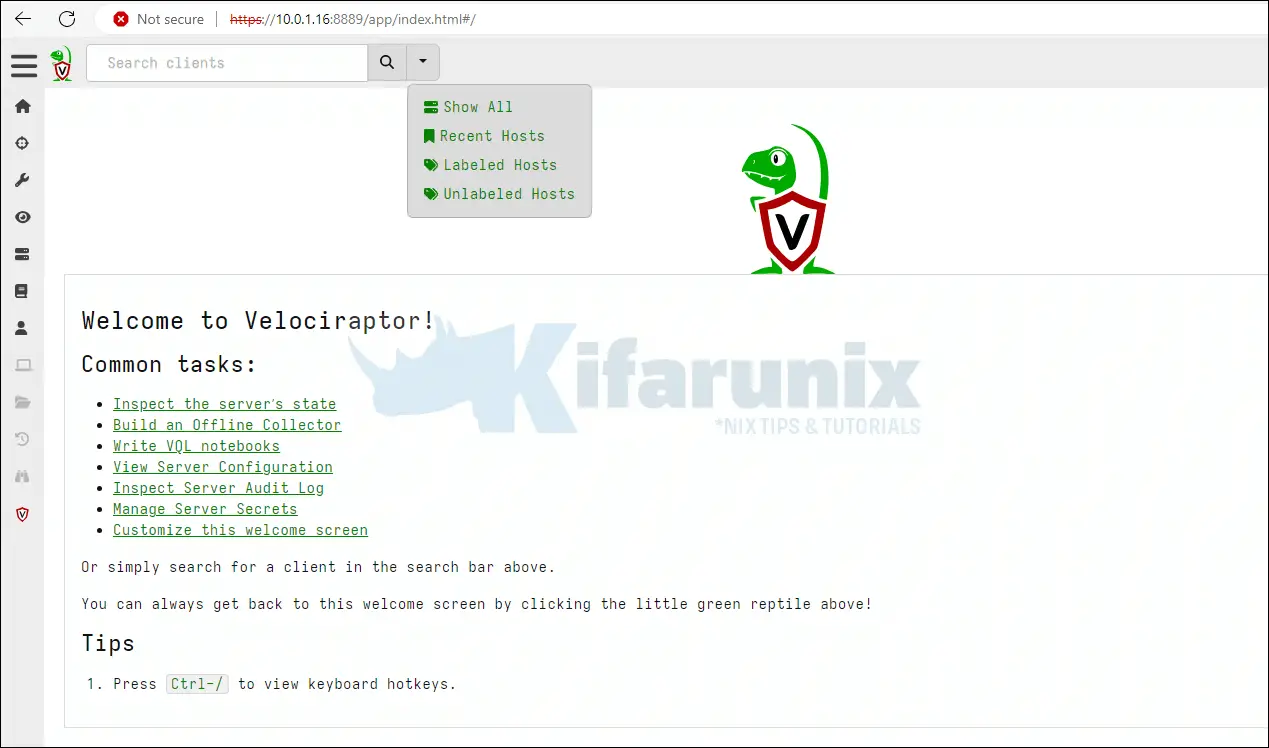
And there you go;

Install Velociraptor client using Velociraptor binary on Windows Systems
Step 1: Create Install Folder
Create Velociraptor folder on target client system in the path specified below:
C:\Program Files\velociraptor\Step 2: Download Velociraptor Client Windows Installer
Download the latest installer from Velociraptor releases page and save it in the folder created above.
We have downloaded the binary to the downloads folder;
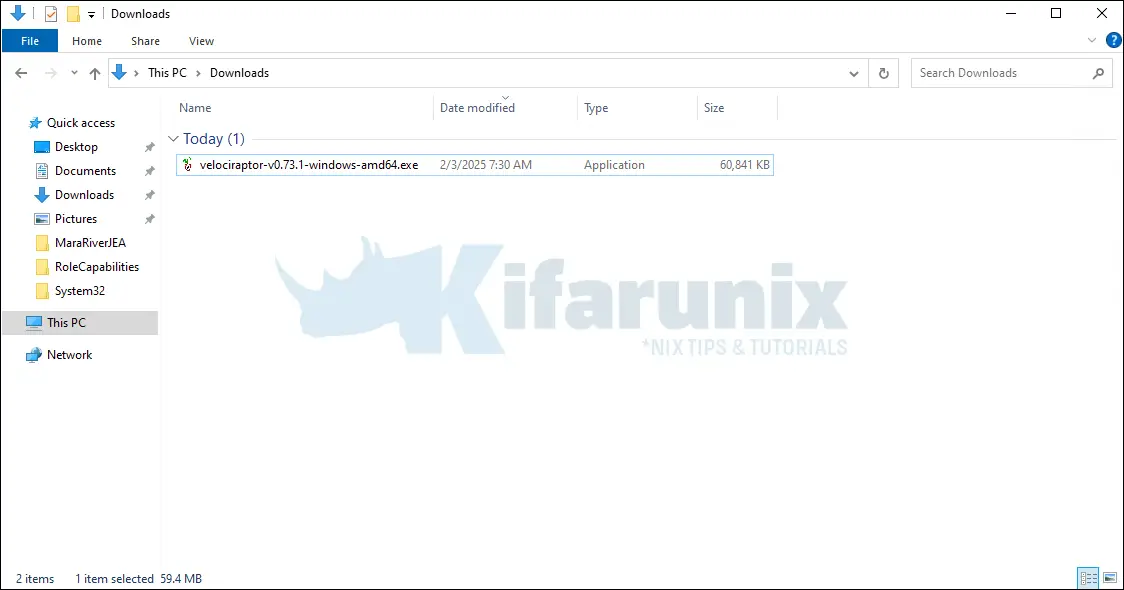
You can move it to Velociraptor folder.
Step 3: Copy Velociraptor Client Configuration file to Install folder
Copy client configuration file generated from the server as we did before to the Windows client install folder created above.
IMPORTANT: Rename the client configuration file as velociraptor.config.yaml.
Note, we have also renamed the binary to remove the version number and OS version.
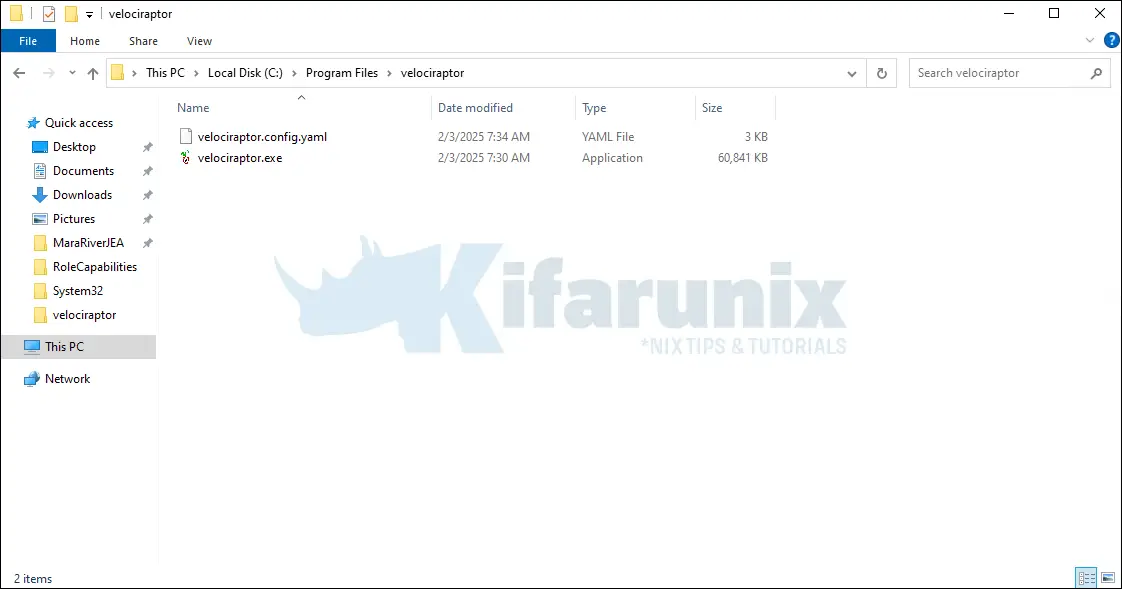
Step 4: Run the Velociraptor Client on Windows:
Open Command prompt with Administrator privileges:
Change to the folder with Velociraptor Binary and client config files created earlier:
cd "C:\Program Files\velociraptor" Run the Binary with Client config file and enroll the endpoint:
.\velociraptor.exe --config velociraptor.config.yaml client -vThe following output is generated for a successful connection with the Fronted service of Velociraptor service:
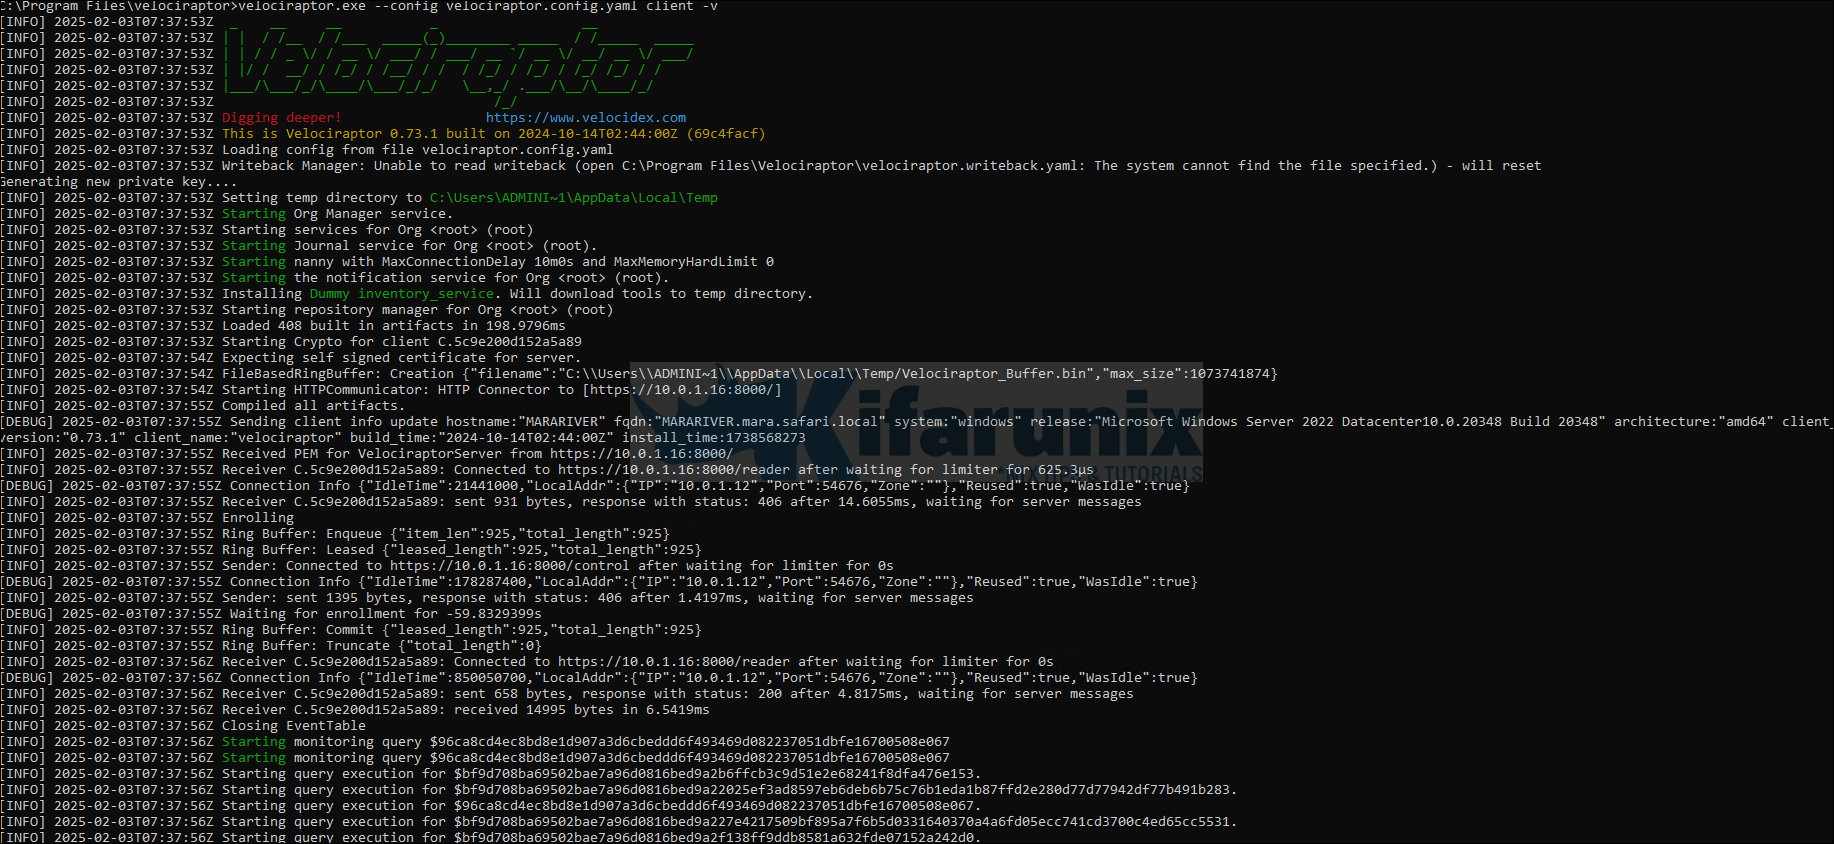
Step 5: Running the client as a service
To run velociraptor client permanently get the MSI installer from Velociraptor Github releases.
Run the Installer by double clicking on the msi.
When the service is started during installation, it attempts to load the configuration file from C:\Program Files\Velociraptor\Velociraptor.config.yaml hence why we created the Folder and configuration file Velociraptor.config.yaml on the file path: C:\Program Files\Velociraptor\.
NOTE:
If there is an existing Velociraptor service that is already installed, it will be overwritten by the Velociraptor service installation. The service is set to start at boot time.
Confirm Velociraptor service is running by opening services, Win Key + R type services.msc to open services program.


On the Server GUI confirm the Windows Client has been enrolled successfully:

From the GUI you can see connected clients, the client(s) ID, hostname and OS Version. Clicking on a client gives more information about the client:
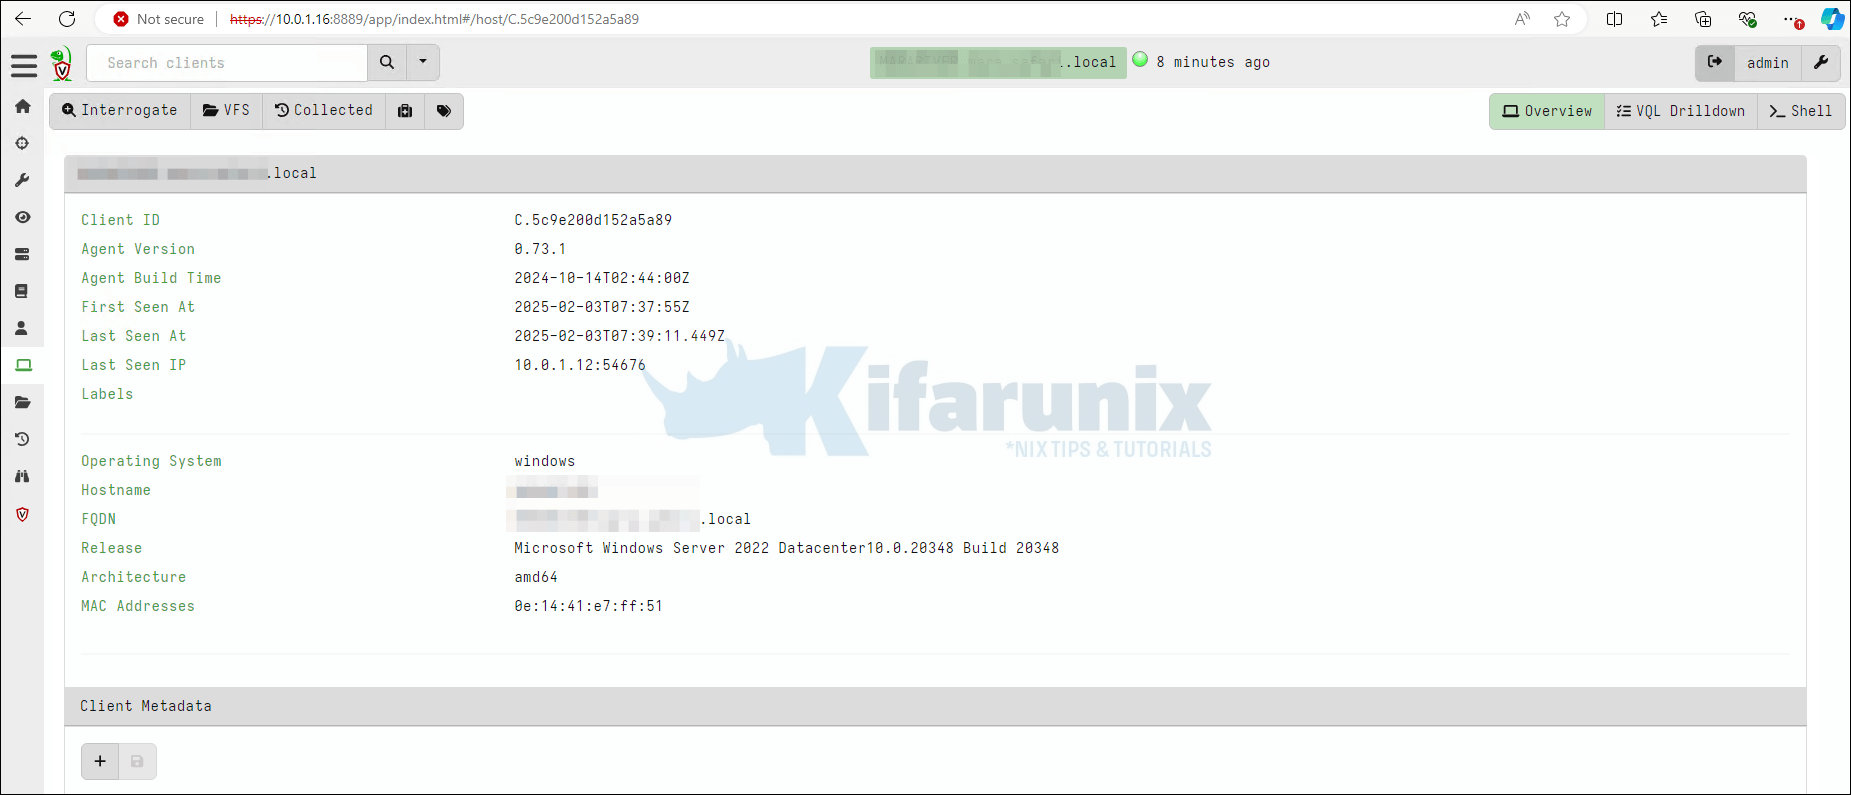
Now that clients are connected they can successfully be queried using VQL.
Install Velociraptor using Velociraptor client packages
Install Velociraptor Client on Linux using Velociraptor client packages
On the velociraptor Server create Velociraptor Linux client package by running the command below;
velociraptor -c /etc/velociraptor/client.config.yaml debian clientCreating amd64 client package at velociraptor_client_0.73.1_amd64.debThe above command packages the client configuration file into the .deb package thus the single .deb package can be distributed to Debian based Linux clients for installation.
lsvelociraptor_client_0.73.1_amd64.debCopy the .deb package to client machine(s) and install the package:
dpkg -i velociraptor_client_0.73.1_amd64.debConfirm the status of Velociraptor:
systemctl status velociraptor_client.serviceThe client enrollment can be confirmed on Velociraptor GUI.
Install Velociraptor Client on Windows using Velociraptor client packages
On the velociraptor Server get the windows binary in the same location as the Velociraptor server binary:
wget https://github.com/Velocidex/velociraptor/releases/download/v0.73/velociraptor-v0.73.1-windows-amd64.exeRun the below command to embed the client’s configuration in the windows binary
velociraptor config repack --exe velociraptor-v0.73.1-windows-amd64.exe \
	/etc/velociraptor/client.config.yaml \
	velociraptor-windows-amd64.exe
Or the MSI;
cd /etc/velociraptorwget https://github.com/Velocidex/velociraptor/releases/download/v0.73/velociraptor-v0.73.1-windows-amd64.msivelociraptor config repack --msi velociraptor-v0.73.1-windows-amd64.msi client.config.yaml velociraptor-windows-amd64.msi[INFO] 2025-02-03T09:31:01Z _ __ __ _ __
[INFO] 2025-02-03T09:31:01Z | | / /__ / /___ _____(_)________ _____ / /_____ _____
[INFO] 2025-02-03T09:31:01Z | | / / _ \/ / __ \/ ___/ / ___/ __ `/ __ \/ __/ __ \/ ___/
[INFO] 2025-02-03T09:31:01Z | |/ / __/ / /_/ / /__/ / / / /_/ / /_/ / /_/ /_/ / /
[INFO] 2025-02-03T09:31:01Z |___/\___/_/\____/\___/_/_/ \__,_/ .___/\__/\____/_/
[INFO] 2025-02-03T09:31:01Z /_/
[INFO] 2025-02-03T09:31:01Z Digging deeper! https://www.velocidex.com
[INFO] 2025-02-03T09:31:01Z This is Velociraptor 0.73.1 built on 2024-10-14T02:35:03Z (69c4fac)
[INFO] 2025-02-03T09:31:01Z Starting Org Manager service.
[INFO] 2025-02-03T09:31:01Z Starting services for Org <root> (root)
[INFO] 2025-02-03T09:31:01Z Starting Journal service for Org <root> (root).
[INFO] 2025-02-03T09:31:01Z Starting user manager service for org root
[INFO] 2025-02-03T09:31:01Z Starting the notification service for Org <root> (root).
[INFO] 2025-02-03T09:31:01Z Installing Dummy inventory_service. Will download tools to temp directory.
[INFO] 2025-02-03T09:31:01Z Starting repository manager for Org <root> (root)
[INFO] 2025-02-03T09:31:02Z Loaded 408 built in artifacts in 173.148641ms
client_repack: Will Repack an MSI file with 2587 bytes of config
Uploaded /etc/velociraptor/velociraptor-windows-amd64.msi (23502848 bytes)
[
{
"RepackInfo": {
"Path": "/etc/velociraptor/velociraptor-windows-amd64.msi",
"Size": 23502848,
"sha256": "5725d1d2b79fd4b46999f1e538e30792ce29777ebcdebfa55920c6cda86d3230",
"md5": "b172a4f6c6edfbd0a57475caf862d103",
"Components": [
"velociraptor-windows-amd64.msi"
]
}
}
]DEBUG:Query Stats: {"RowsScanned":1,"PluginsCalled":1,"FunctionsCalled":1,"ProtocolSearch":0,"ScopeCopy":4}
[INFO] 2025-02-03T09:31:02Z Exiting notification service for Org <root> (root)!
Copy the repackaged Velociraptor client to target clients machine. Launch CMD as an administrator;
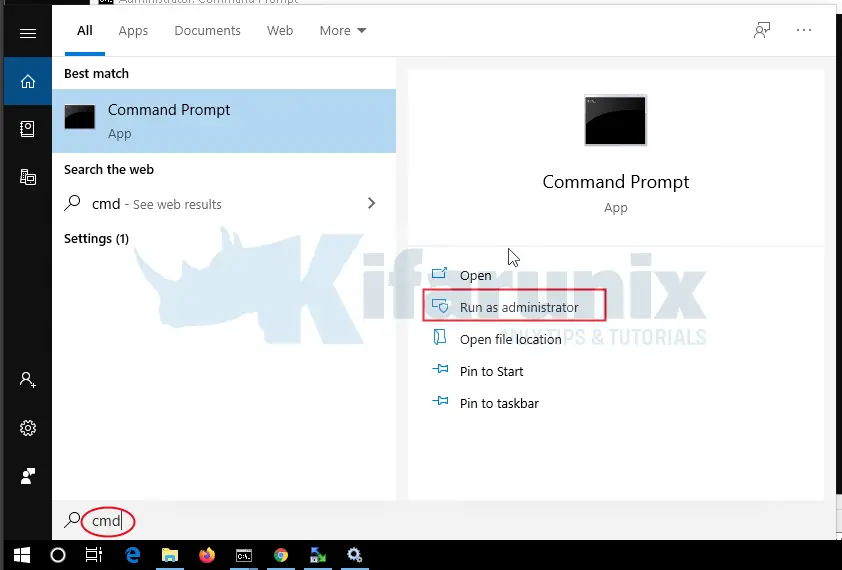
Change directory to the location where the repacked client was copied to and install Velociraptor client to run as a service. This autostarts Velociraptor client service on boot
repackaged_velociraptor.exe service install
Or run the MSI.
Confirm Velociraptor client service is running:
Press Win + R and type services.msc to launch Windows Services application:
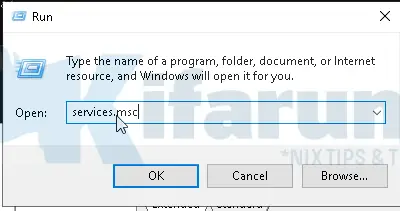
Scroll down or search for the service Velociraptor;

On Velociraptor GUI, the client enrollment can be confirmed by hitting refresh button on the homepage. Click on Show All on the top panel to view connected clients.

Once the clients are connected to the server, they can successfully be queried using VQL. Velociraptor server gives visibility into the hosts (clients) enrolled to Velociraptor server hence can be used to query for info such as:
- running processes
- established network connections
- installed services
That marks the end of our tutorial on installing Velociraptor Client on Linux and Windows Systems.
Reference
Deploying Velociraptor Clients
Other Tutorials
Install FortiClient VPN Client on Ubuntu 20.04/Ubuntu 18.04
Install Gitlab with SSL/TLS Certificate on Ubuntu 20.04
Install ownCloud Desktop Client on Ubuntu 20.04

