In this guide, we will learn how to install ownCloud desktop client on Ubuntu 20.04. If you are using ownCloud server as a central file repository in your environment, chances are you might need something to help you synchronize the your files seamlessly between the ownCloud server and your desktop system. ownCloud provides a desktop client for this purpose.
Table of Contents
Installing ownCloud Desktop Client on Ubuntu 20.04
You can install ownCloud desktop client on Ubuntu 20.04 via their Official ownCloud APT repos or via universe repos.
Install ownCloud Desktop Client via Universe repos
To install ownCloud Desktop client from the Universe repos, simply execute the commands below;
apt update
apt install owncloud-client
Install ownCloud Desktop client via APT repos
Execute the command below to install the ownCloud desktop APT repos signing key;
apt install gnupg2 curl wget vim -ycurl -fsSL \ https://download.opensuse.org/repositories/isv:ownCloud:server:10/Ubuntu_20.04/Release.key \ | gpg --dearmor | sudo tee /etc/apt/trusted.gpg.d/isv_ownCloud_server_10.gpg
Once the repository signing key is installed, install the repository itself.
echo 'deb http://download.opensuse.org/repositories/isv:/ownCloud:/server:/10/Ubuntu_20.04/ /' | \
sudo tee /etc/apt/sources.list.d/isv:ownCloud:server:10.list
Update your system package cache;
apt updateThe ownCloud Desktop client repos are now in place and you can install the client by executing the command;
apt install owncloud-clientConnecting to ownCloud Server with ownCloud Desktop Client
Once the installation is done, you can launch ownCloud from activities menu;

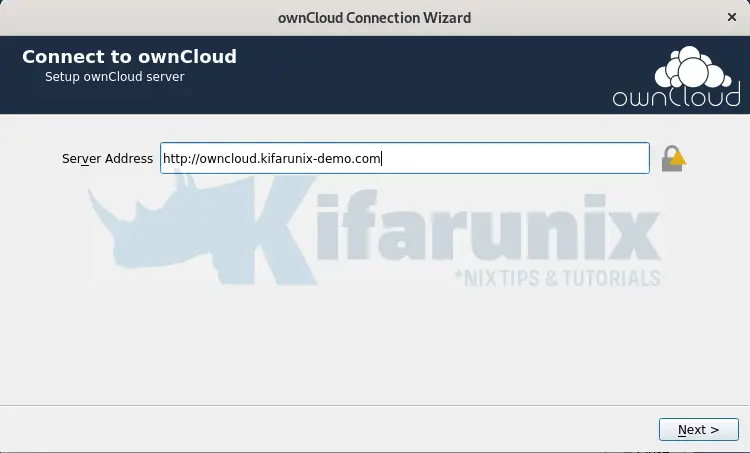
Once the client runs, enter the ownCloud server connection address.
The address should match the value of overwrite.cli.url parameter on the ownCloud server /var/www/owncloud/config/config.php.

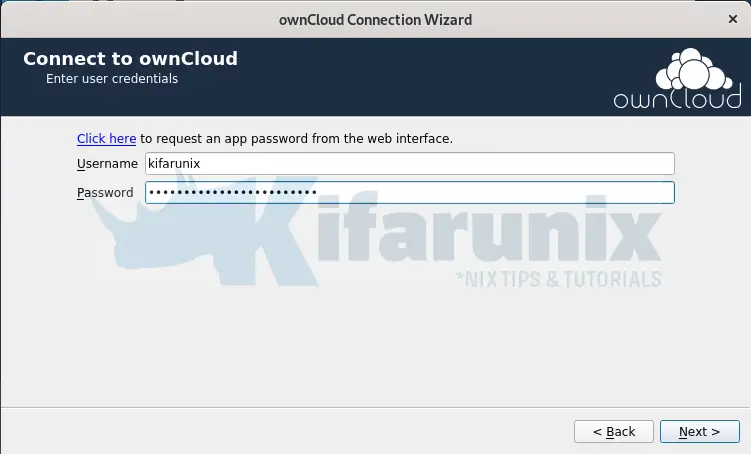
Set the user login credentials.

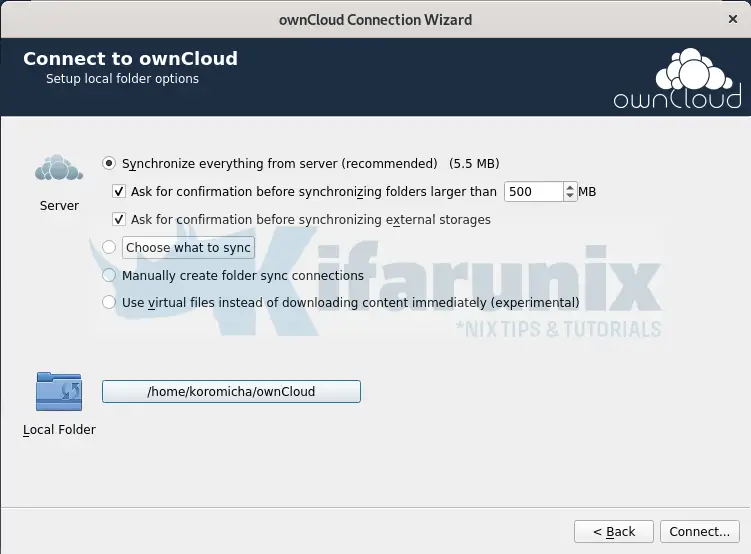
Next, configure your local folder settings.

Connect to ownCloud server and start synchronizing your files.
That brings us to the end of our guide on how to install ownCloud Desktop Client on Ubuntu 20.04.
Related Tutorials
Configure ownCloud OpenLDAP Authentication
Install ownCloud Desktop Client on CentOS 8
Install ownCloud Desktop Client on Debian 10 Buster
Install ownCloud Server on CentOS 8

