In this tutorial, you will learn how to install Request Tracker on AlmaLinux/Rocky Linux, step by step. Request Tracker (RT) is a powerful, open-source ticketing and workflow management system developed by Best Practical Solutions. It’s widely used by IT departments, service desks, CIRTs and security operations teams to manage incoming requests, incidents, and tasks through a structured, auditable workflow.
It supports seamless email integration, custom workflows, SLA automation and tracking, e.t.c. Read more about RT features.
Table of Contents
Install Request Tracker on AlmaLinux/Rocky Linux
Prerequisites
Before installing Request Tracker (RT) on AlmaLinux or Rocky Linux, ensure your system meets the following requirements.
In this blog post, we will be installing Request Tracker version 6.0.2, which is the latest stable release as of this writing.
Required Packages:
- Perl 5.26.3 or later: RT requires this minimum version or newer.
- Supported SQL database: Choose one of the following:
- MySQL 8.0.31+ (with InnoDB)
- MariaDB 10.6+ (with InnoDB)
- PostgreSQL 13+
- Oracle 18c+
- SQLite 3+ (for testing only; not recommended for production)
- Web server with FastCGI or mod_perl support, such as:
- Apache 2.x with
mod_fcgidormod_perl - Nginx (using FastCGI)
- Apache 2.x with
- Perl modules: RT includes tools to automatically install most required modules via CPAN or your OS package manager.
Optional Dependencies:
- Full-text search support: available on most supported databases except SQLite.
- External HTML converter: for improved HTML rendering and performance.
- TLS/SSL certificate: Recommended for production environments.
- Obtain free certificates from Let’s Encrypt or use a self-signed cert for testing.
- If you want to run without HTTPS during testing, add this line to your
RT_SiteConfig.pmfile to allow login:Set( $WebSecureCookies, 0 );
RT System Hardware Requirements
Request Tracker (RT) is a powerful and flexible ticketing system used by organizations of all sizes. While RT’s official documentation does not specify strict hardware requirements, the actual resources you need depend heavily on your usage patterns such as number of users, ticket volume, and enabled features.
There is no one-size-fits-all specification for RT hardware. The following reflects the server specs I use in my test environment, which works well for light to moderate usage. Please adjust and scale your hardware resources based on your own environment and workload to ensure optimal performance.
| Component | Assigned Values |
|---|---|
| CPU | 4 cores |
| RAM | 8 GB |
| Disk Space | 100 GB |
Key Points:
- RT’s database typically grows over time, plan storage accordingly.
- Higher concurrency or large ticket volume requires more CPU and RAM.
- Using SSDs improves database and web interface responsiveness.
- For testing, smaller specs may suffice but production environments should be sized carefully.
Install Request Tracker on AlmaLinux/Rocky Linux
Set RT System’s Hostname
Before proceeding with the installation, set a proper hostname for your Request Tracker (RT) server. This hostname ensures consistent identification across your environment and will later be referenced in RT’s configuration.
Run the command below to set your RT system’s hostname. Replace the example value with your own domain name and IP address accordingly:
sudo -ihostnamectl set-hostname incidents.kifarunix.comMake sure the hostname you set is properly configured in your DNS server so it resolves correctly. If DNS is not available in your environment, you can instead define the hostname manually in your system’s /etc/hosts file.
echo "192.168.122.237 incidents.kifarunix.com incidents" >> /etc/hostsRun System update
To begin with ensure that your system packages are up-to-date.
dnf updateReboot the node if a reboot is required:
dnf install dnf-utils -yneeds-restarting || rebootInstall Required Packages for RT
Request Tracker (RT) requires quite a number of packages in order to install and run. These include Perl and some perl modules, a web server (Nginx or Apache), a backend database (MySQL/MariaDB, PostgreSQL, SQLite, Oracle).
In this demo, we use MariaDB as a database backend and Apache as the Web server.
Enable EPEL and PowerTools/CodeReady Builder (CRB) Repos as they contain some of the required dependencies.
dnf config-manager --set-enabled crbdnf install epel-releaseTo install required packages, simply execute the command below.
dnf install expat \
     gd \
     graphviz \
     openssl \
     expat-devel \
     gd-devel \
     openssl-devel \
     perl \
     perl-CPAN \
     perl-YAML \
     wget \
     elinks \
     screen \
     mod_fcgid \
     perl-libwww-perl \
     perl-Plack \
     perl-GD \
     perl-DBD-mysql \
     perl-GraphViz \
     perl-Crypt-SMIME \
     perl-String-ShellQuote \
     perl-Crypt-X509 \
     perl-LWP-Protocol-https \
     graphviz-devel -y
dnf groupinstall "Development Tools"Install Apache Web server on AlmaLinux 10/Rocky Linux 10.
dnf install httpd -yInstall MariaDB on AlmaLinux 10/Rocky Linux 10.
dnf install mariadb-server -yStart and enable MariaDB to run on system boot.
systemctl enable --now mariadbRun the initial security script and remove test databases, anonymous user accounts, disable remote root login…
mariadb-secure-installationInstall Mail Transfer Agent to allow RT route and deliver mails. Postfix is used in this guide.
dnf -y install postfixDownload RT Tarball
In this guide, RT is installed on AlmaLinux 10/Rocky Linux 10 from the source. As such, navigate to RT downloads page and grab the latest version of RT archive.
RT 6.0.2 is the latest stable release as of this writing.
Simply get the link from the downloads page and pull it using wget command as shown below;
Replace the value of the VER variable with the version of RT you need to install.
VER=6.0.2wget https://download.bestpractical.com/pub/rt/release/rt-${VER}.tar.gzTo verify the integrity of the archive, calculate its hash (sha256) and compare it with the value available on the release page.
sha256sum rt-${VER}.tar.gzf3706fcfd2a6dfbdea58f3e9c64a7d17ae39bdd5928aeac61c4767f30f6b05c4 rt-6.0.2.tar.gzUnpack RT Archive
Extract the RT tarball to some directory.
tar xzf rt-${VER}.tar.gzCompile and Install RT on AlmaLinux/Rocky Linux
Navigate to RT archive directory extracted above.
cd rt-${VER}Next execute the configure script to adapt RT to the system to ensure that all required dependencies to the build and install RT are available.
Note that you can always set the your preferred options for configure script. Simply utilize the help page for the options to use.
./configure --helpTon run configure script with the default options, execute the command below. RT defaults to installing in /opt/rtN (where N is the RT major release number) with MySQL/MariaDB as its database.
./configureOnce the configure script completes, run the command below to check for any Perl missing dependencies.
make testdepsThis script will check if all required dependencies are available and report any that is missing.
Fix missing RT dependencies either by installing the missing dependencies manually or simply executing the make fixdeps command as a privileged user.
However, before you can run the fixdeps command, you need to configure the CPAN shell.
/usr/bin/perl -MCPAN -e shell...
Would you like to configure as much as possible automatically? [yes] yesAt the CPAN shell prompt, type quit to exit the shell.
...
cpan shell -- CPAN exploration and modules installation (v2.36)
Enter 'h' for help.
cpan[1]> quit
Also, CPAN has a tool called cpanm that can help the make fixdeps command install dependencies. Thus install this tool and set RT to use it to fix deps.
To install cpanm, execute the commands below;
curl -L https://cpanmin.us | perl - --sudo App::cpanminuscpanm --self-upgrade --sudocpanm should now be available on your host binaries:
which cpanm/usr/local/bin/cpanmexport RT_FIX_DEPS_CMD=/usr/local/bin/cpanmNext, run the fixdeps command;
make fixdepsThe command may take sometime as it tries to fix the missing dependencies. Ensure that all the dependency issues is sorted before you can proceed.
You can always install or reinstall or force the installation of dependencies using cpanm.
For example, assume you have a few missing dependencies after running the make fixdeps command;
make testdeps | grep -i missingYou can thus install the missing dependencies using cpanm.
cpanm --installdeps . || (make testdeps | awk '/MISSING/ && /::/ {print $1}' | sort -u | xargs cpanm)Check missing dependencies again;
make testdeps...
FASTCGI dependencies:
FCGI >= 0.74 ........................................... ok (0.82)
GPG dependencies:
File::Which ............................................ ok
GnuPG::Interface >= 1.02 ............................... ok (1.05)
PerlIO::eol ............................................ ok
GRAPHVIZ dependencies:
GraphViz2 .............................................. ok
IPC::Run >= 0.90 ....................................... ok (20231003.0)
MYSQL dependencies:
DBD::mysql >= 2.1018, != 4.042 ......................... ok (5.007)
SMIME dependencies:
Crypt::X509 ............................................ ok
File::Which ............................................ ok
String::ShellQuote ..................................... ok
---------------------------------------------------------------------------
All dependencies found.
If you get the last line, All dependencies have been found, you are good to go.
Once the dependencies issue is sorted, install RT.
Note that the command will install RT on the /opt/rtN (/opt/rt6, in this setup) directory.
make installIf all goes well, you should see a congratulatory message on successful RT installation.
...
Congratulations. RT is now installed.


You must now configure RT by editing /opt/rt6/etc/RT_SiteConfig.pm.

(You will definitely need to set RT's database password in
/opt/rt6/etc/RT_SiteConfig.pm before continuing. Not doing so could be
very dangerous.  Note that you do not have to manually add a
database user or set up a database for RT.  These actions will be
taken care of in the next step.)

After that, you need to initialize RT's database by running
 'make initialize-database'
Configuring RT from Web Interface
After the installation completes, you can now proceed to configure RT via web interface by running it on a standalone mode.
Open HTTP Port on Firewall
To enable external access to RT, open web server port on firewall. In this demo, we are using port 80/tcp. Hence, execute the command below to open port 80 on firewall.
firewall-cmd --add-port=80/tcp --permanentfirewall-cmd --reloadLaunch RT in Standalone Mode for Configuration
To be able to access RT from browser, stop your web server if it is running:
systemctl stop httpdand run the script below.
/opt/rt6/sbin/rt-server...
HTTP::Server::PSGI: Accepting connections at http://0:80/You can also access RT using a custom port (be sure to open the port on firewall, if that is the case for you)
/opt/rt6/sbin/rt-server --port 8080Access RT from browser to proceed with configuration. Note that is accepting connections on http://0:80/ in our case. Hence can access it using IP address or resolvable hostname of your server, http://server_IP_OR_hostname.

Choose your setup language and click Let’s go to proceed.
Issue: When running the RT (from v6.0.2) web-based installer for the first time on a fresh RT installation built from source, you may encounter an error when trying to access the installer interface.
Symptoms:
- On the web UI, you’ll see a generic error message:
An internal RT error has occurred. Your administrator can find more details in RT's log files.
- On the CLI where you ran the standalone RT binary (
rt-server), or in your web server error logs, you’ll see:[error]: Can't call method "MaybeRebuildLifecycleCache" on unblessed reference
at /opt/rt6/sbin/../lib/RT/Interface/Web.pm line 1234.
Root Cause: At this point, RT is not fully initialized yet (no database exists). The code at line 1234 of Web.pm tries to call MaybeRebuildLifecycleCache() on the System object, but this object isn’t properly initialized during the pre-database installation phase, resulting in an unblessed reference error.
Resolution:
- Stop the standalone RT server (or web server if using Apache/Nginx)
- Backup the original file:
cp /opt/rt6/lib/RT/Interface/Web.pm /opt/rt6/lib/RT/Interface/Web.pm.backup - Edit
/opt/rt6/lib/RT/Interface/Web.pmand locate line 1234:RT->System->MaybeRebuildLifecycleCache(); - Replace it with:
This wraps the call in an eval block, which will silently ignore the error during installation when the System object isn’t available.eval { RT->System->MaybeRebuildLifecycleCache() }; - Save the file and restart your RT server:
/opt/rt6/sbin/rt-server - Access the installer again at
http://your-serverand proceed with the web-based configuration.
Configure Database Connection Settings
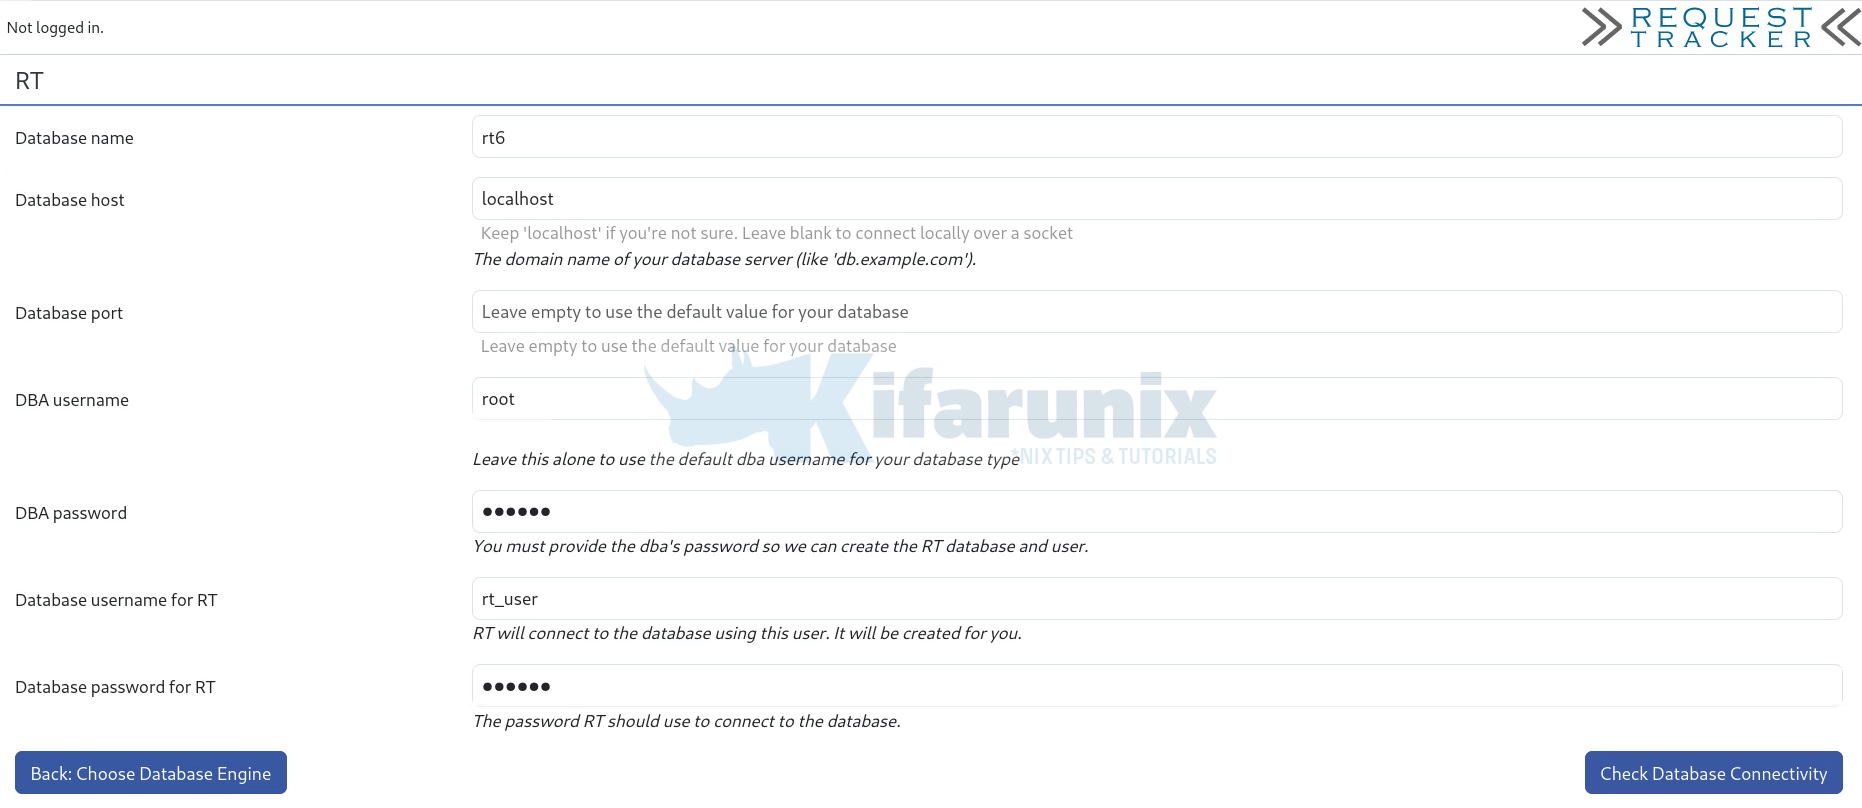
Select the database type. MySQL/MariaDB is used in this guide.

Click Next to create RT database and database user. Ensure you provide credentials for root/administrative user for the DBA password.

To verify database connection, click Check Database Connectivity.

Customize RT
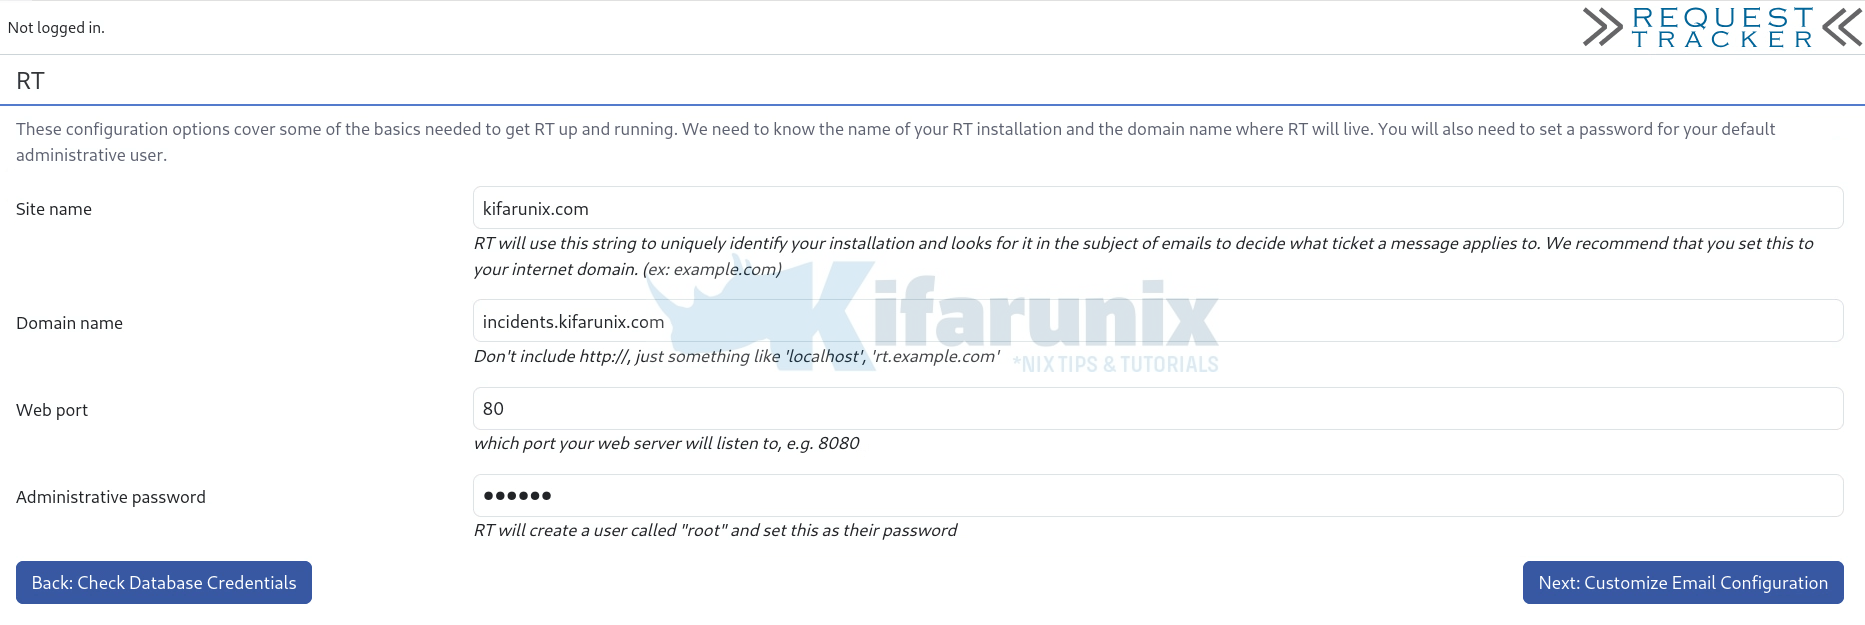
Click Next to customize your RT with the most basic configurations needed to get it up and running. Basically, in this section, you need to provide the following information:
- Site Name / Domain: This is the primary domain for your RT instance e.g.,
example.com. - RT FQDN: This should match the hostname of your RT server. Do not include
http://e.g.,incidents.kifarunix.com. - Web Port: This is the port your web server will listen on e.g.,
80or a custom port such as8080 - Administrative Password: The password for the RT
rootuser. This will be used to log in as the administrator of your RT instance.

Set the path to your MTA and RT admin email. Remember we installed postfix above. So get the full path of the postfix binary and set it up.

We will make further changes later, if needed.
Set the comments and correspondences addresses. A correspondence is any email sent to or from the ticket system (e.g., [email protected]), while a comment is a note added manually in RT.

Click Initialize the database to create RT’s database and insert initial metadata.
Once the database is initialized, click Finish installation to complete the setup.

You are then taken to RT login page.

Note that RT is still running on standalone mode.
Go back to the CLI and press Ctrl+c on the terminal to stop the /opt/rt6/sbin/rt-server script and proceed to configure web server for RT.
Configure RT Web Server on AlmaLinux/Rocky Linux
Edit the /etc/httpd/conf.d/fcgid.conf configuration file and add the line:
FcgidMaxRequestLen 1073741824to define maximum HTTP request length.
vim /etc/httpd/conf.d/fcgid.conf
...
# Use FastCGI to process .fcg .fcgi & .fpl scripts
AddHandler fcgid-script fcg fcgi fpl

# Sane place to put sockets and shared memory file
FcgidIPCDir /run/mod_fcgid
FcgidProcessTableFile /run/mod_fcgid/fcgid_shm
FcgidMaxRequestLen 1073741824
Save and exit the file.
Create RT web configuration file with the content below;
vim /etc/httpd/conf.d/rt.conf<VirtualHost *:80>
ServerName incidents.kifarunix.com
ServerAdmin [email protected]
AddDefaultCharset UTF-8
ScriptAlias / /opt/rt6/sbin/rt-server.fcgi/
DocumentRoot "/opt/rt6/share/html"
<Directory "/opt/rt6/share/html">
Require all granted
Options +ExecCGI
AddHandler fcgid-script fcgi
</Directory>
<Location />
Require all granted
Options +ExecCGI
AddHandler fcgid-script fcgi
</Location>
ErrorLog /var/log/rt6/httpd.error
CustomLog /var/log/rt6/httpd.access combined
LogLevel debug
</VirtualHost>Save the configuration file and quit.
Check for Apache syntax errors.
httpd -tSyntax OKConfigure RT Logging
Logging in RT is controlled from SiteConfig configuration file. There are multiple logging options for RT as described on LogsConfig Wiki. However, we are going to configure RT logging to a file in this guide.
Open the RT_SiteConfig.pm configuration file for editing.
vim /opt/rt6/etc/RT_SiteConfig.pmAt the end of configuration files, insert the following lines making appropriate changes as per your environment setup.
Set($LogToFile,      'debug');
Set($LogToFileNamed, 'rt.log');
Set($LogDir,         '/var/log/rt6');
Save and quit the configuration file.
Check the configuration syntax;
perl -c /opt/rt6/etc/RT_SiteConfig.pmCreate the Logging directory as specified by the $LogDir parameter.
mkdir /var/log/rt6Ensure that the owner of the logging directory is Apache;
chown -R apache:apache /var/log/rt6Configure RT Log Rotation
To keep RT (Request Tracker) logs under control and prevent them from consuming excessive disk space, you can include the log files above in the existing Apache log rotation configuration. This ensures that RT logs are automatically rotated, compressed, and maintained alongside standard HTTPD logs for consistency and easier management.
Open the existing Apache log rotation file:
sudo vim /etc/logrotate.d/httpdModify it so it includes the RT log files:
/var/log/httpd/*log /var/log/rt6/httpd.access /var/log/rt6/httpd.error /var/log/rt6/rt.log {
    daily
    missingok
    notifempty
    sharedscripts
    delaycompress
    postrotate
        /bin/systemctl reload httpd.service > /dev/null 2>/dev/null || true
    endscript
}
Save and exit the file.
Apply and test: Simulate log rotation;
sudo logrotate -d /etc/logrotate.d/httpdForce log rotation to test:
sudo logrotate -f /etc/logrotate.d/httpd
Disable Secure Cookies to Allow RT HTTP Access
As already mentioned, to allow RT to work over plain HTTP (not HTTPS), you need to disable secure cookies by adding this line to your RT configuration:
Set( $WebSecureCookies, 0 );Edit the /opt/rt6/etc/RT_SiteConfig.pm configuration and add the line above.
Save and exit when done:
At this point, this is how the RT_SiteConfig.pm configuration file is like (without comments):
grep -vE "^$|^#" /opt/rt6/etc/RT_SiteConfig.pmuse utf8;
Set( $CommentAddress, '[email protected]' );
Set( $CorrespondAddress, '[email protected]' );
Set( $DatabaseHost, 'localhost' );
Set( $DatabaseName, 'rt6' );
Set( $DatabasePassword, 'hacker' );
Set( $DatabasePort, '' );
Set( $DatabaseType, 'mysql' );
Set( $DatabaseUser, 'rt_user' );
Set( $Organization, 'kifarunix.com' );
Set( $OwnerEmail, '[email protected]' );
Set( $SendmailPath, '/usr/sbin/postfix' );
Set( $WebDomain, 'incidents.kifarunix.com' );
Set( $WebPort, '80' );
Set( $rtname, 'kifarunix.com' );
Set($LogToFile, 'debug');
Set($LogToFileNamed, 'rt.log');
Set($LogDir, '/var/log/rt6');
Set( $WebSecureCookies, 0 );
1;Be sure to always check this configuration file for any RT errors.
Start Apache
systemctl enable --now httpdConfiguring SELinux for RT
SELinux (Security-Enhanced Linux) enforces mandatory access control policies, which can prevent web servers like Apache from reading or writing files in certain directories. By default, SELinux may block RT from writing to its var directory. To allow proper operation, you need to define the correct SELinux context and apply it.
To allows the web server to read and write files in var directory.
semanage fcontext -a -t httpd_sys_rw_content_t "/opt/rt6/var(/.*)?"Apply the new SELinux context;
restorecon -Rv /opt/rt6/varAccessing RT Web Interface
You can now access your RT from browser using the address http://rt-server-IP_OR_hostname.
Use root as the username and password configured while setting up RT.

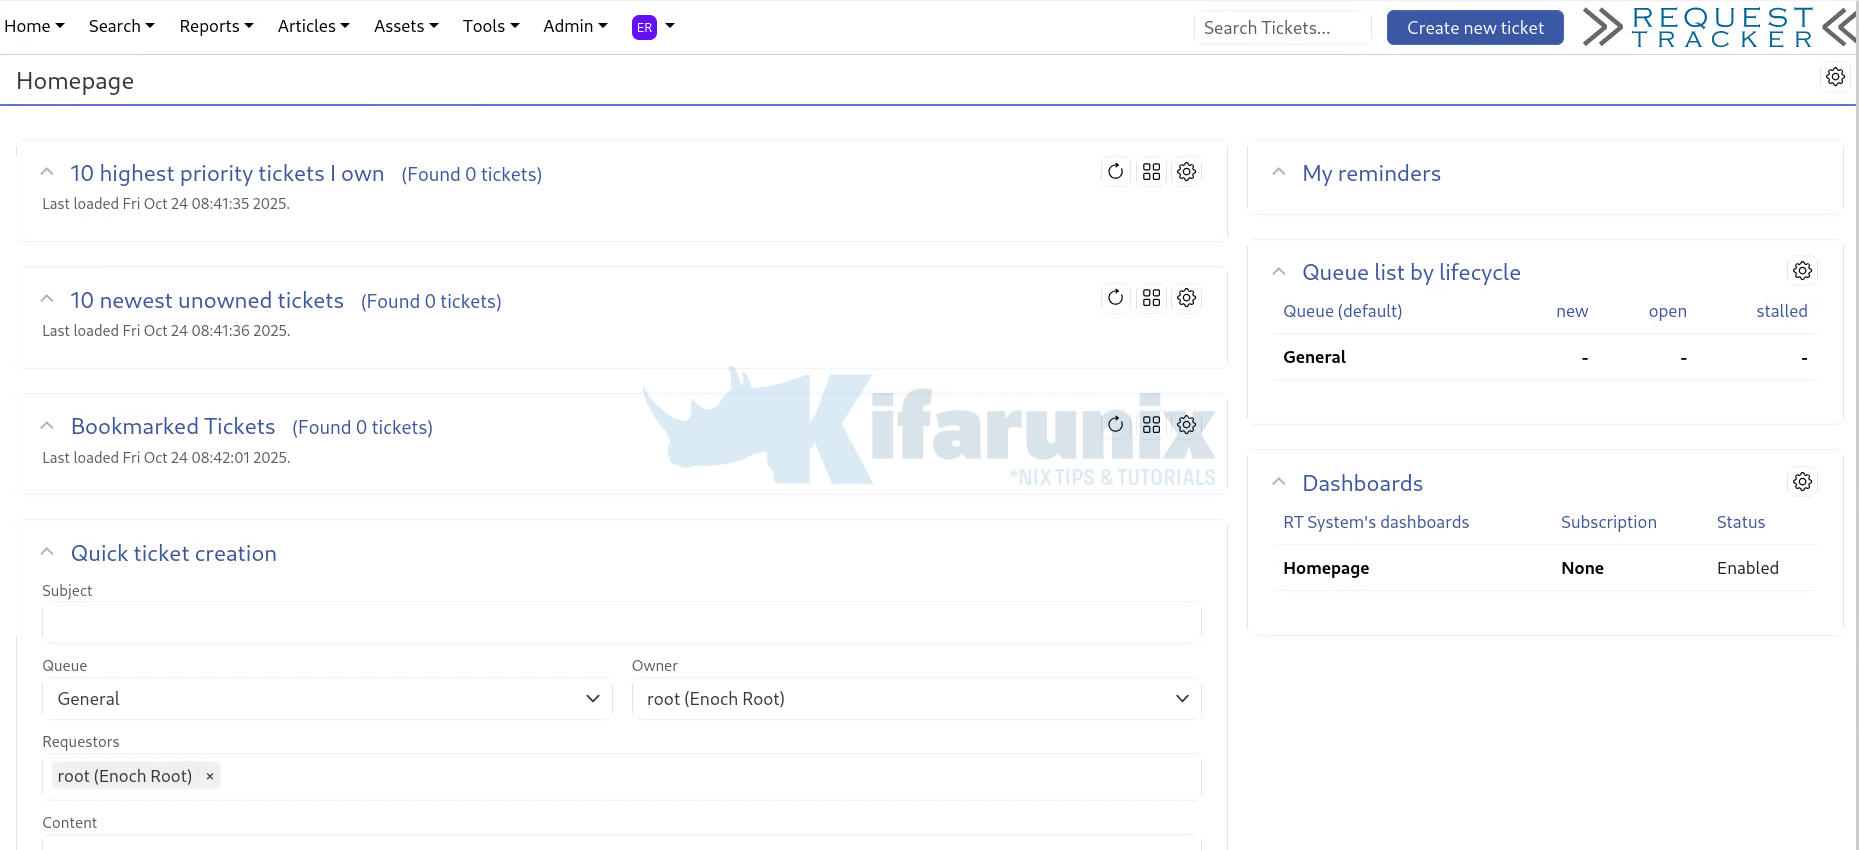
When you successfully log in, you land on RT at a glance web interface.

RT is now installed and running. However, for it to be usable, there is quite a lot that needs to be done. We will cover how to configure RT in our next guides.
Configure SSL/TLS for RT
To ensure that RT is setup with HTTPS, check the link below:
How to Enable HTTPS for Request Tracker on Linux
In the meantime, check:
Configure Request Tracker (RT) to send Mails using MSMTP via Office 365 Relay
Install and Configure Fetchmail with OAuth2 Support for Request Tracker
How to Install RTIR Module on Request Tracker [2025]
That marks the end of our guide on how to install Request Tracker (RT) with MariaDB on AlmaLinux/Rocky Linux 10.

