Welcome to our tutorial on how to install Nexus repository manager on Ubuntu 20.04. Nexus is the World’s #1 repository manager for build artifacts. There exist two versions of Nexus repository manager;
- Professional Edition: Universally manage binaries and artifacts with HA and support.
- OSS Edition: Universally manage binaries and artifacts for FREE.
In this tutorial, we will be dealing with the OSS version of the Nexus repository manager.
Installing Nexus on Ubuntu 20.04
Follow through the steps provided in this guide to install Nexus.
System Requirements
Ensure that the minimum requirements are met by your system before you can proceed to install Nexus as outlined on Nexus system requirements page, links provided below.
Run System Update
Update system package cache;
apt updateInstall Java on Ubuntu 20.04
Nexus repository manager requires Java 8 Runtime Environment (JRE). You can install full JDK or just the JRE.
You can simply run the command below to install Java 8 on Ubuntu 20.04;
apt updateThen install Java 8;
apt install openjdk-8-jdkConfirm the installed version of Java;
java -versionopenjdk version "1.8.0_282"
OpenJDK Runtime Environment (build 1.8.0_282-8u282-b08-0ubuntu1~20.04-b08)
OpenJDK 64-Bit Server VM (build 25.282-b08, mixed mode)Create Dedicated Nexus System Account
As a security precaution, Nexus Repository Manager should NOT be run as the root user. Instead, create a system account for Nexus;
useradd -M -d /opt/nexus -s /bin/bash -r nexusAllow the nexus user to run all commands with sudo without password.
echo "nexus ALL=(ALL) NOPASSWD: ALL" > /etc/sudoers.d/nexusDownload Nexus Repository OSS Tarball
Next, navigate to Nexus repository OSS downloads page, register for an account and download Nexus repository OSS for Unix tarball.
You can simply obtain the link and pull the tarball using wget command as shown below. Note that this downloads the current stable release version of Nexus, 3.29.2-02, as of this writing. Be sure to get the link to the latest version from downloads page.
wget https://sonatype-download.global.ssl.fastly.net/repository/downloads-prod-group/3/nexus-3.29.2-02-unix.tar.gzInstall Nexus Repository Manager
Extract Nexus Repository OSS tarball
Navigate to the directory where you downloaded the Nexus tarball and extract it to the nexus user home directory, which in this guide is /opt/nexus.
mkdir /opt/nexustar xzf nexus-3.29.2-02-unix.tar.gz -C /opt/nexus --strip-components=1Checking the contents of the /opt/nexus directory;
ls /opt/nexusbin deploy etc lib nexus3 NOTICE.txt OSS-LICENSE.txt PRO-LICENSE.txt public systemSet the proper ownership of the nexus directory;
chown -R nexus: /opt/nexusAdjust the Nexus Memory Heap Size
The default minimum JVM heap for Nexus is 2037MB with maximum recommended being 4G. If you have less memory, you can reduce it by editing the file /opt/nexus/bin/nexus.vmoptions and setting a lower value, for demo purposes.
vim /opt/nexus/bin/nexus.vmoptionsReplace the default values for the lines;
-Xms2703m
-Xmx2703m
-XX:MaxDirectMemorySize=2703m
...
To for example, to set it to 1024MB;
-Xms1024m
-Xmx1024m
-XX:MaxDirectMemorySize=1024m
Save and exit the file once you have made the changes.
Running Nexus Repository on Ubuntu 20.04
Nexus provides a startup script at /opt/nexus/bin/nexus.
To run Nexus in standalone mode, you can run this command. However, you need to ensure that Nexus is run as nexus user.
Therefore, edit the file /opt/nexus/bin/nexus.rc and uncomment the line, #run_as_user="" and add nexus as the value.
sed -i 's/#run_as_user=""/run_as_user="nexus"/' /opt/nexus/bin/nexus.rcChange the location of the Sonatype Work directory (Nexus data directory) to a location where nexus user has permissions to write.
For example, in our setup, we set the home directory for Nexus as /opt/nexus and we gave nexus user ownership of this directory.
By default, sonatype-work data directory is moved one directory up, hence, it is expected to be created under /opt, which the nexus user has no permissions to write.
Therefore, edit the /opt/nexus/bin/nexus.vmoptions and adjust the path of the Nexus directory (in the below settings, the directory is changed from ../sonatype-work to ./sonatype-work).
vim /opt/nexus/bin/nexus.vmoptions-XX:LogFile=./sonatype-work/nexus3/log/jvm.log
-XX:-OmitStackTraceInFastThrow
-Djava.net.preferIPv4Stack=true
-Dkaraf.home=.
-Dkaraf.base=.
-Dkaraf.etc=etc/karaf
-Djava.util.logging.config.file=etc/karaf/java.util.logging.properties
-Dkaraf.data=./sonatype-work/nexus3
-Dkaraf.log=./sonatype-work/nexus3/log
-Djava.io.tmpdir=./sonatype-work/nexus3/tmp
...Next, you can then run Nexus;
sudo -u nexus /opt/nexus/bin/nexus startIt might take sometime for Nexus to start. While starting, tail the logs;
tail -f /opt/nexus/sonatype-work/nexus3/log/nexus.log2021-02-15 17:10:56,914+0000 INFO [jetty-main-1] *SYSTEM org.sonatype.nexus.siesta.SiestaServlet - Initialized
2021-02-15 17:10:56,920+0000 INFO [jetty-main-1] *SYSTEM org.sonatype.nexus.repository.httpbridge.internal.ViewServlet - Initialized
2021-02-15 17:10:56,962+0000 INFO [jetty-main-1] *SYSTEM org.eclipse.jetty.server.handler.ContextHandler - Started o.e.j.w.WebAppContext@3b390334{Sonatype Nexus,/,file:///opt/nexus/public/,AVAILABLE}
2021-02-15 17:10:57,082+0000 INFO [jetty-main-1] *SYSTEM org.eclipse.jetty.server.AbstractConnector - Started ServerConnector@75763136{HTTP/1.1, (http/1.1)}{0.0.0.0:8081}
2021-02-15 17:10:57,083+0000 INFO [jetty-main-1] *SYSTEM org.eclipse.jetty.server.Server - Started @182105ms
2021-02-15 17:10:57,083+0000 INFO [jetty-main-1] *SYSTEM org.sonatype.nexus.bootstrap.jetty.JettyServer -
-------------------------------------------------
Started Sonatype Nexus OSS 3.29.2-02
-------------------------------------------------Nexus listens on TCP port 8081 by default;
netstat -altnp | grep :8081tcp 0 0 0.0.0.0:8081 0.0.0.0:* LISTEN 2113/javaYou should now be able to access Nexus web interface from browser.
Create Nexus Repository Systemd Service
In order to easily manage Nexus repository service, create a systemd service unit for it as shown below;
cat > /etc/systemd/system/nexus.service << 'EOL'
[Unit]
Description=nexus service
After=network.target

[Service]
Type=forking
LimitNOFILE=65536
ExecStart=/opt/nexus/bin/nexus start
ExecStop=/opt/nexus/bin/nexus stop
User=nexus
Restart=on-abort

[Install]
WantedBy=multi-user.target
EOL
Next, stop Nexus if you already started it with startup script above.
/opt/nexus/bin/nexus stopReload the systemd manager configuration;
systemctl daemon-reloadStart and enable Nexus service to run on system reboot;
systemctl enable --now nexus.serviceCheck the service status;
systemctl status nexus● nexus.service - nexus service
Loaded: loaded (/etc/systemd/system/nexus.service; enabled; vendor preset: enabled)
Active: active (running) since Mon 2021-02-15 17:14:49 UTC; 5s ago
Process: 67085 ExecStart=/opt/nexus/bin/nexus start (code=exited, status=0/SUCCESS)
Main PID: 67277 (java)
Tasks: 41 (limit: 4620)
Memory: 442.9M
CGroup: /system.slice/nexus.service
└─67277 /usr/lib/jvm/java-8-openjdk-amd64/jre/bin/java -server -Dinstall4j.jvmDir=/usr/lib/jvm/java-8-openjdk-amd64/jre -Dexe4j.moduleName=/opt/nexus/bin/nexu>
Feb 15 17:14:48 ubuntu20 systemd[1]: Starting nexus service...
Feb 15 17:14:49 ubuntu20 nexus[67085]: Starting nexus
Feb 15 17:14:49 ubuntu20 systemd[1]: Started nexus service.You can as well check the logs for verification;
tail -f /opt/nexus/sonatype-work/nexus3/log/nexus.logAccessing Nexus Repository Web Interface
You can now access Nexus repository from browser using the address http://server-IP-or-resolvable-hostname:8081.
If UFW is running, you need to open port 8081 to allow external access.
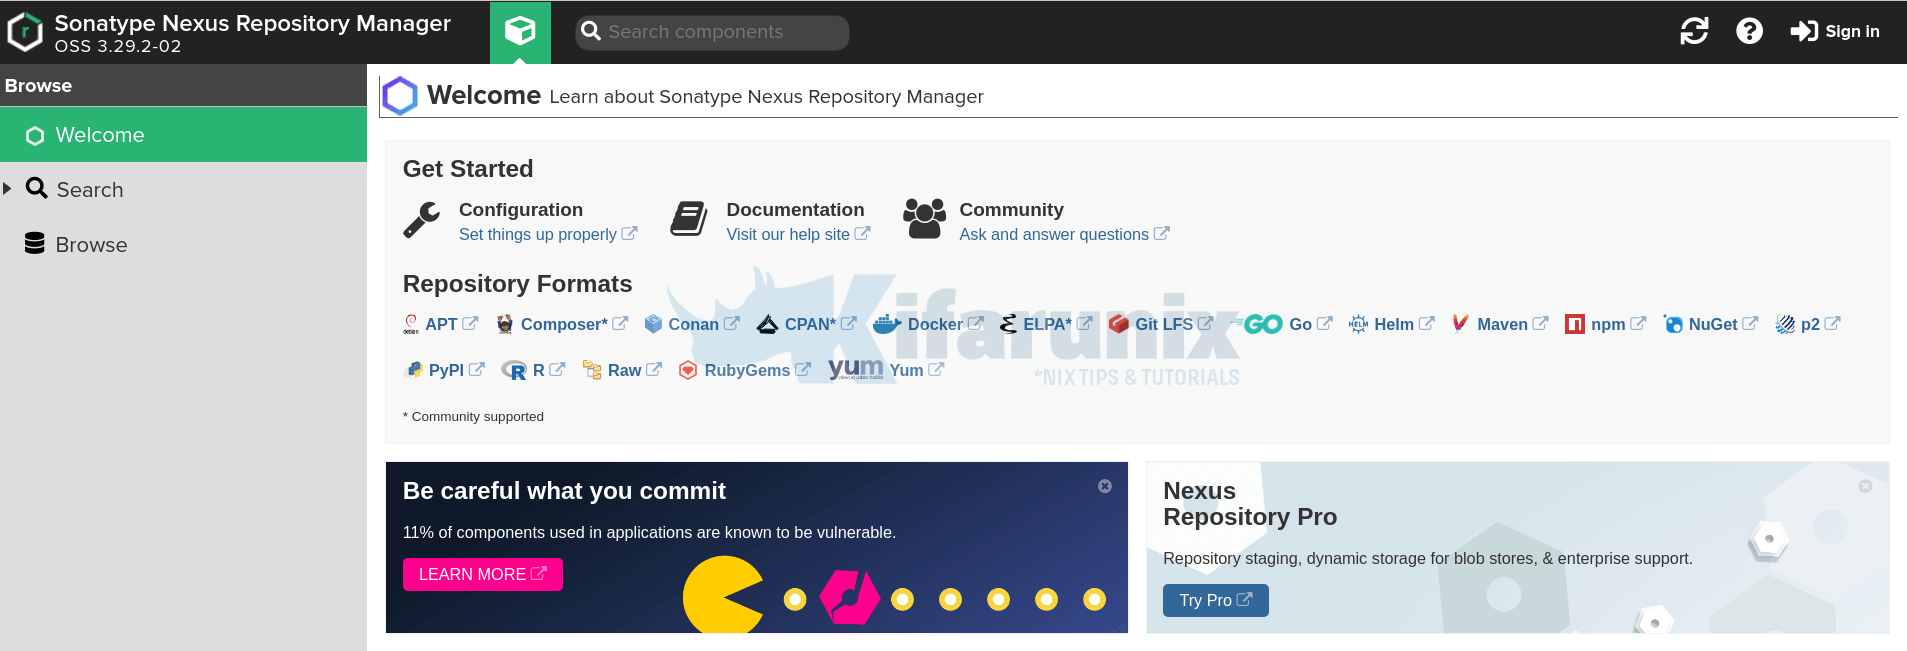
ufw allow 8081/tcpNext, you can access from browser. Such an interface should welcome you.

Setup Nexus Repository Manager
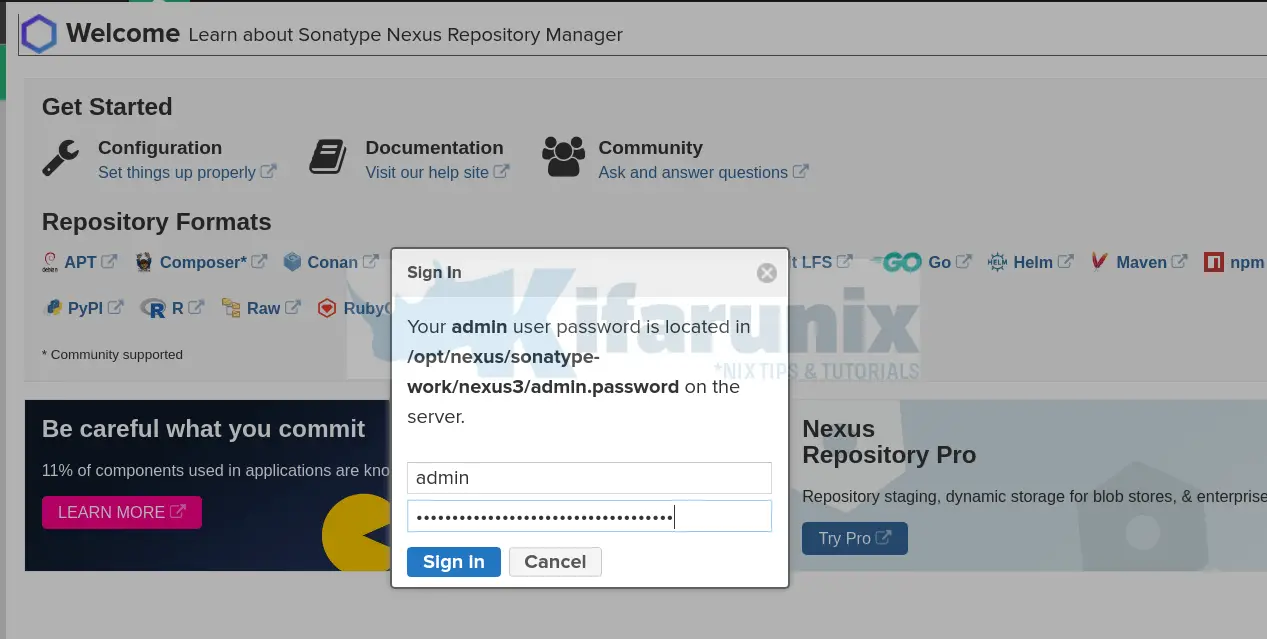
Click the sign in button at the top right corner. Login as admin. The password is located on the file, /opt/nexus/sonatype-work/nexus3/admin.password. To get the password, just print the contents of the file.
cat /opt/nexus/sonatype-work/nexus3/admin.password
Once you logged in, click next to proceed to setup Nexus.
- Reset Nexus repository admin password
- Configure anonymous access. You can choose to disable the anonymous access to secure Nexus repositories by requiring user to authenticate before they can browse through the repositories.
- Finish the setup
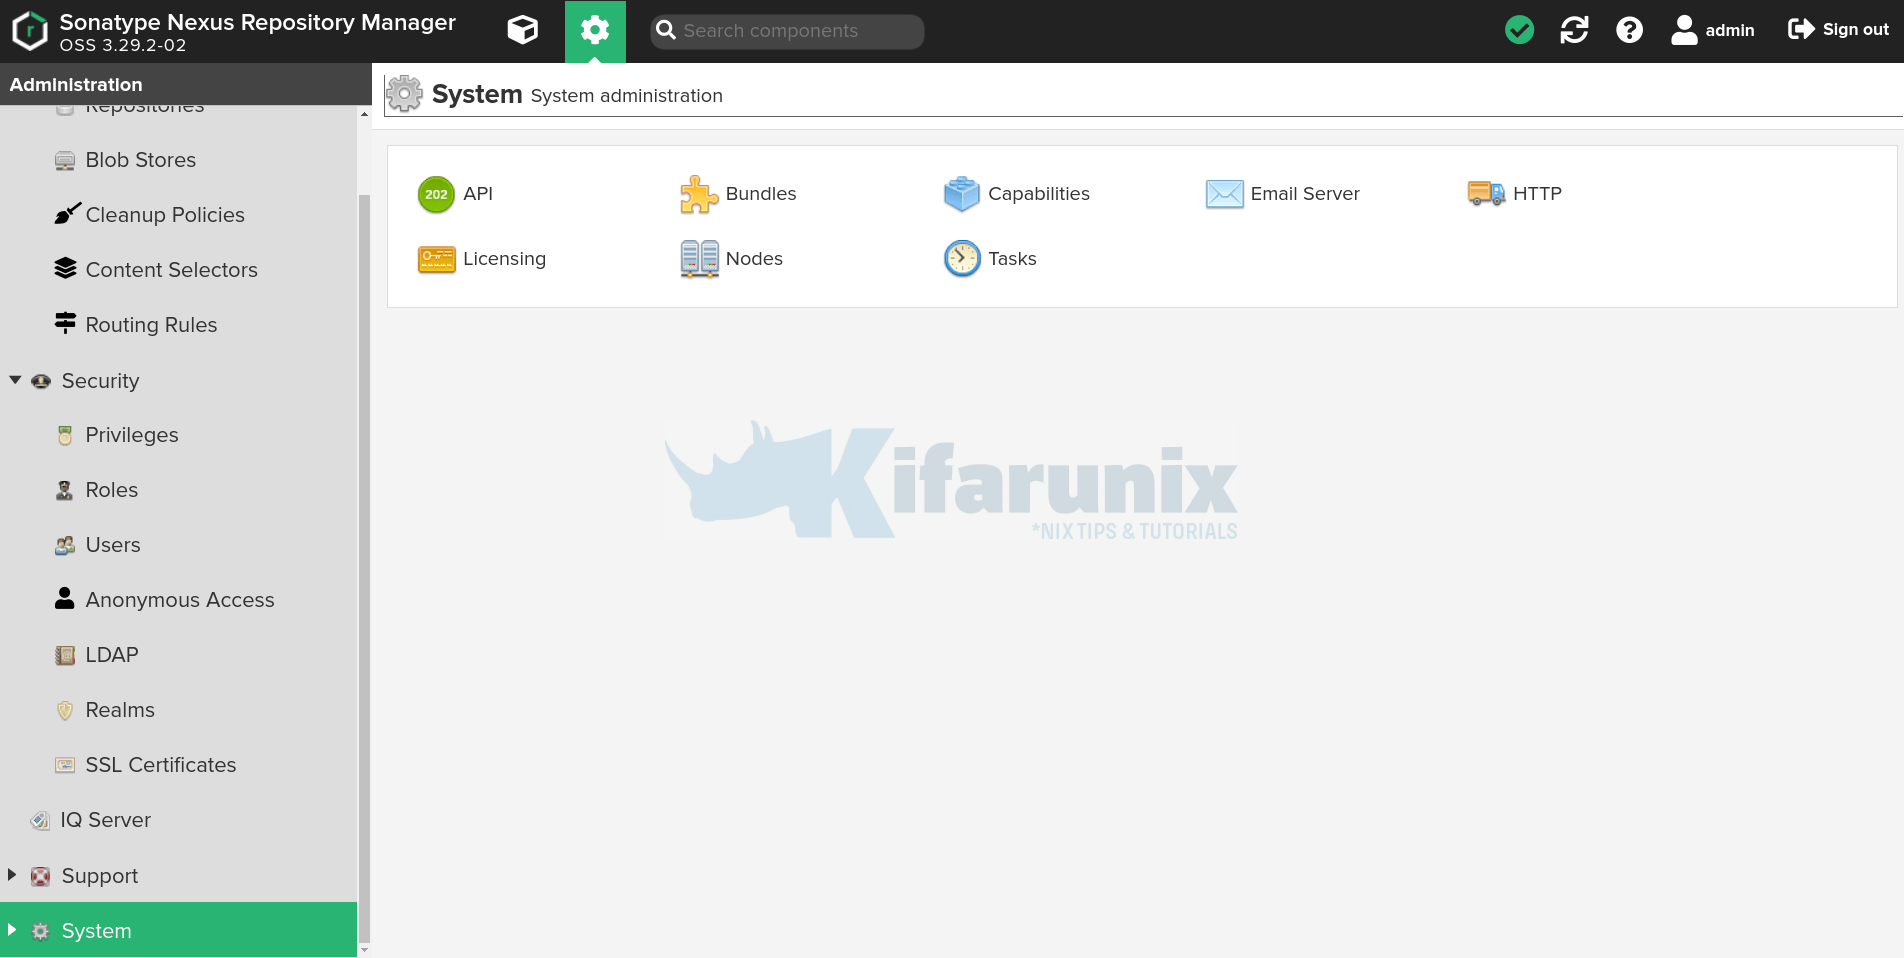
You can access Nexus repository manager settings by clicking on the gear icon;

You can go through the settings and make adjustments to suite your needs.
Further Reading
Read more about Nexus and its setup on Nexus Repository Manager 3 documentation page.
Nexus Repository Manager 3 documentation page
Other Tutorials
Install and setup GVM 20.08 on Debian 10
Install Signal Messenger on Ubuntu 20.04
Install NoMachine on Ubuntu 20.04

