Want to shape your skills on web application security? Well how about you play around with Damn Vulnerable Web Application? Follow through this guide to learn how to install and setup DVWA on Debian 10 Buster as a legal environment to run your tests.
Installing DVWA on Debian 10
Run System Update
To begin with, ensure that your system packages are up-to-date.
apt updateapt upgradeInstall LAMP Stack on Debian 10
One of the major requirements for setting up DVWA lab is to have LAMP Stack up and running. Follow the guides below to learn how to install LAMP stack on Debian 10 Buster.
Install LAMP Stack with MariaDB 10 on Debian 10
Create DVWA Database and Database User
Once the LAMP stack installation is done, proceed to create MariaDB DVWA database and database user.
mysql -u root -pCreate DVWA database. Replace the database name accordingly.
create database dvwa;Create DVWA database user and grant all privileges. Replace the database user accordingly.
grant all on dvwa.* to dvwauser@localhost identified by 'Str0nGp@ssword';Reload the privileges table and exit the database.
flush privileges;quitInstall DVWA on Debian 10
Download and install DVWA on the Apache web root directory,/var/www/html.
Remove the default Apache index.html file.
rm -rf /var/www/html/index.htmlClone the latest version of the DVWA to Apache default web root directory.
apt install git vimgit clone https://github.com/ethicalhack3r/DVWA /var/www/html/Check the contents of /var/www/html/.
ls /var/www/html/about.php config docs external hackable index.php login.php phpinfo.php README.md security.php vulnerabilities
CHANGELOG.md COPYING.txt dvwa favicon.ico ids_log.php instructions.php logout.php php.ini robots.txt setup.phpConfigure DVWA on Debian 10 Buster
Configure DVWA database connection details. Begin by renaming the sample configuration file /var/www/html/config/config.inc.php.dist to /var/www/html/config/config.inc.php
cp /var/www/html/config/config.inc.php.dist /var/www/html/config/config.inc.phpNext, edit the configuration file, /var/www/html/config/config.inc.php and set the database connection details.
vim /var/www/html/config/config.inc.phpReplace the database and database user and the password accordingly.
...
# Database variables
#   WARNING: The database specified under db_database WILL BE ENTIRELY DELETED during setup.
#   Please use a database dedicated to DVWA.
#
# If you are using MariaDB then you cannot use root, you must use create a dedicated DVWA user.
#   See README.md for more information on this.
$_DVWA = array();
$_DVWA[ 'db_server' ]   = '127.0.0.1';
$_DVWA[ 'db_database' ] = 'dvwa';
$_DVWA[ 'db_user' ]     = 'dvwauser';
$_DVWA[ 'db_password' ] = 'Str0nGp@ssword';
...
Install reCAPTCHA keys
Generate recapture values from Google service.
Once generated, simply copy and paste the site key and site secret key to $_DVWA[ 'recaptcha_public_key' ] and $_DVWA[ 'recaptcha_private_key' ] respectively.
...
# ReCAPTCHA settings
#   Used for the 'Insecure CAPTCHA' module
#   You'll need to generate your own keys at: https://www.google.com/recaptcha/admin
$_DVWA[ 'recaptcha_public_key' ]  = '6Lc4BsMUAAAAAKs72dKl4ZTVsA8giXiN7yqQcoVz';
$_DVWA[ 'recaptcha_private_key' ] = '6Lc4BsMUAAAAAI9v0sd_xvlh_PMXTcgtqRYJ6VEd';
...
Save and exit the configuration file and restart MariaDB
systemctl restart mariadbConfigure PHP
Install Required PHP-GD module.
apt install php-gdThe version PHP installed in our case here is 7.3.
php -vPHP 7.3.11-1~deb10u1 (cli) (built: Oct 26 2019 14:14:18) ( NTS )
Copyright (c) 1997-2018 The PHP Group
Zend Engine v3.3.11, Copyright (c) 1998-2018 Zend Technologies
with Zend OPcache v7.3.11-1~deb10u1, Copyright (c) 1999-2018, by Zend TechnologiesProceed to edit /etc/php/7.3/apache2/php.ini and make the following changes.
vim /etc/php/7.3/apache2/php.iniallow_url_include = on– Allows for Remote File Inclusions (RFI)allow_url_fopen = on– Allows for Remote File Inclusions (RFI)display_errors = off– (Optional) Hides PHP warning messages to make it less verbose
Save and quit the PHP configuration file
Set the ownership of the DVWA web root directory to Web server user.
chown -R www-data:www-data /var/www/htmlRestart Apache
systemctl restart apache2Complete DVWA Setup from Browser
Navigate to the web browser and access your DVWA using the address, http://server-IP/login.php.

Login using the default credentials: admin:password.
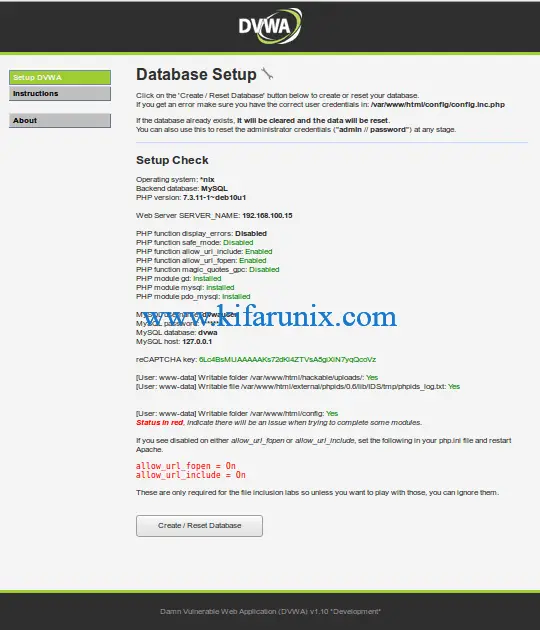
On the status check page, ensure that you fix any check whose status is red.

Next, click Create/Reset Database at the bottom to setup the DVWA database. If the database already exists, it will be reset. After that, you are then taken to the Login screen.
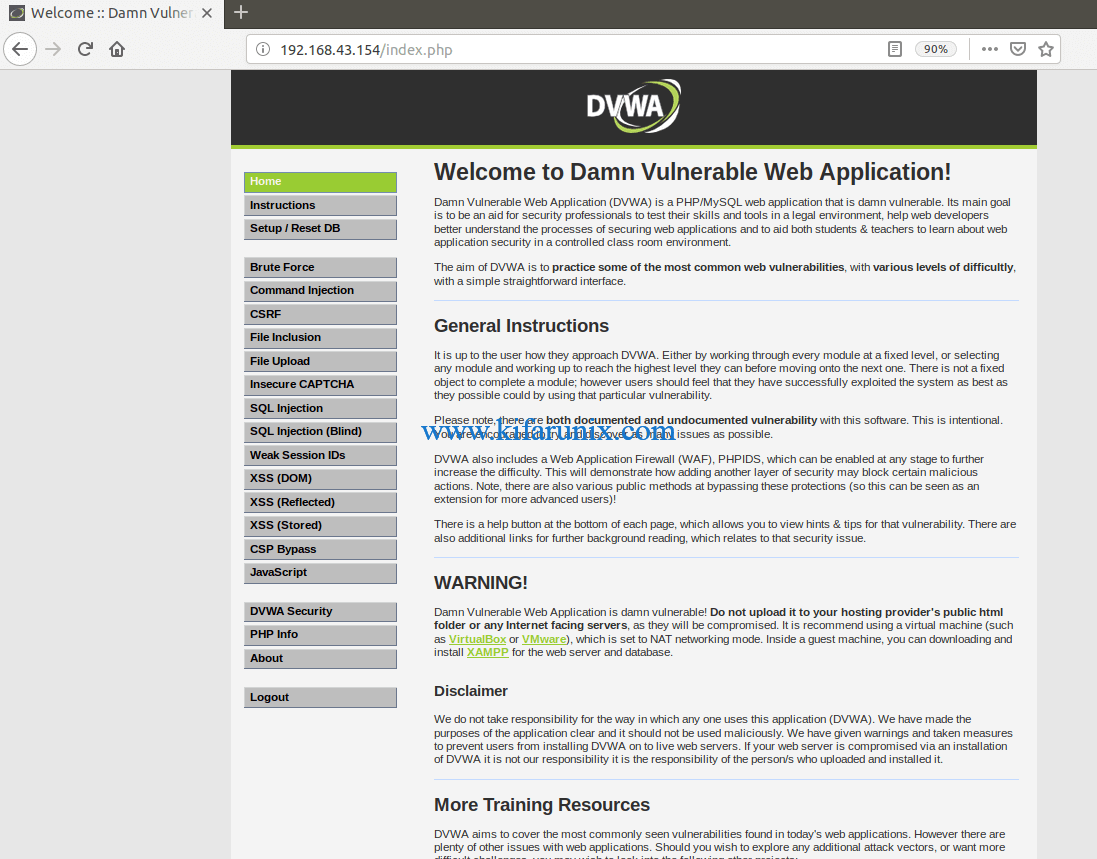
Login again using the default credentials provided above. You should now land on DVWA welcome page.

There you go. You have successfully setup Damn Vulnerable web application Lab on Debian 10. You can now run web application security testings. Enjoy.
Related Tutorials
How to Install and Configure DVWA Lab on Ubuntu 18.04 server


This is awesome. Thank you so much for this article! First DVWA install guide I’ve used that hasn’t been full of errors.
We are glad you found the guide helpful. Enjoy