In this tutorial, you will learn how to install Wazuh agent on RHEL 8/9/10. Our previous setup was on setting up Wazuh server with ELK on Rocky Linux. The Wazuh agent is multi-platform and runs on the hosts that the user wants to monitor. It communicates with the Wazuh manager, sending data in near real time through an encrypted and authenticated channel.
Table of Contents
Install Wazuh Agent on RHEL 8/9/10
In this tutorial, we are going to install the Wazuh agents on RHEL 8/9/10 nodes, which act as the endpoints from which we are collecting logs.
You can check how to install and setup Wazuh SIEM server on RHEL nodes.
How to Install Wazuh SIEM Server on RHEL 9/RHEL 10
Install Wazuh RPM Repository on RHEL Nodes
Wazuh maintains its own official RPM repository for RHEL-based distributions. This allows us to install and manage Wazuh components directly using the package managers.
Elevate your privileges to proceed:
sudo su -Then run the command below to create the Wazuh 4.x repository on RHEL 8/9/10.
cat > /etc/yum.repos.d/wazuh.repo << 'EOF'
[wazuh]
name=EL-$releasever - Wazuh
baseurl=https://packages.wazuh.com/4.x/yum/
gpgcheck=1
gpgkey=https://packages.wazuh.com/key/GPG-KEY-WAZUH
enabled=1
priority=1
EOF
Import the Wazuh repository GPG key
rpm --import http://packages.wazuh.com/key/GPG-KEY-WAZUHInstall Wazuh Agent on RHEL
Once the repos are in place, you can install Wazuh agent by running the command below;
on RHEL 7;
yum install wazuh-agent -yWhile the above works fine across RHEL nodes, you can use DNF command if you want on RHEL 8+.
dnf install wazuh-agent -yThe installation is now complete.
You can also specify the Wazuh manager from the command line. Replace the IP appropriately.
WAZUH_MANAGER="192.168.122.195" dnf install wazuh-agentWazuh agents are only guaranteed to be compatible with manager versions that are equal to or newer. To prevent accidental updates that may break compatibility, it’s best to disable the Wazuh repository after installation.
Use the following command to disable it:
sed -i "s/^enabled=1/enabled=0/" /etc/yum.repos.d/wazuh.repoThis ensures the agent won’t auto-update beyond what your manager supports.
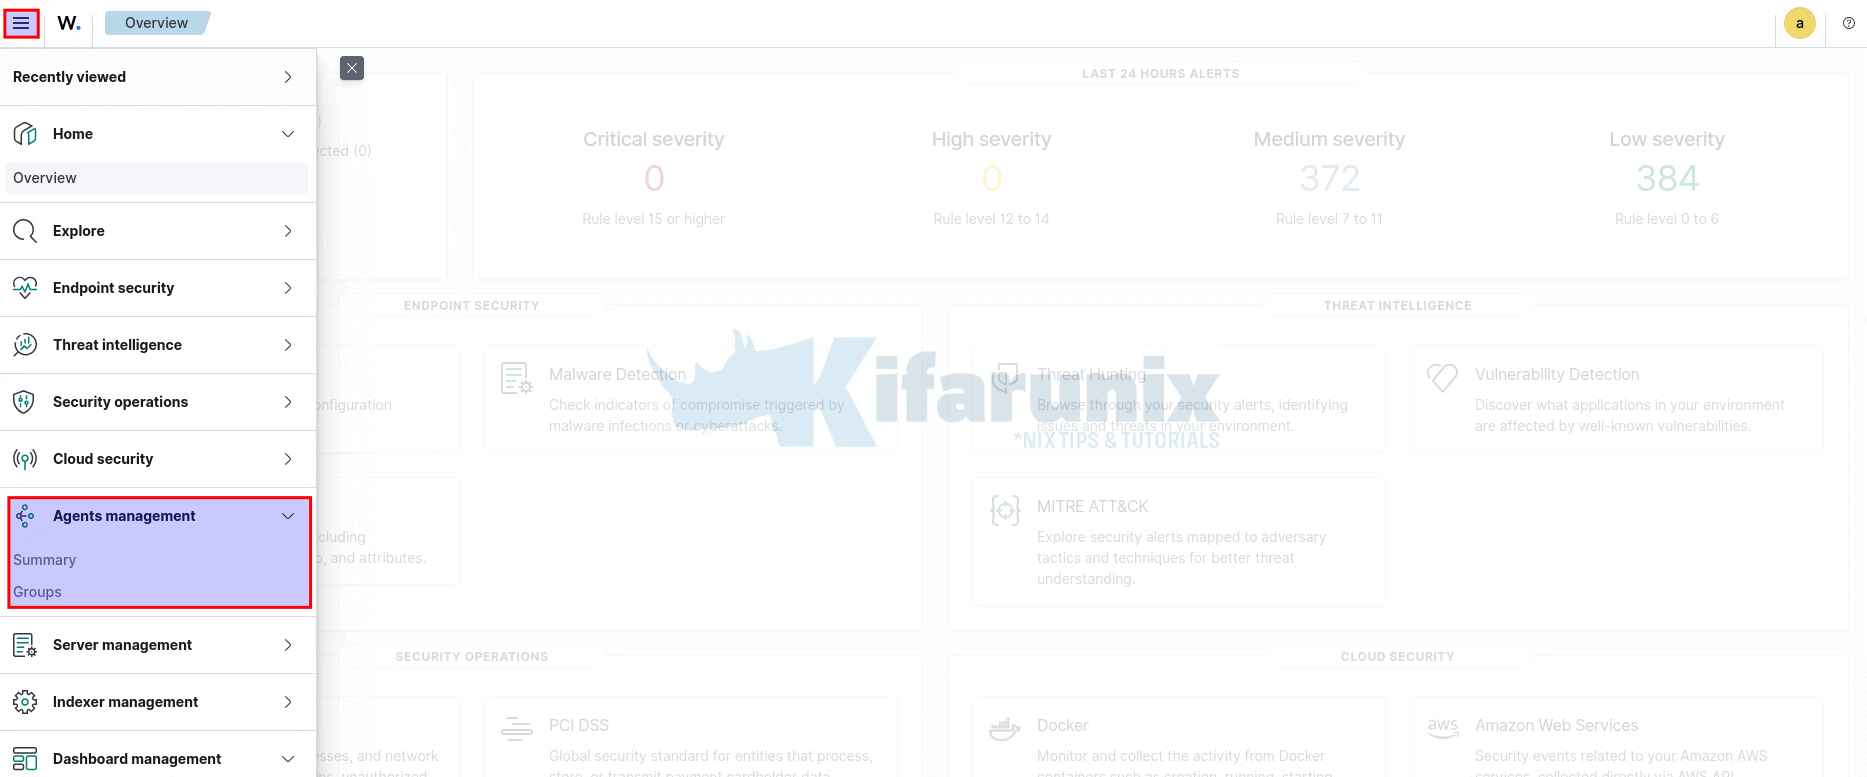
You can check the instructions of installing Wazuh agents from the Wazuh dashboard: Agents management > Summary, and click on Deploy new agent.
Registering (Enrolling) the Agent with the Manager
To ensure successful Wazuh agent enrollment, the following must be in place:
- Wazuh manager must be installed and running.
- Wazuh agent must be installed and running on the target endpoint.
- Network connectivity from agent to manager must be open on the required ports:
1514/TCP: Agent communication1515/TCP: Automatic agent enrollment55000/TCP: Enrollment via Wazuh API
Agent registration is the process of securely connecting a Wazuh agent to the Wazuh manager so that it can be authenticated and monitored.
In recent Wazuh versions, this process has been greatly simplified. All you have to do is configure the Wazuh manager’s IP address or FQDN on the agent (either during installation or by editing the config) and the agent will automatically enroll with the manager; no manual key exchange is needed.
There are two ways you can configure the Wazuh agent to communicate with the Wazuh manager:
- During installation: the preferred and most efficient method.
- After installation: Useful if the agent was installed without specifying the manager.
Configure Wazuh Manager’s Address During Agent Installation
You can use the WAZUH_MANAGER environment variable to specify the IP or hostname of your Wazuh manager with the agent installation command. This will automatically update the agent’s configuration file.
WAZUH_MANAGER="192.168.122.195" dnf install wazuh-agentThis updates the <address> field in the /var/ossec/etc/ossec.conf file under the <client><server> section.
You can also include additional variables during installation if needed:
WAZUH_AGENT_GROUP="default"
WAZUH_REGISTRATION_PASSWORD="mypassword"
Note that the registration password must match the one set on the manager in /var/ossec/etc/authd.pass.
Read more about the Wazuh agent deployment variables.
Once installed, enable and start the agent:
systemctl daemon-reloadsystemctl enable --now wazuh-agentConfigure Wazuh Manager’s Address After Agent Installation
If you skipped setting the environment variable during the agent installation, you can manually configure the manager address afterward.
The Wazuh agent’s default configuration file often includes a placeholder, MANAGER_IP, for the manager address. You can easily replace this placeholder with the actual address using the sed command.
For example, to update the manager IP to 192.168.122.195, run:
sed -i 's/MANAGER_IP/192.168.122.195/g' /var/ossec/etc/ossec.confOtherwise, edit the file manually and replace MANAGER_IP with the correct server IP or hostname:
vim /var/ossec/etc/ossec.confLocate or add the <client> section with your manager’s IP or hostname:
<ossec_config>
  <client>
    <server>
      <address>192.168.122.195</address>
      <port>1514</port>
      <protocol>tcp</protocol>
    </server>
Save and exit the configuration file.
Start and enable the agent to run on system boot:
systemctl daemon-reloadsystemctl enable --now wazuh-agentYou can check additional security options that can be used while registering Wazuh agents to a Wazuh manager.
Listing Wazuh Agents on the Server
Once agents are enrolled and running, you can check their connection status directly from the Wazuh manager. This allows you to verify which agents are currently active, pending, or disconnected.
You can check the status of your registered agents either from:
- the Wazuh dashboard or by
- using the command-line interface (CLI) on the Wazuh manager.
- You can also use the API port 55000 if you want.
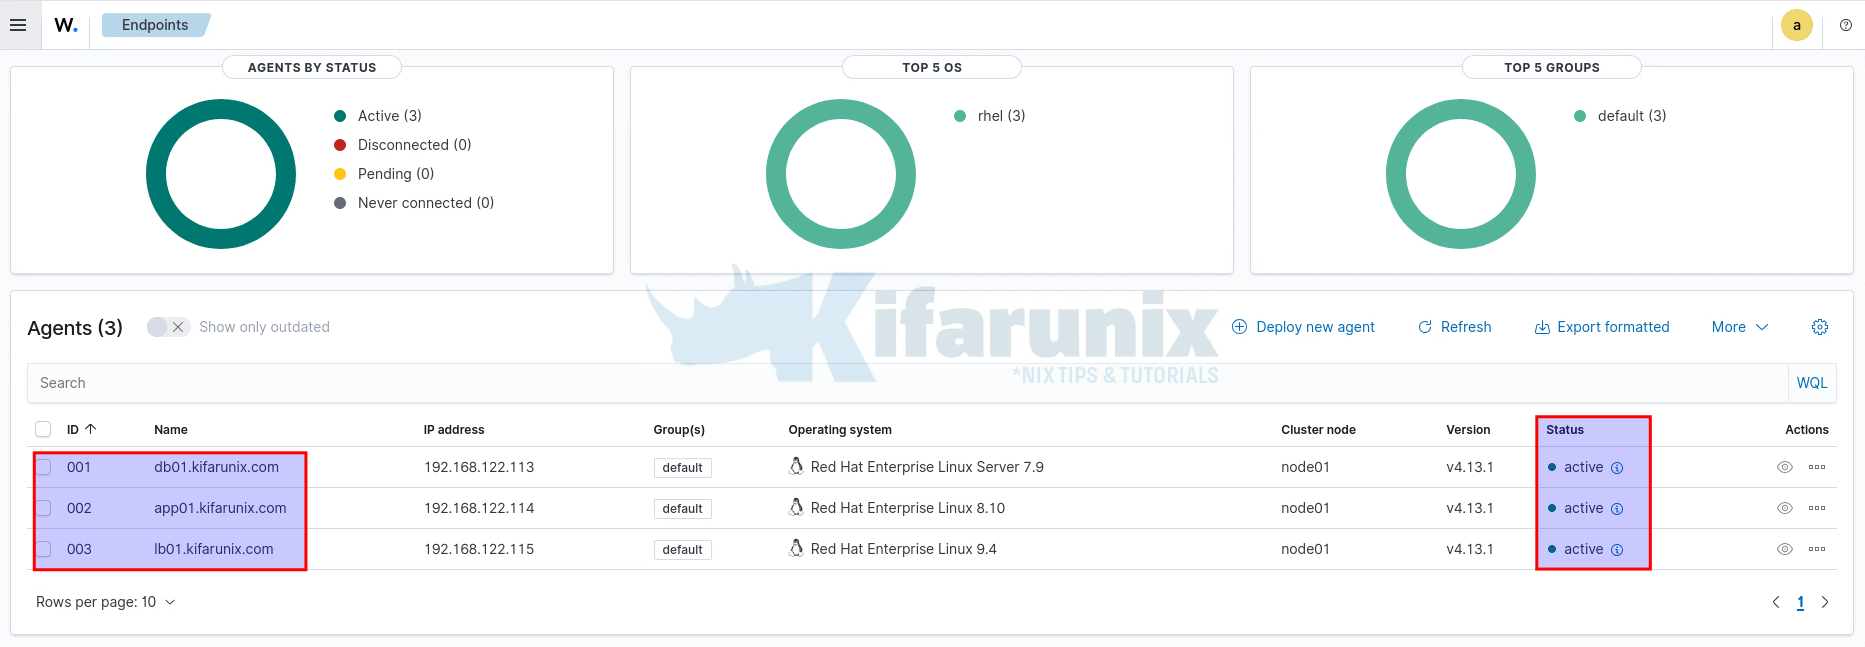
To check the agent status from the dashboard, open the Agent Management > Summary menu.

Inside the Agents management > Summary section, you will find a list of all registered agents along with their statuses (Active, Disconnected, Never connected, etc.).

To check the agents status from the CLI, run the command below on Wazuh server;
/var/ossec/bin/agent_control -l
Wazuh agent_control. List of available agents:
   ID: 000, Name: rhel10-wazuh (server), IP: 127.0.0.1, Active/Local
   ID: 001, Name: db01.kifarunix.com, IP: any, Active
   ID: 002, Name: app01.kifarunix.com, IP: any, Active
   ID: 003, Name: lb01.kifarunix.com, IP: any, Active

List of agentless devices:
To use Wazuh server API to list agents and status:
- Obtain the authentication TOKEN (The default Wazuh server API credential is
wazuh:wazuh):TOKEN=$(curl -u <WAZUH_API_USER>:<WAZUH_API_PASSWORD> -sk -X POST "https://localhost:55000/security/user/authenticate?raw=true") - Then get the agents stats:
Sample agent status output:curl -sk -XGET "https://localhost:55000/?pretty=true" -H "Authorization: Bearer $TOKEN"{ "data": { "affected_items": [ { "os": { "arch": "x86_64", "codename": "Plow", "major": "9", "minor": "4", "name": "Red Hat Enterprise Linux", "platform": "rhel", "uname": "Linux |lb01.kifarunix.com |5.14.0-427.13.1.el9_4.x86_64 |#1 SMP PREEMPT_DYNAMIC Wed Apr 10 10:29:16 EDT 2024 |x86_64", "version": "9.4" }, "node_name": "node01", "status_code": 0, "manager": "rhel10-wazuh", "lastKeepAlive": "2025-09-26T21:55:30+00:00", "dateAdd": "2025-09-26T20:03:22+00:00", "group": [ "default" ], "configSum": "ab73af41699f13fdd81903b5f23d8d00", "status": "active", "registerIP": "any", "id": "003", "group_config_status": "synced", "mergedSum": "e15cd0c9f7dec03be7b82012b99d73bf", "name": "lb01.kifarunix.com", "ip": "192.168.122.115", "version": "Wazuh v4.13.1" }, { "os": { "arch": "x86_64", "codename": "Ootpa", "major": "8", "minor": "10", "name": "Red Hat Enterprise Linux", "platform": "rhel", "uname": "Linux |app01.kifarunix.com |4.18.0-553.72.1.el8_10.x86_64 |#1 SMP Sat Aug 23 20:13:38 EDT 2025 |x86_64", "version": "8.10" }, "node_name": "node01", "status_code": 0, "manager": "rhel10-wazuh", "lastKeepAlive": "2025-09-26T21:55:23+00:00", "dateAdd": "2025-09-26T20:03:19+00:00", "group": [ "default" ], "configSum": "ab73af41699f13fdd81903b5f23d8d00", "status": "active", "registerIP": "any", "id": "002", "group_config_status": "synced", "mergedSum": "e15cd0c9f7dec03be7b82012b99d73bf", "name": "app01.kifarunix.com", "ip": "192.168.122.114", "version": "Wazuh v4.13.1" }, { "os": { "arch": "x86_64", "codename": "Maipo", "major": "7", "minor": "9", "name": "Red Hat Enterprise Linux Server", "platform": "rhel", "uname": "Linux |db01.kifarunix.com |3.10.0-1160.el7.x86_64 |#1 SMP Tue Aug 18 14:50:17 EDT 2020 |x86_64", "version": "7.9" }, "node_name": "node01", "status_code": 0, "manager": "rhel10-wazuh", "lastKeepAlive": "2025-09-26T21:55:40+00:00", "dateAdd": "2025-09-26T20:03:14+00:00", "group": [ "default" ], "configSum": "ab73af41699f13fdd81903b5f23d8d00", "status": "active", "registerIP": "any", "id": "001", "group_config_status": "synced", "mergedSum": "e15cd0c9f7dec03be7b82012b99d73bf", "name": "db01.kifarunix.com", "ip": "192.168.122.113", "version": "Wazuh v4.13.1" }, { "os": { "arch": "x86_64", "codename": "Coughlan", "major": "10", "minor": "0", "name": "Red Hat Enterprise Linux", "platform": "rhel", "uname": "Linux |rhel10-wazuh |6.12.0-55.9.1.el10_0.x86_64 |#1 SMP PREEMPT_DYNAMIC Tue Mar 25 09:14:09 EDT 2025 |x86_64", "version": "10.0" }, "node_name": "node01", "status_code": 0, "manager": "rhel10-wazuh", "lastKeepAlive": "9999-12-31T23:59:59+00:00", "dateAdd": "2025-09-26T16:12:24+00:00", "status": "active", "registerIP": "127.0.0.1", "id": "000", "group_config_status": "synced", "name": "rhel10-wazuh", "ip": "127.0.0.1", "version": "Wazuh v4.13.1" } ], "total_affected_items": 4, "total_failed_items": 0, "failed_items": [] }, "message": "All selected agents information was returned", "error": 0
Verify Wazuh Agent Data Reception on Wazuh Dashboard
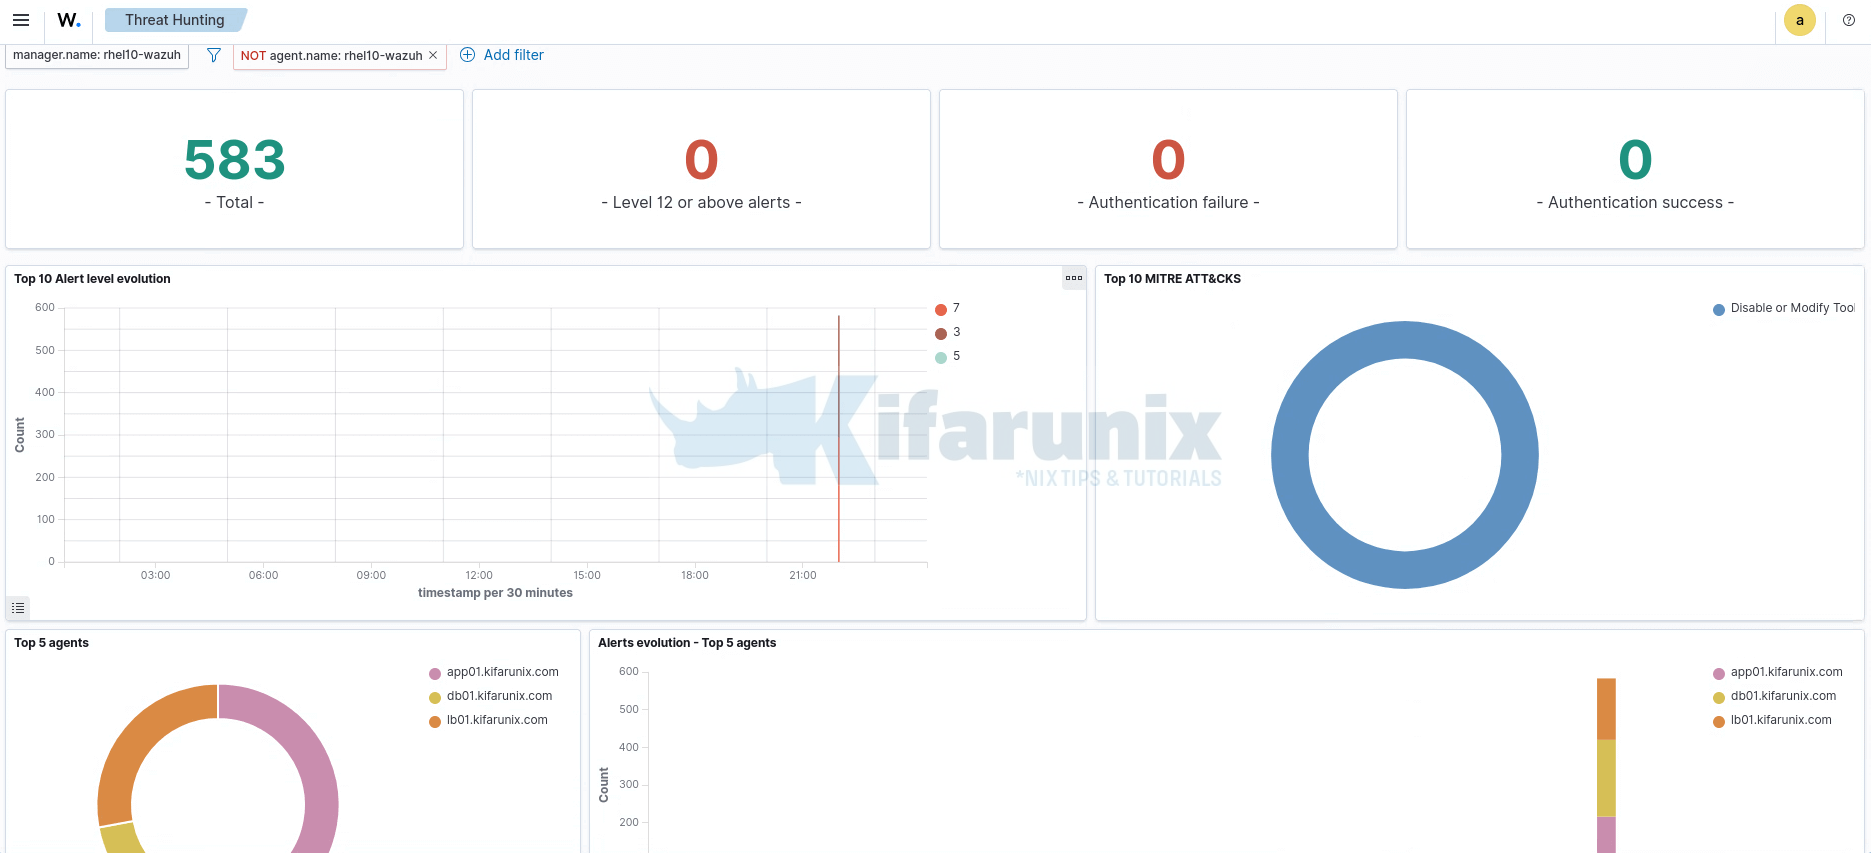
Check that the agents are now active as shown above and then navigate to Threat Hunting:
Dashboard:

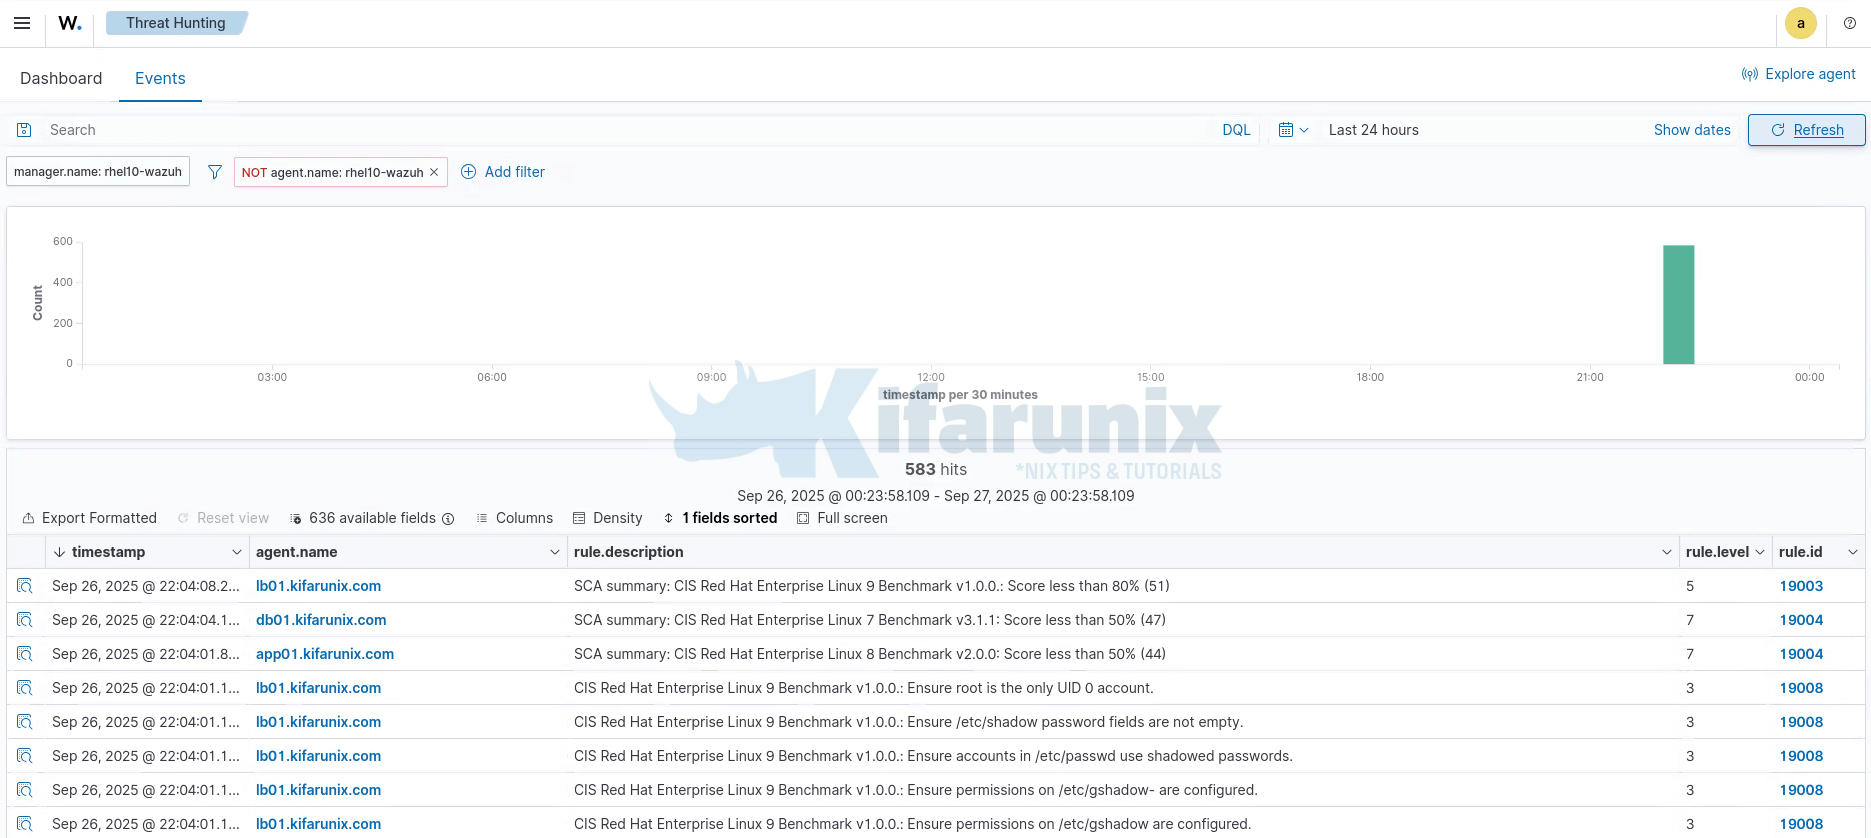
Navigate to Events to view security related events.

You can dig deeper into the individual agent events.
That concludes our guide on how to install Wazuh agent on RHEL nodes.
Reference
Wazuh Agent installation

