In this tutorial, you will learn how to install Red Hat Discovery tool on RHEL 9. So, what is Red Hat Discovery? Red Hat Discovery is an agentless inspection and reporting tool designed to identify and collect data about physical and virtual Red Hat systems within a network, including their operating systems and configurations. It helps organizations understand and report on subscription usage by gathering detailed facts about Red Hat technologies without requiring software installation on target systems; only SSH access is needed. The tool uses specialized Ansible Playbooks along with a front-end UI and API for automation. It supports discovery across a range of Red Hat products, such as RHEL 6+, JBoss EAP, JBoss Fuse, JWS, BRMS, and platforms like Satellite, vCenter, OpenShift, and Ansible Automation Platform.
Table of Contents
How to Install Red Hat Discovery Tool on RHEL 9
Prerequisites:
Hardware Requirements
Below are the bare minimum hardware requirements for running Red Hat Discovery tool on a RHEL node.
- CPU: 2 cores, recommended 4 cores
- RAM: 2 GB, recommended 4 GB
- Disk Storage: 30 GB of free space required in the directory used by Podman for container storage (default:
${HOME}/.local/share/containers, unless configured otherwise).
Software Requirements
- Operating System: A clean install of latest versions of RHEL 8 or RHEL 9.
- cgroup_v2: Ensure cgroup_v2 is enabled for better resource management. RHEL 9 has cgroup_v2 enabled by default while RHEL 8 has cgroup_v1 enabled by default. See how to check if cgroup_v2 is enabled on RHEL OS below.
- OverlayFS storage driver: OverlayFS is the recommended storage driver. overlay2 storage driver requires that the underlying filesystem supports the
d_typefield in directory entries. Since RHEL uses XFS by default, this means the filesystem must be formatted withftype=1. - Podman. Discovery runs as containers. RHEL nodes manages containers using Podman by default. Podman is also installed by default on RHEL 8/RHEL 9 nodes. Podman version 4.9.4 or later is required. You can confirm the version via
podman --versioncommand.
Check cgroup_v2 support
There are different ways on how to check if cgroup_v2 is enabled on RHEL nodes. Some of the commands you can use:
Mount command:
mount | grep cgroupcgroup2 on /sys/fs/cgroup type cgroup2 (rw,nosuid,nodev,noexec,relatime,seclabel,nsdelegate,memory_recursiveprot)This means the system is using CGroup v2.
You can also use stat command:
stat -f -c %T /sys/fs/cgroupOutput;
cgroup2fsThis means the system is using CGroup v2.
Check overlay driver support
You can use xfs_info command to check if overlay2 driver is enabled.
xfs_info /drive/pathe.g
xfs_info /dev/rhel/rootmeta-data=/dev/mapper/rhel-root isize=512 agcount=4, agsize=3076864 blks
= sectsz=512 attr=2, projid32bit=1
= crc=1 finobt=1, sparse=1, rmapbt=0
= reflink=1 bigtime=1 inobtcount=1 nrext64=0
data = bsize=4096 blocks=12307456, imaxpct=25
= sunit=0 swidth=0 blks
naming =version 2 bsize=4096 ascii-ci=0, ftype=1
log =internal log bsize=4096 blocks=16384, version=2
= sectsz=512 sunit=0 blks, lazy-count=1
realtime =none extsz=4096 blocks=0, rtextents=0
ftype=1: OverlayFS-compatible.ftype=0: Not compatible (OverlayFS will not work)
To enable cgroups-v2, see Mounting cgroups-v2.
Installing Red Hat Discovery Tool
There are two different types of installation for Red Hat Discovery:
- Connected Installation: Installing Red Hat Discovery from a system that has internet access, also commonly referred to as a connected or online environment.
- Disconnected Installation: Installing Red Hat Discovery from a system that does not have internet access, also commonly referred to as a disconnected, offline, or air-gapped environment.
In this guide, we will focus on connected installation of Red Hat Discovery tool on RHEL 9.
Deploy Clean RHEL 9 Node
In our environment, we have deployed a RHEL 9 virtual machine.
cat /etc/redhat-releaseRed Hat Enterprise Linux release 9.4 (Plow)As you can see, I am on RHEL 9.4. However, the requirement is you must be on the latest version of the OS release. Hence, run system update to update the OS to the latest RHEL release version, e.g RHEL 9.5 in my case.
Ensure your node is registered to Satellite for package installation or to the Internet directly.
sudo subscription-manager status+-------------------------------------------+
System Status Details
+-------------------------------------------+
Overall Status: Disabled
Content Access Mode is set to Simple Content Access. This host has access to content, regardless of subscription status.
System Purpose Status: Disabled
Run RHEL 9 update;
sudo dnf update -yAfter the system update completes, reboot the system;
sudo rebootAnd now, we are on the latest RHEL 9 release;
cat /etc/redhat-releaseRed Hat Enterprise Linux release 9.5 (Plow)Create Standard User Account on RHEL Node
Running Discovery application as root user or with sudo rights is discouraged. You however need to give the user sudo rights just in case you need to perform activities that require elevated privileges.
Ensure the user account shell is not set to /bin/false nor /sbin/nologin shell.
Sample user account.
id kifarunixuid=1000(kifarunix) gid=1000(kifarunix) groups=1000(kifarunix),10(wheel)If you want, you can create an account using the command below;
sudo useradd -m -s /bin/bash -G wheel USERNAMEReplace USERNAME with the username of your user account.
And set the password.
sudo passwd USERNAMEInstall Discovery-Installer for Setting up Discovery Tool
The discovery-installer will help install Discovery tool database and server containers.
To install the discovery-installer tool, subscribe your system directly to Red Hat’s Content Delivery Network (CDN).
sudo subscription-manager registerIf you had previously registered the system to your Satellite server, then use --force to force the re-registration.
sudo subscription-manager register --forceProvide your subscription username and password.
Enable Discovery-installer repos;
sudo subscription-manager repos --enable discovery-1-for-rhel-9-x86_64-rpmsIf using RHEL 8, then;
sudo subscription-manager repos --enable discovery-1-for-rhel-8-x86_64-rpmsOnce the repos are enabled, install the discovery-installer;
sudo dnf install discovery-installer[sudo] password for kifarunix:
Updating Subscription Management repositories.
Last metadata expiration check: 1:52:26 ago on Mon 14 Apr 2025 02:38:55 PM CEST.
Dependencies resolved.
=================================================================================================================================================================================================================
Package Architecture Version Repository Size
=================================================================================================================================================================================================================
Installing:
discovery-installer noarch 1.13.0-1.el9 discovery-1-for-rhel-9-x86_64-rpms 31 k
Transaction Summary
=================================================================================================================================================================================================================
Install 1 Package
Total download size: 31 k
Installed size: 67 k
Is this ok [y/N]: y
Downloading Packages:
discovery-installer-1.13.0-1.el9.noarch.rpm 156 kB/s | 31 kB 00:00
-----------------------------------------------------------------------------------------------------------------------------------------------------------------------------------------------------------------
Total 155 kB/s | 31 kB 00:00
Running transaction check
Transaction check succeeded.
Running transaction test
Transaction test succeeded.
Running transaction
Preparing : 1/1
Installing : discovery-installer-1.13.0-1.el9.noarch 1/1
Verifying : discovery-installer-1.13.0-1.el9.noarch 1/1
Installed products updated.
Installed:
discovery-installer-1.13.0-1.el9.noarch
Complete!
Login to Red Hat’s official Container Image Registry
Discovery tool is run as containers. The required container images are hosted on the Red Hat’s official container image registry, registry.redhat.io. Therefore, you are required to login to the registry using your Red Hat’s account credentials that has access to the Red Hat Ecosystem Catalog to be able to pull the container images required to setup Discovery tool.
Before you can proceed, if you had logged in as a different user other than the one that you plan to use to manage the Discovery tool with, then log out and login as that user.
Similarly, if you had switched to the user using su – command, then log out and login as that user.
See, for example, I plan to use kifarunix user to manage Discovery tool, then;
ssh kifarunix@discovery-server-IPAfter that;
Login to the registry with podman;
podman login registry.redhat.ioIf you switched to the user from another user account, without direct login via SSH/console, you may get such a warning:
podman login registry.redhat.io
WARN[0000] The cgroupv2 manager is set to systemd but there is no systemd user session available
WARN[0000] For using systemd, you may need to log in using a user session
WARN[0000] Alternatively, you can enable lingering with: `loginctl enable-linger 1000` (possibly as root)
WARN[0000] Falling back to --cgroup-manager=cgroupfs
Username:
Deploy Discovery Tool on RHEL 9
Once you successfully login to the registry, run the Discovery installer to download the container images and setup Discovery tool.
discovery-installer installOnce you execute the command, you will be prompted to enter the Discovery server password.
The password must meet the following requirements:
- cannot be numeric only
- at least ten characters
- cannot be a word found in the dictionary
- cannot be the previously provided Discovery default password
Thus, provide the password and proceed with the setup.
The Discovery-installer will then proceed to create the server password and create necessary configurations required to setup and run the Discovery tool.
Sample setup output;
216b569b0d8bba515346f0fef
ID                         NAME                       DRIVER      CREATED                 UPDATED
216b569b0d8bba515346f0fef  discovery-server-password  file        Less than a second ago  Less than a second ago
03fb1a55d2911d35552a8e931
ID                         NAME                         DRIVER      CREATED                 UPDATED
03fb1a55d2911d35552a8e931  discovery-django-secret-key  file        Less than a second ago  Less than a second ago
Installing Discovery configuration files ...
Generate the Discovery services ...
Install complete.

You may now start Discovery by running the following command:

    systemctl --user start discovery-app
Start the Discovery App
Once the installation is complete, run the Discovery app systemd command provided to start the service.
systemctl --user start discovery-appThe first time you start Discovery, the initial startup procedure for the application might take a long time to complete since the required container images need to be downloaded into the local system.
Once the startup is complete, run the command below to check the status;
systemctl --user status discovery-app● discovery-app.service - Discovery App
Loaded: loaded (/home/kifarunix/.config/containers/systemd/discovery-app.container; generated)
Active: active (running) since Mon 2025-04-14 17:32:10 CEST; 34s ago
Main PID: 6565 (conmon)
Tasks: 17 (limit: 11089)
Memory: 104.1M
CPU: 12.419s
CGroup: /user.slice/user-1000.slice/[email protected]/app.slice/discovery-app.service
├─libpod-payload-f16c902bfaf9d1a51a96a1cfe0cf4cd64585cda11ddb1308e586e20971fe8710
│ ├─6568 /bin/bash /opt/app-root/entrypoint.sh
│ ├─6628 "nginx: master process nginx -g daemon off;"
│ ├─6629 "nginx: worker process"
│ └─6630 "nginx: worker process"
└─runtime
├─6565 /usr/bin/conmon --api-version 1 -c f16c902bfaf9d1a51a96a1cfe0cf4cd64585cda11ddb1308e586e20971fe8710 -u f16c902bfaf9d1a51a96a1cfe0cf4cd64585cda11ddb1308e586e20971fe8710 -r /usr/bin/crun ->
├─6610 rootlessport
└─6616 rootlessport-child
Apr 14 17:32:07 discovery.kifarunix-demo.com podman[6147]: 2025-04-14 17:32:07.498640987 +0200 CEST m=+18.789299457 image pull b78ec4ca92a105a485fcd2f4f89fa2d9655c6bfe0f056288112403434ebda5a1 registry.redhat.>
Apr 14 17:32:10 discovery.kifarunix-demo.com podman[6147]: 2025-04-14 17:32:10.672881815 +0200 CEST m=+21.963540275 container create f16c902bfaf9d1a51a96a1cfe0cf4cd64585cda11ddb1308e586e20971fe8710 (image=reg>
Apr 14 17:32:10 discovery.kifarunix-demo.com podman[6147]: 2025-04-14 17:32:10.830774774 +0200 CEST m=+22.121433234 container init f16c902bfaf9d1a51a96a1cfe0cf4cd64585cda11ddb1308e586e20971fe8710 (image=regis>
Apr 14 17:32:10 discovery.kifarunix-demo.com podman[6147]: 2025-04-14 17:32:10.834281363 +0200 CEST m=+22.124939842 container start f16c902bfaf9d1a51a96a1cfe0cf4cd64585cda11ddb1308e586e20971fe8710 (image=regi>
Apr 14 17:32:10 discovery.kifarunix-demo.com systemd[5081]: Started Discovery App.
Apr 14 17:32:10 discovery.kifarunix-demo.com discovery-app[6147]: f16c902bfaf9d1a51a96a1cfe0cf4cd64585cda11ddb1308e586e20971fe8710
Apr 14 17:32:10 discovery.kifarunix-demo.com discovery-app[6565]: No certificates provided. Creating them...
Apr 14 17:32:10 discovery.kifarunix-demo.com discovery-app[6565]: ..+++++++++++++++++++++++++++++++++++++++*....+...+..+.....................+++++++++++++++++++++++++++++++++++++++*.....+..................+..>
Apr 14 17:32:10 discovery.kifarunix-demo.com discovery-app[6565]: ....+.+..+.+.........+.....+.+.................+.........+++++++++++++++++++++++++++++++++++++++*.+.+......+.....+.+........+.........+.+.....>
Apr 14 17:32:10 discovery.kifarunix-demo.com discovery-app[6565]: -----
List the Discovery app containers;
podman psCONTAINER ID IMAGE COMMAND CREATED STATUS PORTS NAMES
0ddad8907ff2 registry.redhat.io/rhel9/postgresql-15:latest run-postgresql 5 minutes ago Up 5 minutes 5432/tcp discovery-db
e66c3b377fd4 registry.redhat.io/rhel9/redis-6:latest run-redis 4 minutes ago Up 4 minutes 6379/tcp discovery-redis
04d0154f562e registry.redhat.io/discovery/discovery-server-rhel9:1.13 /bin/bash /deploy... 4 minutes ago Up 4 minutes 443/tcp, 8000/tcp discovery-server
cc28f8ed8ba4 registry.redhat.io/discovery/discovery-server-rhel9:1.13 /bin/sh -c /deplo... 4 minutes ago Up 4 minutes 443/tcp discovery-celery-worker
f16c902bfaf9 registry.redhat.io/discovery/discovery-ui-rhel9:1.13 /bin/bash /opt/ap... 3 minutes ago Up 3 minutes 0.0.0.0:9443->9443/tcp, 8080/tcp, 8443/tcp, 9443/tcp discovery-app
Check the images;
podman imagesREPOSITORY TAG IMAGE ID CREATED SIZE
registry.redhat.io/rhel9/postgresql-15 latest 56cffb212d58 5 days ago 395 MB
registry.redhat.io/rhel9/redis-6 latest f236922666e8 5 days ago 291 MB
registry.redhat.io/discovery/discovery-server-rhel9 1.13 9378a6b780f0 6 days ago 2.25 GB
registry.redhat.io/discovery/discovery-ui-rhel9 1.13 b78ec4ca92a1 5 weeks ago 365 MB
Next, run the command below to allow the Discovery app service to remain running even after the user’s login session ends;
loginctl enable-linger $USERAccessing Discover App from Web Browser
As you can see above, the Discovery app is exposed on TCP port 9443. To remotely access outside the serve on which it is running, open this port on firewalld.
sudo firewall-cmd --add-port=9443/tcp --permanentsudo firewall-cmd --reloadYou can then access the service via, https://server-IP:9443.
Accept the use of self-signed SSL certs and proceed to the login page.
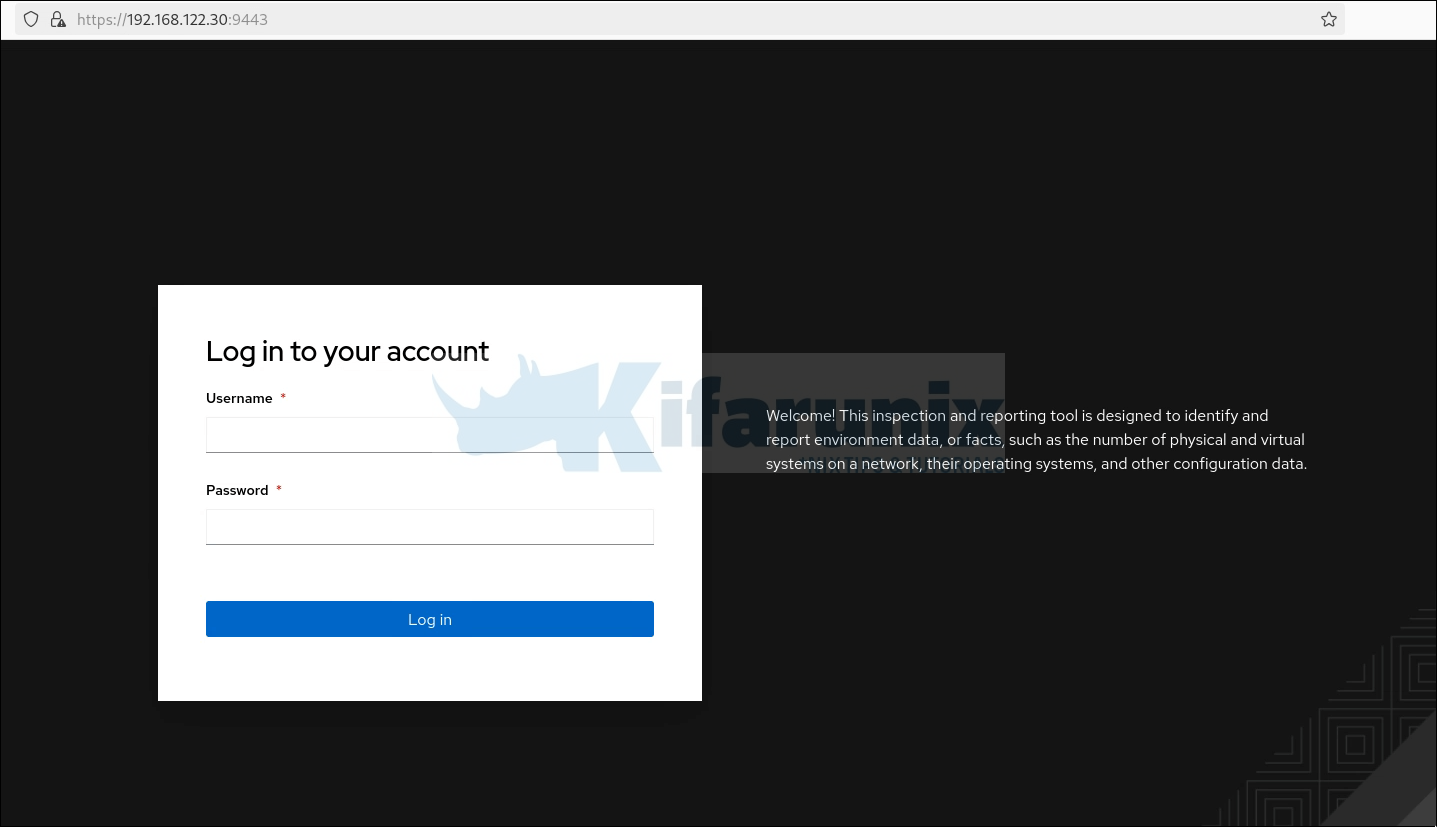
The default username is admin. Use the password that you provided while initially running the installer.
Discovery tool web interface;
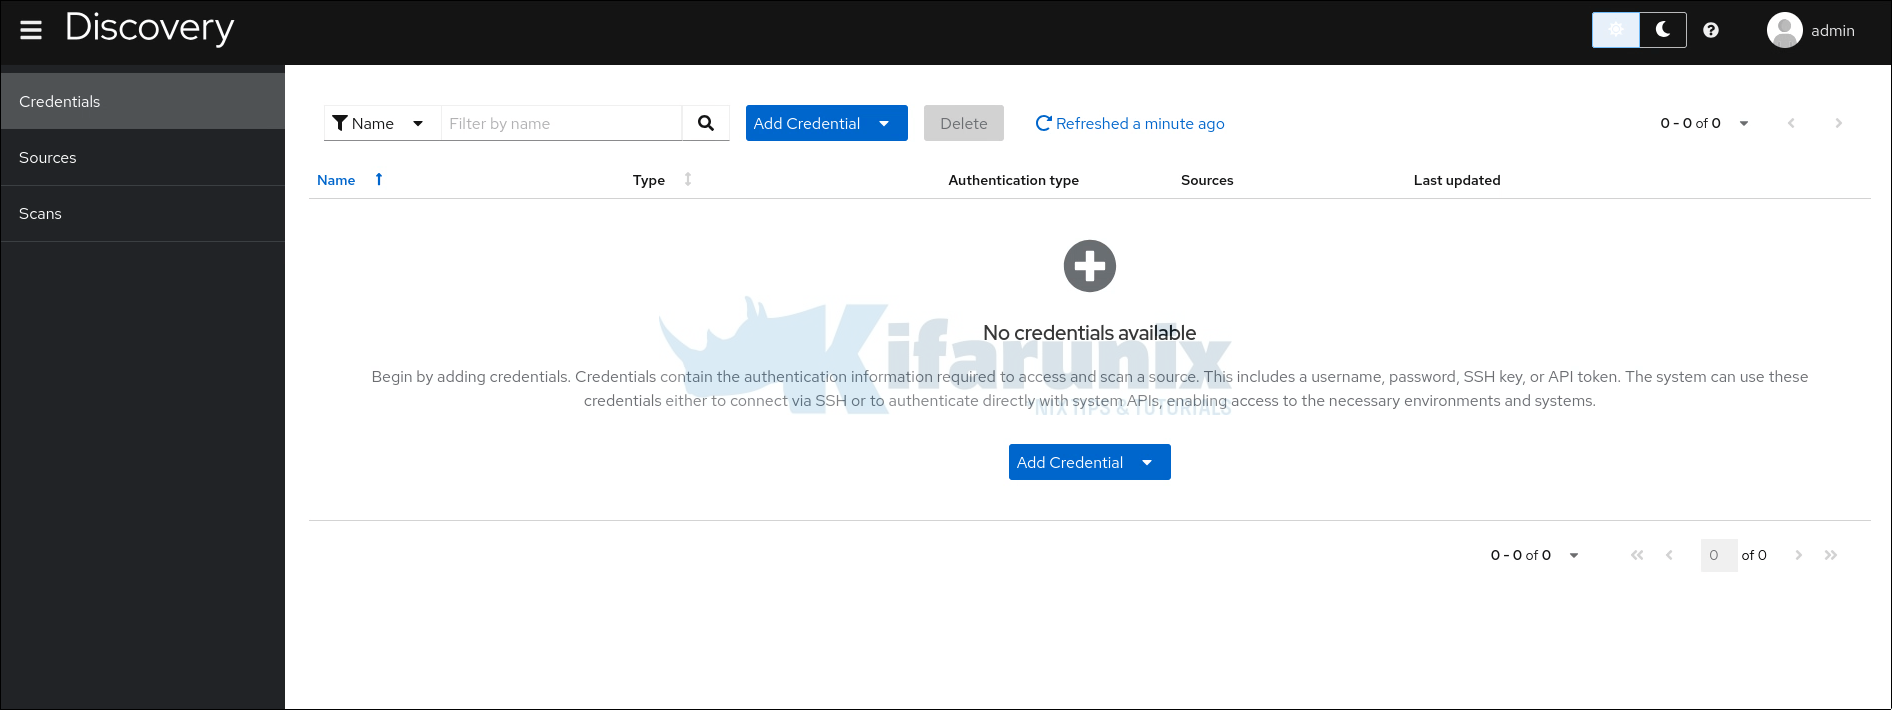
Reset Discovery App Admin Password
If you happen to forget the initial admin password for the Discovery app, then you can reset it using the command below;
discovery-installer create-server-passwordProvide a password that meets the minimum requirements provided above.
You need to restart the Discovery app after resetting the password. You can only restart if it all it was running when you did the password reset.
systemctl --user restart discovery-appScan and Discover Red Hat Systems in your Environment
The Discovery tool is now setup and ready to scan your environment to discover whatever Red Hat systems available and their configuration data.
In order to run the scans, there are two things that you need:
- Sources: A source defines a single asset or a set of multiple assets that are to be inspected during the scan.
- Credentials: defines the authentication information, such as a username and password or SSH key for a user with sufficient permissions required to access the sources for scanning.
Types of Discovery Sources
There are different types of sources you can configure:
- Network Source: Enables you to scan assets such as physical machines, virtual machines, or containers in your network. You can define them as hostnames, IP addresses, IP ranges, or subnets.
- Satellite Source: Enables you to scan your deployment of Red Hat Satellite Server to find the assets that it manages.
- vCenter Source: Enables you to scan your deployment of vCenter Server to find the assets that it manages.
- OpenShift Source: Enables you to scan your deployment of Red Hat OpenShift Container Platform clusters.
- Ansible Source: Enables you to scan your deployment of Ansible Automation Platform to find the secured clusters that it manages.
- RHACS Source: Enables you to scan your deployment of Red Hat Advanced Cluster Security for Kubernetes to find the secured clusters that RHACS manages.
As an example, we will focus on scanning Network sources in this guide.
Scanning Network Sources
To begin with, create the credentials that will be used to scan various network sources you will define later.
You can create credentials from Credentials page by just clicking Add Credential and selecting the source e.g Network range. The credentials creation wizard pops up. On the wizard, define:
- Name of the credentials
- Authentication type
- Username and password (If using username and password auth type or SSH private key, username, ssh-passphrase if using SSH-key auth type).
- Become method (how to elevate privileges)
- If using another user/password or elevating privileges, define them.
Defined credentials:

Next, create the Network sources. From the sources menu, click Add Source and select Network range.
You can enter hostnames, IP addresses, and IP ranges in the format.
- Enter hostnames as DNS hostnames, for example,
node.domain.com. - Enter IP ranges in CIDR or Ansible notation, for example,
192.168.10.0/24for CIDR notation or192.168.20.[200:254]for Ansible notation.
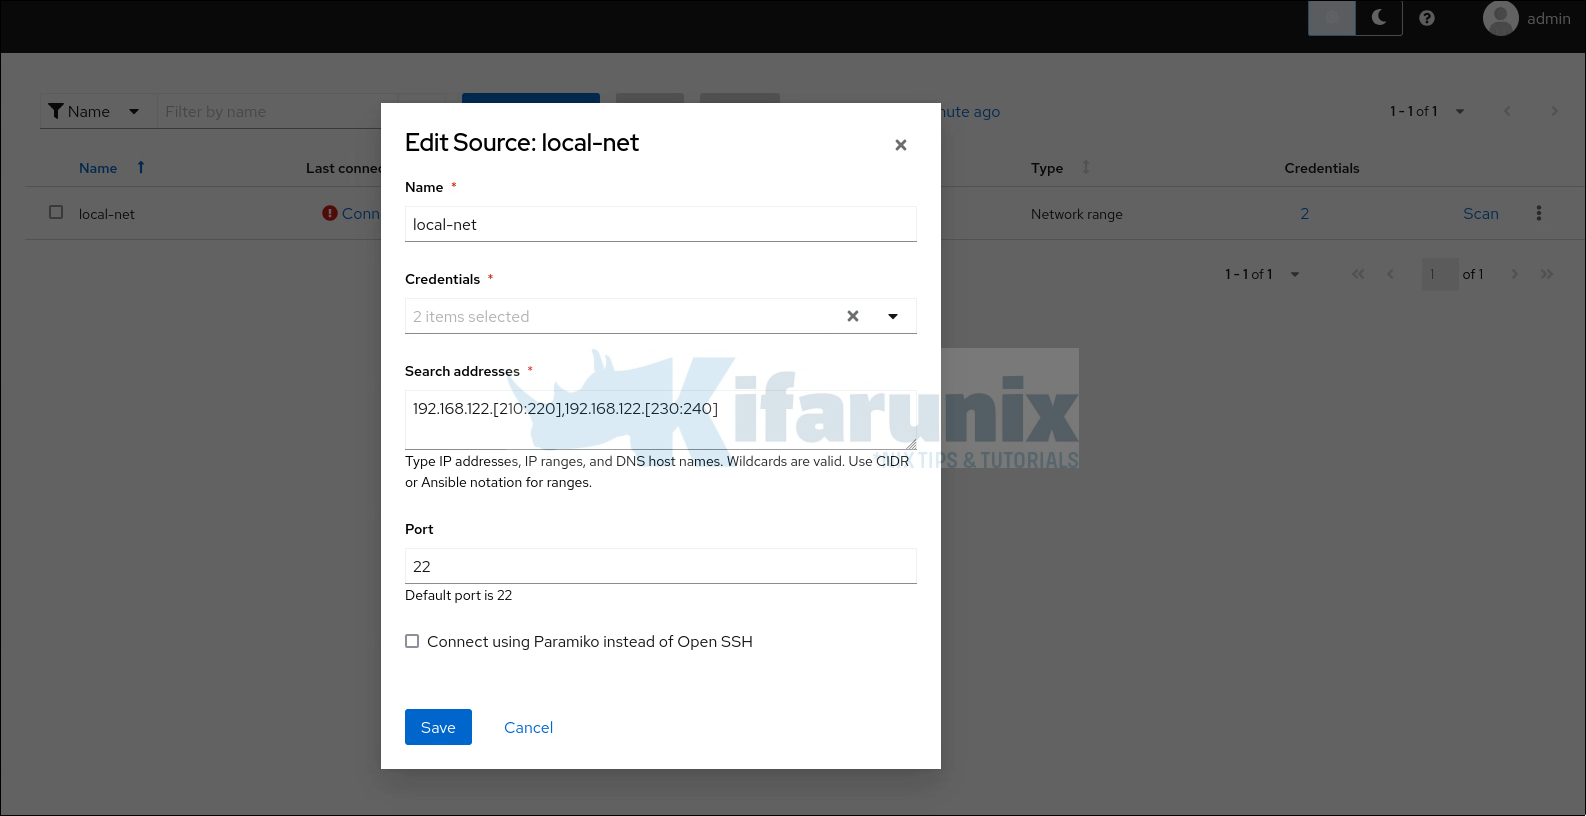
You can define multiple credentials and select them to use against your network sources.
Once you have defined the credentials and the scan sources, launch the scan by clicking Scan against the defined source.

When you click on Scan, scan wizard opens up. Set the name of the scan, max number of concurrent scans, and choose whether to run deep scan for the available products.
Save the scan and it will be launched immediately.
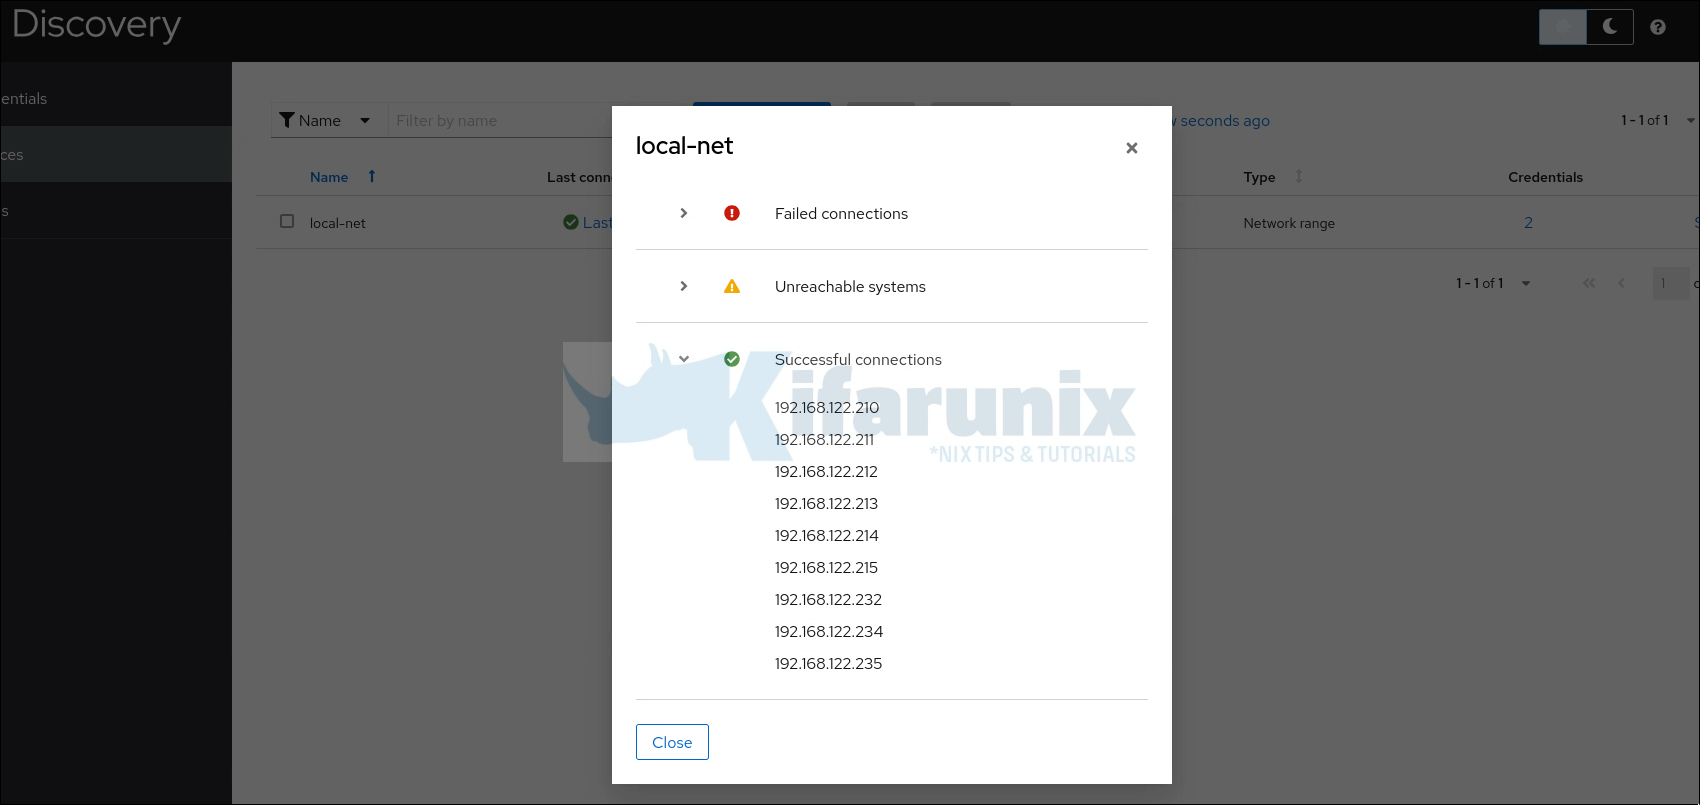
You will then see scan progress under last connected column on Sources page. To view connection status, click on Sources > Last connected. You will see three types of connection status:
- Failed connections
- Unreachable systems
- Successful connections
Expand each to view more host details.
On Scans page, click the Last Scanned item to view status.
Sample completed scan!

Download Discovery Scan Report
Click on the scan status to download the report.
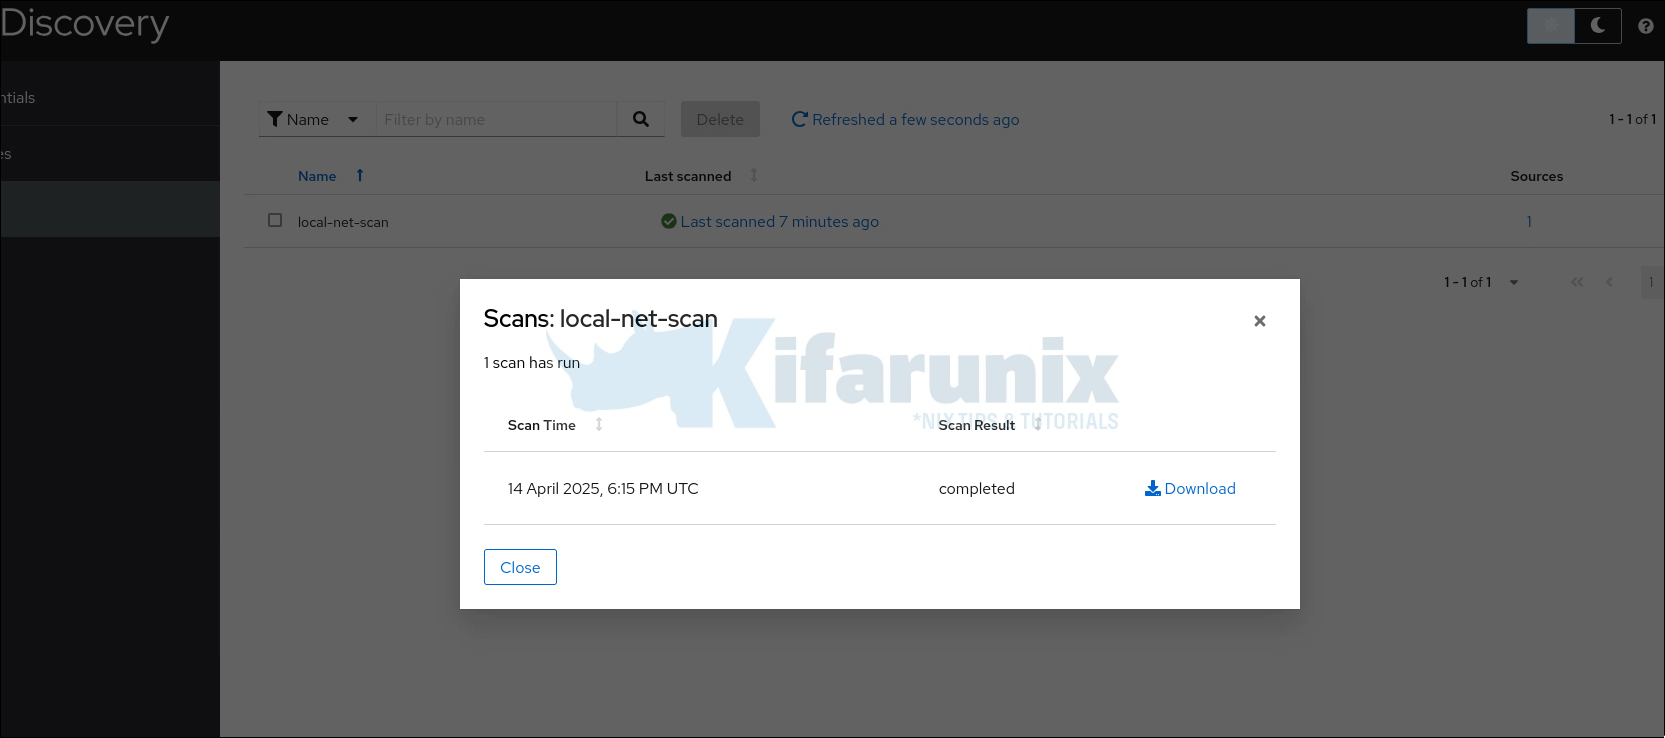
Click Download button to download the report.
The downloaded report is in tar archive, .tar.gz file, for example, report_id_1_20250414_182501271.tar.gz.
Navigate to the download directory and extract the report;
tar xzf report_id_1_20250414_182501271.tar.gzReports are available in two formats:
- a comma-separated variable (CSV) format.
- a JavaScript Object Notation (JSON) format.
They are also available in two content types:
- raw output from the scan as a details report
- processed content as a deployments report
ls -1 report_id_1aggregate.json
deployments.csv
deployments.json
details.csv
details.json
scan-job-3-ansible-stderr.txt
scan-job-3-ansible-stdout.txt
SHA256SUM
Preview of the details.csv report.

Conclusion
And that is how you can easily deploy the Red Hat Discovery tool to scan your environment for Red Hat products. You can add more sources to obtain information from and run the scans accordingly.
That concludes our guide on how to install Red Hat Discovery tool on RHEL 9.

