
In this tutorial, you will learn how to easily install and setup PowerDNS Admin on Ubuntu 20.04. PowerDNS Admin is a web administrative interface for PowerDNS. It enables you to easily create and manage DNS zones from a web browser.
Table of Contents
Features of PowerDNS Admin
PowerDNS Admin provides advanced features for managing PowerDNS. These include;
- Multiple domain management
- Domain template
- User management
- User access management based on domain
- User activity logging
- Support Local DB / SAML / LDAP / Active Directory user authentication
- Support Google / Github / Azure / OpenID OAuth
- Support Two-factor authentication (TOTP)
- Dashboard and pdns service statistics
- DynDNS 2 protocol support
- Edit IPv6 PTRs using IPv6 addresses directly (no more editing of literal addresses!)
- Limited API for manipulating zones and records
Installing PowerDNS Admin on Ubuntu 20.04
Install and Setup PowerDNS on Ubuntu 20.04
To easily install PowerDNS Admin, you need to have already installed PowerDNS nameserver.
In our previous guide, we discussed how to configure PowerDNS nameserver with MariaDB on Ubuntu 20.04. Follow the link below to set it up.
Easily Install and Setup PowerDNS on Ubuntu 20.04
NOTE: We are installing PowerDNS Admin on the same server with PowerDNS already installed.
Install Required Package Dependencies
Install Python 3 library and development tools
apt install python3-dev
Install various required build tools and package dependencies.
apt install libsasl2-dev libldap2-dev libssl-dev \
libxml2-dev libxslt1-dev libxmlsec1-dev libffi-dev \
pkg-config apt-transport-https virtualenv build-essential \
libmariadb-dev git python3-flask libpq-dev -y
Install NodeJS
curl -sL https://deb.nodesource.com/setup_18.x | sudo -E bash -
sudo apt install -y nodejsInstall Yarn
curl -sS https://dl.yarnpkg.com/debian/pubkey.gpg | sudo gpg --dearmor -o /etc/apt/trusted.gpg.d/yarn.gpg
echo "deb https://dl.yarnpkg.com/debian/ stable main" | sudo tee /etc/apt/sources.list.d/yarn.listapt update
apt install yarnInstall Nginx HTTP Server
apt install nginx
Clone PowerDNS Admin Source Code to Web Root Directory
Clone PowerDNS Admin git source code to your Nginx web root directory. In this setup, we use, /var/www/html/pdns, as our PowerDNS Admin web root directory. It can be different for your case.
git clone https://github.com/ngoduykhanh/PowerDNS-Admin.git /var/www/html/pdns
Create PowerDNS Admin Virtualenv
Navigate to the PowerDNS Admin web root directory and create a virtualenv.
cd /var/www/html/pdns/
virtualenv -p python3 flask
Next, active your Python 3 Virtual environment and install required Python 3 libraries
source ./flask/bin/activate
pip install --upgrade pippip install -r requirements.txt
Similarly, the textsize function is deprecated in Pillow 10. Thus Pillow 9.5.0 is required:
pip3 install Pillow==9.5.0Configure PowerDNS Admin Database Connection
Exit the virtualenv and edit the default PowerDNS admin configuration file, $WEB_ROOT/powerdnsadmin/default_config.py, to define the database connection details. Replace the $WEB_ROOT with the path to your web root directory.
deactivate
vim /var/www/html/pdns/powerdnsadmin/default_config.py
On the basic App configs, you can replace the SALT and SECRET_KEY keys, set the bind address and port;
### BASIC APP CONFIG
SALT = 'xohDoozee8Zuneekooch9ohrieghei'
SECRET_KEY = 'hohru1aethaeyahpheH7Gaathaikah'
BIND_ADDRESS = '192.168.57.3'
PORT = 9191
HSTS_ENABLED = False
OFFLINE_MODE = False
On the database configs, configure your PowerDNS database connection details. Note that we are using the details already created while setting up PowerDNS as defined in our guide.
### DATABASE CONFIG
SQLA_DB_USER = 'pdnsadmin'
SQLA_DB_PASSWORD = 'PdnSPassW0rd'
SQLA_DB_HOST = '127.0.0.1'
SQLA_DB_NAME = 'kifarunixdemopdns'
SQLALCHEMY_TRACK_MODIFICATIONS = True
Save and exit the configuration.
Next, reactivate the virtualenv run the DB migration;
cd /var/www/html/pdns/
source ./flask/bin/activate
export FLASK_APP=powerdnsadmin/__init__.py
flask db upgrade
Once the command above completes, generate asset files with yarn;
yarn install --pure-lockfile
flask assets buildExit the virtualenv;
deactivateRunning PowerDNS Admin
PowerDNS Admin is now setup and ready. It can be run in standalone mode, by executing the run.py in the web root directory.
In this setup, we will be using Nginx web server to access the PowerDNS Admin.
Enable PowerDNS API access
“The PowerDNS Authoritative Server features a built-in webserver that exposes a JSON/REST API. This API allows for controlling several functions, reading statistics and modifying zone content, metadata and DNSSEC key material“.
Open PowerDNS configuration file and enable API and set the API Key;
vim /etc/powerdns/pdns.conf
#################################
# api   Enable/disable the REST API (including HTTP listener)
#
# api=no
api=yes

#################################
# api-key       Static pre-shared authentication key for access to the REST API
#
# api-key=
api-key=ahqu4eiv2vaideep8AQu9nav5Aing0
Save and exit the file and restart PowerDNS;
systemctl restart pdns
Create PowerDNS Admin Nginx Site
Create PowerDNS Admin Nginx site with the contents below. Replace web root directory accordingly.
vim /etc/nginx/conf.d/pdns-admin.conf
server {
  listen	*:80;
  server_name               pdnsadmin.kifarunix-demo.com;

  index                     index.html index.htm index.php;
  root                      /var/www/html/pdns;
  access_log                /var/log/nginx/pdnsadmin_access.log combined;
  error_log                 /var/log/nginx/pdnsadmin_error.log;

  client_max_body_size              10m;
  client_body_buffer_size           128k;
  proxy_redirect                    off;
  proxy_connect_timeout             90;
  proxy_send_timeout                90;
  proxy_read_timeout                90;
  proxy_buffers                     32 4k;
  proxy_buffer_size                 8k;
  proxy_set_header                  Host $host;
  proxy_set_header                  X-Real-IP $remote_addr;
  proxy_set_header                  X-Forwarded-For $proxy_add_x_forwarded_for;
  proxy_headers_hash_bucket_size    64;

  location ~ ^/static/  {
    include  /etc/nginx/mime.types;
    root /var/www/html/pdns/powerdnsadmin;

    location ~*  \.(jpg|jpeg|png|gif)$ {
      expires 365d;
    }

    location ~* ^.+.(css|js)$ {
      expires 7d;
    }
  }

  location / {
    proxy_pass            http://unix:/run/pdnsadmin/socket;
    proxy_read_timeout    120;
    proxy_connect_timeout 120;
    proxy_redirect        off;
  }

}
Save and exit the file.
Remove the default Nginx default site and run config syntax check.
mv /etc/nginx/sites-enabled/default{,.old}
nginx -t
Sample syntax check output.
nginx: the configuration file /etc/nginx/nginx.conf syntax is ok
nginx: configuration file /etc/nginx/nginx.conf test is successful
Update ownership of the PDNS Admin root directory
chown -R www-data: /var/www/html/pdns
Restart Nginx;
systemctl restart nginx
Create PowerDNS Admin Systemd Service Unit
To be able to run PowerDNS Admin as a systemd service, create a unit file as shown below;
cat > /etc/systemd/system/pdnsadmin.service << 'EOL'
[Unit]
Description=PowerDNS-Admin
Requires=pdnsadmin.socket
After=network.target

[Service]
PIDFile=/run/pdnsadmin/pid
User=pdns
Group=pdns
WorkingDirectory=/var/www/html/pdns
ExecStart=/var/www/html/pdns/flask/bin/gunicorn --pid /run/pdnsadmin/pid --bind unix:/run/pdnsadmin/socket 'powerdnsadmin:create_app()'
ExecReload=/bin/kill -s HUP $MAINPID
ExecStop=/bin/kill -s TERM $MAINPID
PrivateTmp=true

[Install]
WantedBy=multi-user.target
EOL
cat > /etc/systemd/system/pdnsadmin.socket << 'EOL'
[Unit]
Description=PowerDNS-Admin socket

[Socket]
ListenStream=/run/pdnsadmin/socket

[Install]
WantedBy=sockets.target
EOL
echo "d /run/pdnsadmin 0755 pdns pdns -" >> /etc/tmpfiles.d/pdnsadmin.conf
mkdir /run/pdnsadmin/
chown -R pdns: /run/pdnsadmin/
chown -R pdns: /var/www/html/pdns/powerdnsadmin/
Reload System Configurations and start and enable PowerDNS Admin service to run on system boot;
systemctl enable --now pdnsadmin.service pdnsadmin.socket
Check the status;
systemctl status pdnsadmin.service pdnsadmin.socket
● pdnsadmin.service - PowerDNS-Admin
     Loaded: loaded (/etc/systemd/system/pdnsadmin.service; enabled; vendor preset: enabled)
     Active: active (running) since Wed 2023-07-26 06:02:46 UTC; 8s ago
TriggeredBy: ● pdnsadmin.socket
   Main PID: 43752 (gunicorn)
      Tasks: 2 (limit: 2257)
     Memory: 89.8M
     CGroup: /system.slice/pdnsadmin.service
             ├─43752 /var/www/html/pdns/flask/bin/python /var/www/html/pdns/flask/bin/gunicorn --pid /run/pdnsadmin/pid --bind unix:/run/pdnsadmin/socket powerdnsadmin:cre>
             └─43769 /var/www/html/pdns/flask/bin/python /var/www/html/pdns/flask/bin/gunicorn --pid /run/pdnsadmin/pid --bind unix:/run/pdnsadmin/socket powerdnsadmin:cre>

Jul 26 06:02:46 focal systemd[1]: Started PowerDNS-Admin.
Jul 26 06:02:46 focal gunicorn[43752]: [2023-07-26 06:02:46 +0000] [43752] [INFO] Starting gunicorn 20.1.0
Jul 26 06:02:46 focal gunicorn[43752]: [2023-07-26 06:02:46 +0000] [43752] [INFO] Listening at: unix:/run/pdnsadmin/socket (43752)
Jul 26 06:02:46 focal gunicorn[43752]: [2023-07-26 06:02:46 +0000] [43752] [INFO] Using worker: sync
Jul 26 06:02:46 focal gunicorn[43769]: [2023-07-26 06:02:46 +0000] [43769] [INFO] Booting worker with pid: 43769

● pdnsadmin.socket - PowerDNS-Admin socket
     Loaded: loaded (/etc/systemd/system/pdnsadmin.socket; enabled; vendor preset: enabled)
     Active: active (running) since Wed 2023-07-26 06:02:46 UTC; 8s ago
   Triggers: ● pdnsadmin.service
     Listen: /run/pdnsadmin/socket (Stream)
     CGroup: /system.slice/pdnsadmin.socket

Jul 26 06:02:46 focal systemd[1]: Listening on PowerDNS-Admin socket.
Accessing PowerDNS Admin Web Interface
Open Nginx on firewall to allow external access;
ufw allow "Nginx Full"
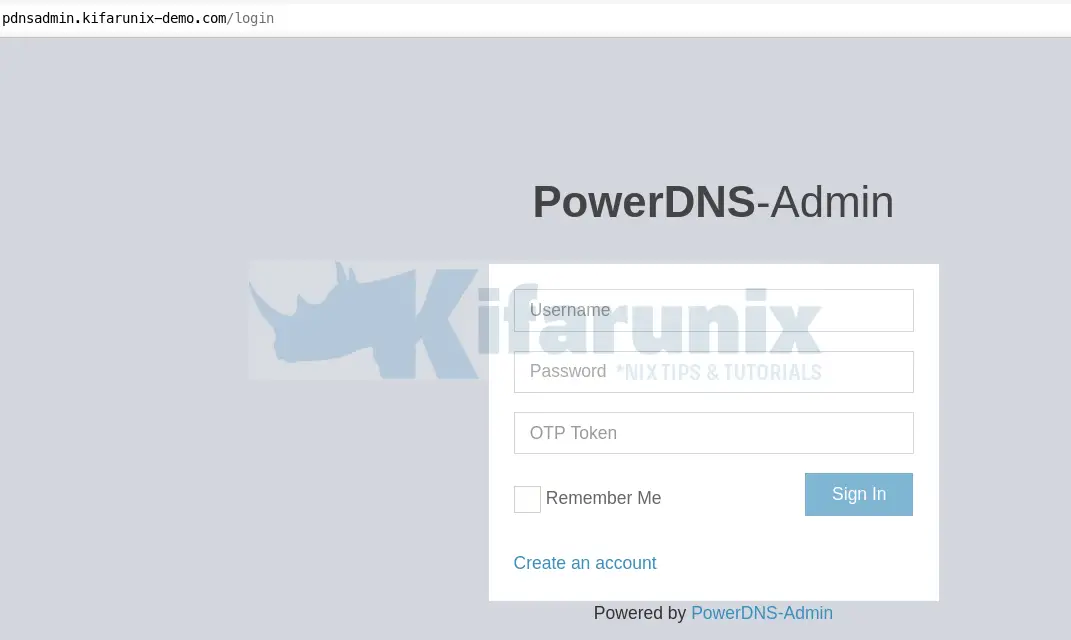
As per our configuration above, you can access PowerDNS Admin web interface via the address http://server-hostname. You should be able to see the PowerDNS Admin login screen. (if not, check status of the PowerDNS admin service or Nginx error logs for a hint).
Create PowerDNS Admin administrative user account
Click Create an account to create the very first PowerDNS Admin admin user. Enter the user details.

Click Register to create an account.
After that, login using the user details you provided. Upon successful login, you should land on PowerDNS Admin interface.
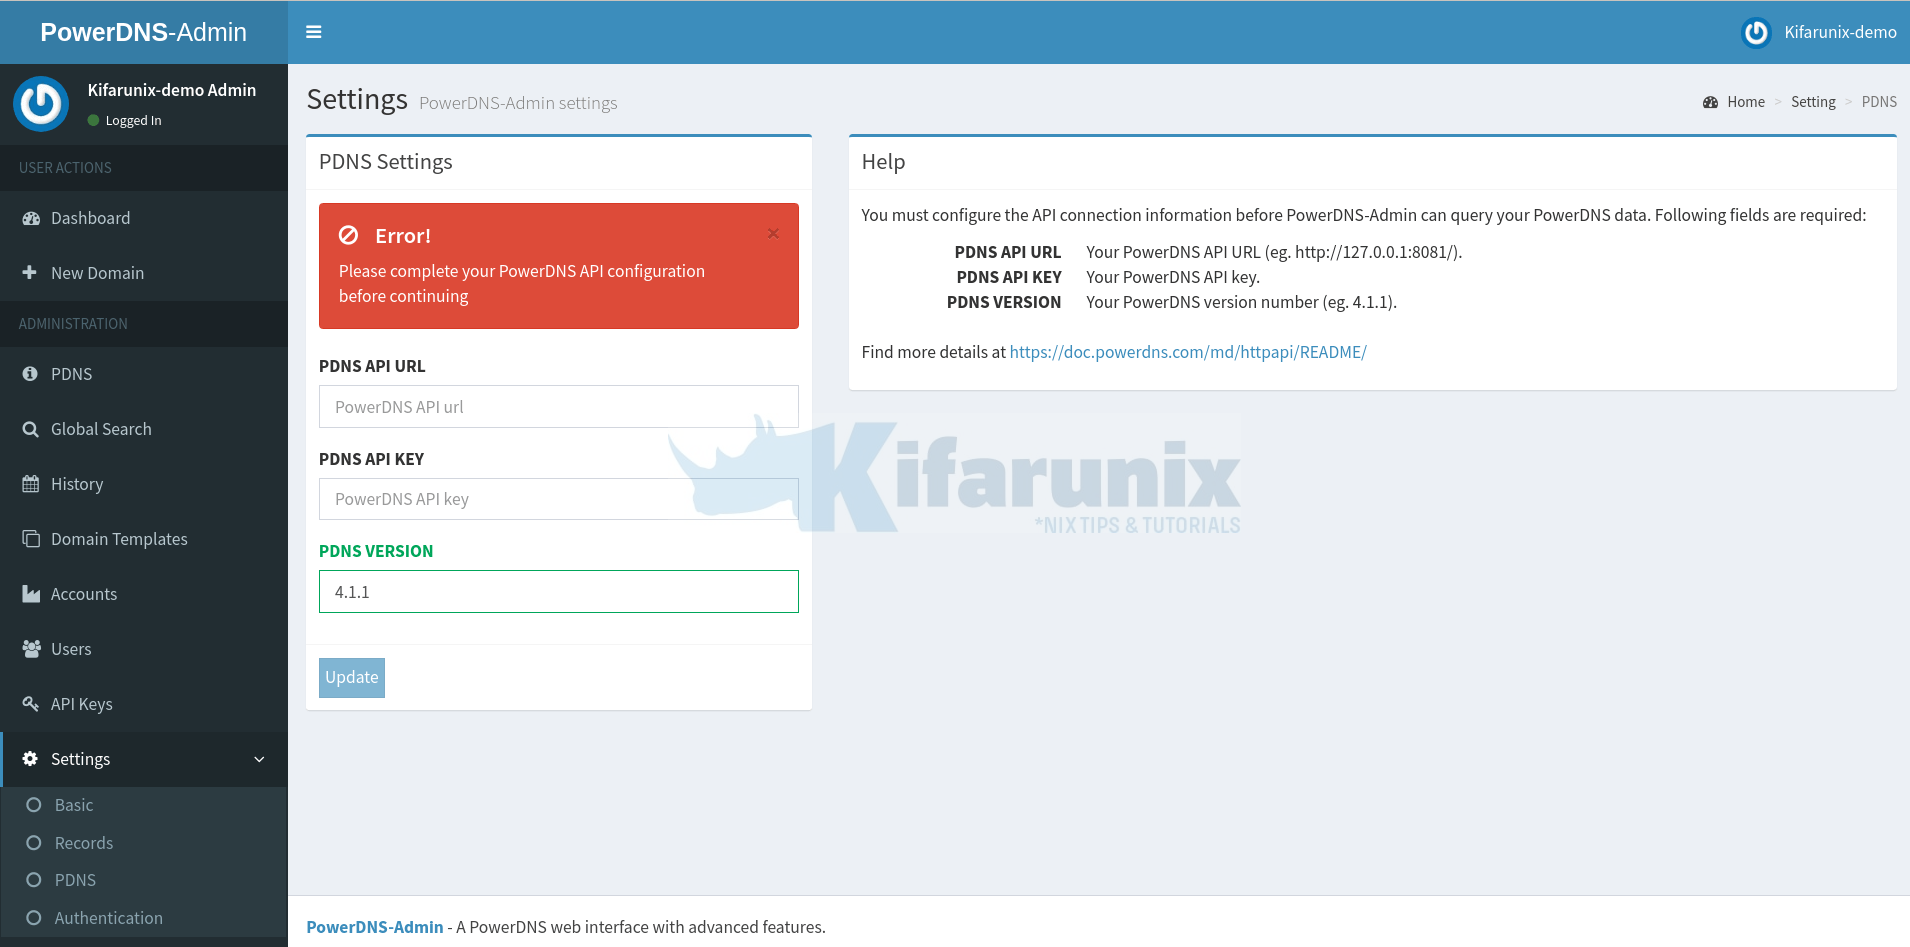
For PowerDNS Admin to be able to connect to PowerDNS and manage it, you need to provide;
- the API Key URL, usually, http://127.0.0.1:8081 by default,
- the API Key you defined in the PowerDNS configuration file.
- Exact version of your PowerDNS (get the version using the command,
pdns_control version).
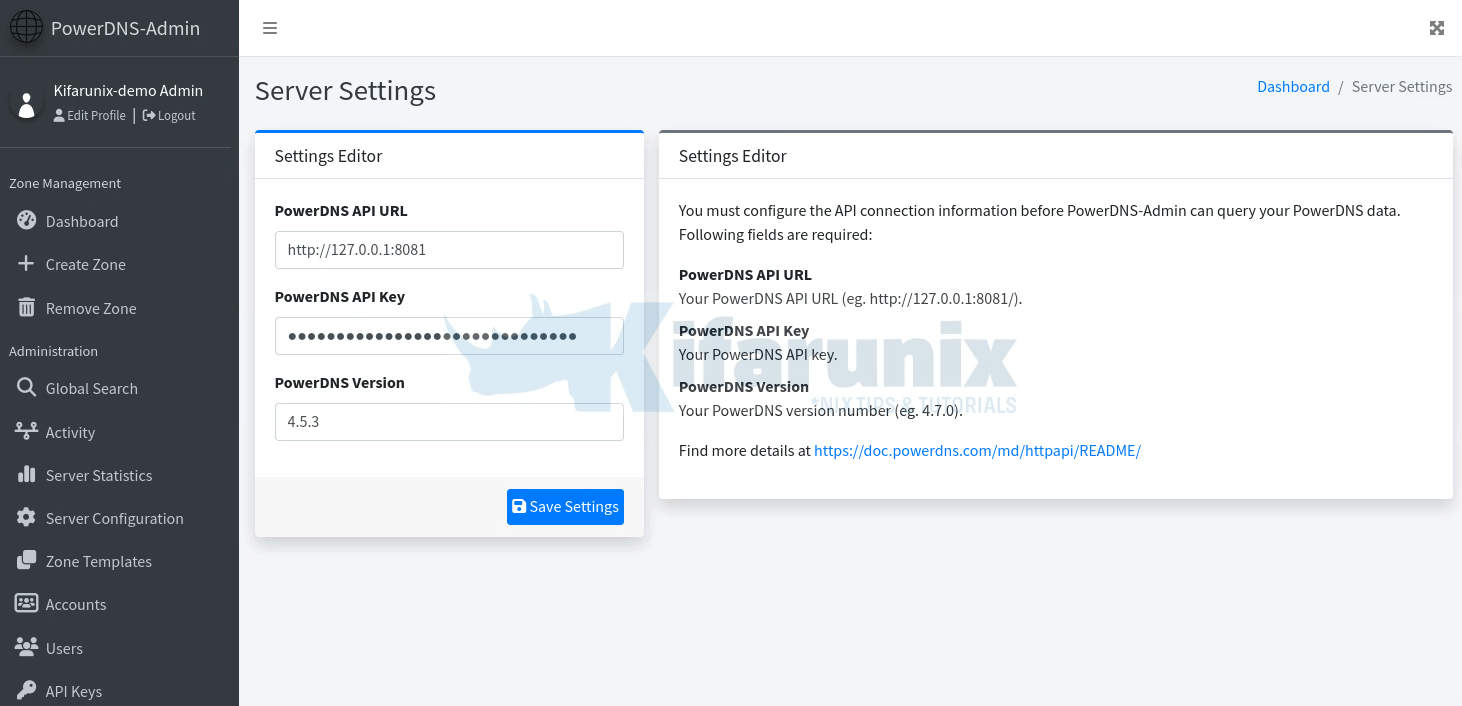
Click Save Settings and the error should just disappear.
Click on the Dashboard to go to PowerDNS Admin dashboard and you should be able to see your zones.
Forward Zone and Records;
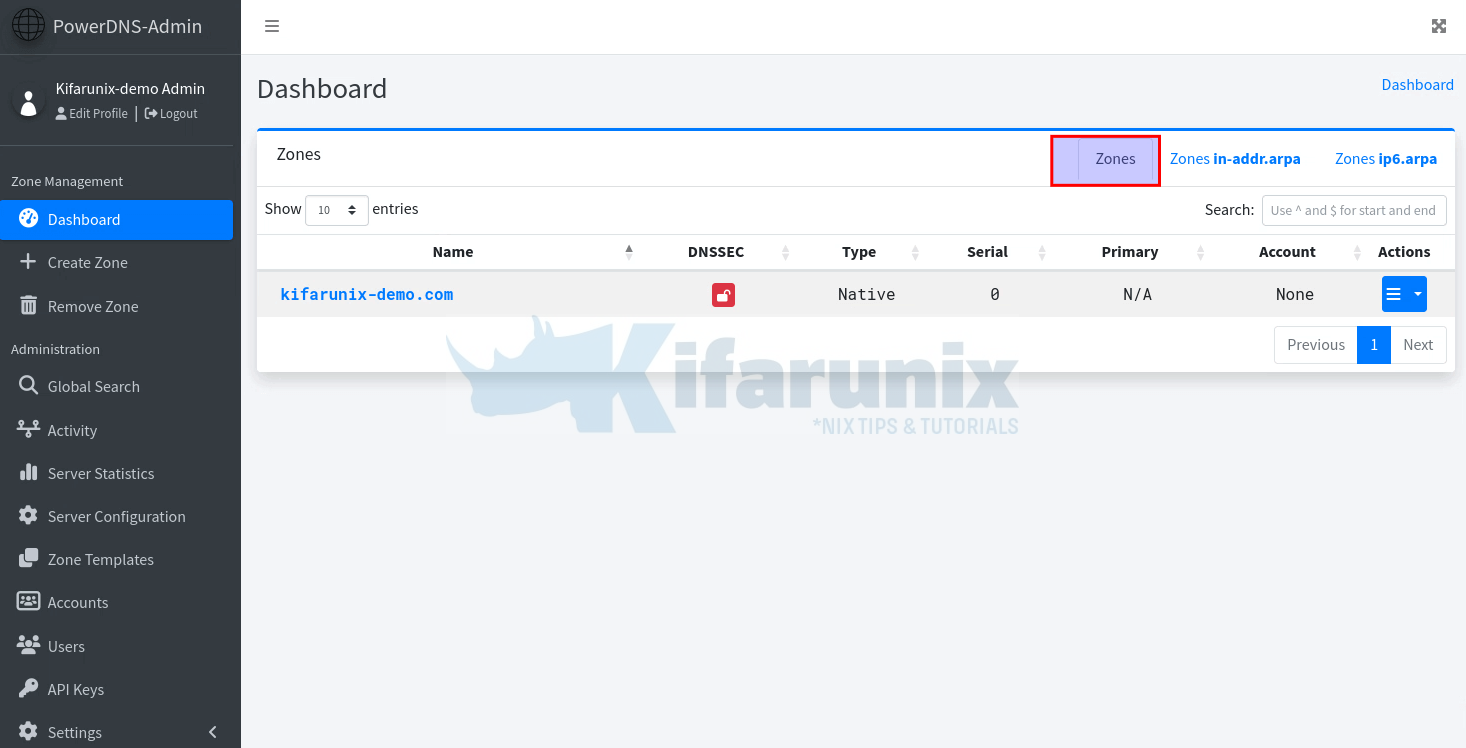
As you can see, we already added the DNS records in our previous guide. If you click on the domain name, you should the records we already added;
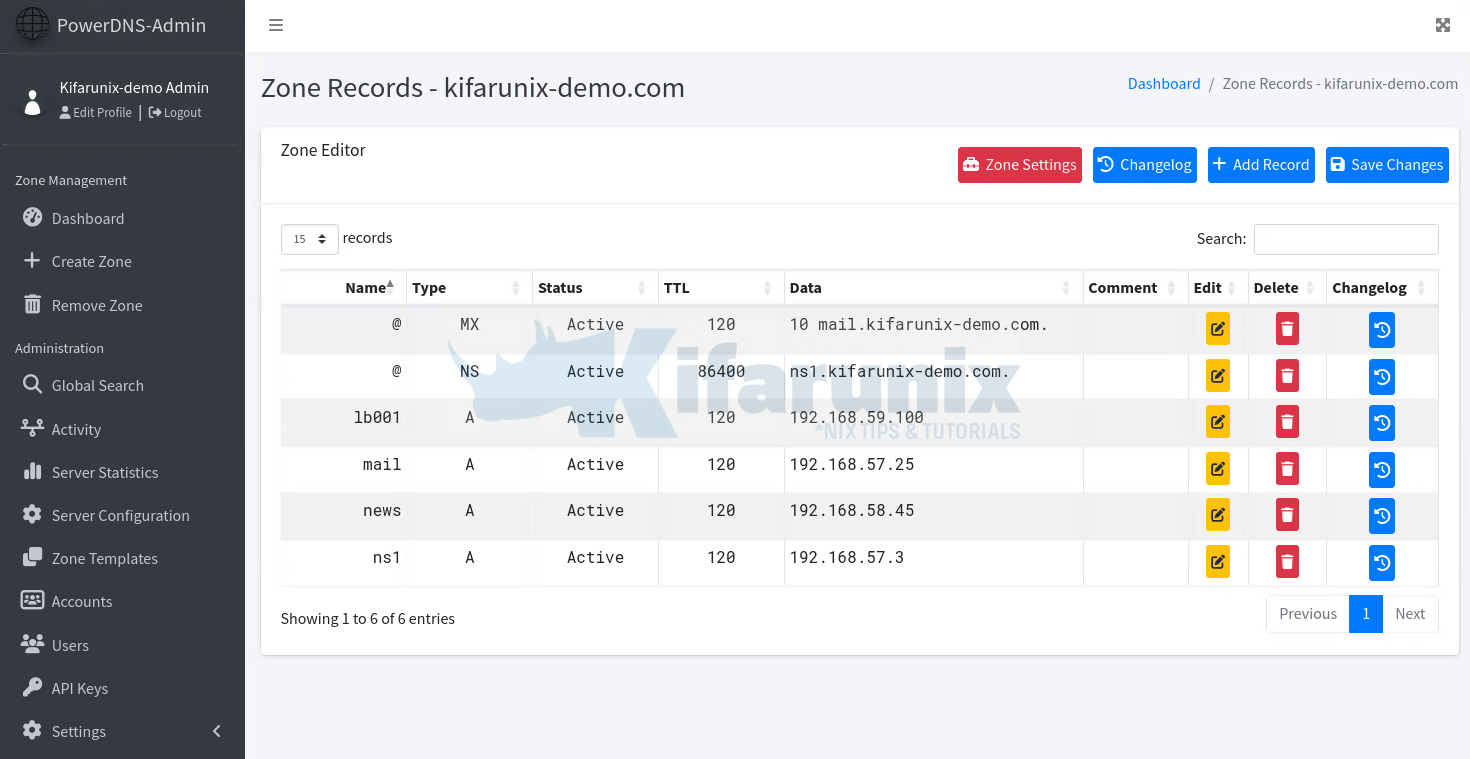
That is the forward zone records.
Reverse Zones;
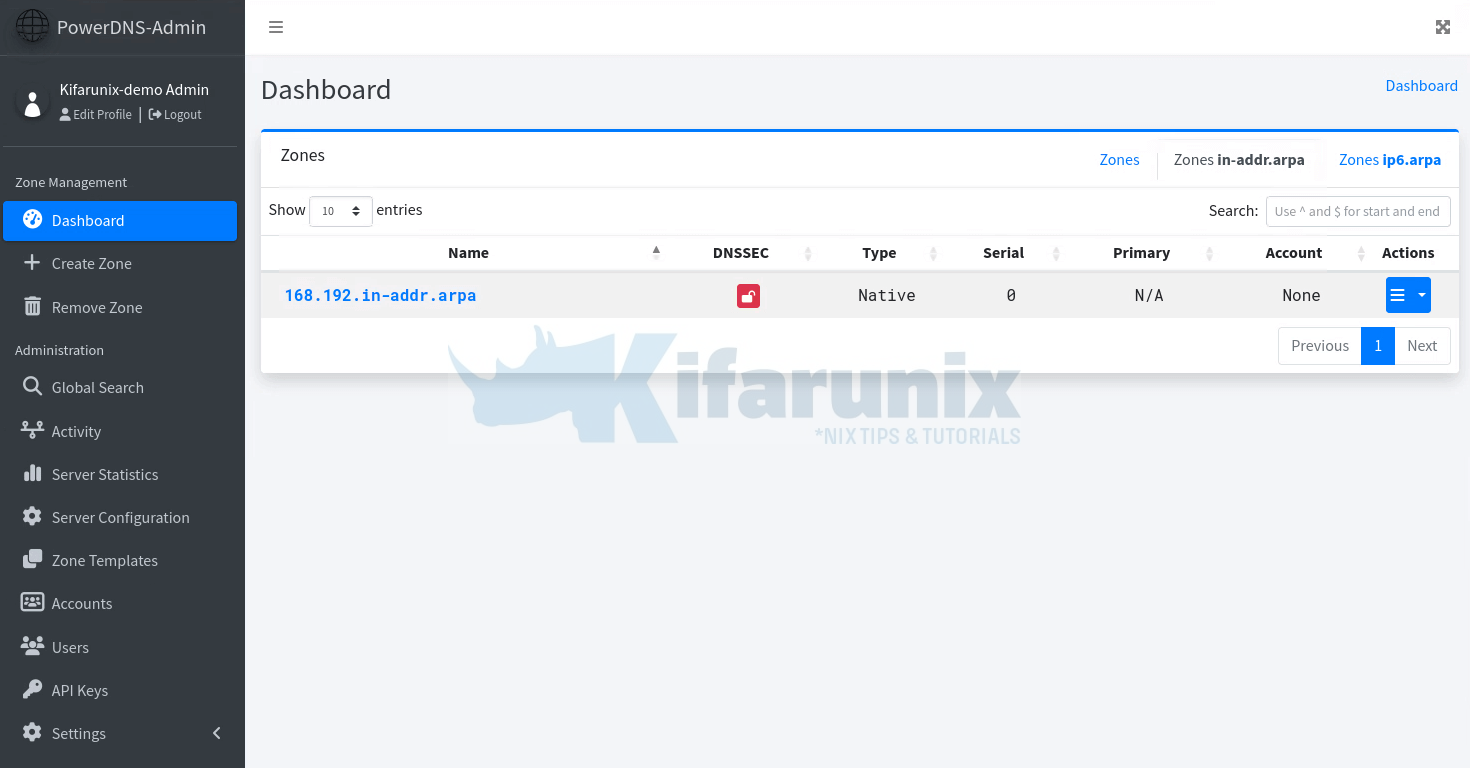
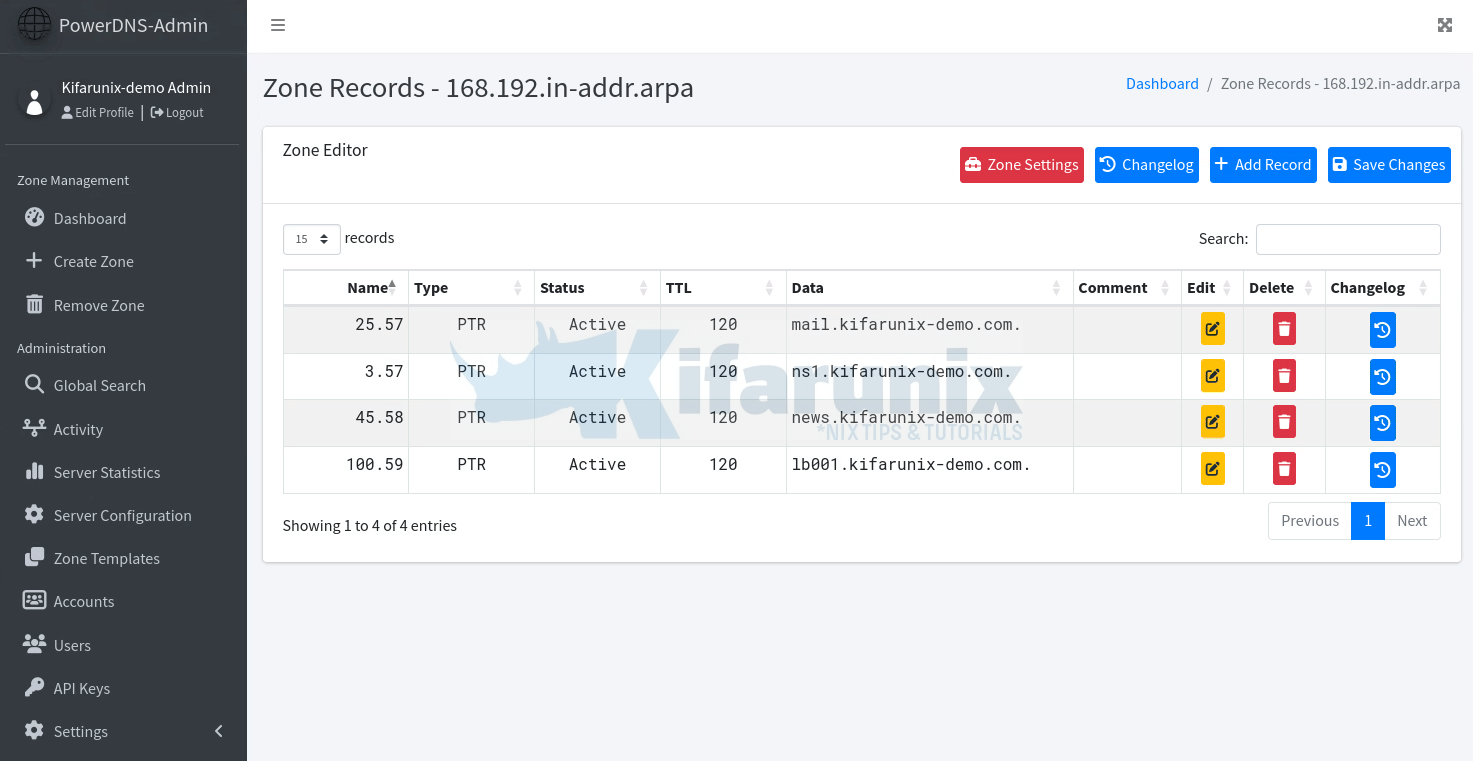
If you click on the reverse zone under the Dashboard > Zones in-addr, you should see the reverse zone records.
Reverse zone Records;
And that marks the end of our tutorial on how to easily install PowerDNS Admin on Ubuntu 20.04.
Reference
Running PowerDNS Admin on Ubuntu or Debian
Other Related Tutorials
Configure Local DNS Server using Dnsmasq on Ubuntu 20.04
Setup Caching-Only DNS Server using BIND9 on Ubuntu 20.04
Configure BIND DNS Server using Webmin on CentOS 8
Setup Bind DNS Using Webmin on Debian 10


Hi,
I’m not new to Ubuntu, but I’m still learning.
Good thing you created the tutorial for Ubuntu 20 but have you actually used it? (the tutorial)
For me run.py is not working.
And here I think you’re missing something:
“d /run/pdnsadmin 0755 pdns pdns -”
Thank you
if you are getting the default nginx splash page when trying to access the powerdns-admin site via IP address, you will need to edit your HOSTS file to point your domain name to your IP address otherwise nginx wont know how to parse the request
i did everything according to these instructions, also in the hosts the ip pointed to the domain, but i only get the nginx splash page and i cannot access the admin page
Hello, can someone help me? At the end of the installation without errors, in the PowerDNS Admin web login, when I try to register the user, it shows “HTTP 500 Error”, “Oops! Something went wrong.”
I have verified that the MySQL access is ok.
Hello, you need to downgrade the Python Pillow package. Check the guide again. it has been updated. thanks