In this blog post, we will dive into Kubernetes disaster recovery strategies, backup and restore etcd, using etcdctl and etcdutl tools. Even the most robust Kubernetes clusters aren’t immune to accidents. Data loss or corruption can bring your applications to a screeching halt. That’s where backups come in – your safety net for disaster recovery. At the heart of Kubernetes is etcd, the central data store fthat holds all cluster data, including the state of nodes, pods, services, e.t.c. Hence, mastering the backup and restoration process of etcd data is a crucial skill for any Kubernetes administrators.
Table of Contents
Backup and Restore Kubernetes etcd with etcdctl and etcdutl
What is etcd in Kubernetes and why is it important?
etcd is a distributed, consistent key-value store used by Kubernetes to manage cluster state. It acts as the central data store for all the essential data that governs the state and configuration of your Kubernetes cluster.
But, what does etcd store exactly in a Kubernetes cluster?
- Cluster state: Information about all pods, deployments, services, and other Kubernetes resources deployed in your cluster.
- Desired state vs. Actual state: etcd stores both the desired state (as defined by your deployments) and the actual state (the current running state of your applications). This allows Kubernetes to maintain consistency and take corrective actions if there are discrepancies.
- Configuration: etcd holds configuration data for various Kubernetes components, including the API server, scheduler, and controllers.
Why etcd Important in Kubernetes Cluster?
- Single Source of Truth: etcd serves as a centralized location for all cluster data, ensuring consistency and simplifying cluster management.
- Highly Available: Designed to be highly available, etcd can tolerate failures and maintain data integrity. This is crucial for ensuring your Kubernetes cluster remains operational even if individual etcd nodes experience issues.
- Scalability: etcd can be scaled horizontally by adding more nodes to the cluster, allowing it to handle the growing demands of your deployments.
- Centralized Configuration Management: With configuration data stored in etcd, changes can be made in a single location, simplifying cluster administration.
- Scheduling and Coordination: etcd plays a vital role in scheduling tasks across worker nodes and coordinating various Kubernetes components, ensuring smooth operation of your applications.
While there are more advanced tools for backing up and restoring Kubernetes cluster, this guide will focus on the basic tools, etcdctl and etcdutl.
So, to backup and restore Kubernetes cluster etcd, follow through.
Backup etcd cluster with etcdctl command line tool
Install etcdctl and etcdutl command line tools
If etcdctl/etcdutl tools are not already installed, you can install them by following the guides on the links below
Install etcdctl command line tool on Kubernetes control plane
Install etcdutl command line tool on Kubernetes control plane
Find the Required Details about etcd Pods
You will need to know the etcd pods endpoint uri as well as the required TLS certificates and keys for securing connection to etcd cluster.
To begin with, list the etcd pods on the kube-system namespace;
kubectl get pods -n kube-system -l component=etcdNAME READY STATUS RESTARTS AGE
etcd-master-01 1/1 Running 1 (2d10h ago) 2d12h
etcd-master-02 1/1 Running 0 2d12h
etcd-master-03 1/1 Running 0 2d12h
In a Kubernetes setup with a multi-node etcd cluster, it is important to understand that etcd uses a distributed architecture where data is replicated across all nodes in the cluster. This ensures high availability and redundancy. When it comes to taking snapshots for backups, the snapshot can be taken from any one of the healthy etcd nodes, as the data will be consistent across the cluster.
So, let’s get the details of one of the pods, say etcd-master-01;
kubectl describe pod etcd-master-01 -n kube-systemSample output;
Name:                 etcd-master-01
Namespace:            kube-system
Priority:             2000001000
Priority Class Name:  system-node-critical
Node:                 master-01/192.168.122.58
Start Time:           Sat, 08 Jun 2024 07:44:21 +0000
Labels:               component=etcd
                      tier=control-plane
Annotations:          kubeadm.kubernetes.io/etcd.advertise-client-urls: https://192.168.122.58:2379
                      kubernetes.io/config.hash: af3280d5bddb0c05b28b8bdde858c3e6
                      kubernetes.io/config.mirror: af3280d5bddb0c05b28b8bdde858c3e6
                      kubernetes.io/config.seen: 2024-06-08T05:30:06.933599803Z
                      kubernetes.io/config.source: file
Status:               Running
SeccompProfile:       RuntimeDefault
IP:                   192.168.122.58
IPs:
  IP:           192.168.122.58
Controlled By:  Node/master-01
Containers:
  etcd:
    Container ID:  containerd://521ed0ce231aedfa7479f8a73bc0761e0468fd5d3398682043e05d3802eb9239
    Image:         registry.k8s.io/etcd:3.5.12-0
    Image ID:      registry.k8s.io/etcd@sha256:44a8e24dcbba3470ee1fee21d5e88d128c936e9b55d4bc51fbef8086f8ed123b
    Port:
    Host Port:
    Command:
      etcd
      --advertise-client-urls=https://192.168.122.58:2379
      --cert-file=/etc/kubernetes/pki/etcd/server.crt
      --client-cert-auth=true
      --data-dir=/var/lib/etcd
      --experimental-initial-corrupt-check=true
      --experimental-watch-progress-notify-interval=5s
      --initial-advertise-peer-urls=https://192.168.122.58:2380
      --initial-cluster=master-01=https://192.168.122.58:2380
      --key-file=/etc/kubernetes/pki/etcd/server.key
      --listen-client-urls=https://127.0.0.1:2379,https://192.168.122.58:2379
      --listen-metrics-urls=http://127.0.0.1:2381
      --listen-peer-urls=https://192.168.122.58:2380
      --name=master-01
      --peer-cert-file=/etc/kubernetes/pki/etcd/peer.crt
      --peer-client-cert-auth=true
      --peer-key-file=/etc/kubernetes/pki/etcd/peer.key
      --peer-trusted-ca-file=/etc/kubernetes/pki/etcd/ca.crt
      --snapshot-count=10000
      --trusted-ca-file=/etc/kubernetes/pki/etcd/ca.crt
    State:          Running
      Started:      Sat, 08 Jun 2024 07:44:22 +0000
    Last State:     Terminated
      Reason:       Unknown
      Exit Code:    255
      Started:      Sat, 08 Jun 2024 05:30:02 +0000
      Finished:     Sat, 08 Jun 2024 07:44:20 +0000
    Ready:          True
    Restart Count:  1
    Requests:
      cpu:        100m
      memory:     100Mi
    Liveness:     http-get http://127.0.0.1:2381/health%3Fexclude=NOSPACE&serializable=true delay=10s timeout=15s period=10s #success=1 #failure=8
    Startup:      http-get http://127.0.0.1:2381/health%3Fserializable=false delay=10s timeout=15s period=10s #success=1 #failure=24
    Environment:
    Mounts:
      /etc/kubernetes/pki/etcd from etcd-certs (rw)
      /var/lib/etcd from etcd-data (rw)
Conditions:
  Type                        Status
  PodReadyToStartContainers   True
  Initialized                 True
  Ready                       True
  ContainersReady             True
  PodScheduled                True
Volumes:
  etcd-certs:
    Type:          HostPath (bare host directory volume)
    Path:          /etc/kubernetes/pki/etcd
    HostPathType:  DirectoryOrCreate
  etcd-data:
    Type:          HostPath (bare host directory volume)
    Path:          /var/lib/etcd
    HostPathType:  DirectoryOrCreate
QoS Class:         Burstable
Node-Selectors:
Tolerations:       :NoExecute op=Exists
Events:
So, what we need is:
- listen-client-urls: https://127.0.0.1:2379,https://192.168.122.58:2379
- cert-file: /etc/kubernetes/pki/etcd/server.crt
- key-file: /etc/kubernetes/pki/etcd/server.key
- trusted-ca-file: /etc/kubernetes/pki/etcd/ca.crt
Backup etcd cluster with etcdctl
etcdctl can be used to create a backup of the etcd cluster by taking a snapshot of the current state of the cluster. The snapshot captures the data and metadata of the entire etcd cluster at a specific point in time and are typically stored as binary files.
Thus, to create a snapshot of the current etcd cluster state, use the etcdctl command as follows;
etcdctl snapshot save <filename> [flags]You can get required flags from the help page;
etcdctl snapshot save --helpNAME:
snapshot save - Stores an etcd node backend snapshot to a given file
USAGE:
etcdctl snapshot save [flags]
OPTIONS:
-h, --help[=false] help for save
GLOBAL OPTIONS:
--cacert="" verify certificates of TLS-enabled secure servers using this CA bundle
--cert="" identify secure client using this TLS certificate file
--command-timeout=5s timeout for short running command (excluding dial timeout)
--debug[=false] enable client-side debug logging
--dial-timeout=2s dial timeout for client connections
-d, --discovery-srv="" domain name to query for SRV records describing cluster endpoints
--discovery-srv-name="" service name to query when using DNS discovery
--endpoints=[127.0.0.1:2379] gRPC endpoints
--hex[=false] print byte strings as hex encoded strings
--insecure-discovery[=true] accept insecure SRV records describing cluster endpoints
--insecure-skip-tls-verify[=false] skip server certificate verification (CAUTION: this option should be enabled only for testing purposes)
--insecure-transport[=true] disable transport security for client connections
--keepalive-time=2s keepalive time for client connections
--keepalive-timeout=6s keepalive timeout for client connections
--key="" identify secure client using this TLS key file
--password="" password for authentication (if this option is used, --user option shouldn't include password)
--user="" username[:password] for authentication (prompt if password is not supplied)
-w, --write-out="simple" set the output format (fields, json, protobuf, simple, table)
Note that from etcd v3.4, it is not really necessary to prefix the etcdctl/etcdutl commands with API version, ETCDCTL_API=3.
Now, that we have the required details to backup etcd cluster, proceed as follows;
sudo etcdctl snapshot save /mnt/backups/snapshot_v1-`date +%FT%T`.db \
	 --cacert=/etc/kubernetes/pki/etcd/ca.crt \
	 --cert=/etc/kubernetes/pki/etcd/server.crt \
	 --key=/etc/kubernetes/pki/etcd/server.key
If you don’t specify the endpoint, localhost port 2379 will be used (https://127.0.0.1:2379).
This command will create an etcd snapshot file like, snapshot_v1-2024-06-10T21:18:51.db under the /mnt/backups directory. This directory must exist before running the command.
Sample output;
{"level":"info","ts":"2024-06-10T18:23:08.050843Z","caller":"snapshot/v3_snapshot.go:65","msg":"created temporary db file","path":"/mnt/backups/snapshot_v1-2024-06-10T18:23:08.db.part"}
{"level":"info","ts":"2024-06-10T18:23:08.060964Z","logger":"client","caller":"[email protected]/maintenance.go:212","msg":"opened snapshot stream; downloading"}
{"level":"info","ts":"2024-06-10T18:23:08.061344Z","caller":"snapshot/v3_snapshot.go:73","msg":"fetching snapshot","endpoint":"127.0.0.1:2379"}
{"level":"info","ts":"2024-06-10T18:23:08.127634Z","logger":"client","caller":"[email protected]/maintenance.go:220","msg":"completed snapshot read; closing"}
{"level":"info","ts":"2024-06-10T18:23:08.139728Z","caller":"snapshot/v3_snapshot.go:88","msg":"fetched snapshot","endpoint":"127.0.0.1:2379","size":"8.0 MB","took":"now"}
{"level":"info","ts":"2024-06-10T18:23:08.139803Z","caller":"snapshot/v3_snapshot.go:97","msg":"saved","path":"/mnt/backups/snapshot_v1-2024-06-10T18:23:08.db"}
Snapshot saved at /mnt/backups/snapshot_v1-2024-06-10T18:23:08.db
Check Status of the etcd Snapshot Backup File
You can use the command, etcdctl snapshot status command to check the status of the snapshot file. However, the use of etcdctl snapshot status command is deprecated and will be removed in etcd v3.6. Thus, you can use etcdutl snapshot status instead.
etcdutl snapshot status <filename> [flags]For example;
sudo etcdutl snapshot status /mnt/backups/snapshot_v1-2024-06-10T18:23:08.dbOr
sudo etcdutl snapshot status /mnt/backups/snapshot_v1-2024-06-10T18:23:08.db -w table+----------+----------+------------+------------+
| HASH | REVISION | TOTAL KEYS | TOTAL SIZE |
+----------+----------+------------+------------+
| 545378d6 | 593444 | 1352 | 8.0 MB |
+----------+----------+------------+------------+
Similarly, consider encrypting your snapshot backup files at rest!
Restoring Kubernetes etcd from Snapshot
In case a disaster strikes, and you need to restore your cluster, you can use etcdutl snapshot restore command.
etcdutl snapshot restore <filename> --data-dir {output dir} [options] [flags]etcdutl snapshot restore --helpUsage:
etcdutl snapshot restore --data-dir {output dir} [options] [flags]
Flags:
--bump-revision uint How much to increase the latest revision after restore
--data-dir string Path to the output data directory
-h, --help help for restore
--initial-advertise-peer-urls string List of this member's peer URLs to advertise to the rest of the cluster (default "http://localhost:2380")
--initial-cluster string Initial cluster configuration for restore bootstrap (default "default=http://localhost:2380")
--initial-cluster-token string Initial cluster token for the etcd cluster during restore bootstrap (default "etcd-cluster")
--mark-compacted Mark the latest revision after restore as the point of scheduled compaction (required if --bump-revision > 0, disallowed otherwise)
--name string Human-readable name for this member (default "default")
--skip-hash-check Ignore snapshot integrity hash value (required if copied from data directory)
--wal-dir string Path to the WAL directory (use --data-dir if none given)
Global Flags:
-w, --write-out string set the output format (fields, json, protobuf, simple, table) (default "simple")
So, how do we confirm that a restore works as expected? Let’s take for example, I have an Nginx app running on the apps namespace;
kubectl get pods,svc,configmaps,deployment -n appsNAME READY STATUS RESTARTS AGE
pod/nginx-app-6ff7b5d8f6-7mldr 1/1 Running 0 6m43s
NAME TYPE CLUSTER-IP EXTERNAL-IP PORT(S) AGE
service/nginx-app NodePort 10.103.175.198 80:32189/TCP 6m28s
NAME DATA AGE
configmap/html-page 1 9m4s
configmap/kube-root-ca.crt 1 9m16s
NAME READY UP-TO-DATE AVAILABLE AGE
deployment.apps/nginx-app 1/1 1 1 8m55s
The Nginx is exposed on port 32189 on the cluster;
kubectl get svc nginx-app -n apps -o wideNAME TYPE CLUSTER-IP EXTERNAL-IP PORT(S) AGE SELECTOR
nginx-app NodePort 10.103.175.198 80:32189/TCP 8m46s app=nginx-app
kubectl get pods -n apps -o wide --selector=app=nginx-app
NAME                         READY   STATUS    RESTARTS   AGE     IP               NODE        NOMINATED NODE   READINESS GATES
nginx-app-6ff7b5d8f6-7mldr   1/1     Running   0          9m33s   10.100.202.199   worker-03   <none>           <none>
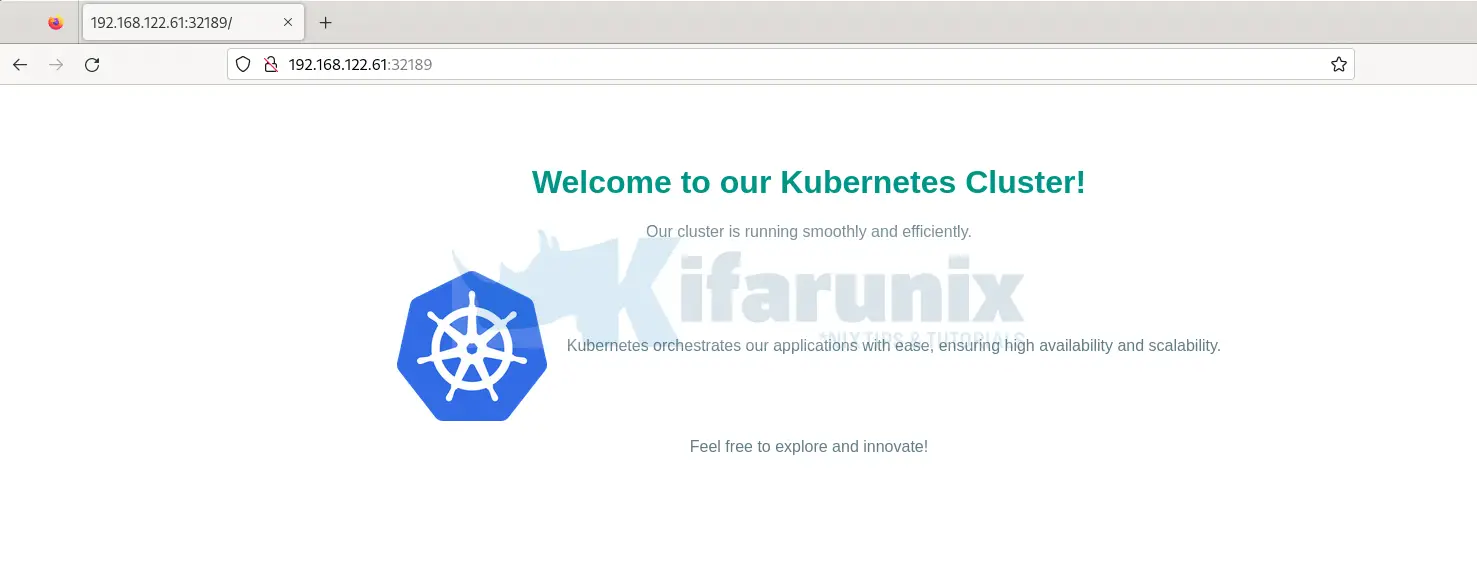
And this is how my apps looks like on browser;

So, I have already taken backup of our Kubernetes cluster etcd.
sudo etcdutl snapshot status /mnt/backups/snapshot_v4-2024-06-11T10:37:24.db -w table+---------+----------+------------+------------+
| HASH | REVISION | TOTAL KEYS | TOTAL SIZE |
+---------+----------+------------+------------+
| 78eacca | 680597 | 949 | 8.0 MB |
+---------+----------+------------+------------+
So, let’s delete the whole namespace
kubectl delete ns appsConfirm;
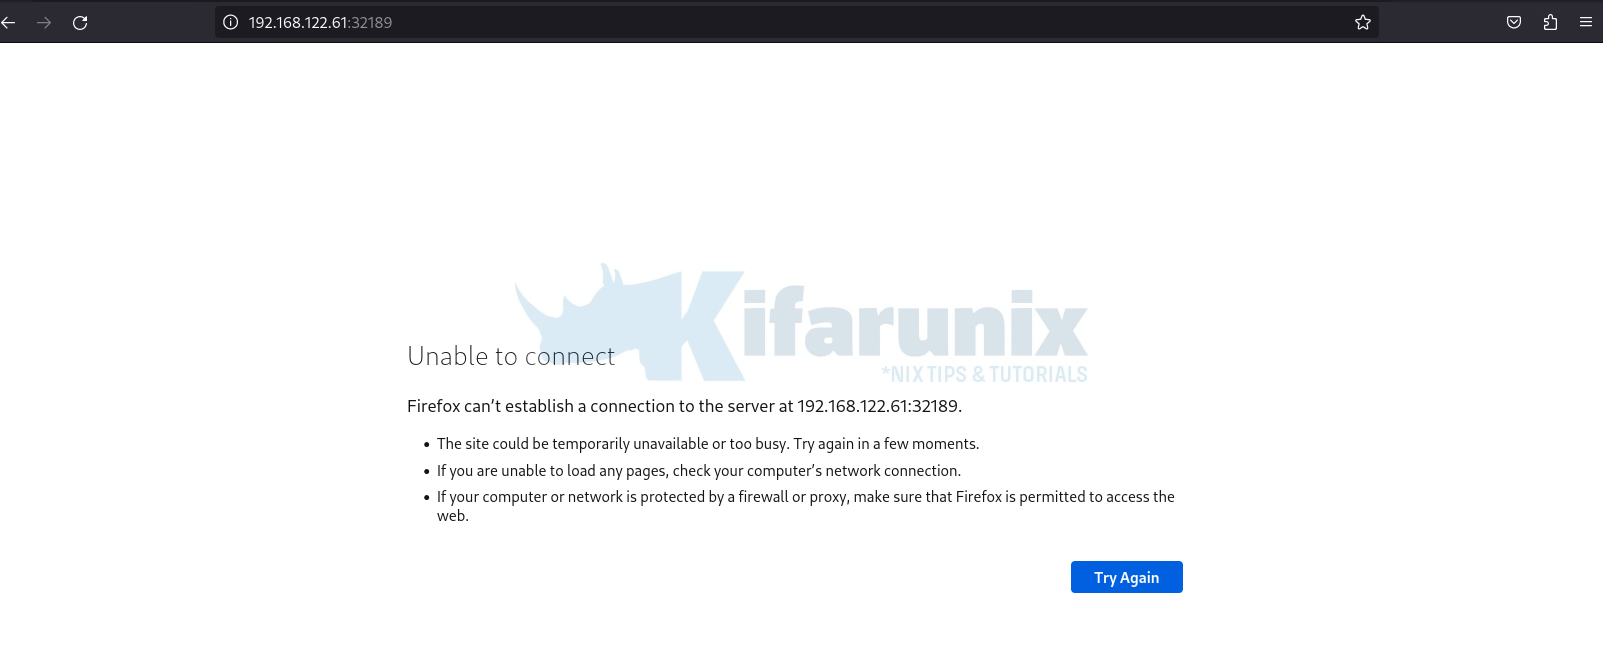
kubectl get nsIf you try access the web server;

Restore etcd Backup in a Single Node Control Plane Kubernetes Cluster
If you have only a single control plane node in your Kubernetes cluster with a single etcd data store, then the restoration is as follows.
Ensure you have worked around this apparmor bug that prevents pods from terminating.
Next, stop the API server. Kubernetes API server is running as a static Pod. Therefore, you can simply “remove” the static pods manifests file directory, /etc/kubernetes/manifests;
sudo mv /etc/kubernetes/manifests{,.01}The static pods will now be shut down.
You can check with the command below;
sudo crictl -r unix:///run/containerd/containerd.sock psEnsure that all the core kubernetes pod containers are not running before you can proceed.
Stop kubelet
sudo systemctl stop kubeletNext, remove the initial etcd data directory, /var/lib/etcd. If you want to keep the original data directory, you can restore the snapshot to a different directory.
sudo mv /var/lib/etcd{,.01}Restore etcd from the backup snapshot;
sudo etcdutl snapshot restore /mnt/backups/snapshot_v4-2024-06-11T10:37:24.db --data-dir /var/lib/etcdSample output;
2024-06-11T10:48:42Z	info	snapshot/v3_snapshot.go:260	restoring snapshot	{"path": "/mnt/backups/snapshot_v4-2024-06-11T10:37:24.db", "wal-dir": "/var/lib/etcd/member/wal", "data-dir": "/var/lib/etcd/", "snap-dir": "/var/lib/etcd/member/snap"}
2024-06-11T10:48:42Z	info	membership/store.go:141	Trimming membership information from the backend...
2024-06-11T10:48:42Z	info	membership/cluster.go:421	added member	{"cluster-id": "cdf818194e3a8c32", "local-member-id": "0", "added-peer-id": "8e9e05c52164694d", "added-peer-peer-urls": ["http://localhost:2380"]}
2024-06-11T10:48:42Z	info	snapshot/v3_snapshot.go:287	restored snapshot	{"path": "/mnt/backups/snapshot_v4-2024-06-11T10:37:24.db", "wal-dir": "/var/lib/etcd/member/wal", "data-dir": "/var/lib/etcd/", "snap-dir": "/var/lib/etcd/member/snap"}
We have restored the data to the default etcd data dir, /var/lib/etcd.
You can now move the static pods manifests to the right place.
sudo mv /etc/kubernetes/manifests{.01,}If you restored etcd data to a different data directory, you will have to update the default data directory path in the etcd deployment manifest file, /etc/kubernetes/manifests/etcd.yaml. Replace /var/lib/etcd with your current restore data path. Save and exit the file.
Start kubelet service.
sudo systemctl start kubeletThe Pods should now be coming up.
kubectl get pods -n kube-systemNAME READY STATUS RESTARTS AGE
coredns-7db6d8ff4d-8859g 1/1 Running 0 66m
coredns-7db6d8ff4d-lkhgp 1/1 Running 0 66m
etcd-master-01 1/1 Running 0 67m
kube-apiserver-master-01 1/1 Running 0 67m
kube-controller-manager-master-01 1/1 Running 0 67m
kube-proxy-6vwk7 1/1 Running 7 (4m37s ago) 60m
kube-proxy-chrxf 1/1 Running 10 (96s ago) 60m
kube-proxy-ttdc6 1/1 Running 0 66m
kube-proxy-wvvns 1/1 Running 9 (2m16s ago) 60m
kube-scheduler-master-01 1/1 Running 0 67m
You can watch the events unfold!
kubectl get pods -n kube-system -wConfirm it after recreation that your namespace is available;
kubectl get nsNAME STATUS AGE
apps Active 60m
calico-apiserver Active 66m
calico-system Active 66m
default Active 68m
kube-node-lease Active 68m
kube-public Active 68m
kube-system Active 68m
tigera-operator Active 67m
So, we have our namespace, apps. Check the all resources in the namespace;
kubectl get all -n appsNAME READY STATUS RESTARTS AGE
pod/nginx-app-6ff7b5d8f6-msvld 1/1 Running 3 (55m ago) 62m
NAME TYPE CLUSTER-IP EXTERNAL-IP PORT(S) AGE
service/nginx-app NodePort 10.109.243.106 80:32189/TCP 62m
NAME READY UP-TO-DATE AVAILABLE AGE
deployment.apps/nginx-app 1/1 1 1 62m
NAME DESIRED CURRENT READY AGE
replicaset.apps/nginx-app-676b458f4f 0 0 0 62m
replicaset.apps/nginx-app-6ff7b5d8f6 1 1 1 62m
Confirm the nodes are ready to handle the workload;
kubectl get nodesNAME STATUS ROLES AGE VERSION
master-01 Ready control-plane 75m v1.30.1
worker-01 Ready 68m v1.30.1
worker-02 Ready 68m v1.30.1
worker-03 Ready 68m v1.30.1
You should now be able to access your web server the way it was before the disaster.
Restore etcd in a Stacked etcd Kubernetes HA Cluster
If you are running a stacked etcd HA cluster and you have taken a snapshot as shown above, then you can restore it in case of unforeseen disaster as follows.
As usual, you need to ensure that your backup is secure and not corrupted!
In my setup, I have 3 control planes and 3 worker nodes.
Setup Highly Available Kubernetes Cluster with Haproxy and Keepalived
kubectl get nodesNAME STATUS ROLES AGE VERSION
master-01 Ready control-plane 17h v1.30.1
master-02 Ready control-plane 17h v1.30.1
master-03 Ready control-plane 17h v1.30.1
worker-01 Ready 16h v1.30.1
worker-02 Ready 16h v1.30.1
worker-03 Ready 33m v1.30.1
The procedure to restore etcd backup in stacked etcd HA cluster is more less similar to the procedure used above.
To begin with, ensure the snapshots are stored well and the integrity checks well!
We have our snapshot file under /mnt/backups/snapshot_v2.db.
sudo etcdutl snapshot status /mnt/backups/snapshot_v2.db -w table+----------+----------+------------+------------+
| HASH | REVISION | TOTAL KEYS | TOTAL SIZE |
+----------+----------+------------+------------+
| 993414e1 | 23609 | 2443 | 10 MB |
+----------+----------+------------+------------+
When snapshot was taken, we had a sample Nginx app running under the apps namespace.
kubectl get all -n appsNAME READY STATUS RESTARTS AGE
pod/nginx-app-6ff7b5d8f6-9qhlh 1/1 Running 0 15h
NAME TYPE CLUSTER-IP EXTERNAL-IP PORT(S) AGE
service/nginx-app NodePort 10.98.82.32 80:31501/TCP 15h
NAME READY UP-TO-DATE AVAILABLE AGE
deployment.apps/nginx-app 1/1 1 1 15h
NAME DESIRED CURRENT READY AGE
replicaset.apps/nginx-app-676b458f4f 0 0 0 15h
replicaset.apps/nginx-app-6ff7b5d8f6 1 1 1 15h
Let’s delete the namespace and everything within it.
kubectl delete ns appsConfirm;
kubectl get nsAs you can see, there is no namespace named apps.
NAME               STATUS   AGE
calico-apiserver   Active   17h
calico-system      Active   17h
default            Active   17h
kube-node-lease    Active   17h
kube-public        Active   17h
kube-system        Active   17h
tigera-operator    Active   17h
kubectl get all -n appsNo resources found in apps namespace.So, let’s try to restore the etcd snapshot in the Kubernetes HA cluster.
Stop all Kubernetes core components (kube-apiserver, etcd, scheduler and controller-manager) on all control plane instances.
But how can you stop these components? Well, you can shut them down by temporarily removing their respective manifest yaml files from /etc/kubernetes/manifests directory.
Kubelet continuously monitors the contents of /etc/kubernetes/manifests/. If it detects any changes (additions, modifications, or deletions) to the pod manifests within this directory, it automatically manages the corresponding pods’ lifecycle on the node.
Therefore, to stop these components, you can move the manifests files outside the /etc/kubernetes/manifests/ directory to other location.
State of the Pods containers on one of the control plane nodes before removing the manifests files;
sudo crictl -r unix:///run/containerd/containerd.sock psCONTAINER IMAGE CREATED STATE NAME ATTEMPT POD ID POD
8345f5a431daf 7820c83aa1394 32 seconds ago Running kube-scheduler 1 6988e08d0e41e kube-scheduler-master-01
eae8fa68f43ad e874818b3caac 37 seconds ago Running kube-controller-manager 1 c8866eb2013fc kube-controller-manager-master-01
080e2fdbfe0fc 6c07591fd1cfa 26 minutes ago Running calico-apiserver 0 b9d58e1e01a1c calico-apiserver-6d69f8d89f-jcplx
e08b9afc6d710 0f80feca743f4 26 minutes ago Running csi-node-driver-registrar 0 2fda38a106385 csi-node-driver-bv7cs
5514f4bbe2bdc 1a094aeaf1521 26 minutes ago Running calico-csi 0 2fda38a106385 csi-node-driver-bv7cs
bac154fa9b086 4e42b6f329bc1 26 minutes ago Running calico-node 0 d79ecf4326e92 calico-node-zzsqs
e4238345bfbbd a9372c0f51b54 27 minutes ago Running calico-typha 0 288729a1f918b calico-typha-f64f84658-5zsst
8410ce8bb7647 53c535741fb44 30 minutes ago Running kube-proxy 0 098fea76f0dca kube-proxy-4c699
46baba197fc08 3861cfcd7c04c 31 minutes ago Running etcd 0 fcadbd893b13c etcd-master-01
5b7e68be6694d 56ce0fd9fb532 31 minutes ago Running kube-apiserver 0 9e438a9bf57ff kube-apiserver-master-01
So, on all control plane nodes, let’s remove the core components manifests files.
You can find which node is the leader or follower using the command below.
sudo etcdctl endpoint status --cacert=/etc/kubernetes/pki/etcd/ca.crt \
--cert=/etc/kubernetes/pki/etcd/server.crt \
 	--key=/etc/kubernetes/pki/etcd/server.key \
 	--cluster -w table
sudo mv /etc/kubernetes/manifests /mnt/backups/After a while, all static pods containers are gone!
sudo crictl -r unix:///run/containerd/containerd.sock psCONTAINER IMAGE CREATED STATE NAME ATTEMPT POD ID POD
080e2fdbfe0fc 6c07591fd1cfa 31 minutes ago Running calico-apiserver 0 b9d58e1e01a1c calico-apiserver-6d69f8d89f-jcplx
e08b9afc6d710 0f80feca743f4 32 minutes ago Running csi-node-driver-registrar 0 2fda38a106385 csi-node-driver-bv7cs
5514f4bbe2bdc 1a094aeaf1521 32 minutes ago Running calico-csi 0 2fda38a106385 csi-node-driver-bv7cs
bac154fa9b086 4e42b6f329bc1 32 minutes ago Running calico-node 0 d79ecf4326e92 calico-node-zzsqs
e4238345bfbbd a9372c0f51b54 32 minutes ago Running calico-typha 0 288729a1f918b calico-typha-f64f84658-5zsst
8410ce8bb7647 53c535741fb44 36 minutes ago Running kube-proxy 0 098fea76f0dca kube-proxy-4c699
Similarly, remove the etcd data directory on all the control plane nodes. This will allow us to restore the backup into the original data directory. You can however restore to a different path and update the same in the manifest file for etcd (etcd.yaml).
sudo mv /var/lib/etcd /mnt/backups/As this point, you wont be able to access the cluster!
Stop Kubelet on control plane nodes.
sudo systemctl stop kubeletEnsure the snapshot file is accessible on all the control plane nodes. If you want, you can use shared storage for easy access to the snapshots files across the control plane nodes.
For now, let’s just copy our snapshot from master-01 to other control plane nodes, master-02 and master-03.
for i in 02 03; do sudo rsync -avP /mnt/backups/snapshot_v3.db root@master-$i:/mnt/backups/; doneRestore the snapshot on all the control plane nodes using etcdutl command. Rember you can still use etcdctl even though it is already deprecated.
See how to install etcdutl command line tool.
On all control plane restore etcd snapshot. We will use etcdutl command which is set to replace etcdctl for restoration.
etcdutl snapshot restore --helpUsage:
etcdutl snapshot restore --data-dir {output dir} [options] [flags]
Flags:
--bump-revision uint How much to increase the latest revision after restore
--data-dir string Path to the output data directory
-h, --help help for restore
--initial-advertise-peer-urls string List of this member's peer URLs to advertise to the rest of the cluster (default "http://localhost:2380")
--initial-cluster string Initial cluster configuration for restore bootstrap (default "default=http://localhost:2380")
--initial-cluster-token string Initial cluster token for the etcd cluster during restore bootstrap (default "etcd-cluster")
--mark-compacted Mark the latest revision after restore as the point of scheduled compaction (required if --bump-revision > 0, disallowed otherwise)
--name string Human-readable name for this member (default "default")
--skip-hash-check Ignore snapshot integrity hash value (required if copied from data directory)
--wal-dir string Path to the WAL directory (use --data-dir if none given)
Global Flags:
-w, --write-out string set the output format (fields, json, protobuf, simple, table) (default "simple")
As already mentioned, we have three control plane nodes (master-01,02,03)
The value of initial-cluster, name, initial-advertise-peer-urls MUST match what is defined on each control plane etcd.yaml manifest file.
On first control plane node (master-01)
etcdutl snapshot restore /mnt/backups/snapshot_v3.db \
	--name master-01 \
	--initial-cluster master-01=https://192.168.122.58:2380,master-02=https://192.168.122.59:2380,master-03=https://192.168.122.60:2380 \
	--data-dir /var/lib/etcd \
	--initial-advertise-peer-urls https://192.168.122.58:2380
Second control plane (master-02)
etcdutl snapshot restore /mnt/backups/snapshot_v3.db \
	--name master-02 \
	--initial-cluster master-01=https://192.168.122.58:2380,master-02=https://192.168.122.59:2380,master-03=https://192.168.122.60:2380 \
	--data-dir /var/lib/etcd \
	--initial-advertise-peer-urls https://192.168.122.59:2380
Next control plane (master-03)
etcdutl snapshot restore /mnt/backups/snapshot_v3.db \
	--name master-03 \
	--initial-cluster master-01=https://192.168.122.58:2380,master-02=https://192.168.122.59:2380,master-03=https://192.168.122.60:2380 \
	--data-dir /var/lib/etcd \
	--initial-advertise-peer-urls https://192.168.122.60:2380
Next, move back the Kubernetes core services manifests YAML files into the right directory on all control plane nodes;
sudo mv /mnt/backups/manifests /etc/kubernetes/Start Kubelet
sudo systemctl start kubeletThe Kubernets core components pods containers should be coming up now;
crictl -r unix:///run/containerd/containerd.sock psCONTAINER IMAGE CREATED STATE NAME ATTEMPT POD ID POD
3ee7db5199d21 3861cfcd7c04c Less than a second ago Running etcd 0 0ac470d386f96 etcd-master-03
685d11faf98cf e874818b3caac Less than a second ago Running kube-controller-manager 0 97e8a01818631 kube-controller-manager-master-03
b0f70b7246d87 7820c83aa1394 Less than a second ago Running kube-scheduler 0 f829c946d19ca kube-scheduler-master-03
f1bcd51cc8269 56ce0fd9fb532 Less than a second ago Running kube-apiserver 0 4390ce5db8a47 kube-apiserver-master-03
65ba3c8a76bfc 0f80feca743f4 51 minutes ago Running csi-node-driver-registrar 1 c1539a2211bf5 csi-node-driver-dql9n
7c0fd95753436 1a094aeaf1521 51 minutes ago Running calico-csi 1 c1539a2211bf5 csi-node-driver-dql9n
d540ad32d70f7 cbb01a7bd410d 51 minutes ago Running coredns 1 396cca65c3afa coredns-7db6d8ff4d-4xb99
8e9ba7a50b35e 428d92b022539 51 minutes ago Running calico-kube-controllers 1 b7a8e1b6ec67b calico-kube-controllers-584469688f-7lb9z
b87f929f56aad cbb01a7bd410d 51 minutes ago Running coredns 1 52c20065e9cdd coredns-7db6d8ff4d-48x7h
767cf9f1a2aba 4e42b6f329bc1 52 minutes ago Running calico-node 1 76e48bfd7fd37 calico-node-9jcv6
2322ab0046f40 53c535741fb44 52 minutes ago Running kube-proxy 1 3a4dcd0a0f6f0 kube-proxy-fdz5w
Cluster should be healthy;
sudo etcdctl endpoint status --cacert=/etc/kubernetes/pki/etcd/ca.crt \
--cert=/etc/kubernetes/pki/etcd/server.crt \
--key=/etc/kubernetes/pki/etcd/server.key \
--cluster -w table
+-----------------------------+------------------+---------+---------+-----------+------------+-----------+------------+--------------------+--------+
|          ENDPOINT           |        ID        | VERSION | DB SIZE | IS LEADER | IS LEARNER | RAFT TERM | RAFT INDEX | RAFT APPLIED INDEX | ERRORS |
+-----------------------------+------------------+---------+---------+-----------+------------+-----------+------------+--------------------+--------+
| https://192.168.122.60:2379 | 71adc069c6babb75 |  3.5.12 |   13 MB |     false |      false |         2 |        992 |                992 |        |
| https://192.168.122.58:2379 | 7f56434149e2cc7f |  3.5.12 |   13 MB |      true |      false |         2 |        992 |                992 |        |
| https://192.168.122.59:2379 | db4091f30b21595e |  3.5.12 |   13 MB |     false |      false |         2 |        992 |                992 |        |
+-----------------------------+------------------+---------+---------+-----------+------------+-----------+------------+--------------------+--------+
Check cluster nodes should be up;
kubectl get nodesNAME STATUS ROLES AGE VERSION
master-01 Ready control-plane 18h v1.30.1
master-02 Ready control-plane 18h v1.30.1
master-03 Ready control-plane 18h v1.30.1
worker-01 Ready <none> 17h v1.30.1
worker-02 Ready <none> 17h v1.30.1
worker-03 Ready <none> 102m v1.30.1
You can check the core services;
kubectl get pods -n kube-systemList namespaces to confirm that the apps namespace is restored;
kubectl get nsNAME STATUS AGE
apps Active 17h
calico-apiserver Active 18h
calico-system Active 18h
default Active 18h
kube-node-lease Active 18h
kube-public Active 18h
kube-system Active 18h
tigera-operator Active 18
I can see our namespace is available.
Get resources in the namespace;
kubectl get all -n appsNAME READY STATUS RESTARTS AGE
pod/nginx-app-6ff7b5d8f6-njkcr 1/1 Running 0 54m
NAME TYPE CLUSTER-IP EXTERNAL-IP PORT(S) AGE
service/nginx-app NodePort 10.109.64.134 80:30833/TCP 53m
NAME READY UP-TO-DATE AVAILABLE AGE
deployment.apps/nginx-app 1/1 1 1 54m
NAME DESIRED CURRENT READY AGE
replicaset.apps/nginx-app-676b458f4f 0 0 0 54m
replicaset.apps/nginx-app-6ff7b5d8f6 1 1 1 54m
Looks good.
Confirm access to our app!

And there you go!
Kubernetes multi-master HA cluster is restored from snapshot successfully.
Conclusion
You have learnt how to backup and restore ectd cluster in Kubernetes. Kubernetes etcd cluster backup can be done using etcdctl snapshot save command.
Similarly, you have also learnt how to restore Kubernetes ectd cluster backup for both single control plane and multi-control plane Kubernetes cluster using the etcdutl snapshot restore command.

