In this tutorial, you will learn how you can analyze network traffic using Brim security tool. Brim is an open source desktop application that can be used to analyze structured network traffic data like;
- packet captures, e.g created by Wireshark
- structured logs, especially from the Zeek network analysis framework.
According to their page, Brim is built from open source components, including:
- Zed, a structured log query engine;
- Electron and React for multi-platform UI;
- Zeek, to generate network analysis data from packet capture files.
Analyzing Network Traffic Using Brim Security
In our previous tutorial, we discussed how to analyze Network traffic using Zeek.
Analyze Network Traffic using Zeek
In the above tutorial, the analysis was done mostly using the zeek-cut command.
Install Brim Security on Ubuntu/Debian Desktop
Download Brim Debian binary installer from the download’s page.
You can download using wget. Be sure to change the version number.
wget https://github.com/brimdata/brim/releases/download/v0.28.0/Brim-0.28.0.debOnce the download is complete, then run the command below to install Brim;
apt install ./Brim-0.28.0.deb -yOn Debian 11 Bullseye, there are some dependencies that cannot be met.
The following packages have unmet dependencies:
 brim : Depends: libappindicator3-1 but it is not installable
E: Unable to correct problems, you have held broken packages.
To fix this, add the Debian 10 buster repos to Debian 11 system;
echo 'deb http://ftp.de.debian.org/debian buster main' > /etc/apt/sources.list.d/buster.listUpdate the repos and install Brim on Debian 11;
apt updateapt install ./Brim-0.28.0.deb -yOnce the installation is done, remove the Debian 10 buster repos;
rm -rf /etc/apt/sources.list.d/buster.listInstall Brim on CentOS/Rocky Linux/RHEL Based Desktop Systems
Similarly, download RPM binaries from the download’s page;
yum localinstall https://github.com/brimdata/brim/releases/download/v0.28.0/Brim-0.28.0.rpmRunning Brim Security
You can now launch Brim security from your system application menu;
On Debian 11, for example;
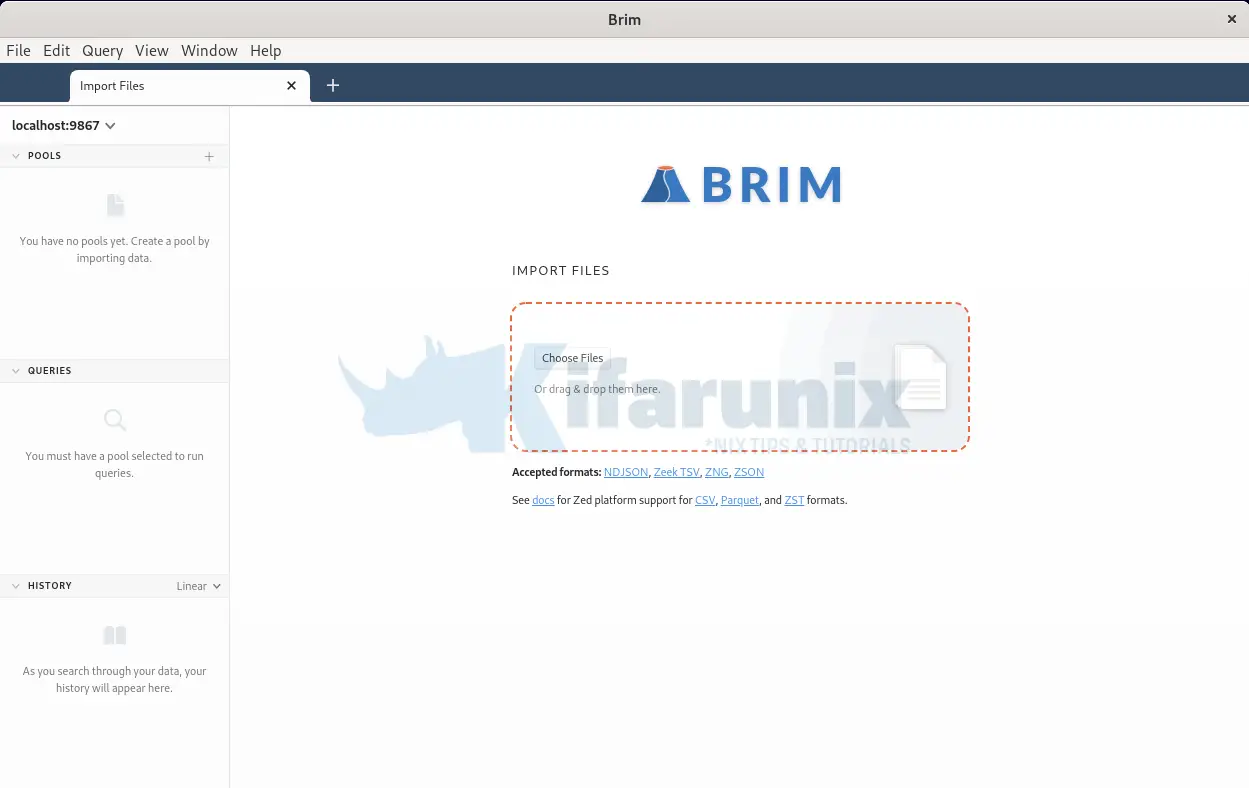
When first launched, it opens the release notes tab. You can close the tab and this is how Brim desktop app looks like;
Analyze Network Traffic with Brim Security
In order to learn how to use Brim Security, we will analyze the same PCAP file from the cyberdefenders.org we analyzed using zeek-cut and try to answer the same questions.
Thus, download and extract the PCAP file;
wget https://download.cyberdefenders.org/BlueYard/c04-MalwareTrafficAnalysis1.zip -P ~/Downloadscd ~/Downloads
unzip -P cyberdefenders.org c04-MalwareTrafficAnalysis1.zipYou should now have a PCAP file, mta1.pcap.
To analyze this network traffic packet capture using Brim;
- Import the PCAP file to Brim for analysis by either dragging the file to Brim or simply importing by uploading it.
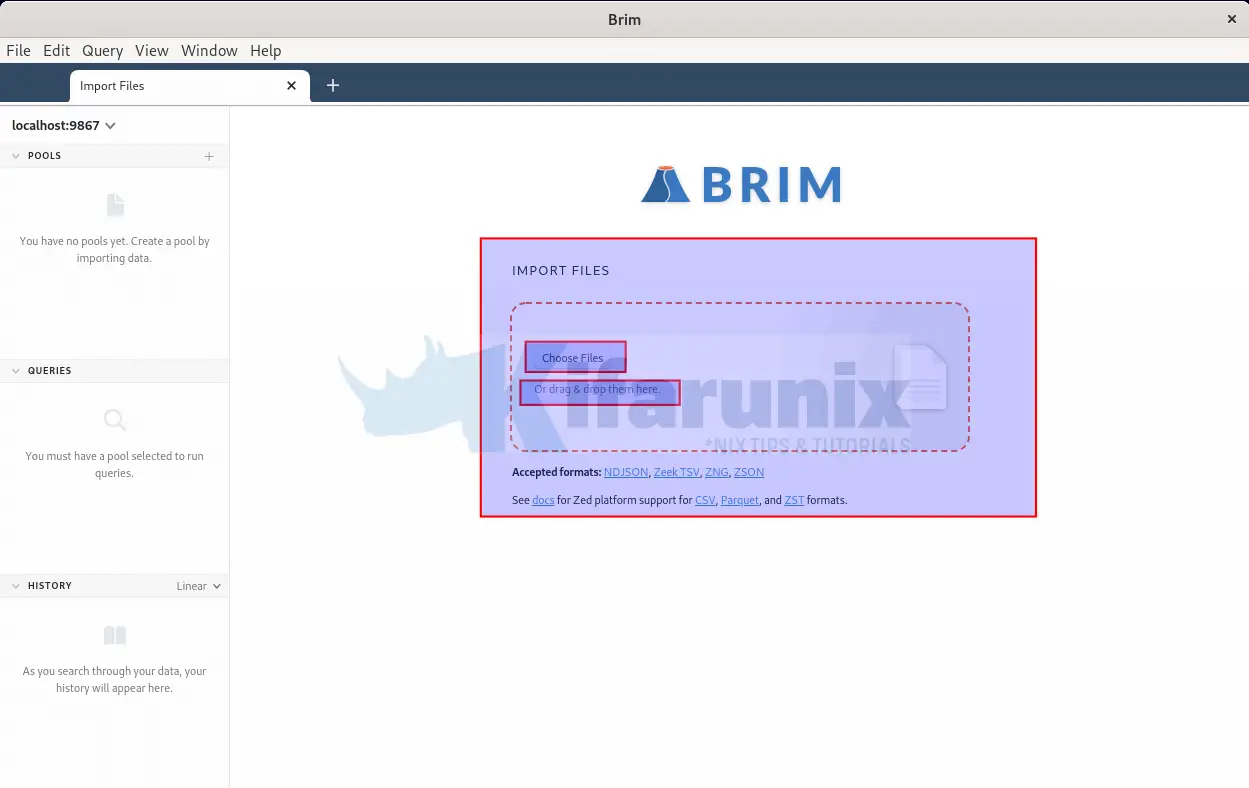
- Upon upload, Brim immediately begins to process the network traffic file using inbuild Zeek engines;
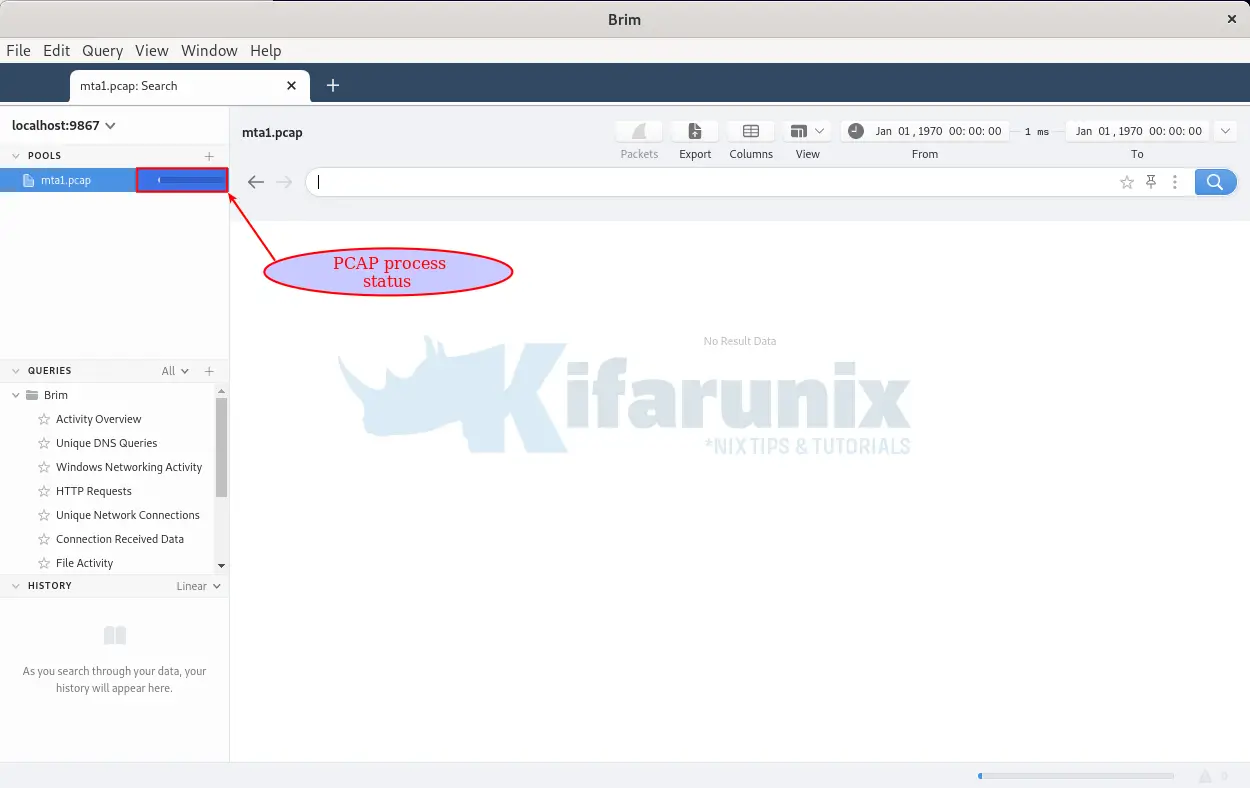
- It take just a few mins to process the PCAP file, depending on the size.
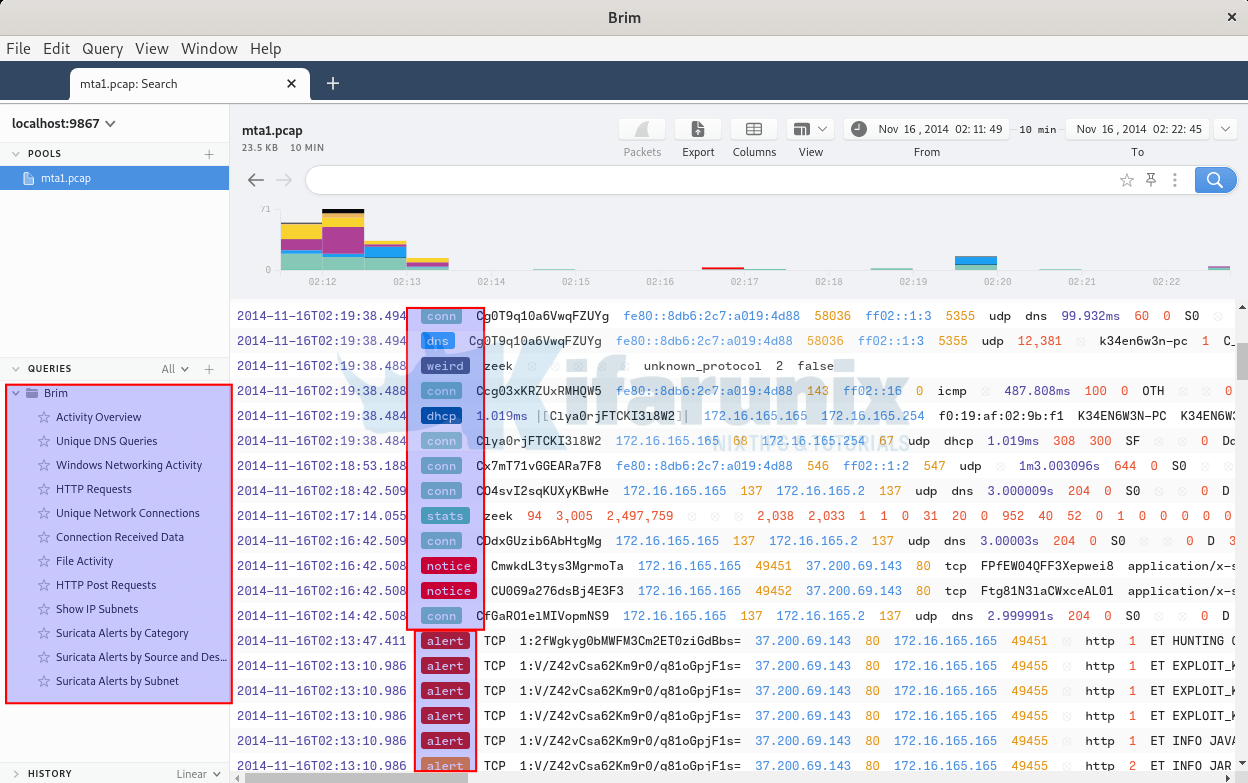
- Well, from the events on dashboard, you can easily notice Zeek generated logs with the paths being dns, stats, conn, weird, capture_loss etc.
- You can also notice logs whose path are named as alert. These are logs generated using Brim’s Suricata engine rules.
- On the left pane, you can also see the various group queries such as DNS queries, File activity…
Network Traffic Overview Activity
On the left pane, click Overview Activity to see a number of occurrences of various network traffic connections.
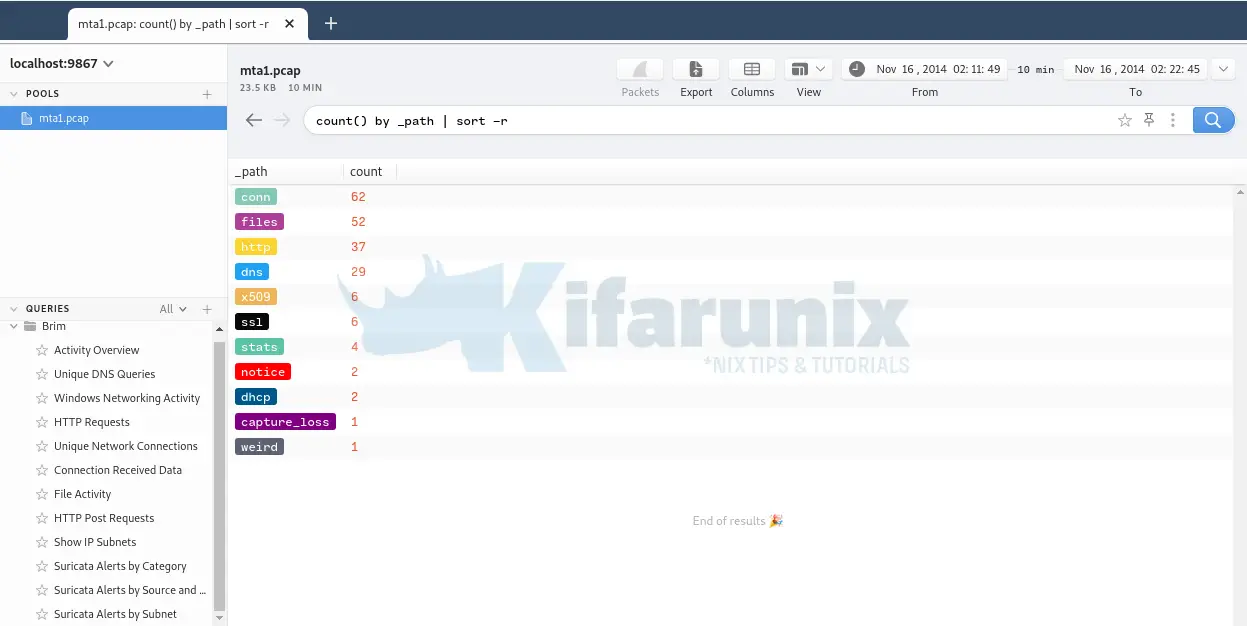
Now, let’s try to answer the questions related to Cyberdefenders.org PCAP file above.
1. What is the IP address of the Windows VM that gets infected?
As mentioned in our previous guide with Zeek, one of the ways in which we can use to find the infected machines it to identify which IPs/hosts connections involves large number of packets or bytes, which in this case we can refer to them the top talkers.
If you check the sample queries on the left pane, you can see a query named Connection Received Data.
Click on the query and you should see such events. You can see that a single host is involved in so many external connections. You can also see number of bytes exchanged between the external host and the local lost.
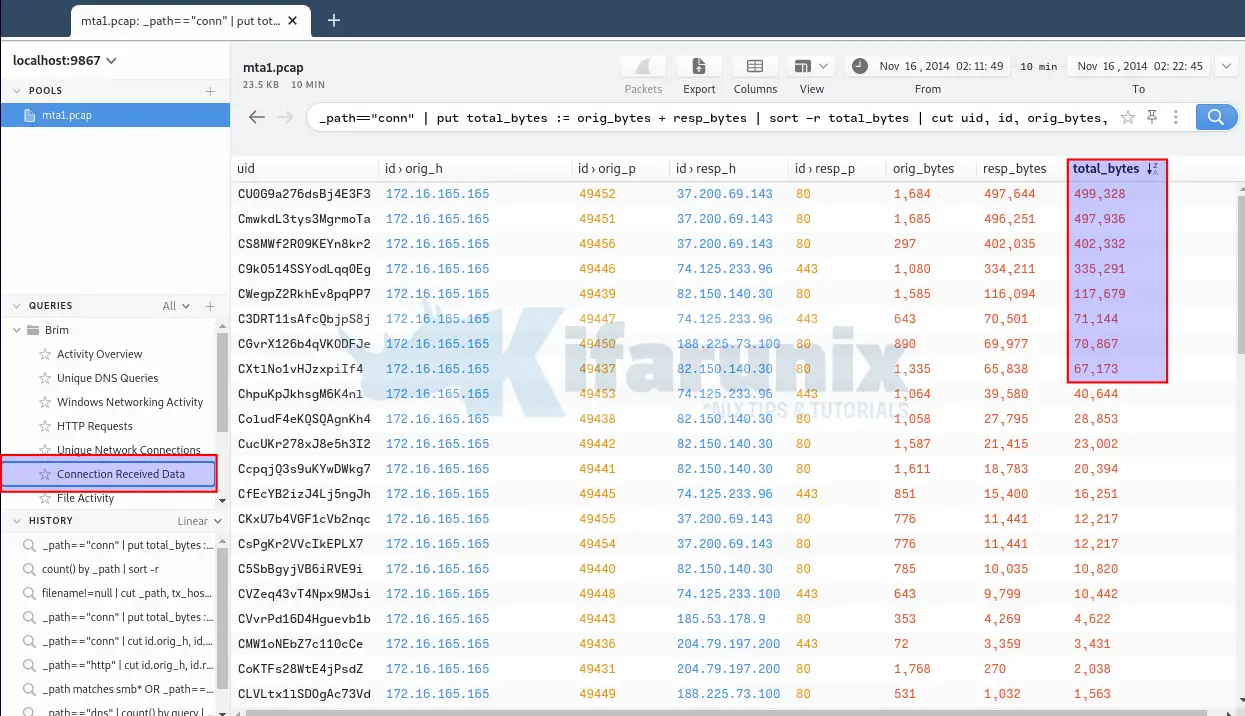
Thus, it can be assumed that the host, 172.16.165.165 is the culprit.
2. What is the host name of the Windows VM that gets infected?
It is possible to get the hostname associated with an IP address by checking DHCP, NetBIOS Name Service (NBNS), or SMB related traffic.
From the Activity Overview, you can see types of traffic found on the PCAP file. Thus, analyze the DHCP related traffic to get the hostname of the infected virtual machine.
On the search bar, enter the query;
_path "dhcp" | cut client_addr, client_fqdn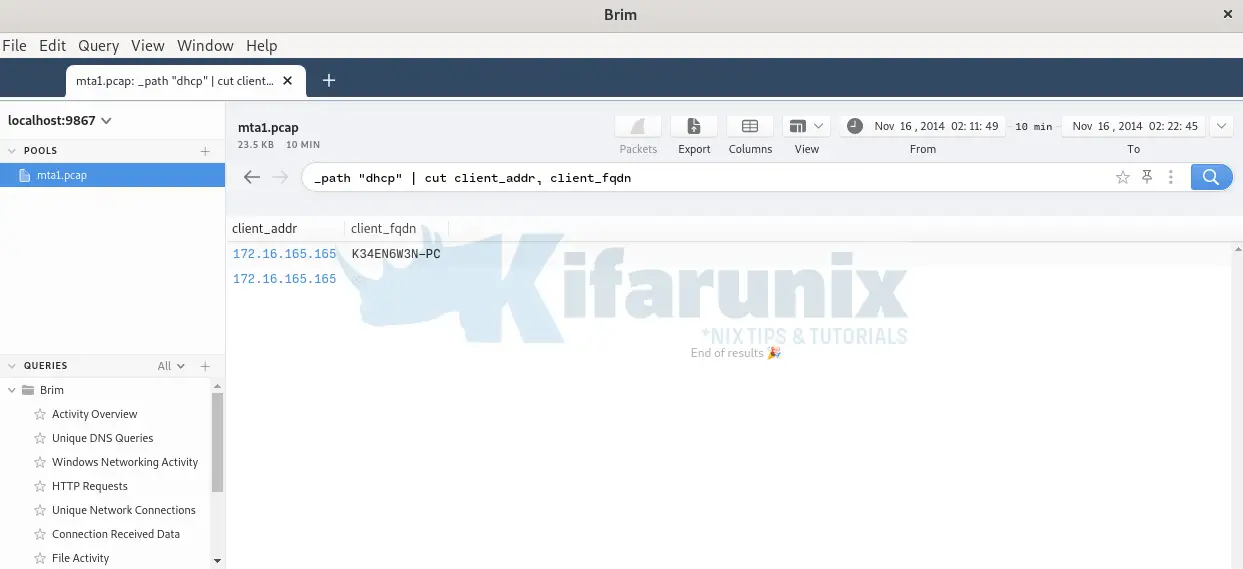
3. What is the MAC address of the infected VM?
DHCP server assigns systems IP addresses based on their mac addresses. Thus, the same information can be obtained from the DHCP traffic.
Use the query below on Brim;
_path "dhcp" | cut client_addr, client_fqdn, mac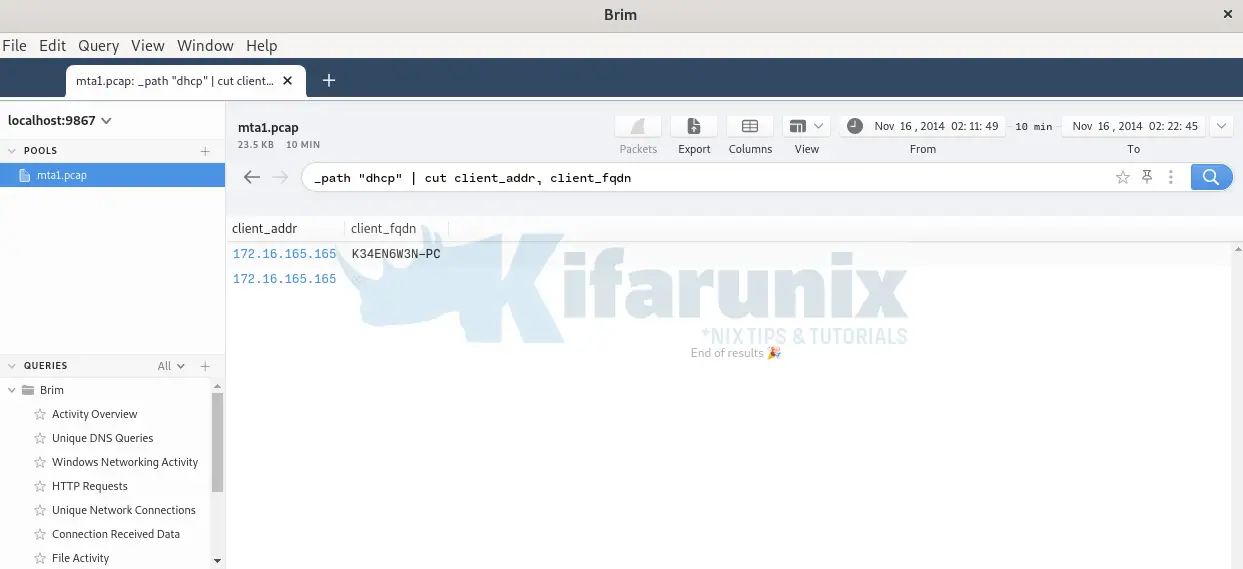
4. What is the IP address of the compromised web site?
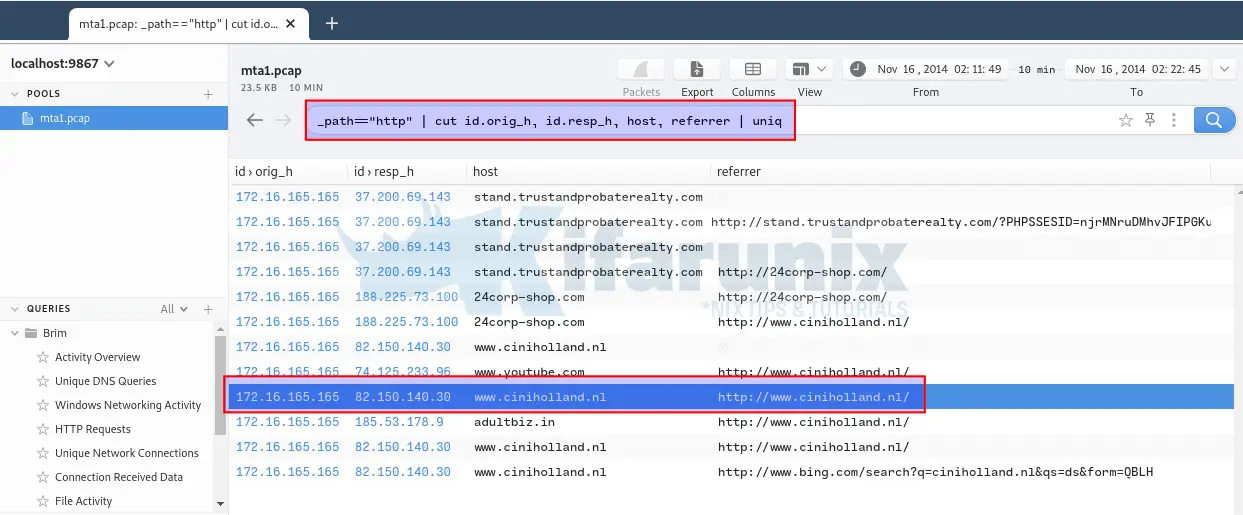
If you analyze http logs, you realize that most of the requests to the site http://www.ciniholland.nl/ are referred to quite a number of sites. It looks like there are some links embedded on that site that takes user requests to other sites upon clicking.
Brim Query;
_path "http" | cut id.orig_h, id.resp_h, host, referrer | uniqHence, we can conclude that this is the compromised site whose IP address is 82.150.140.30.
5. What is the FQDN of the compromised website?
Answered above, www.ciniholland.nl.
And there is more to this.
However, that is just it for this tutorial. Feel free to share your thoughts in the comments section.
Read more on Brim Wiki’s page.
Other Tutorials
Install and Enroll Elastic Agents to Fleet Manager in Linux
Detect Changes to Critical Files in Linux using Auditbeat and ELK

