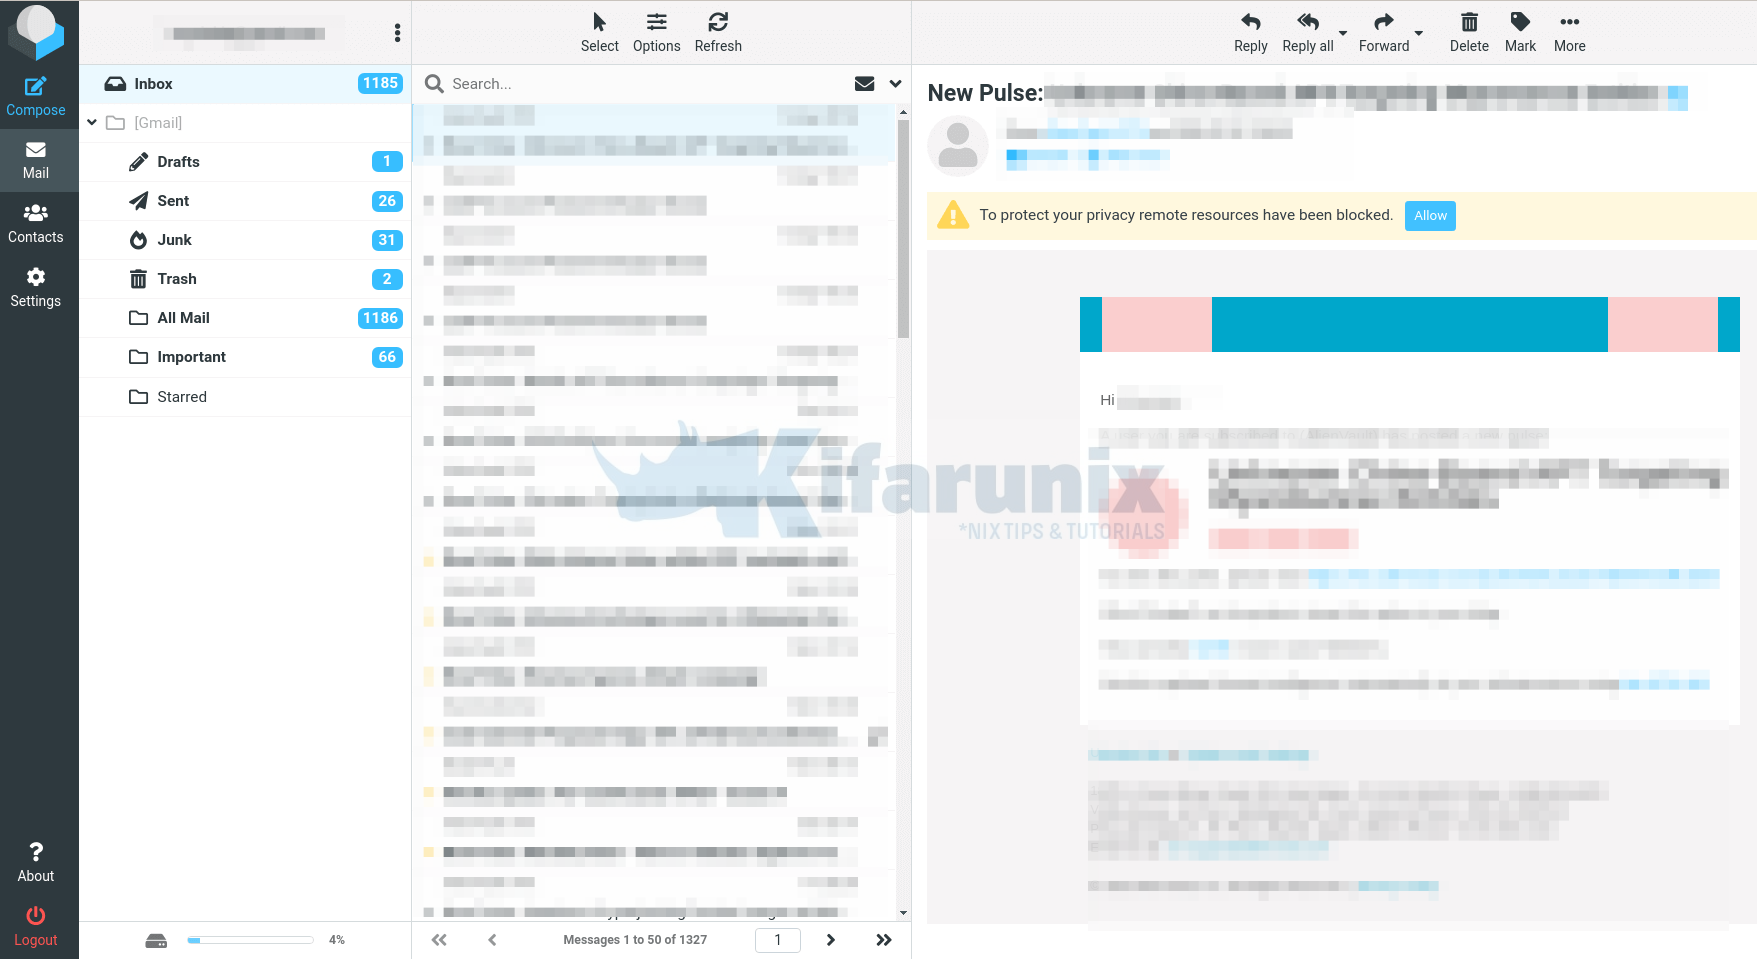
In this tutorial, we are going to learn how to install Roundcube webmail on Ubuntu 22.04. Roundcube webmail is a free and open source web-based IMAP email client. It is written in PHP and works just like any other email client. It provides a handful of features;
- Full support for MIME and HTML messages
- Sophisticated privacy protection
- Compose messages with attachments
- Multiple sender identities
- Full featured address book with groups and LDAP connectors
- Find-as-you-type address book integration
- Richtext/HTML message composing
- Forwarding messages with attachments
- Searching messages and contacts
- Spell checking
You can find comprehensive list of features of Roundcube here.
Install Roundcube Webmail on Ubuntu 22.04
Prerequisites
As stated, Roundcube Webmail is written in PHP and thus it runs on a standard LAMPP server. The following are the minimum server requirements;
- Apache, Lighttpd, Nginx, Cherokee or Hiawatha web server
- PHP Version 5.4 or greater
- MySQL, PostgreSQL, SQLite, MSSQL or Oracle database
- SMTP server and IMAP server with IMAP4 rev1 support
- PEAR packages distributed with Roundcube
Run system Update
Before you can proceed with installation and configuration of Roundcube webmail on Ubuntu 22.04, update your package cache;
apt updateInstall and Setup LAMP Stack On Ubuntu
Install LAMP stack by running the command below;
apt install apache2 php mariadb-server mariadb-client -yNext, iInstall other required PHP modules;
apt install openssl composer php-{net-smtp,mysql,gd,xml,mbstring,intl,zip,json,pear,bz2,gmp,imap,imagick,auth-sasl,mail-mime,net-ldap3,net-sieve,curl} libapache2-mod-php curl -yDownload Roundcube
The latest stable release version for Roundcube can be installed by downloading the source code from the Roundcube downloads page.
NOTE that Roundcube is availble on the default Ubuntu repos.
apt info roundcube-coreHowever, the repositories do not usually provide an up-to-date version. As of this writing, Roundcube 1.5.2 is the latest stable release version.
Thus, you can simply get the link to the current release version of Roundcub and pull the tarball as follows;
Be sure to download the complete package.
VER=1.5.2wget -P /tmp/ https://github.com/roundcube/roundcubemail/releases/download/$VER/roundcubemail-$VER-complete.tar.gzExtract Roundcube to Apache Web Root Directory
Extract the Roundcube tarball archive to your web root directory, in our case, this directory is /var/www/html/roundcube.
Create this directory if it doesn’t exist.
mkdir /var/www/html/roundcubetar xzf /tmp/roundcubemail-$VER-complete.tar.gz -C /var/www/html/roundcube --strip-components 1Set proper ownership for roundcube root directory and permissions for Roundcube /temp and /logs directories;
chown -R www-data.www-data /var/www/html/roundcube/
chmod -R 775 /var/www/html/roundcube/{temp,logs}
The /config, /temp and /logs directories should be protected against access from the browser.
Configure Apache VirtualHost for Roundcube
Create a dedicated Apache VirtualHost configuration file for Roundcube;
tee /etc/apache2/sites-available/roundcube.conf << 'EOL'
<VirtualHost *:80>
        ServerName roundcube.kifarunix-demo.com
        ServerAdmin [email protected]
        DocumentRoot /var/www/html/roundcube

	<Directory /var/www/html/roundcube>
		Options +FollowSymLinks
		AddType text/x-component .htc
		<IfModule mod_php.c>
			php_flag        display_errors  Off
			php_flag        log_errors      On
			php_value       upload_max_filesize     10M
			php_value       post_max_size           12M
			php_value       memory_limit            64M
			php_flag        zlib.output_compression         Off
			php_flag        magic_quotes_gpc                Off
			php_flag        magic_quotes_runtime            Off
			php_flag        zend.ze1_compatibility_mode     Off
			php_flag        suhosin.session.encrypt         Off
			php_flag        session.auto_start      Off
			php_value       session.gc_maxlifetime  21600
			php_value       session.gc_divisor      500
			php_value       session.gc_probability  1
		</IfModule>
		<IfModule mod_rewrite.c>
			RewriteEngine On
			RewriteRule ^favicon\.ico$ skins/larry/images/favicon.ico
			RewriteRule ^(?!installer)(\.?[^\.]+)$ - [F]
			RewriteRule ^/?(\.git|\.tx|SQL|bin|config|logs|temp|tests|program\/(include|lib|localization|steps)) - [F]
			RewriteRule /?(README\.md|composer\.json-dist|composer\.json|package\.xml)$ - [F]
		</IfModule>
		<IfModule mod_deflate.c>
			SetOutputFilter DEFLATE
		</IfModule>
		<IfModule mod_headers.c>
			# replace 'append' with 'merge' for Apache version 2.2.9 and later
			# Header append Cache-Control public env=!NO_CACHE
		</IfModule>
		<IfModule mod_expires.c>
			ExpiresActive On
			ExpiresDefault "access plus 1 month"
		</IfModule>
		FileETag MTime Size
		<IfModule mod_autoindex.c>
			Options -Indexes
		</ifModule>
		AllowOverride None
		Require all granted
	</Directory>

	<Directory /var/www/html/roundcube/plugins/enigma/home>
		Options -FollowSymLinks
		AllowOverride None
		Require all denied
	</Directory>
	<Directory /var/www/html/roundcube/config>
		Options -FollowSymLinks
		AllowOverride None
		Require all denied
	</Directory>
	<Directory /var/www/html/roundcube/temp>
		Options -FollowSymLinks
		AllowOverride None
		Require all denied
	</Directory>
	<Directory /var/www/html/roundcube/logs>
		Options -FollowSymLinks
		AllowOverride None
		Require all denied
	</Directory>
        ErrorLog ${APACHE_LOG_DIR}/roundcube-error.log
        CustomLog ${APACHE_LOG_DIR}/roundcube-access.log combined
</VirtualHost>
EOL
Save and quit the configuration file.
If you need to use HTTPS, obtain the SSL/TLS certificates and configure Apache appropriately.
Disable Apache default site
a2dissite 000-defaultEnable Roundcube site.
a2ensite roundcubeEnable the following Apache Modules
a2enmod deflate expires headers rewriteVerify syntactical errors in Rouncube site configuration.
apachectl -tSyntax OKIf there are syntax errors, restart Apache if there is error.
systemctl restart apache2Create Roundcube Database and Database User
Roundcube supports various database backends as stated above.
In this guide, we are going to use MySQL server which we already installed in the guide whose link is given above.
Login to MySQL and create Roundcube databases.
systemctl enable --now mariadbmysql -u root -pReplace the database and database user names accordingly.
create database roundcube;Create Roundcube database user and grant all privileges on Roundcube database.
create user rcadmin@localhost identified by 'StrongPassword';grant all on roundcube.* to rcadmin@localhost;Reload privileges tables and exit the database;
flush privileges;
quit
Import Roundcube initial database into MySQL database created above;
mysql -u rcadmin -p roundcube < /var/www/html/roundcube/SQL/mysql.initial.sqlConfigure PHP for Roundcube
To begin, ensure the mbstring, xml, dom, intl PHP modules are enabled;
php -m | grep -iE "mbstring|xml|dom|intl"Set default time zone in php.ini;
sed -i 's/^;date.timezone =/date.timezone = Asia\/Nicosia/' /etc/php/*/apache2/php.iniConfigure Roundcube Webmail on Ubuntu 22.04
You can now complete the setup of Roundcube from browser by accessing the http://server-IP-or-hostname/installer link.
Check the Prerequisites
When the installer runs, it first checks if all required dependencies are met. Ensure that everything is in an OK state before proceeding.
Create Roundcube Configuration
Once all the requirements are met, click step 2 to create configuration for Roundcube.
For the General configuration and Logging & Debugging settings, let us go with the defaults.
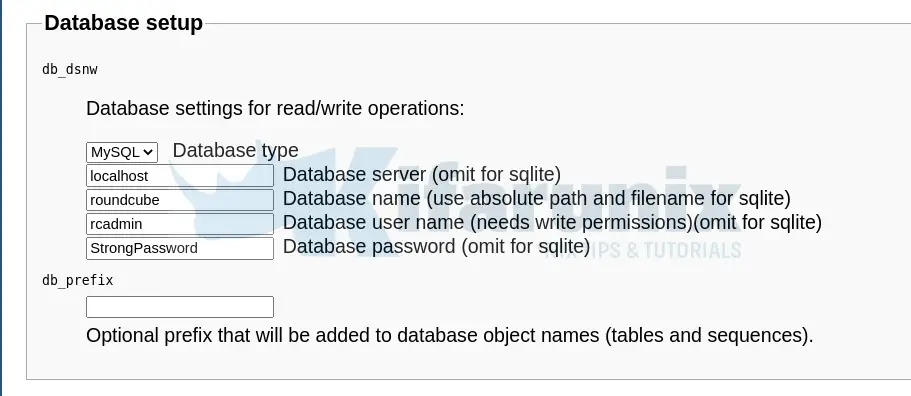
Set the database connection settings as per what you created above.
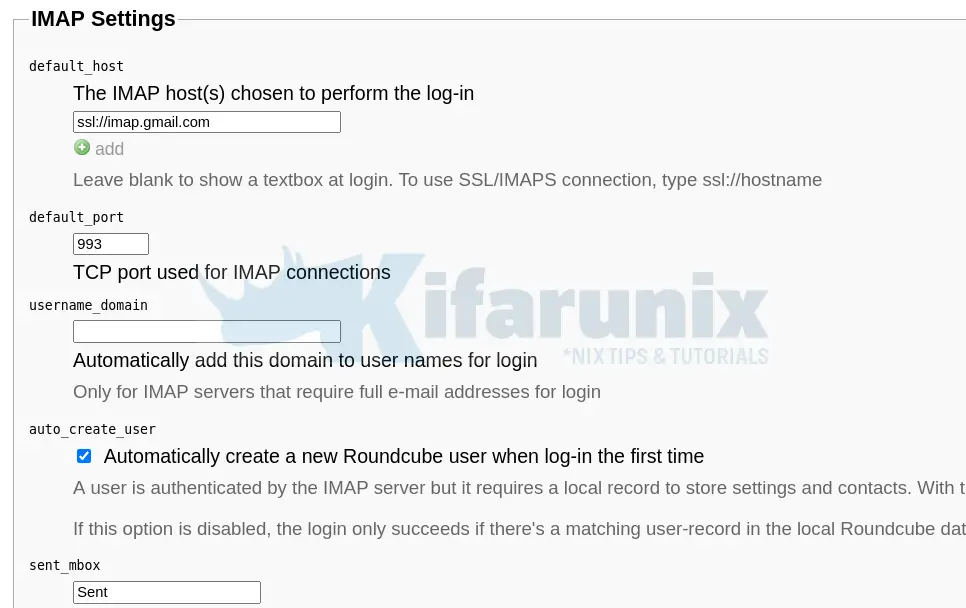
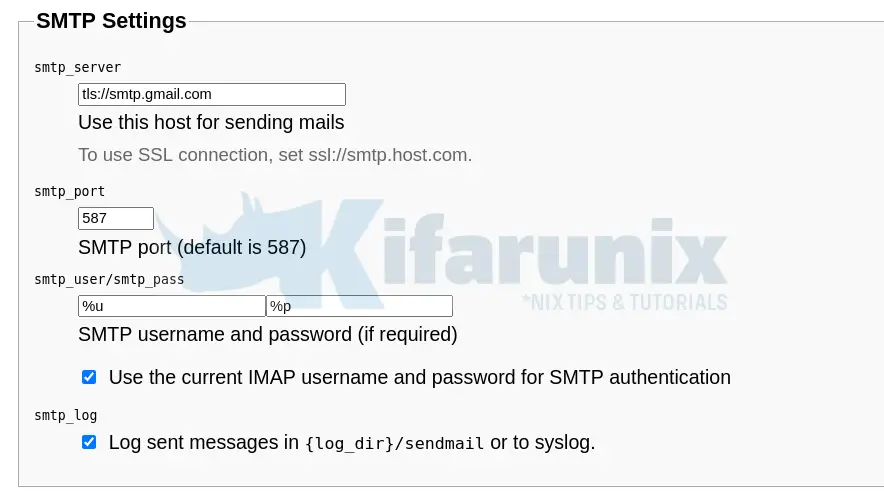
For both IMAP and SMTP settings, we are using GMAIL relay. Hence just set the hosts and ports.
For the rest of the settings, you can leave the defaults or update them to your preference.
At the bottom of the page, CREATE CONFIG to create your Roundcube configuration with the options you have defined.
You should see a message that the configuration has been created successfully.
Click CONTINUE to proceed and Test the configuration.
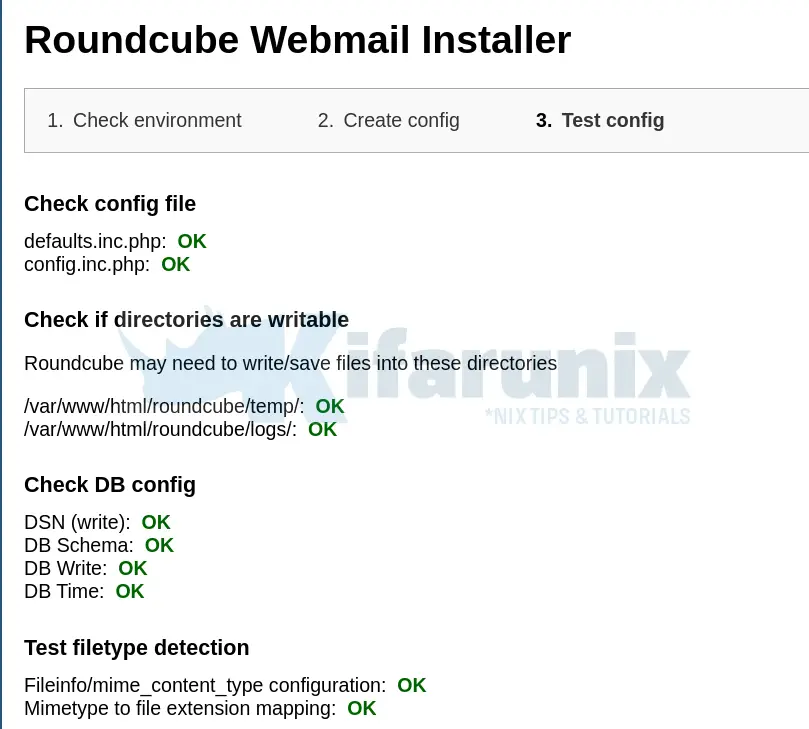
Test your mail relay message deliverability by ending your email and password and click Send Test mail.

Test your message receivability, click Check login to verify.

After completing the installation and the final tests remove the whole installer folder from the web root directory.
rm -rf /var/www/html/roundcube/installer/You can simply disable the installer by running the command below;
echo "$config['enable_installer'] = false;" >> /var/www/html/roundcube/config/config.inc.phpLogin to Roundcube Webmail
You can now access your Roundcube webmail via the address http://server-IP-or-hostname. This takes you to the login screen.
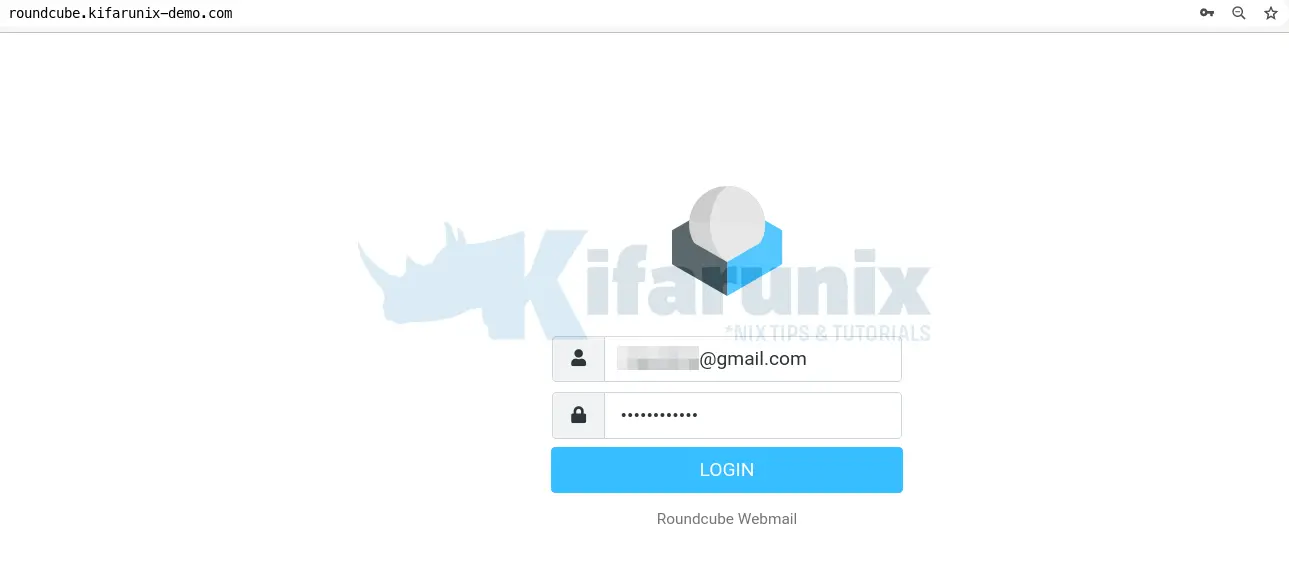
Use your email account credentials for logging in. In my case, am using my Gmail account.
There you go. Roundcube is now up and running on Ubuntu 22.04. You can explore various functionalities of the tool further.
That marks the end of our guide on how to install Roundcube Webmail.
Further Reading
Related Tutorials
How to Install and Setup Roundcube Webmail on Debian 9
Configure Sendmail to Use Gmail Relay on Ubuntu 18.04/Debian 10/9
How to Install and Setup iRedMail Mail Server on Ubuntu 18.04 LTS

