Welcome to our tutorial on how to install and setup iRedMail mail server on Ubuntu 22.04/20.04. iRedMail is an open-source mail server solution. It provides a fully-fledged and fully featured mail server at no cost at all.
Table of Contents
Why iRedMail?
Some of the reasons why you may want to consider iRedMail for your mail server include;
- It enables you to have a complete control over your emails and their security, transaction logs…
- It is opensource and hence it easier to get the bug fixes and updates from your trusted Linux/BSD vendors.
- It uses secure connection protocols, POP3/IMAP/SMTP over TLS, webmail with HTTPS, by default.
- It provides an intuitive Web GUI for managing mails, folders, sieve filters.
- It supports backends such as OpenLDAP, MySQL, MariaDB, PostgreSQL.
You can read more about iRedMail features on iRedMail page.
Installing iRedMail Mail Server on Ubuntu 22.04/20.04
Prerequisites
Before you can proceed, ensure that the following bare minimums are met;
- Confirm the current version of Linux distro supported.
- Install a FRESH Ubuntu server with NO mail related components installed.
- Provide the system with at least 2GB of RAM
- Ensure that the following User ID and Group ID are not being used; 2001,2002,2003
- Set a fully qualified domain name (FQDN) for your server e.g
mx.example.com. You can set your hostname with the command.
sudo hostnamectl set-hostname mx.kifarunix-demo.com- Ensure that the hostname is resolvable. If you dont have a DNS server, set record in your
/etc/hosts. You can set this record by running the command below;
echo "192.168.58.33 mx.kifarunix-demo.com mx" | sudo tee -a /etc/hostsInstall iRedMail Mail Server on Ubuntu 22.04/20.04
Run System Update
Once the above prerequisites are met, step through the following to install iRedMail mail server on Ubuntu 22.04/20.04
Ensure your server is up-to-date;
apt update
apt upgradeInstall Required Packages
There are a number of packages required by iRedMail. Install them by running the command below;
apt install gzip dialogDownload iRedMail Archive
Navigate to iRedMail Download’s page and download the latest stable release of iRedMail archive.
Version 1.6.3 is the current stable release as of this writing.
Replace the value of the VER variable below with the current release version number.
VER=1.6.3wget https://github.com/iredmail/iRedMail/archive/refs/tags/${VER}.tar.gz
Extract the iRedMail tarball
Once the download is complete, extract the archive/
tar xzf ${VER}.tar.gz
Launch iRedMail Mail server installer
Navigate to iRedMail source directory and run the installer script as shown below;
cd iRedMail-${VER}bash iRedMail.shDuring the installation, you will be prompted to answer several questions required to setup iRedMail mail server.
Press ENTER to continue.
The setup is interactive and the first screen welcomes you and thank you for using iRedMail.
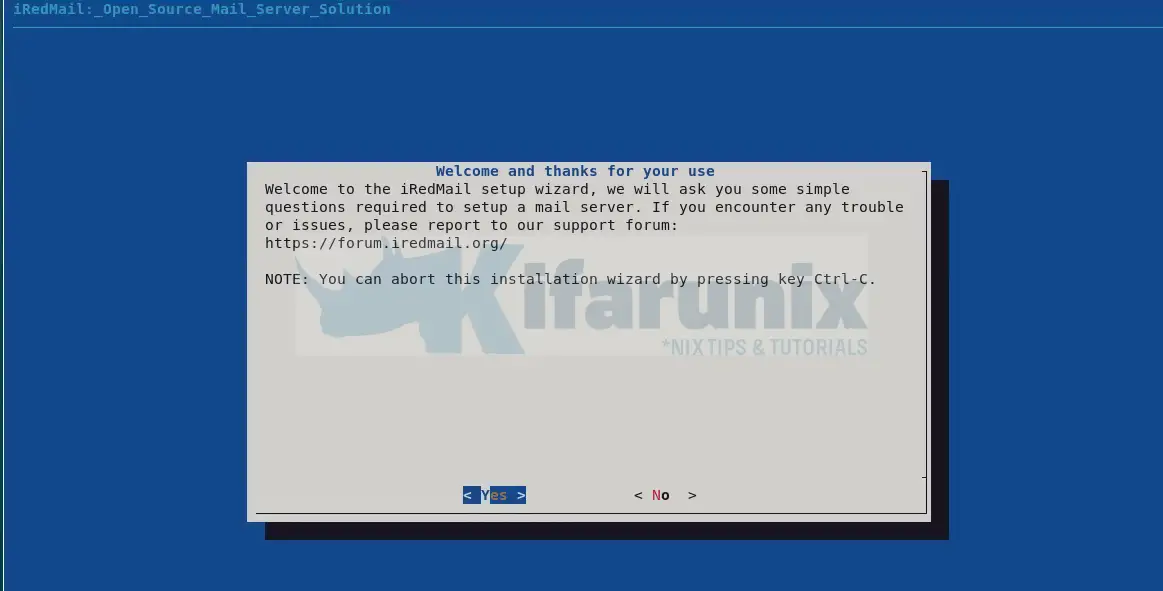
Press Enter to accept and proceed with the installation. As stated, you can press Ctrl+c cancel the installation.
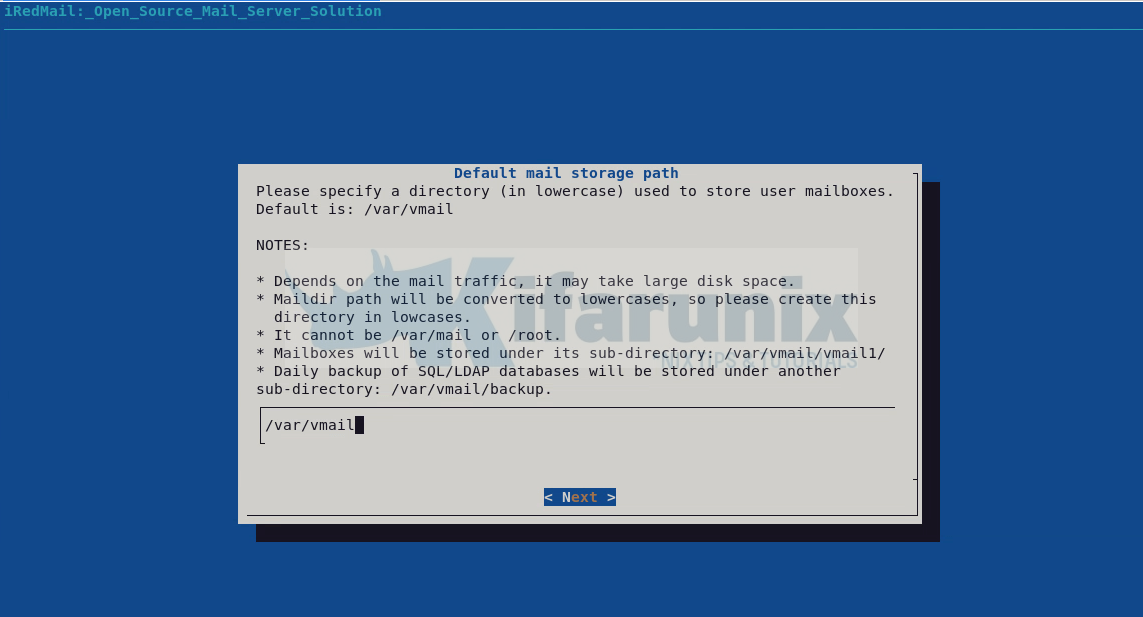
On the next screen, you are required to provide a full path where user mailboxes will be stored. The default path is /var/vmail.
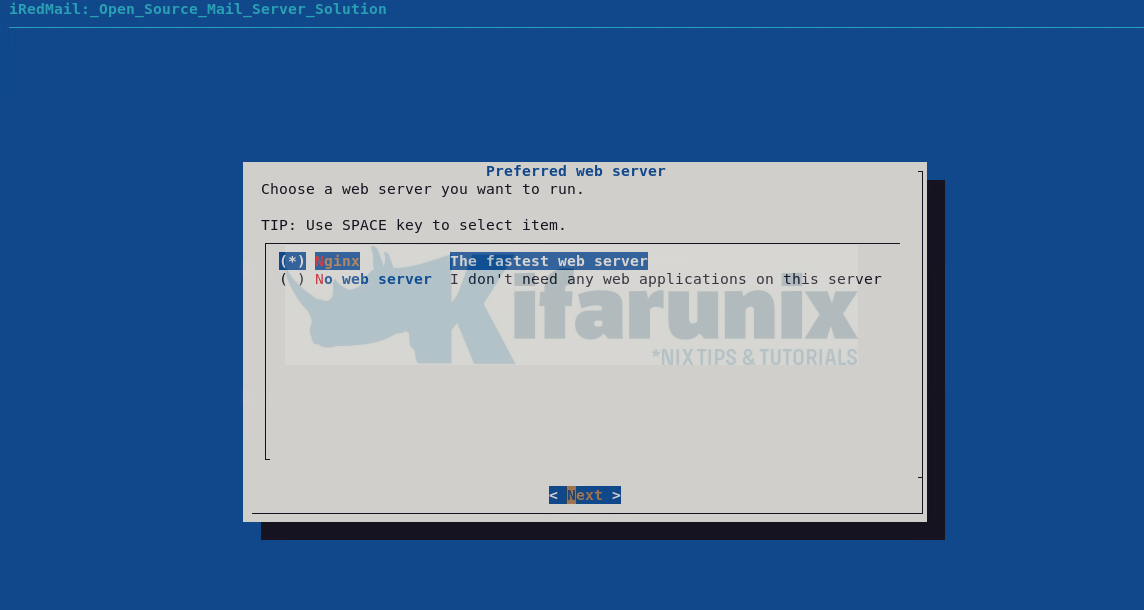
After that, select Next to choose the web server to use. In this case, am going with the default, Nginx.
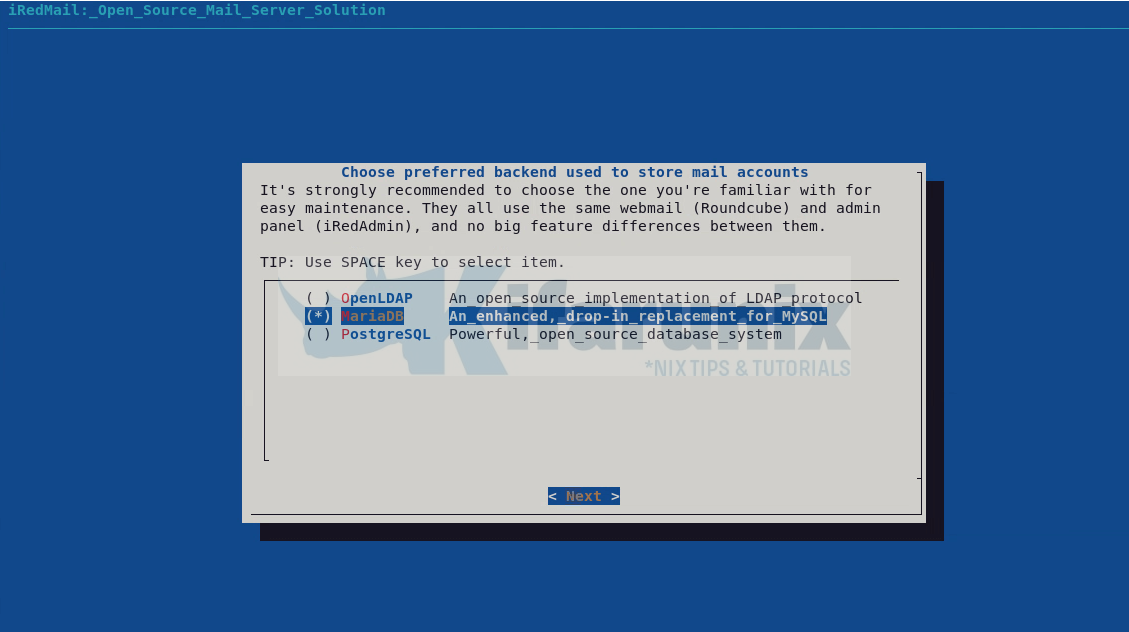
Next, you are required to choose the backend to store your mail accounts. In this case, we are going to select MySQL database as our backend. Use up and down arrow keys move between the options. Press Space Bar to select your option.
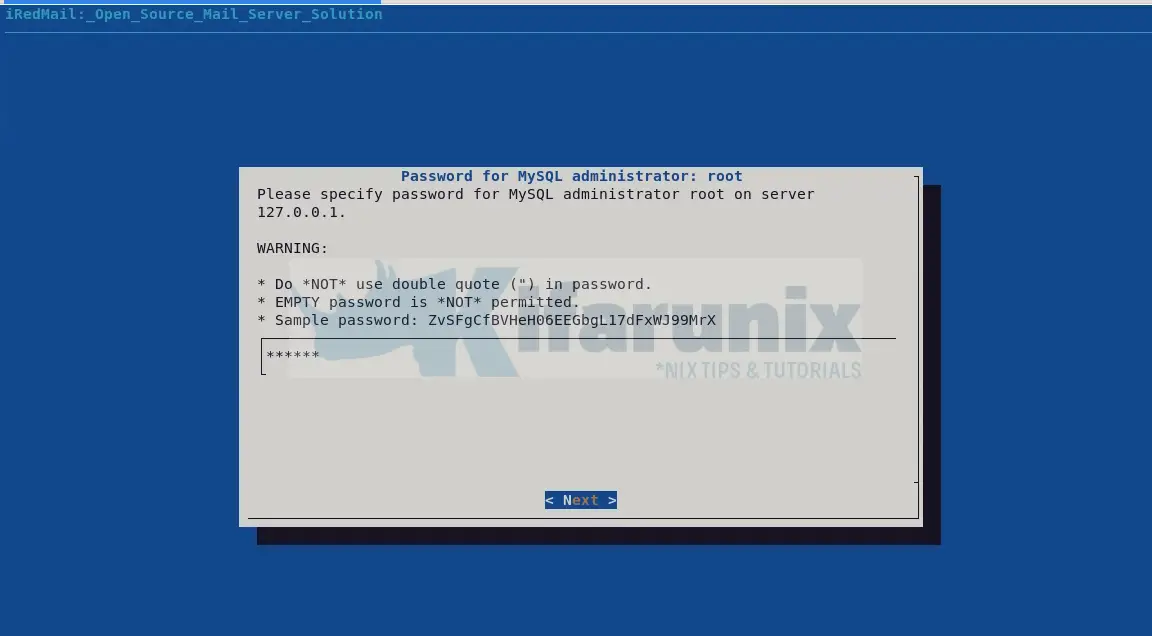
Next, you need to the set the MySQL root user password on the localhost server (127.0.0.1)
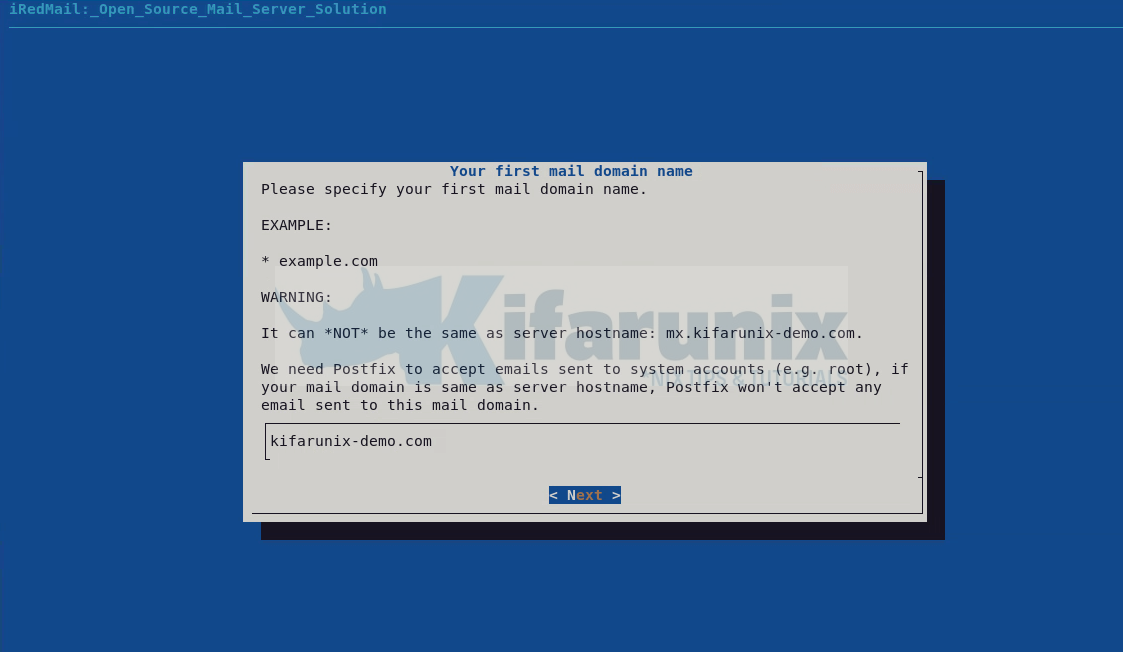
After that, proceed to the next screen to set your first mail domain.
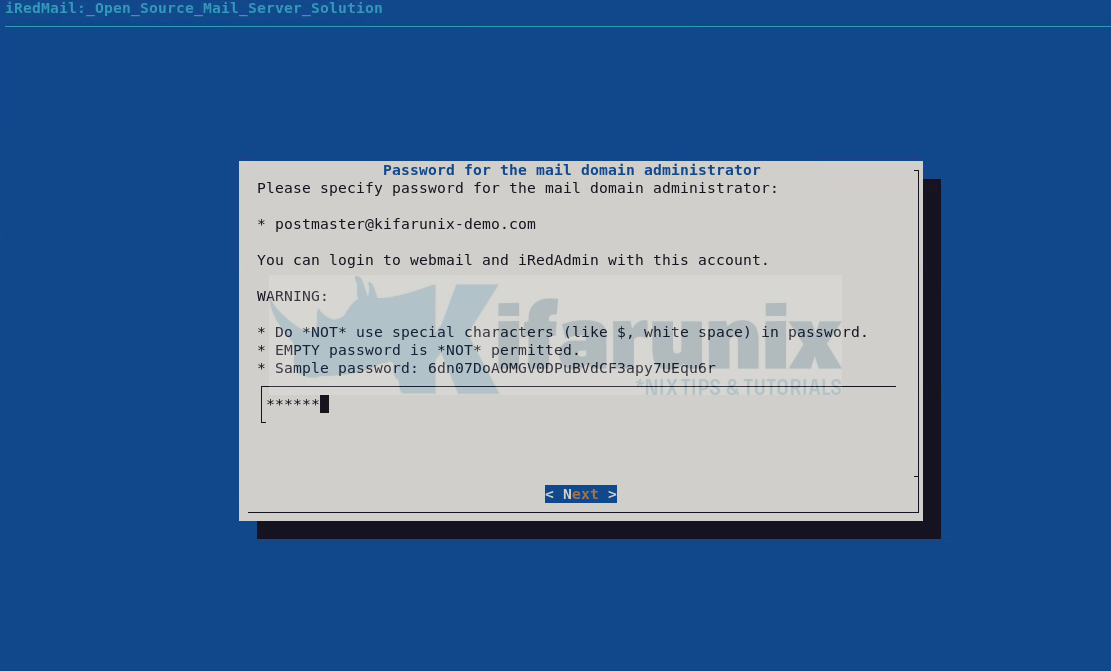
Set the password for the mail domain administrator. [email protected] is configured by default.
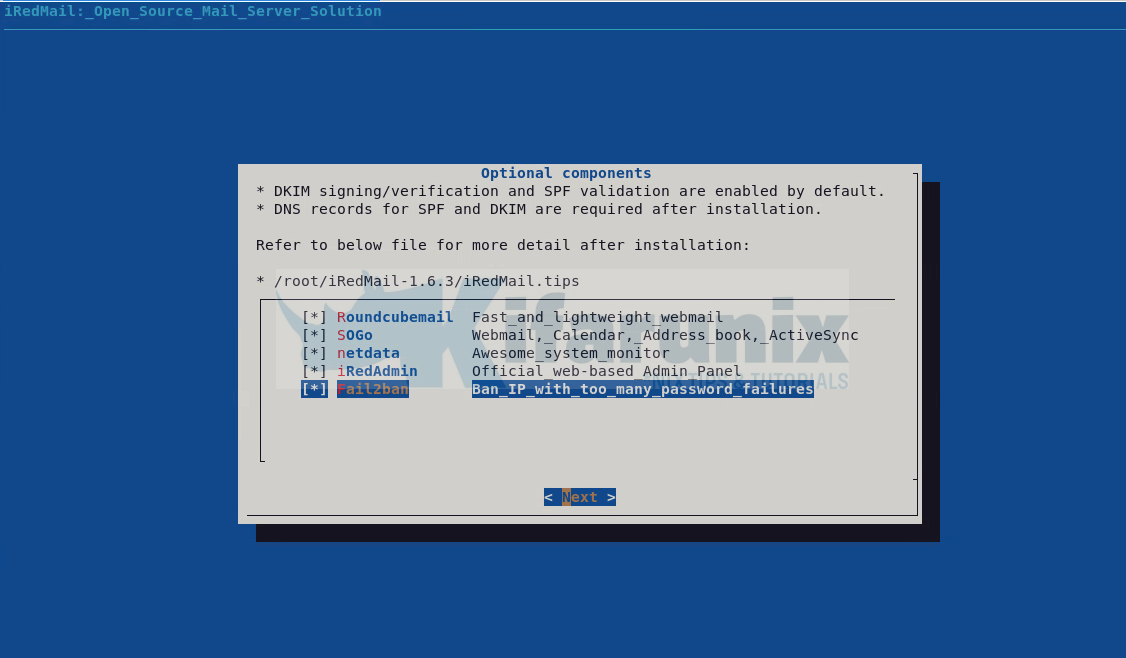
In the next screen, your are prompted to choose some of optional components that can be used to add extra functionalities your mail server. Select the components you require and press Next to proceed.
You are then required to review all the options you have chosen. iRedMail will install and configure the appropriate packages.
*************************************************************************
***************************** WARNING ***********************************
*************************************************************************
*                                                                       *
* Below file contains sensitive infomation (username/password), please  *
* do remember to *MOVE* it to a safe place after installation.          *
*                                                                       *
*   * /root/iRedMail-1.6.3/config
*                                                                       *
*************************************************************************
********************** Review your settings *****************************
*************************************************************************

* Storage base directory:               /var/vmail
* Mailboxes:
* Daily backup of SQL/LDAP databases:
* Store mail accounts in:               MariaDB
* Web server:                           Nginx
* First mail domain name:               kifarunix-demo.com
* Mail domain admin:                    [email protected]
* Additional components:                Roundcubemail SOGo netdata iRedAdmin Fail2ban

< Question > Continue? [y|N]y
If all the options are fine, type y and press Enter to proceed with installation.
After the installation, you are prompted on whether to use firewall rules provided by iRedMail. Type y and press Enter to accept.
======= Important SOGo post-installation note =======

SOGo database schemas are _not_ automatically upgraded by
the packaging system.

Please check the list of database schema upgrade scripts
inside /usr/share/doc/sogo/ and apply them if needed.

More details can be found in the Upgrading section:
https://sogo.nu/files/docs/SOGoInstallationGuide.html#_upgrading

Setting up sogo-activesync (5.8.4.20230712-1) ...
Processing triggers for rsyslog (8.2112.0-2ubuntu2.2) ...
Processing triggers for ufw (0.36.1-4build1) ...
Processing triggers for man-db (2.10.2-1) ...
Processing triggers for dbus (1.12.20-2ubuntu4.1) ...
Processing triggers for libc-bin (2.35-0ubuntu3.1) ...
Processing triggers for php8.1-cli (8.1.2-1ubuntu2.13) ...
Processing triggers for dovecot-core (1:2.3.16+dfsg1-3ubuntu2.2) ...
Processing triggers for php8.1-fpm (8.1.2-1ubuntu2.13) ...
NEEDRESTART-VER: 3.5
NEEDRESTART-KCUR: 5.15.0-76-generic
NEEDRESTART-KEXP: 5.15.0-76-generic
NEEDRESTART-KSTA: 1
NEEDRESTART-SVC: dbus.service
NEEDRESTART-SVC: networkd-dispatcher.service
NEEDRESTART-SVC: systemd-logind.service
NEEDRESTART-SVC: unattended-upgrades.service
NEEDRESTART-SVC: [email protected]

********************************************************************
* Start iRedMail Configurations
********************************************************************
[ INFO ] Generate self-signed SSL cert (4096 bits, expire in 10 years).
[ INFO ] Generate Diffie Hellman Group with openssl, please wait.
[ INFO ] Create required system accounts.
[ INFO ] Configure MariaDB database server.
[ INFO ] Setup daily cron job to backup SQL databases with /var/vmail/backup/backup_mysql.sh
[ INFO ] Configure Postfix (MTA).
[ INFO ] Configure Dovecot (POP3/IMAP/Managesieve/LMTP/LDA).
[ INFO ] Configure Nginx web server.
[ INFO ] Configure PHP.
[ INFO ] Configure mlmmj (mailing list manager).
[ INFO ] Configure ClamAV (anti-virus toolkit).
[ INFO ] Configure Amavisd-new (interface between MTA and content checkers).
[ INFO ] Configure SpamAssassin (content-based spam filter).
[ INFO ] Configure iRedAPD (postfix policy daemon).
[ INFO ] Configure iRedAdmin (official web-based admin panel).
[ INFO ] Configure Roundcube webmail.
[ INFO ] Configure SOGo Groupware (Webmail, Calendar, Address Book, ActiveSync).
[ INFO ] Configure Fail2ban (authentication failure monitor).
[ INFO ] Configure netdata (system and application monitor).

*************************************************************************
* iRedMail-1.6.3 installation and configuration complete.
*************************************************************************

< Question > Would you like to use firewall rules provided by iRedMail?
< Question > File: /etc/nftables.conf, with SSHD ports: 22. [Y|n] y
After that, restart firewall;
< Question > Restart firewall now (with ssh ports: 22)? [y|N]yAt the end of it, you will be presented with useful links to access various components of the iRedMail server.
[ INFO ] Updating ClamAV database (freshclam), please wait ...
********************************************************************
* URLs of installed web applications:
*
* - Roundcube webmail: https://mx.kifarunix-demo.com/mail/
* - SOGo groupware: https://mx.kifarunix-demo.com/SOGo/
* - netdata (monitor): https://mx.kifarunix-demo.com/netdata/
*
* - Web admin panel (iRedAdmin): https://mx.kifarunix-demo.com/iredadmin/
*
* You can login to above links with below credential:
*
* - Username: [email protected]
* - Password: hacker
*
*
********************************************************************
* Congratulations, mail server setup completed successfully. Please
* read below file for more information:
*
*   - /root/iRedMail-1.6.3/iRedMail.tips
*
* And it's sent to your mail account [email protected].
*
********************* WARNING **************************************
*
* Please reboot your system to enable all mail services.
*
********************************************************************
Reboot the Server
You mail server is successfully setup. Restart your server to enable all mail services
systemctl reboot -i
iRedMail Tips
You can also read the file, ~/iRedMail-${VER}/iRedMail.tips, to find out more information about your mail server.
Sample;
Admin of domain kifarunix-demo.com:

    * Account: [email protected]
    * Password: fA7o9zqkuBhgaofYbAdx

    You can login to iRedAdmin with this account, login name is full email address.

First mail user:
    * Username: [email protected]
    * Password: fA7o9zqkuBhgaofYbAdx
    * SMTP/IMAP auth type: login
    * Connection security: STARTTLS or SSL/TLS

    You can login to webmail with this account, login name is full email address.

* Enabled services:  rsyslog postfix mysql nginx php8.1-fpm dovecot clamav-daemon amavis clamav-freshclam sogo memcached fail2ban cron nftables


SSL cert keys (size: 4096):
    - /etc/ssl/certs/iRedMail.crt
    - /etc/ssl/private/iRedMail.key

Mail Storage:
    - Mailboxes: /var/vmail/vmail1
    - Mailbox indexes:
    - Global sieve filters: /var/vmail/sieve
    - Backup scripts and backup copies: /var/vmail/backup

MySQL:
    * Root user: root, Password: "fA7o9zqkuBhgaofYbAdx" (without quotes)
    * Bind account (read-only):
        - Username: vmail, Password: MNdHNdO3O5QHhNFsFHhyeDlypPcZ4o43
    * Vmail admin account (read-write):
        - Username: vmailadmin, Password: Tvjdkqvk2n7IsyLLraeAwIC9EYHIA1Nd
    * Config file: /etc/mysql/my.cnf
    * RC script: /etc/init.d/mysql

Virtual Users:
    - /root/iRedMail-1.6.3/samples/iredmail/iredmail.mysql
    - /root/iRedMail-1.6.3/runtime/*.sql

Backup MySQL database:
    * Script: /var/vmail/backup/backup_mysql.sh
    * See also:
        # crontab -l -u root

Postfix:
    * Configuration files:
        - /etc/postfix
        - /etc/postfix/aliases
        - /etc/postfix/main.cf
        - /etc/postfix/master.cf

    * SQL/LDAP lookup config files:
        - /etc/postfix/mysql

Dovecot:
    * Configuration files:
        - /etc/dovecot/dovecot.conf
        - /etc/dovecot/dovecot-ldap.conf (For OpenLDAP backend)
        - /etc/dovecot/dovecot-mysql.conf (For MySQL backend)
        - /etc/dovecot/dovecot-pgsql.conf (For PostgreSQL backend)
        - /etc/dovecot/dovecot-used-quota.conf (For real-time quota usage)
        - /etc/dovecot/dovecot-share-folder.conf (For IMAP sharing folder)
    * Syslog config file:
        - /etc/rsyslog.d/1-iredmail-dovecot.conf (present if rsyslog >= 8.x)
    * RC script: /etc/init.d/dovecot
    * Log files:
        - /var/log/dovecot/dovecot.log
        - /var/log/dovecot/sieve.log
        - /var/log/dovecot/lmtp.log
        - /var/log/dovecot/lda.log (present if rsyslog >= 8.x)
        - /var/log/dovecot/imap.log (present if rsyslog >= 8.x)
        - /var/log/dovecot/pop3.log (present if rsyslog >= 8.x)
        - /var/log/dovecot/sieve.log (present if rsyslog >= 8.x)
    * See also:
        - /var/vmail/sieve/dovecot.sieve
        - Logrotate config file: /etc/logrotate.d/dovecot

Nginx:
    * Configuration files:
        - /etc/nginx/nginx.conf
        - /etc/nginx/sites-available/00-default.conf
        - /etc/nginx/sites-available/00-default-ssl.conf
    * Directories:
        - /etc/nginx
        - /var/www/html
    * See also:
        - /var/www/html/index.html

php-fpm:
    * Configuration files: /etc/php/8.1/fpm/pool.d/www.conf

PHP:
    * PHP config file for Nginx:
    * Disabled functions: posix_uname,eval,pcntl_wexitstatus,posix_getpwuid,xmlrpc_entity_decode,pcntl_wifstopped,pcntl_wifexited,pcntl_wifsignaled,phpAds_XmlRpc,pcntl_strerror,ftp_exec,pcntl_wtermsig,mysql_pconnect,proc_nice,pcntl_sigtimedwait,posix_kill,pcntl_sigprocmask,fput,phpinfo,system,phpAds_remoteInfo,ftp_login,inject_code,posix_mkfifo,highlight_file,escapeshellcmd,show_source,pcntl_wifcontinued,fp,pcntl_alarm,pcntl_wait,ini_alter,posix_setpgid,parse_ini_file,ftp_raw,pcntl_waitpid,pcntl_getpriority,ftp_connect,pcntl_signal_dispatch,pcntl_wstopsig,ini_restore,ftp_put,passthru,proc_terminate,posix_setsid,pcntl_signal,pcntl_setpriority,phpAds_xmlrpcEncode,pcntl_exec,ftp_nb_fput,ftp_get,phpAds_xmlrpcDecode,pcntl_sigwaitinfo,shell_exec,pcntl_get_last_error,ftp_rawlist,pcntl_fork,posix_setuid

ClamAV:
    * Configuration files:
        - /etc/clamav/clamd.conf
        - /etc/clamav/freshclam.conf
        - /etc/logrotate.d/clamav
    * RC scripts:
            + /etc/init.d/clamav-daemon
            + /etc/init.d/clamav-freshclam

Amavisd-new:
    * Configuration files:
        - /etc/amavis/conf.d/50-user
        - /etc/postfix/master.cf
        - /etc/postfix/main.cf
    * RC script:
        - /etc/init.d/amavis
    * SQL Database:
        - Database name: amavisd
        - Database user: amavisd
        - Database password: IKI5MIUn24SJRtqiljodR4LGzSET00cW

DNS record for DKIM support:

; key#1 2048 bits, s=dkim, d=kifarunix-demo.com, /var/lib/dkim/kifarunix-demo.com.pem
dkim._domainkey.kifarunix-demo.com.	3600 TXT (
  "v=DKIM1; p="
  "MIIBIjANBgkqhkiG9w0BAQEFAAOCAQ8AMIIBCgKCAQEAuFtsYHji0+138NLpjt7H"
  "2RovbYjY7MqiwAL6ixTnzSzoXWsDUf/vY3n3HlCDlqZeHV3pU7hifSuZtVPKsCT1"
  "ChYn3fnaZiofhNmC2WuXA9pIoAL+0mUiNKMitj8MK3OEYLpqcIh0E2RgqMMcrvXa"
  "HxfsZmYIGylcF0wcn4h44t8YSzOTccacLPxdjuzT0R+dbl9pvOdzLW9NKHu0ipd1"
  "eomT7oPc/pvux9+es4xjLKy1ru60cCLsaHyIVGqk+pa55PHNXTuoZz3OvLnQ1KkQ"
  "XV4ixI1Abz0QQ/QjUOAV/GePEY3VAynPhh0jPgs903jFGWJJPW1z8RRa0a8FwHMP"
  "2QIDAQAB")
SpamAssassin:
    * Configuration files and rules:
        - /etc/mail/spamassassin
        - /etc/mail/spamassassin/local.cf

iRedAPD - Postfix Policy Server:
    * Version: 5.3
    * Listen address: 127.0.0.1, port: 7777
    * SQL database account:
        - Database name: iredapd
        - Username: iredapd
        - Password: MtZsW1ZMc9CNroZefC0IvhfXsaI9Zvjj
    * Configuration file:
        - /opt/iredapd/settings.py
    * Related files:
        - /opt/iRedAPD-5.3
        - /opt/iredapd (symbol link to /opt/iRedAPD-5.3

iRedAdmin - official web-based admin panel:
    * Version: 2.3
    * Root directory: /opt/www/iRedAdmin-2.3
    * Config file: /opt/www/iRedAdmin-2.3/settings.py
    * Web access:
        - URL: https://mx.kifarunix-demo.com/iredadmin/
        - Username: [email protected]
        - Password: fA7o9zqkuBhgaofYbAdx
    * SQL database:
        - Database name: iredadmin
        - Username: iredadmin
        - Password: aBQSQZ1BtOHjdThM47u400gcoMLTyLTg

Roundcube webmail: /opt/www/roundcubemail-1.6.1
    * Config file: /opt/www/roundcubemail-1.6.1/config
    * Web access:
        - URL: http://mx.kifarunix-demo.com/mail/ (will be redirected to https:// site)
        - URL: https://mx.kifarunix-demo.com/mail/ (secure connection)
        - Username: [email protected]
        - Password: fA7o9zqkuBhgaofYbAdx
    * SQL database account:
        - Database name: roundcubemail
        - Username: roundcube
        - Password: snUVImKkWSLAag43khYGuk69iUtruYZH
    * Cron job:
        - Command: "crontab -l -u root"

SOGo Groupware:
    * Web access: httpS://mx.kifarunix-demo.com/SOGo/
    * Main config file: /etc/sogo/sogo.conf
    * Nginx template file: /etc/nginx/templates/sogo.tmpl
    * Database:
        - Database name: sogo
        - Database user: sogo
        - Database password: H68s637rHRgE58lxVIQ0exIbP3ySIAYQ
    * SOGo sieve account (Warning: it's a Dovecot Master User):
        - file: /etc/sogo/sieve.cred
        - username: [email protected]
        - password: s6ovcPdzgQjLBzBqUlKiOxOfcOcH4V9v
    * See also:
        - cron job of system user: sogo

netdata (monitor):
    - Config files:
        - All config files: /opt/netdata/etc/netdata
        - Main config file: /opt/netdata/etc/netdata/netdata.conf
        - Modified modular config files:
            - /opt/netdata/etc/netdata/go.d
            - /opt/netdata/etc/netdata/python.d
    - HTTP auth file (if you need a new account to access netdata, please
      update this file with command like 'htpasswd' or edit manually):
        - /etc/nginx/netdata.users
    - Log directory: /opt/netdata/var/log/netdata
    - SQL:
        - Username: netdata
        - Password: mc3J8Bi8TMZLuPEbmc3B5qAUuwyy6z4m
        - NOTE: No database required by netdata.
There is also a SENSITIVE file that you need to pay attention to; ~/iRedMail-${VER}/config. This file contains usernames and passwords. Therefore, save the contents in a safe place and remove it immediately after the installation
rm ~/iRedMail-${VER}/config
Accessing iRedMail Web Admin Panel
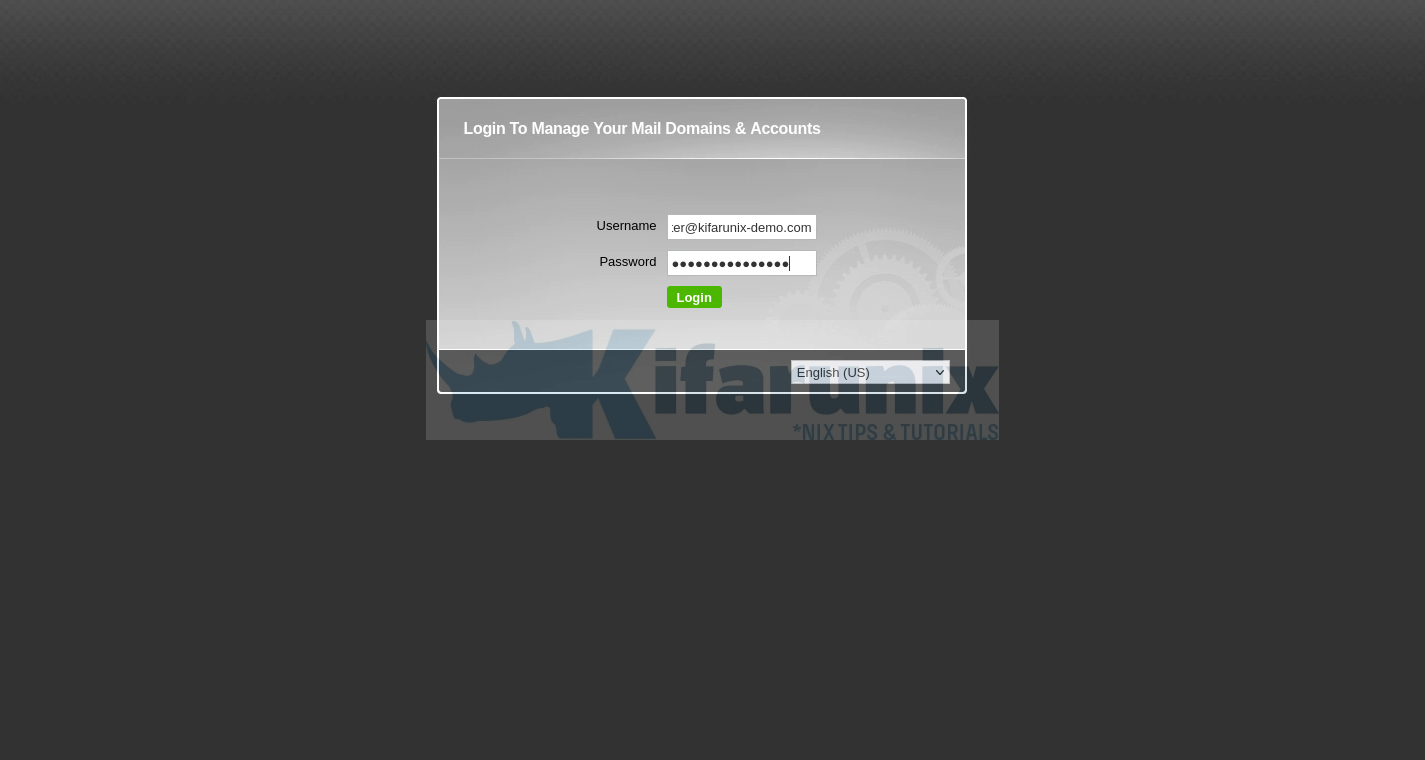
To access the iRedMail web admin Panel, use the URL, https://<your-domain>/iredadmin/. You may encounter certificate warnings. This is because self-signed certificate is used by default. You should however consider obtaining a commercial SST/TLS certificates for use with iRedMail.
Get the details from the iRedMail.tips file.
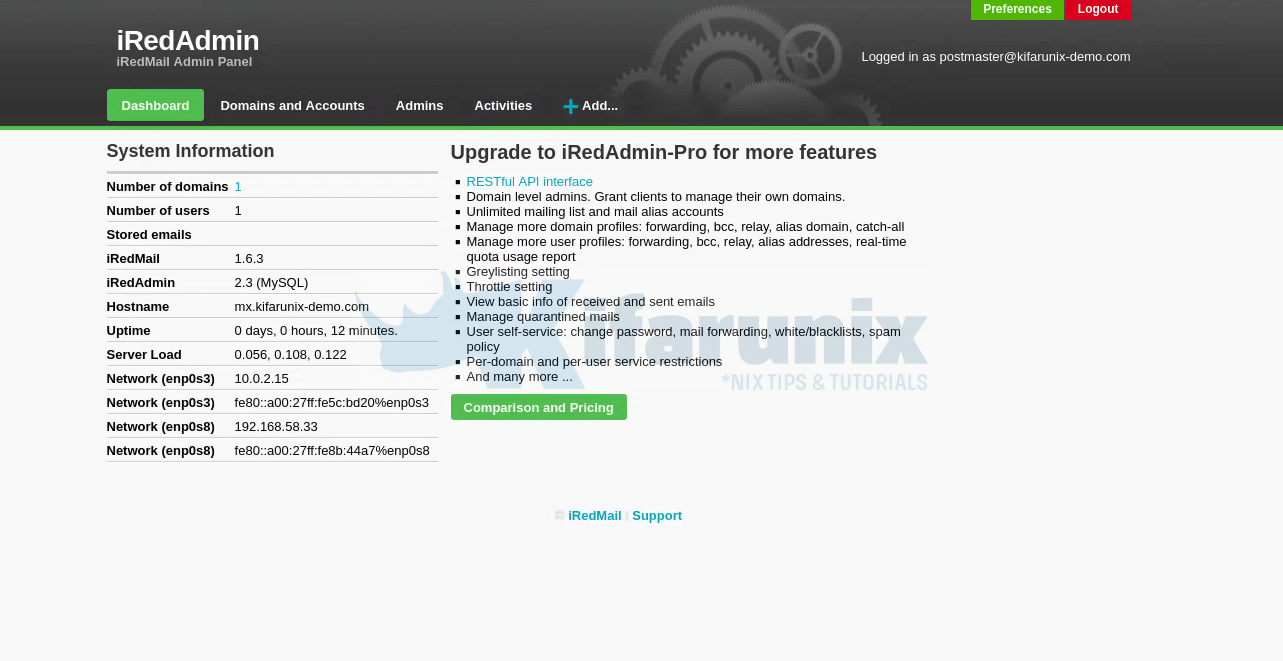
When you login, you will land of iRedMail Dashboard.
Accessing Roundcube Web Mail Client
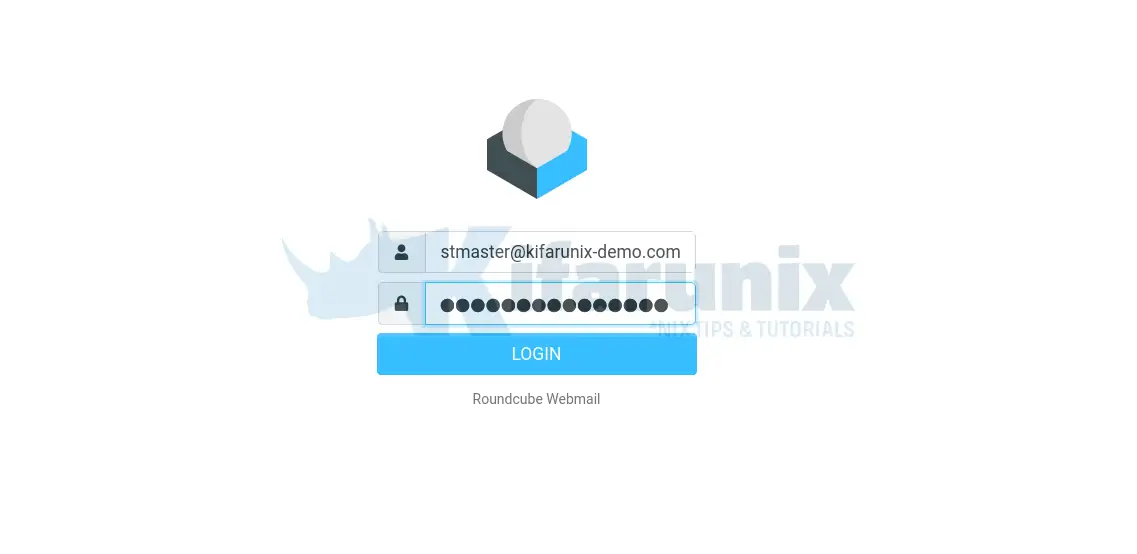
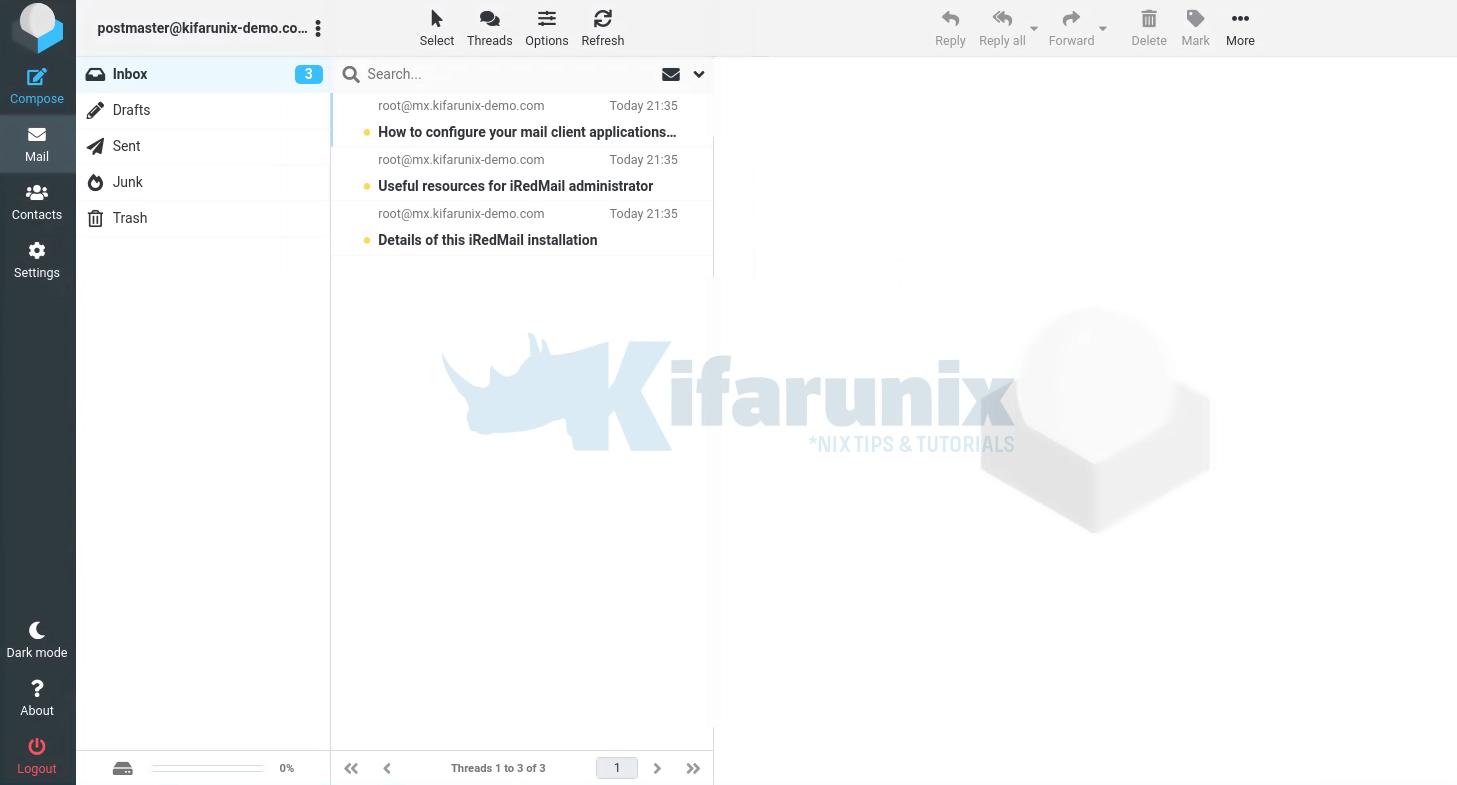
You can also login to Roundcube webmail to read the mails that were generated after the installation. To login to Roundcube, use the URL; https://<your-domain>.com/mail/.
Get the login details from the iRedMail.tips file.
You may also be interested in our article on how to install and setup Roundcube Webmail on Debian 12/11/10.
Read more on the documentation.
Other tutorials
Configure Sendmail to Use Gmail Relay on Ubuntu 18.04/Debian 10/9

