
In this tutorial, you will learn how to install Gitlab CE on Debian 11. GitLab is an open source end-to-end software development platform with built-in version control, issue tracking, code review, CI/CD, etc. It is is a complete DevOps platform, delivered as a single application.
Table of Contents
Read more about what Gitlab offers on Gitlab Features page.
You can also check how to configure Gitlab to sent mails via Gmail SMTP;
Configure Gitlab to use Gmail SMTP for Outbound Mails
Installing Gitlab CE on Debian 11
Gitlab Installation Requirements
Below are the bare minimums to install Gitlab with SSL/TLS certificates on Debian 11.
Hardware Requirements
Ensure the system you want to host with Gitlab has met the following minimum hardware requirements;
- Storage: Enough storage depending on the size of the repositories you want to store in GitLab.
- CPU: At least 4 cores. (supports up to 500 users).
- Memory: At least 4GB RAM (supports up to 500 users).
- Swap: At least 2GB of swap memory.
Software Requirements
- GitLab requires Ruby (MRI) 2.6.
- The minimum required Go version is 1.13.
- Node.js 10.13.0 or higher is required. Node 12.x is recommended.
- GitLab 13.0 and later requires Redis version 4.0 or higher.
Database Requirements
Gitlab supports PostgreSQL database only. With the following being table outlining required version of PostgreSQL database for a specific version of Gitlab;
| GitLab version | Minimum PostgreSQL version |
|---|---|
| 10.0 | 9.6 |
| 13.0 | 11 |
| 14.0 | 12 |
Read more about the requirements of installing Gitlab on Requirements page.
Install Gitlab CE
Run system update;
apt updateRun the command below to install some required package dependencies.
apt install curl tzdata ca-certificates openssh-server sudoInstalling Gitlab CE
In this tutorial, we are installing Gitlab Community Edition, CE.
There are two ways in which you can install Gitlab CE.
Install Gitlab CE from APT Repository
To install Gitlab CE from APT repository on Debian 11, you need to install the Gitlab CE repo by running the command below;
curl -sS https://packages.gitlab.com/install/repositories/gitlab/gitlab-ce/script.deb.sh | sudo bashOnce the Gitlab package repo is done, install Gitlab on Debian 11;
NOTE that as of this writing, there are not repos for Debian 11 bullseye. In this case, to install Gitlab-CE on Debian 11 from APT repo, you can use Debian 10 buster repos.
Thus, update the repo accordingly;
sed -i 's/bullseye/buster/' /etc/apt/sources.list.d/gitlab_gitlab-ce.listapt updateapt install gitlab-ceReading package lists... Done
Building dependency tree... Done
Reading state information... Done
The following NEW packages will be installed:
gitlab-ce
0 upgraded, 1 newly installed, 0 to remove and 28 not upgraded.
Need to get 954 MB of archives.
After this operation, 2,570 MB of additional disk space will be used.
Get:1 https://packages.gitlab.com/gitlab/gitlab-ce/debian buster/main amd64 gitlab-ce amd64 14.3.3-ce.0 [954 MB]
Fetched 954 MB in 1min 29s (10.7 MB/s)
Selecting previously unselected package gitlab-ce.
(Reading database ... 30799 files and directories currently installed.)
Preparing to unpack .../gitlab-ce_14.3.3-ce.0_amd64.deb ...
Unpacking gitlab-ce (14.3.3-ce.0) ...
Setting up gitlab-ce (14.3.3-ce.0) ...
It looks like GitLab has not been configured yet; skipping the upgrade script.
*. *.
*** ***
***** *****
.****** *******
******** ********
,,,,,,,,,***********,,,,,,,,,
,,,,,,,,,,,*********,,,,,,,,,,,
.,,,,,,,,,,,*******,,,,,,,,,,,,
,,,,,,,,,*****,,,,,,,,,.
,,,,,,,****,,,,,,
.,,,***,,,,
,*,.
_______ __ __ __
/ ____(_) /_/ / ____ _/ /_
/ / __/ / __/ / / __ `/ __ \
/ /_/ / / /_/ /___/ /_/ / /_/ /
\____/_/\__/_____/\__,_/_.___/
Thank you for installing GitLab!
GitLab was unable to detect a valid hostname for your instance.
Please configure a URL for your GitLab instance by setting `external_url`
configuration in /etc/gitlab/gitlab.rb file.
Then, you can start your GitLab instance by running the following command:
sudo gitlab-ctl reconfigure
For a comprehensive list of configuration options please see the Omnibus GitLab readme
https://gitlab.com/gitlab-org/omnibus-gitlab/blob/master/README.md
Help us improve the installation experience, let us know how we did with a 1 minute survey:
https://gitlab.fra1.qualtrics.com/jfe/form/SV_6kVqZANThUQ1bZb?installation=omnibus&release=14-3
Installing Gitlab CE using DEB Binary package
To install Gitlab using DEB binary package, download the binary from the Gitlab packages page and install it manually using apt or dpkg commands;
wget -O gitlab-ce_14.3.3-ce.0_arm64.deb https://packages.gitlab.com/gitlab/gitlab-ce/packages/ubuntu/focal/gitlab-ce_14.3.3-ce.0_arm64.deb/download.debapt install ./gitlab-ce_14.3.3-ce.0_arm64.debConfigure Gitlab CE on Debian 11
Once the Gitlab CE package is installed, you can install SSL/TLS certificates. There are two ways in which you can configure Gitlab with SSL/TLS certificates;
- Using free and automated HTTPS with Let’s Encrypt
- Manually configuring HTTPS with your own certificates
In this demo, we are going to manually setup Gitlab with SSL certs using our own self signed certificates. If you are going to expose your gitlab server to public internet, you can consider using the commercial TLS certs.
Create a directory to store the SSL certs;
mkdir /etc/gitlab/sslNext, generate the self signed SSL certs by running the command below. Be sure to replace the certificates details accordingly in the command below;
openssl req -newkey rsa:4096 -x509 -sha512 -days 3650 -nodes -out /etc/gitlab/ssl/kifarunix-demo.crt -keyout /etc/gitlab/ssl/kifarunix-demo.key -subj "/C=US/ST=California/L=San Francisco/O=Kifarunix-demo Ltd/CN=*.kifarunix-demo.com/"Copy the public certificate file only into the /etc/gitlab/trusted-certs directory.
mkdir /etc/gitlab/trusted-certscp /etc/gitlab/ssl/kifarunix-demo.crt /etc/gitlab/trusted-certs/Want to use Let’s Encrypt instead? Check this link.
Configure a URL for GitLab Server on Debian 11
Once the certificates are generated, edit the /etc/gitlab/gitlab.rb configuration file and replace the value of the external_url parameter to your Gitlab CE server URL to enable HTTPS for the domain. Replace the domain name appropriately.
Replace the Gitlab external URL domain.
sed -i '/external_url/s/example.com/kifarunix-demo.com/' /etc/gitlab/gitlab.rbEnable Gitlab SSL Settings
Next, scroll down to Gitlab NGINX section and make the following adjustments (as per your setup).
vim /etc/gitlab/gitlab.rb################################################################################
## GitLab NGINX
##! Docs: https://docs.gitlab.com/omnibus/settings/nginx.html
################################################################################
nginx['enable'] = true
nginx['client_max_body_size'] = '250m'
nginx['redirect_http_to_https'] = true
...
...
nginx['ssl_certificate'] = "/etc/gitlab/ssl/kifarunix-demo.crt"
nginx['ssl_certificate_key'] = "/etc/gitlab/ssl/kifarunix-demo.key"
...
...
nginx['ssl_protocols'] = "TLSv1.2 TLSv1.3"
There are quite number of configuration option options. Go through the configuration and enable ssl for any other service you need.
Save and exit the configuration file once you are done with the configurations.
Reconfigure Omnibus GitLab
Once the setup is done, reconfigure Omnibus Gitlab. Reconfiguration is needed whenever there is any configuration changes.
gitlab-ctl reconfigureSample command output;
...
Running handlers:
Running handlers complete
Chef Infra Client finished, 567/1516 resources updated in 14 minutes 01 seconds

Notes:
Default admin account has been configured with following details:
Username: root
Password: You didn't opt-in to print initial root password to STDOUT.
Password stored to /etc/gitlab/initial_root_password. This file will be cleaned up in first reconfigure run after 24 hours.

NOTE: Because these credentials might be present in your log files in plain text, it is highly recommended to reset the password following https://docs.gitlab.com/ee/security/reset_user_password.html#reset-your-root-password.

gitlab Reconfigured!
Based on the summary, Gitlab login username is root and the password is stored in the file, /etc/gitlab/initial_root_password.
grep Password: /etc/gitlab/initial_root_passwordPassword: kidvQYseZEKzHrtorZ44wLr6ovBbu5bTvgUykFSX354=If you want to reset Gitlab user password, run the command below;
gitlab-rake "gitlab:password:reset"The command will prompt to enter the username and password.
You can specify the username in command line. Replace the username with respective username.
gitlab-rake "gitlab:password:reset[username]"Like;
gitlab-rake "gitlab:password:reset[root]"Check the status of Gitlab services;
gitlab-ctl statusrun: alertmanager: (pid 2380) 407s; run: log: (pid 2072) 468s
run: gitaly: (pid 2415) 406s; run: log: (pid 1507) 1209s
run: gitlab-exporter: (pid 2350) 410s; run: log: (pid 2012) 485s
run: gitlab-workhorse: (pid 2327) 411s; run: log: (pid 1917) 545s
run: grafana: (pid 2400) 407s; run: log: (pid 2283) 427s
run: logrotate: (pid 1430) 1222s; run: log: (pid 1438) 1221s
run: nginx: (pid 1951) 511s; run: log: (pid 1962) 507s
run: node-exporter: (pid 2342) 410s; run: log: (pid 1993) 493s
run: postgres-exporter: (pid 2392) 407s; run: log: (pid 2110) 461s
run: postgresql: (pid 1644) 1129s; run: log: (pid 1656) 1126s
run: prometheus: (pid 2364) 409s; run: log: (pid 2049) 475s
run: puma: (pid 1870) 560s; run: log: (pid 1878) 557s
run: redis: (pid 1465) 1216s; run: log: (pid 1476) 1215s
run: redis-exporter: (pid 2352) 409s; run: log: (pid 2037) 480s
run: sidekiq: (pid 1888) 554s; run: log: (pid 1899) 551s
If you need to restart all Gitlab services;
gitlab-ctl restartYou can as well use start|stop command options to control Gitlab services.
To start, stop or restart an individual component, eg nginx;
gitlab-ctl start|stop|restart nginxAccessing Gitlab Web Interface
The basic install of Gitlab CE on Debian 11 is now done. All you can do now is to access the Gitlab web interface, https://server-IP-or-domain.
If UFW is running, you need to open port 443/80 to allow external access.
ufw allow "Apache Full"To allow from specific IPs;
ufw allow from 192.168.58.1 to any port 80 proto tcp
ufw allow from 192.168.58.1 to any port 443 proto tcp
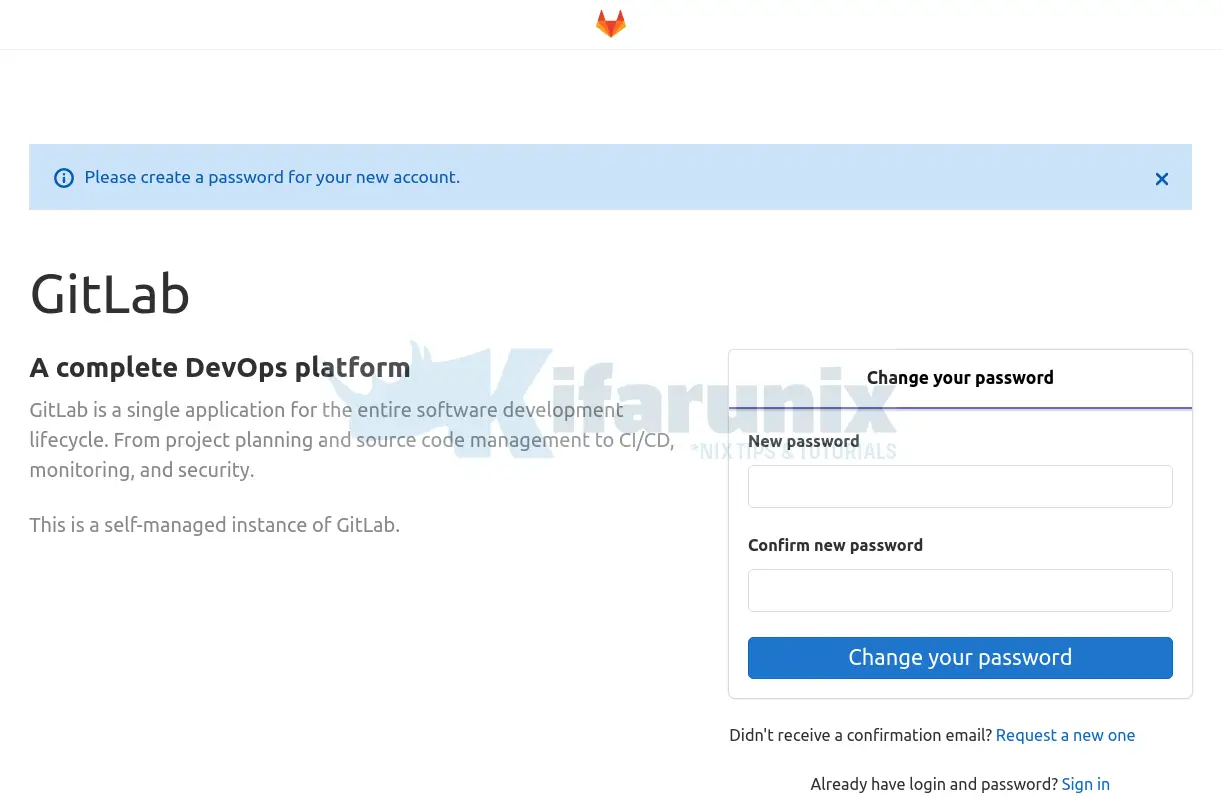
Login to Gitlab web user interface as root user with password provided above.
Upon successful login, such an interface welcomes you.

Gitlab web dashboard for user root;

Gitlab is now installed and setup, basically. That marks the end of our tutorial.
Reference
Download and install Gitlab on Ubuntu
