This tutorial will guide you through how to import Kali Linux Image into OpenStack. Kali Linux is a powerful and versatile Linux distribution widely used for penetration testing, cybersecurity research, and ethical hacking. Importing Kali Linux 2024.2 into an OpenStack environment allows you to leverage the scalability and flexibility of cloud infrastructure for your security operations of the current release version of Kali Linux.
Table of Contents
Importing Kali Linux 2024.x into OpenStack
Install and Setup OpenStack
We assume that you already have a running OpenStack. If you are yet to set it up, then check our previous guides on how to deploy OpensSack using Kolla-Ansible or DevStack.
How to install and setup OpenStack
Download and Prepare Kali Linux Image for Import into OpenStack
Kali Linux is available for different platforms. In this particular context, you can choose to;
- Download raw ISO file installer and prepare your Kali Linux machine yourself to your liking on your virtualization environment, or
- Download a ready made cloud version that is available as a generic cloud image. This is a headless version with no GUI installed.
- It is also available as virtual machines for various virtualization platforms. Using KVM/QEMU qcow2 images is a recommended for deploying instances within OpenStack. However, the available virtual machine requires a whooping 80G virtual disk! As such, I recommend that you setup your own with minimal disk space! Remember once it is on OpenStack, you can resize the disk space to any feasible size.
In this guide, we are interested in running the GUI version of Kali Linux 2024.2 on OpenStack. Therefore, we will proceed to install and setup our Kali Linux 2024.2 virtual machine on KVM for OpenStack.
Our previous guide provides a comprehensive guide on how to prepare OpenStack image on KVM before import.
Install and Setup OpenStack Image on KVM
Follow through the guide to install your Kali Linux 2024.2. Remember to use respective installation ISO files (https://cdimage.kali.org/kali-2024.2/kali-linux-2024.2-installer-amd64.iso).
The names assigned to the VM is not really a matter as you can later name the virtual machine to anything you like once it is on OpenStack.
A note on Kali Linux disk partitioning
We want to be able to automatically resize the disk of the instance while running on OpenStack. Now, default partition, while it is okay, use logical and primary partitions. This will pause a challenge to automatic disk resize using cloud-init and whenever you use a bigger flavor, you have to login to the instance and manually adjust the disk size to match that of the assigned flavor.
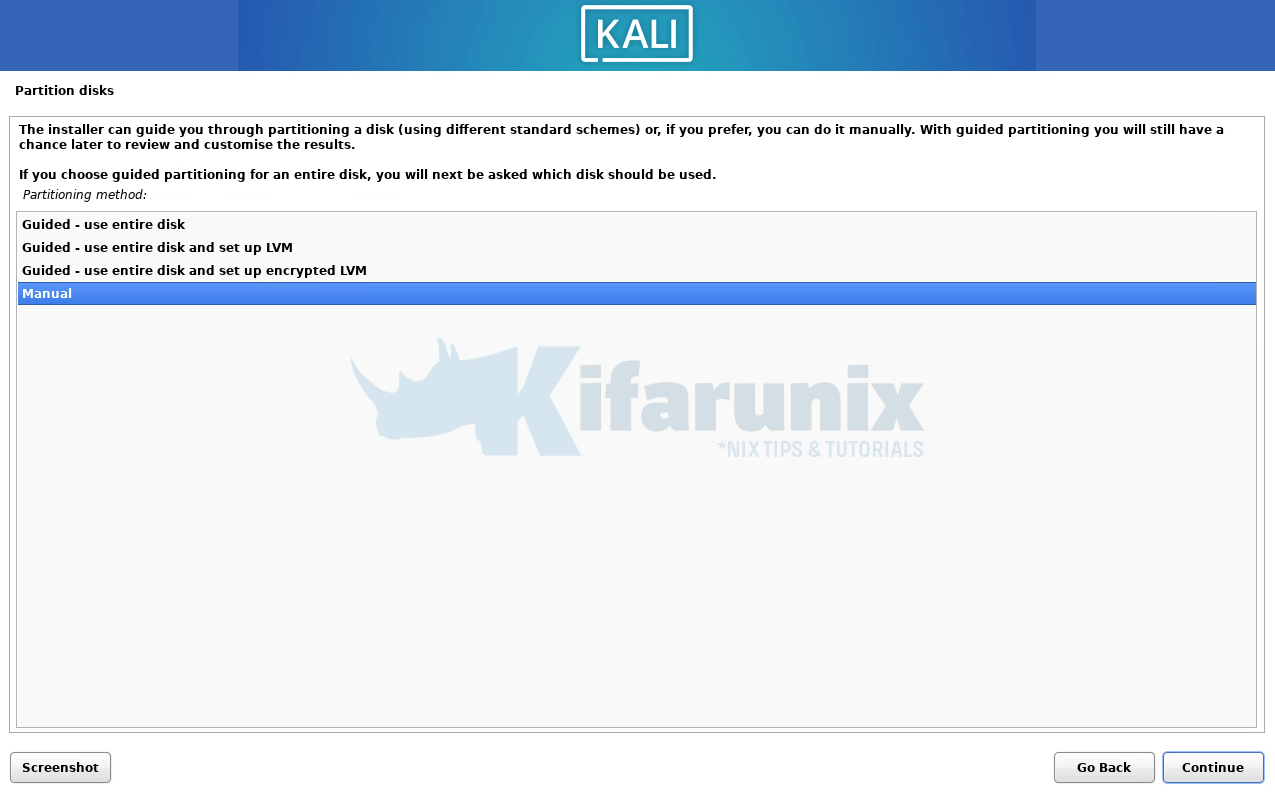
Therefore, I recommend manual partitioning as follows:
Select manual partition;
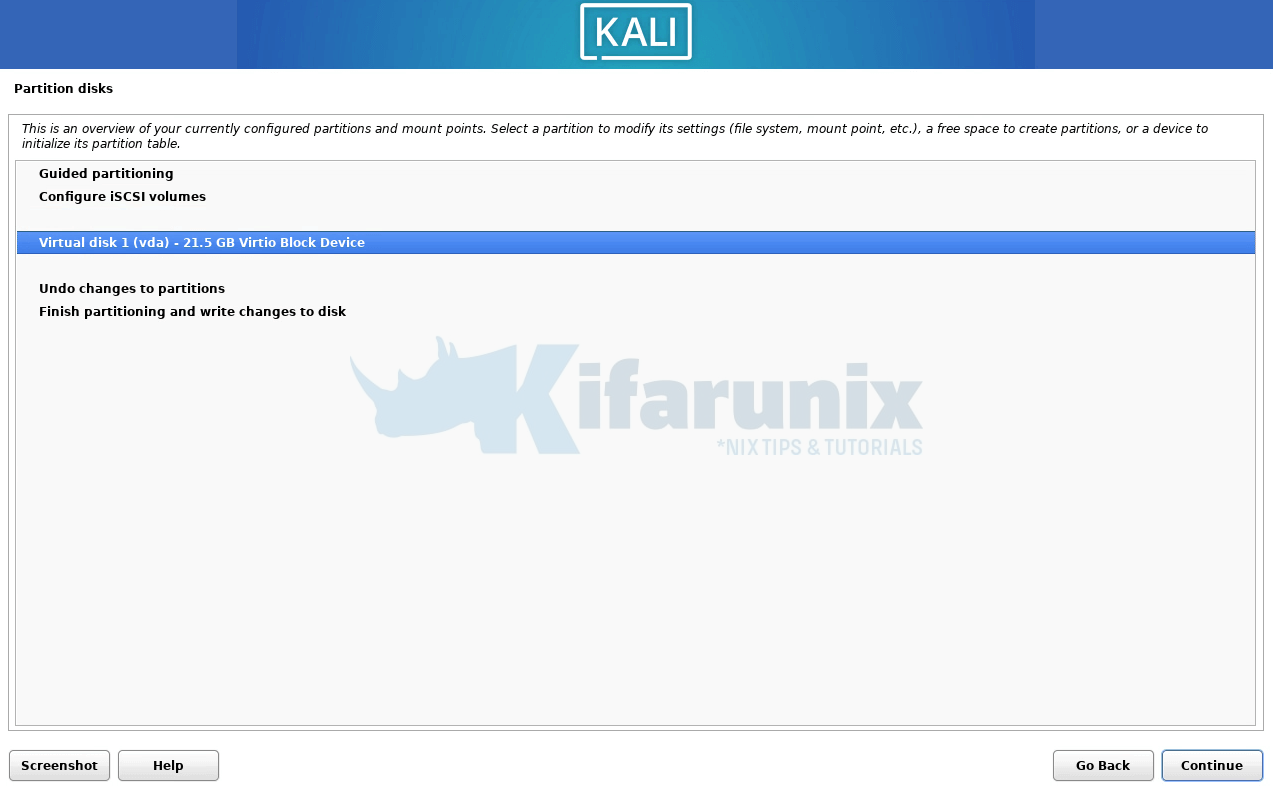
Select device to use;
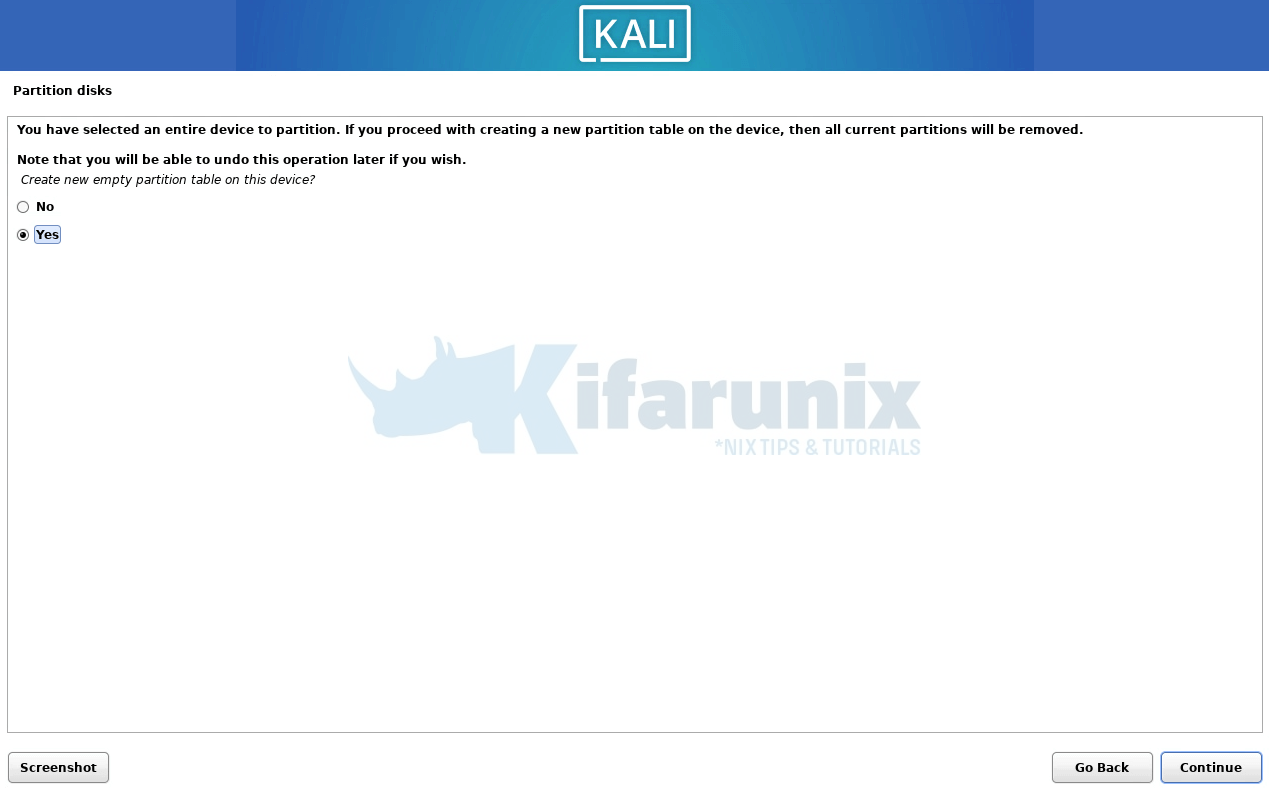
Create empty partition
Select created partition;
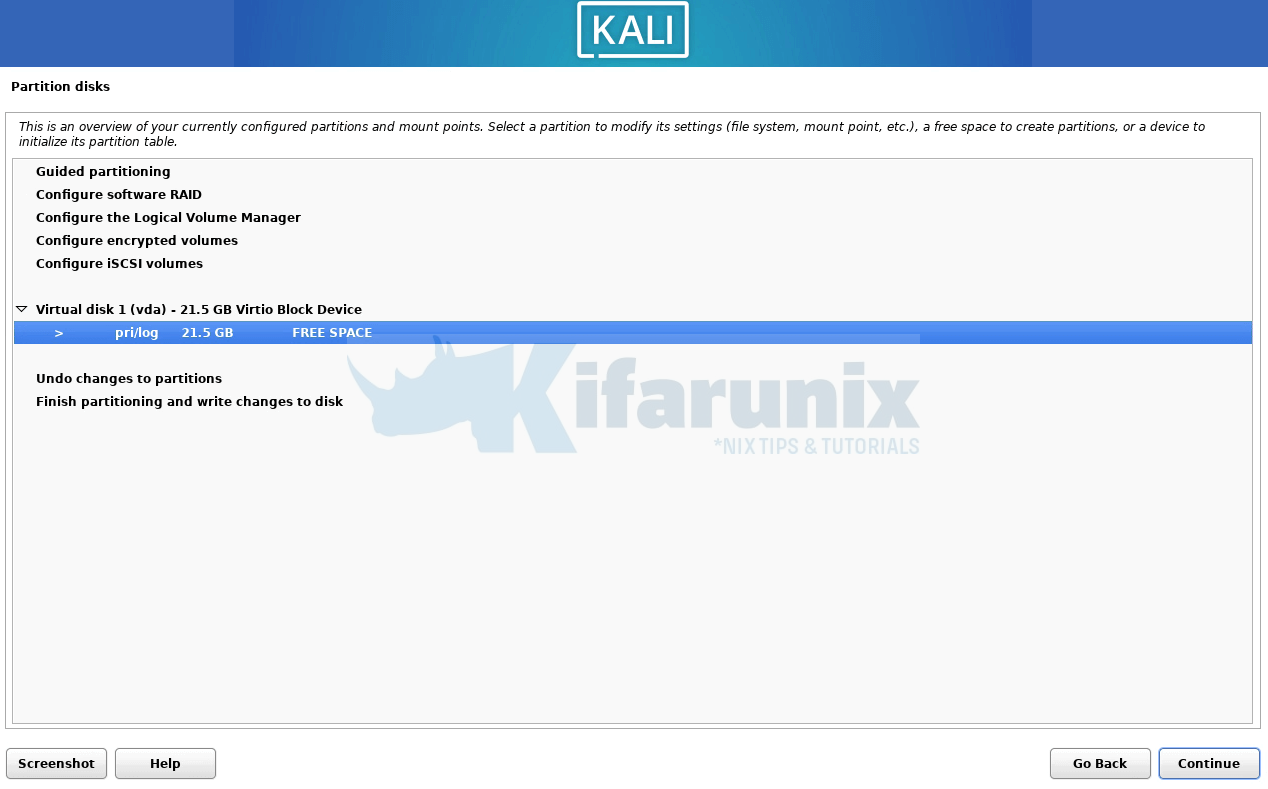
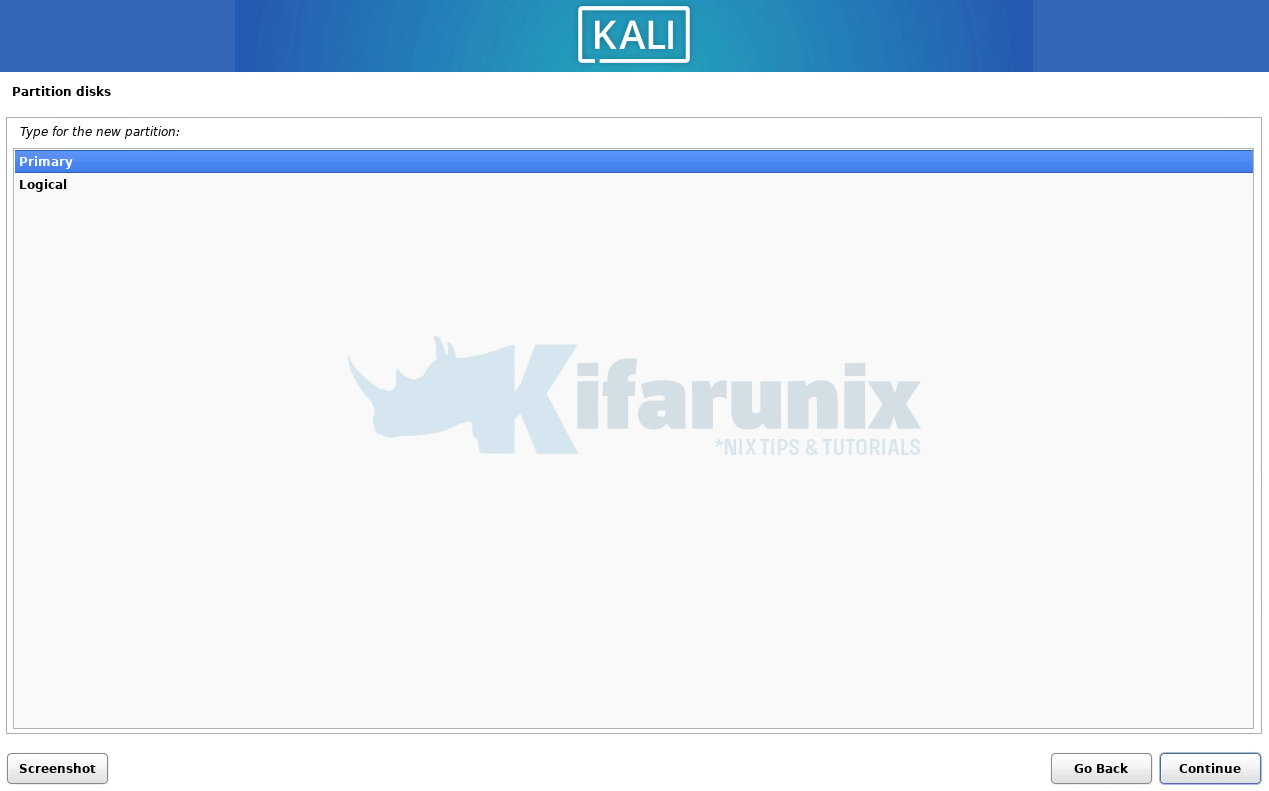
Create new primary partition;
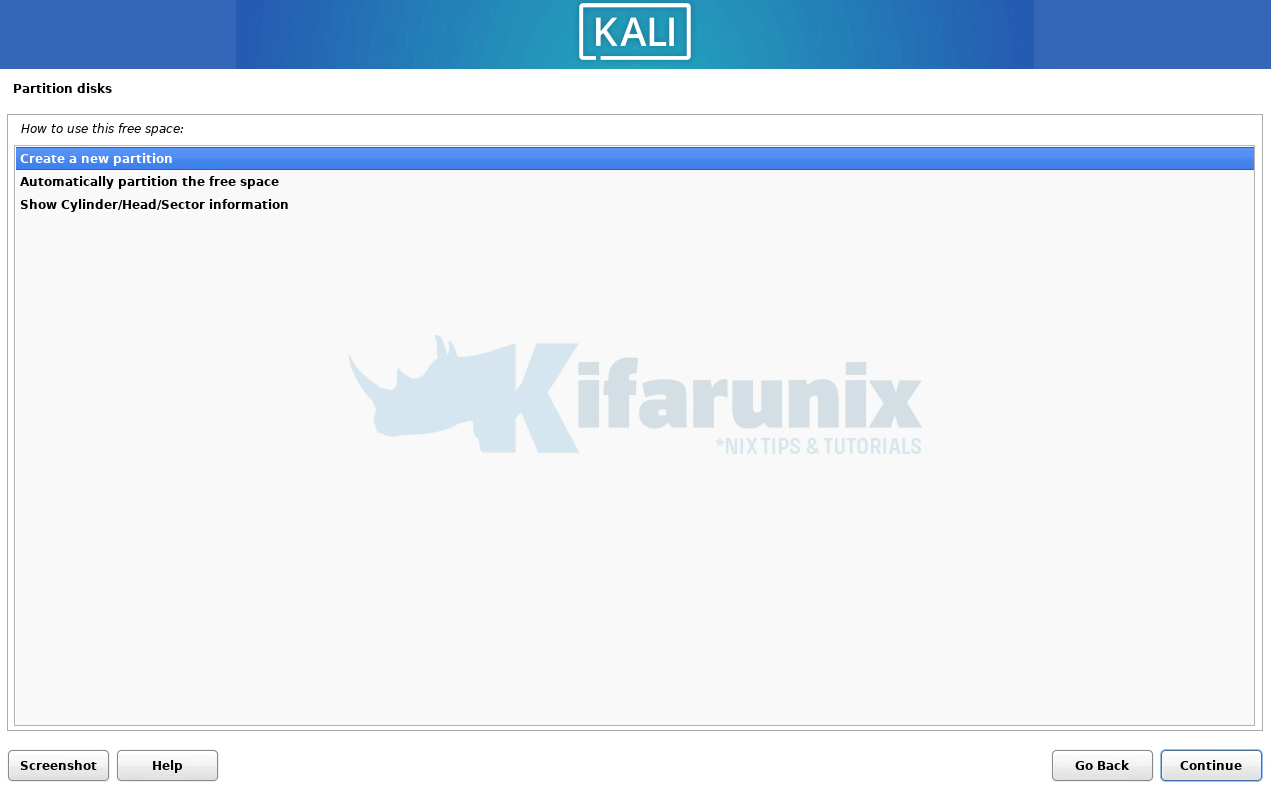
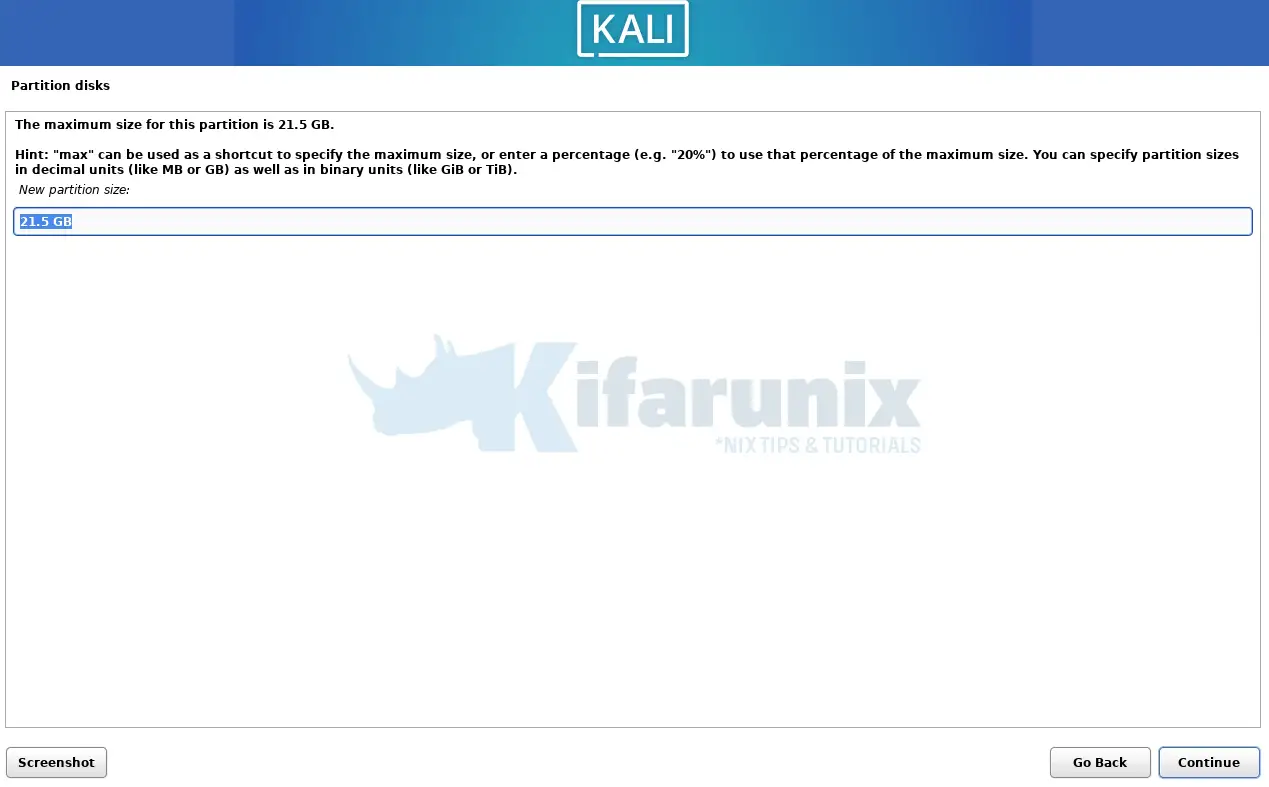
Set partition size (we use entire size for root filesystem);
Set partition as primary;
Confirm disk settings. We went with default here.
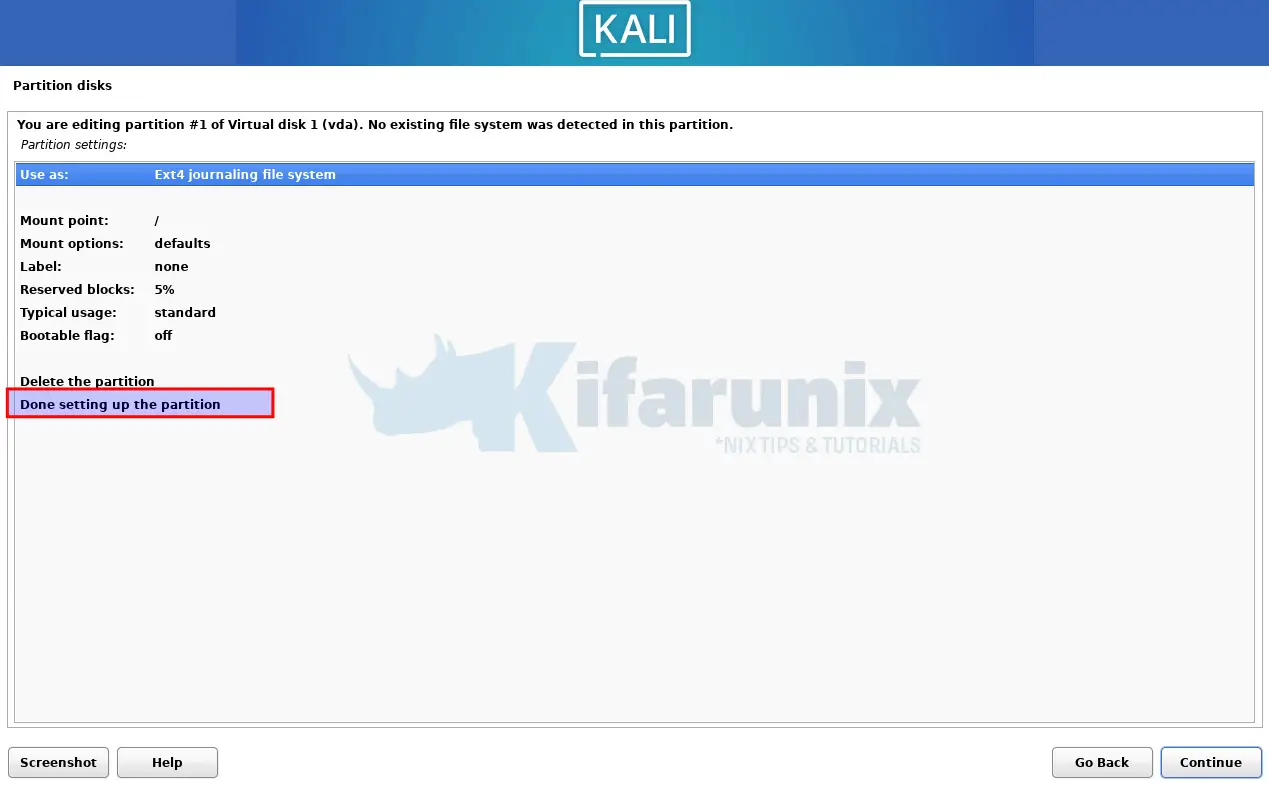
Finish partitioning;
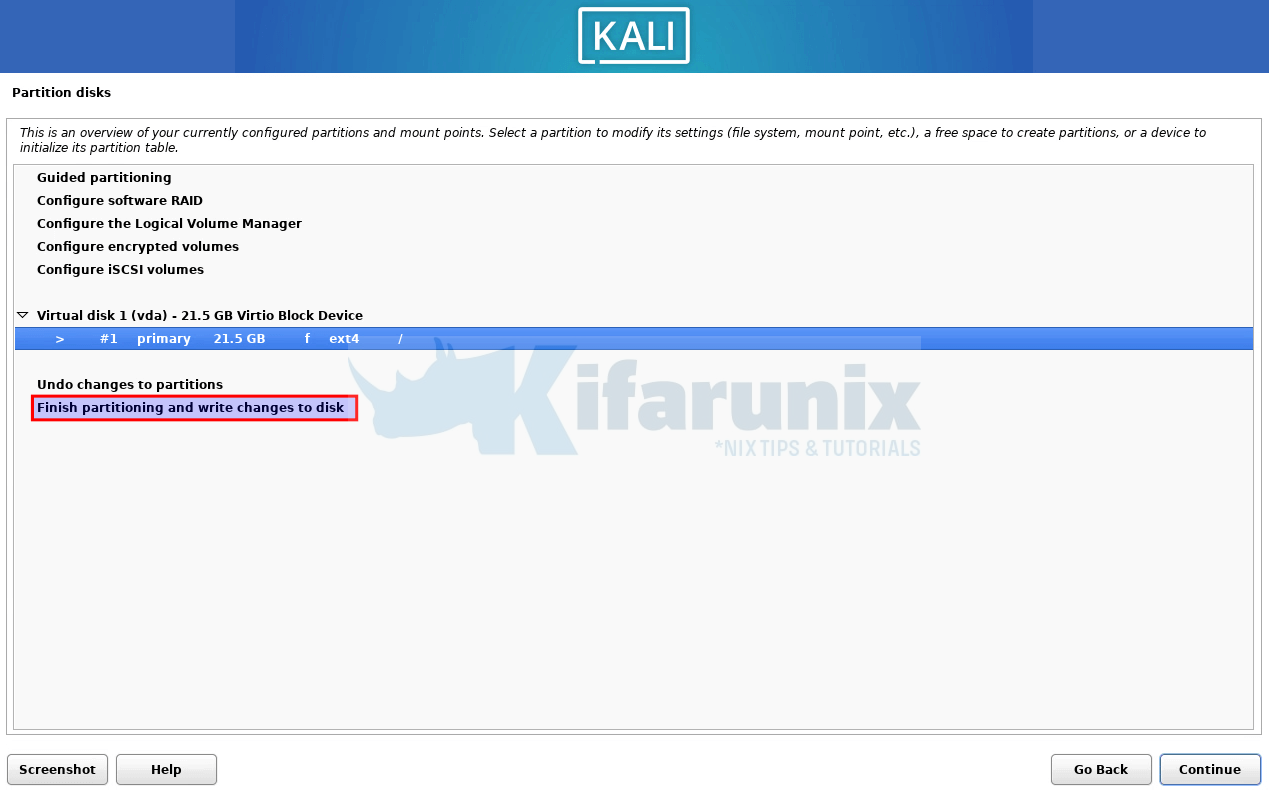
Proceed with settings. Otherwise, if you want to go back to partitioning, select appropriate option.
Write changes to disk;
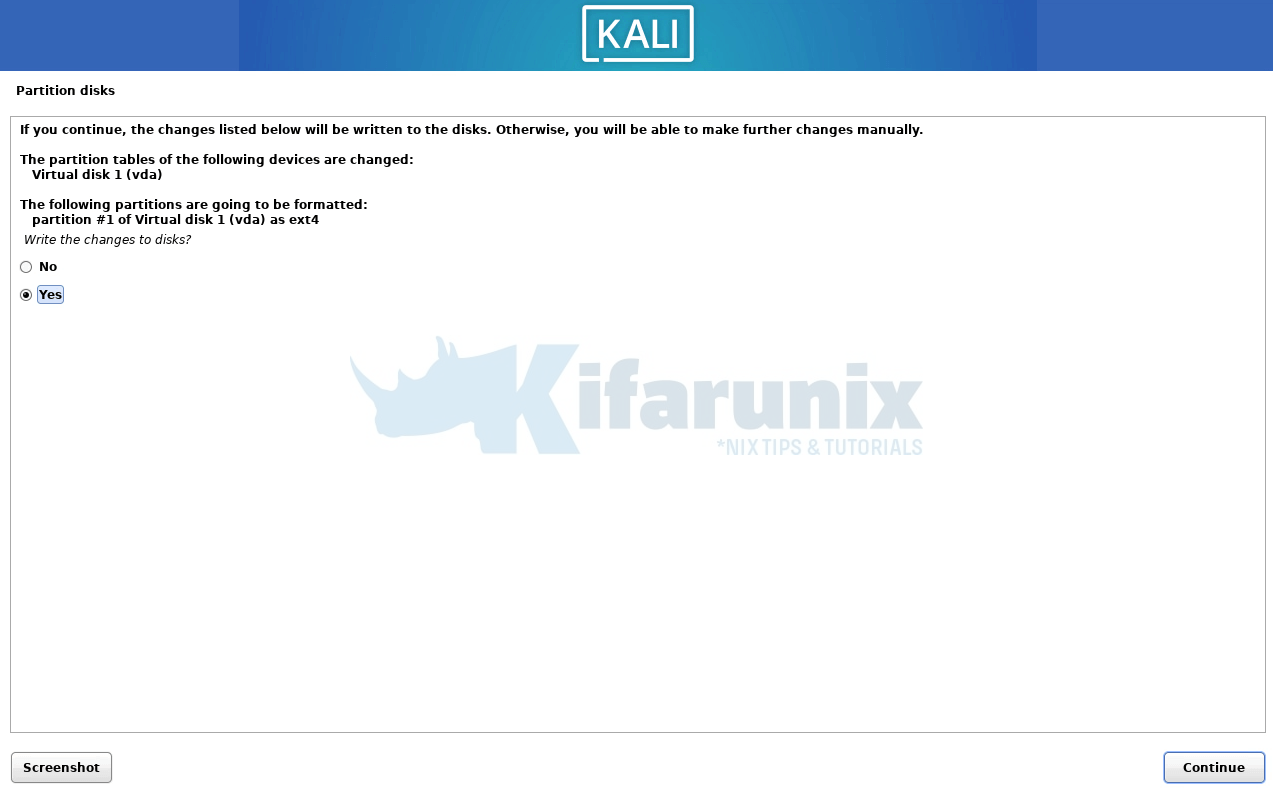
Also install GRUB to entire device, /dev/vda for example.
Install Cloud-init Package on Kali Linux 2024.x
Once the virtual machine is installed and running, login to it and install some of the packages required to prepare the virtual machine for use in the OpenStack cloud.
Ensure the Kali Linux repository is setup;
cat /etc/apt/sources.list# See https://www.kali.org/docs/general-use/kali-linux-sources-list-repositories/
deb http://http.kali.org/kali kali-rolling main contrib non-free non-free-firmware
# Additional line for source packages
# deb-src http://http.kali.org/kali kali-rolling main contrib non-free non-free-firmware
Check the link below on how to install the cloud-init package on Kali Linux.
Install Cloud-init Package on the Virtual Machine
You can install additional packages;
sudo apt updatesudo apt install cloud-image-utils cloud-initramfs-growroot cloud-utils gdiskAs already mentioned in the previous guide, you won’t mostly need to update anything on cloud-init configuration.
However, if you need to make any changes, then you can update the main configuration file, /etc/cloud/cloud.cfg or anything custom under /etc/cloud/cloud.cfg.d directory.
Read more on example configurations.
Install and Enable SSH Service on Kali Linux Image
Install SSH;
sudo apt install ssh -yStart and enable to run on system boot.
sudo systemctl enable --now sshInstall and Enable RDP on Kali Linux
In case you want to be able to use RDP to access Kali Linux on OpenStack, you can install and enable the service.
sudo apt install xrdpStart and enable the service.
sudo systemctl enable xrdpYou can test RDP from another machine just to confirm that you can RDP successfully.
Any other configuration
If there is any other configuration that you need to have on your Kali Linux while it is on OpenStack, ensure you do it before finally importing the image into OpenStack.
Initialize Cloud-Init
cloud-init runs automatically at boot time, but you can force it to reapply the configuration manually by running the command below;
sudo cloud-init cleansudo cloud-init init --localThis will clean any existing cloud-init state and reinitialize it with your updated configuration.
Clean Kali Linux History Commands
If you want to ensure that you import Kali Linux into OpenStack without any history of the commands executed, run the command below, as any other user that performed or executed any commands.
As a root user;
┌──(root㉿kali)-[~]
└─# rm -f ~/.zsh_history && kill -9 $$
As any other normal user;
┌──(kifarunix㉿kali)-[~]
└─$ rm -f ~/.zsh_history && kill -9 $$
Import Kali Linux into OpenStack
When you are satisfied with the changes you have made on Kali Linux, you can now shut it down for importing into OpenStack and proceed using the links below.
- Copy the Image to OpenStack
- Create Custom Linux Image on OpenStack Horizon
- Create Custom Linux Image on OpenStack CLI
Kali Linux Image imported;
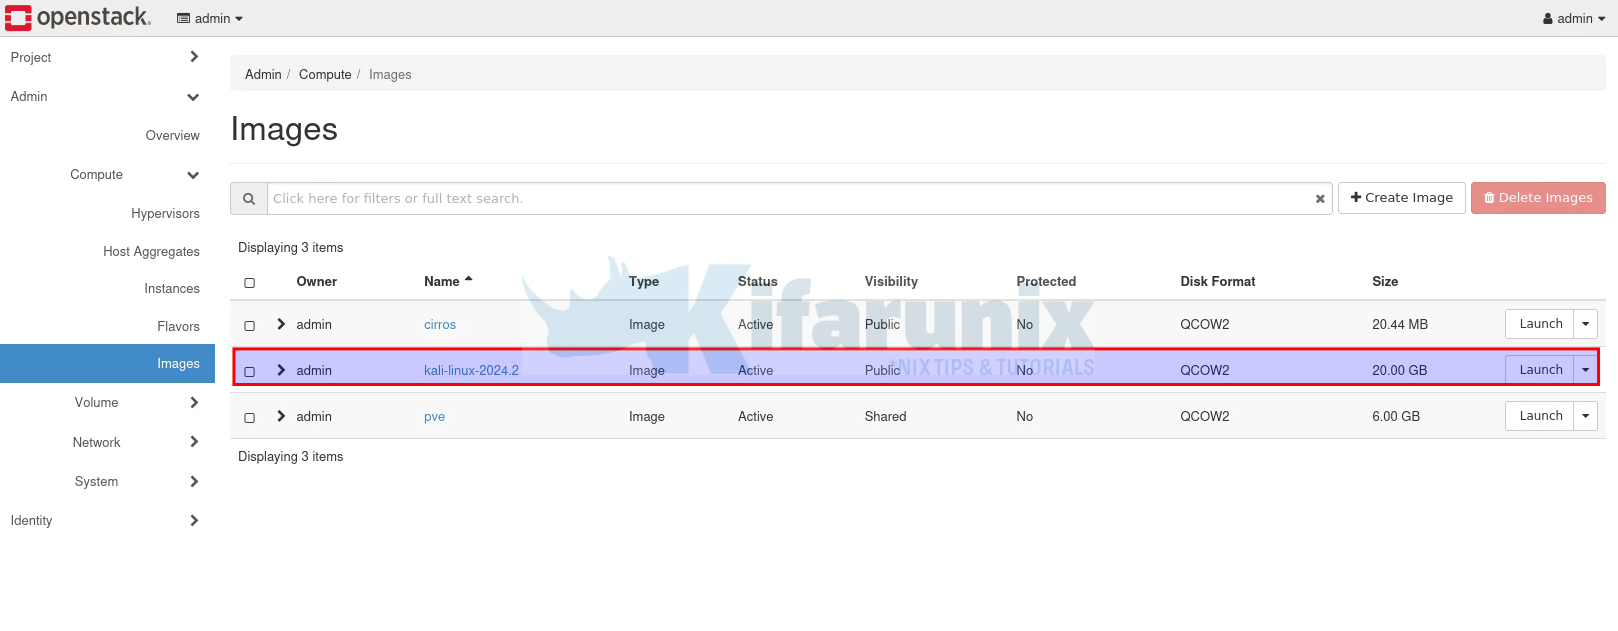
Kali Linux instance
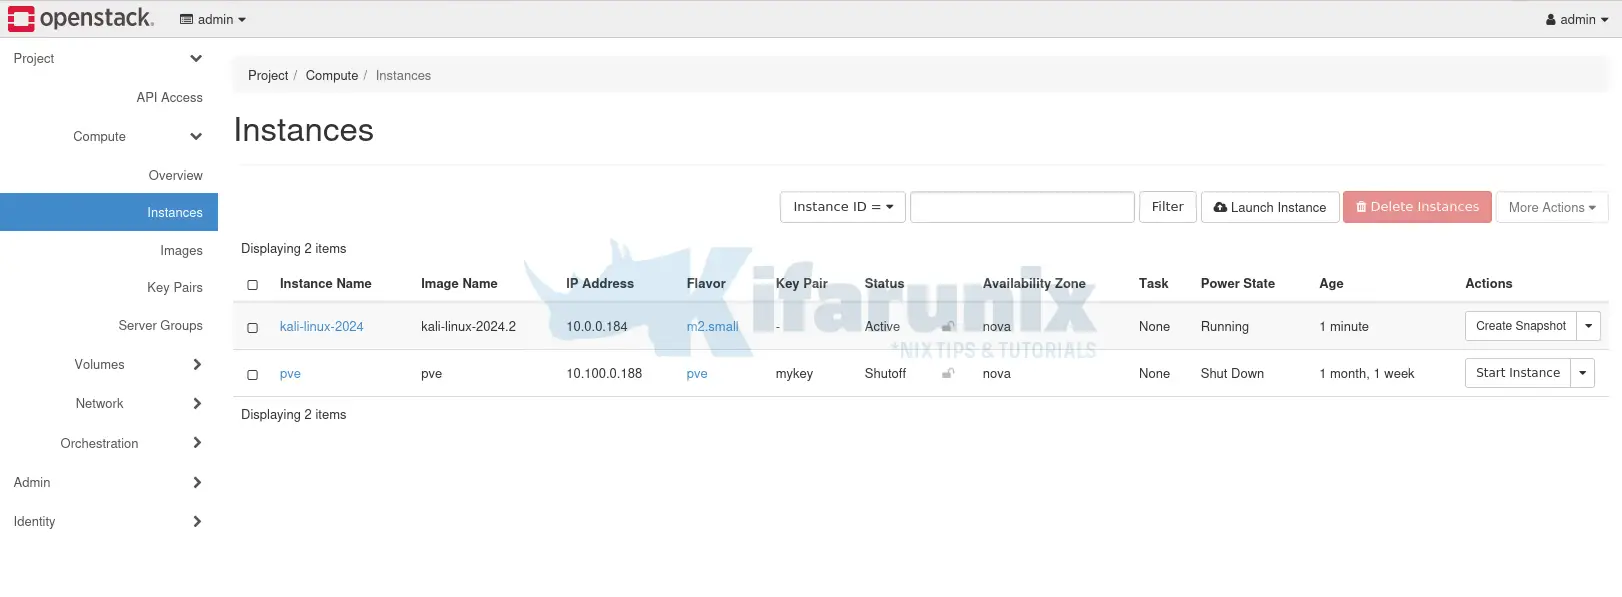
Console;
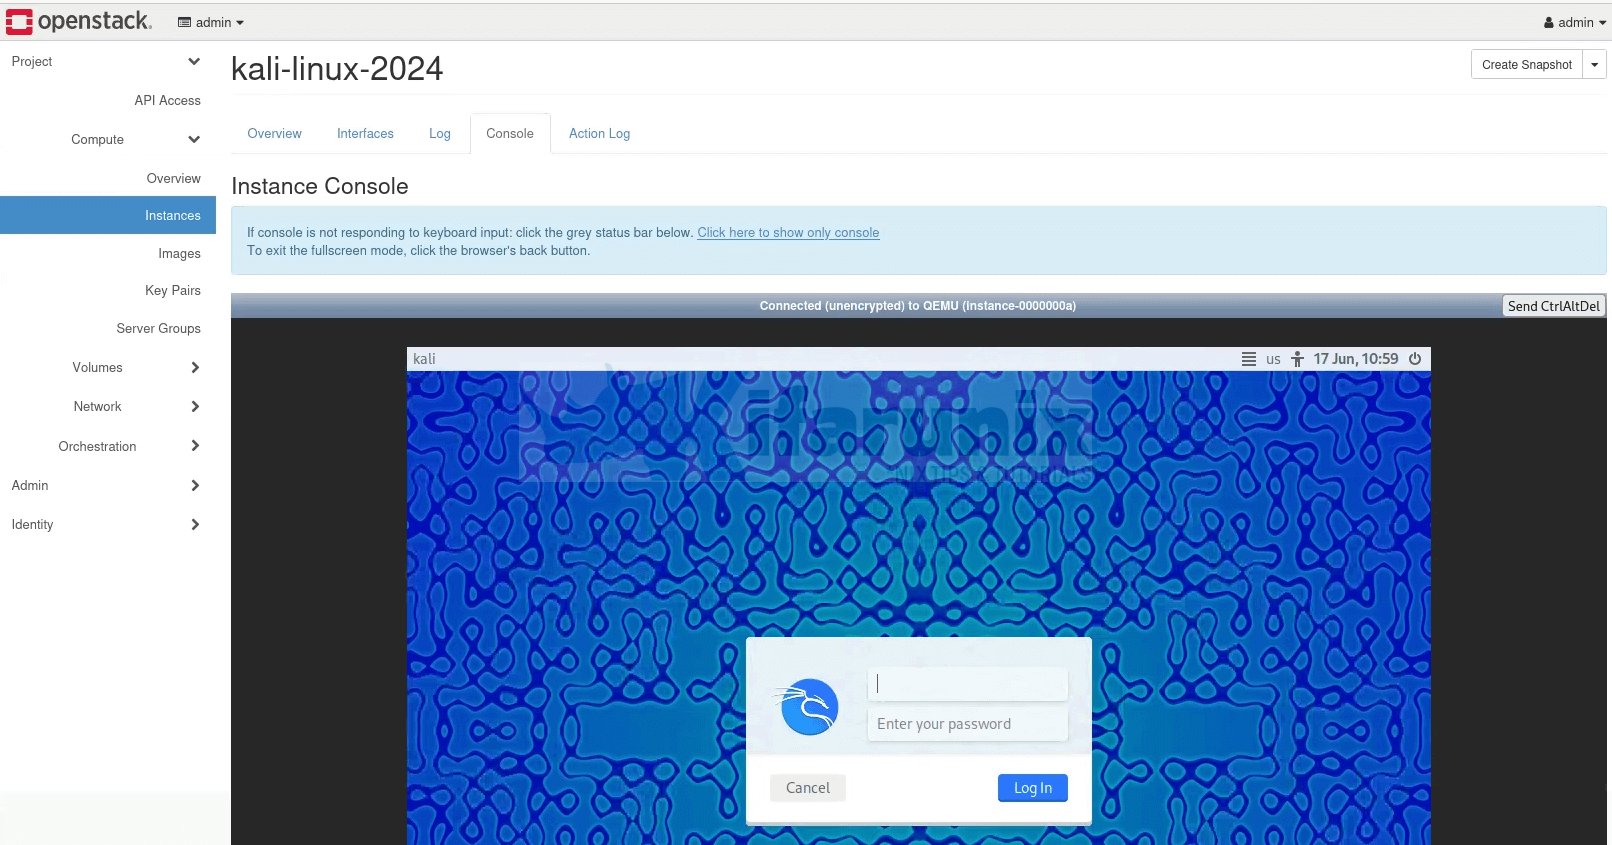
Console on new tap;
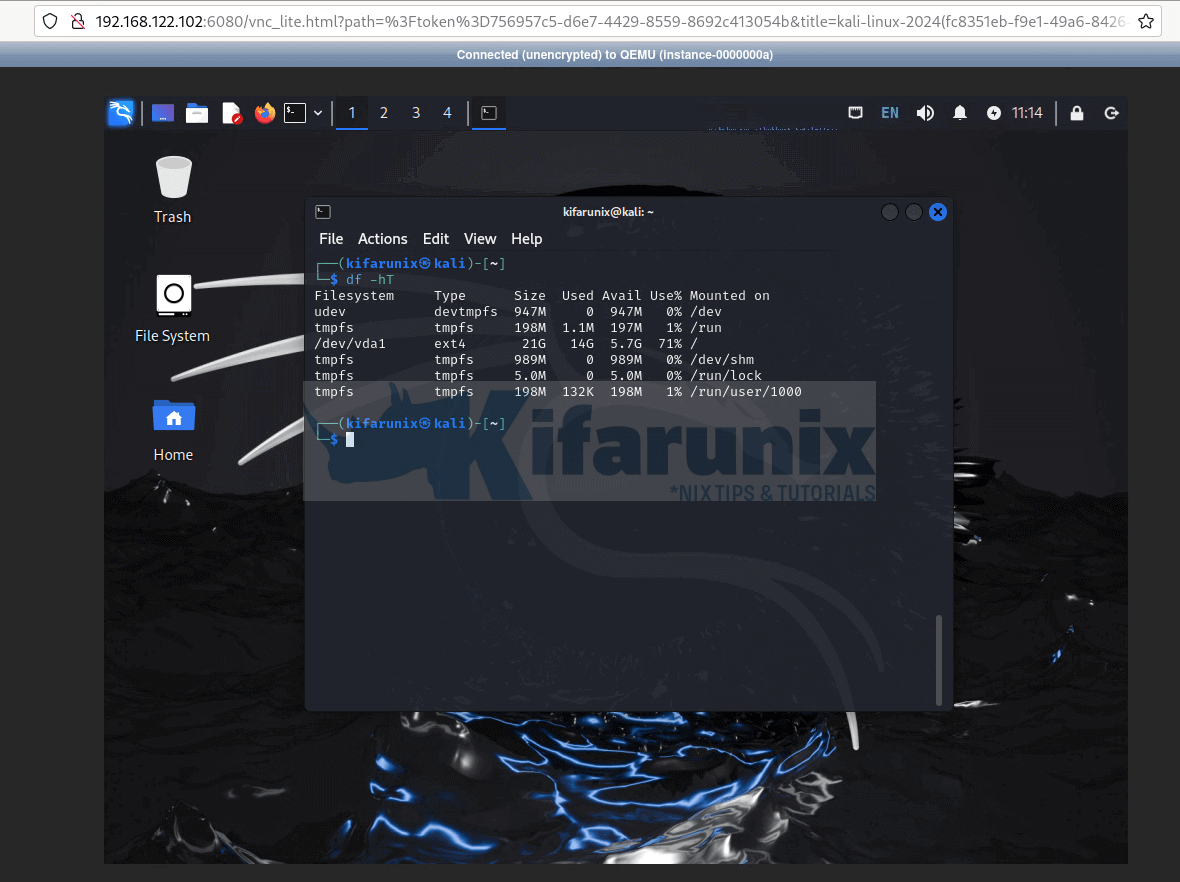
Kali Linux is now running on OpenStack and is available for your cloud projects.
That brings us to the end of our guide.

