How do I deploy an application to a swarm cluster? In this tutorial, you will learn how to deploy an application in a Docker swarm cluster. Normally, you would simply fire up your containerized application using docker run command and specifying related options and docker images to create the container from. However, when you are running a Docker swarm cluster, things are a little bit different.
Table of Contents
Deploying an Application in a Docker Swarm Cluster
You need to create a service for the specific application you want to run as a swarm. A swarm service is a group of tasks. A task on the other hand is a running container created by a service. A task consists of the container image, command to run inside container, environment variables e.t.c.
We will use one of the custom images that we created in our previous tutorial on how to deploy Nagios as a Docker container to deploy a swarm service
docker imagesREPOSITORY TAG IMAGE ID CREATED SIZE
nagios-core 4.4.9 fc672f3a3f3e 2 weeks ago 753MBSetup a swarm Cluster
Before you can proceed, you need to have a running Docker swarm cluster.
You can follow tutorial below to learn how to setup a Docker swarm cluster.
How to Setup Three Node Docker Swarm Cluster on Ubuntu 22.04
Create Docker Swarm Local Registry
Consider the above image. It is a local image and is only available on our swarm01 manager node image cache.
Thus, let’s create a local registry that can be easily accessed by other nodes on the swarm cluster. In this local registry, we will store any of our custom images we would like to use to deploy our custom applications in a Docker swarm cluster.
Note that for production environment, the registry node need to be running on node separate from the swarm cluster.
To create a docker swarm local registry;
docker service create \
-p 5000:5000 \
--mount type=bind,src=/mnt/local-images,dst=/var/lib/registry \
--name registry \
registry:2
So what does this command do exactly;
docker service create: Creates a new swarm service-p 5000:5000: Exposes a service port on the node.--mount type=bind,src=/mnt/local-images,dst=/var/lib/registry: Attaches a filesystem mount to the service. A bind mount (type=bind) makes a file or directory on the host available to the service it is mounted within.- For this type of mount (bind), the host-path must refer to an existing path on every swarm node.
--name: Name given to the service to be created.registry: Image to be used for creating the service.
Listing available services on swarm manager;
docker service lsID NAME MODE REPLICAS IMAGE PORTS
irngg0gn9pkk registry replicated 1/1 registry:2 *:5000->5000/tcp
So, now let’s tag and push our Nagios image, nagios-core:4.4.9, into the local registry.
docker image tag nagios-core:4.4.9 localhost:5000/nagios-core:4.4.9docker image push localhost:5000/nagios-core:4.4.9All the nodes in the cluster should now have port 5000/tcp opened and listening. And thus, they can access the local registry.
You should also see the repository created on the local host mount, /mnt/local-images.
List images in the local registry;
curl localhost:5000/v2/_catalog{"repositories":["nagios-core"]}Deploying Application in a Docker Swarm
So the custom image is now available in our local registry
We will create a Nagios server service, which will be deployed across all the nodes in the swarm cluster.
Below is the command we use to create Nagios swarm service;
docker service create \
-p 80:80 \
--mount type=bind,src=/opt/nagios-core-docker/etc,target=/usr/local/nagios/etc \
--name nagios-server \
localhost:5000/nagios-core:4.4.9
As you can see above, we are mounting our Nagios configuration files under the /opt/nagios-core-docker/etc directory on the Docker host into the swarm service directory, /usr/local/nagios/etc. The source configurations directory, MUST exists on all the Docker swarm nodes. Otherwise, the service will fail.
Listing swarm services;
docker service lsSample output;
ID             NAME            MODE         REPLICAS   IMAGE                              PORTS
ptcbzei0vlex   nagios-server   replicated   1/1        localhost:5000/nagios-core:4.4.9   *:80->80/tcp
irngg0gn9pkk   registry        replicated   1/1        registry:2                         *:5000->5000/tcp
As you can see from the output, the service has a single replica.
List swarm service tasks;
docker service ps nagios-serverID NAME IMAGE NODE DESIRED STATE CURRENT STATE ERROR PORTS
2swi5yqeqwad nagios-server.1 localhost:5000/nagios-core:4.4.9 swarm03 Running Running 3 minutes ago
The single replica is running on swarm03 node.
Now, let us scale this service to 3 replicas;
docker service scale nagios-server=3Output;
nagios-server scaled to 3
overall progress: 3 out of 3 tasks
1/3: running   [==================================================>]
2/3: running   [==================================================>]
3/3: running   [==================================================>]
verify: Service converged
List the services;
docker service lsID NAME MODE REPLICAS IMAGE PORTS
ptcbzei0vlex nagios-server replicated 3/3 localhost:5000/nagios-core:4.4.9 *:80->80/tcp
irngg0gn9pkk registry replicated 1/1 registry:2 *:5000->5000/tcp
Again, list the nagios-server service tasks;
docker service ps nagios-serverID NAME IMAGE NODE DESIRED STATE CURRENT STATE ERROR PORTS
2swi5yqeqwad nagios-server.1 localhost:5000/nagios-core:4.4.9 swarm03 Running Running 11 minutes ago
te8pgkeigcdv nagios-server.2 localhost:5000/nagios-core:4.4.9 swarm01 Running Running 11 seconds ago
lf4bj1hq1crd nagios-server.3 localhost:5000/nagios-core:4.4.9 swarm02 Running Running 11 seconds ago
We now have our Nagios server application replicated across the three Docker swarm nodes.
You can also display detailed information about a service;
docker service inspect nagios-server[
{
"ID": "ptcbzei0vlexkqzmrlvkfk1w7",
"Version": {
"Index": 479
},
"CreatedAt": "2023-01-29T12:13:33.231199034Z",
"UpdatedAt": "2023-01-29T12:24:26.611553811Z",
"Spec": {
"Name": "nagios-server",
"Labels": {},
"TaskTemplate": {
"ContainerSpec": {
"Image": "localhost:5000/nagios-core:4.4.9@sha256:63190b0c0831f5af89168948085a841f4b23d01498e9edbf4a1f4033b85f2e3a",
"Init": false,
"Mounts": [
{
"Type": "bind",
"Source": "/opt/nagios-core-docker/etc",
"Target": "/usr/local/nagios/etc"
}
],
"StopGracePeriod": 10000000000,
"DNSConfig": {},
"Isolation": "default"
},
"Resources": {
"Limits": {},
"Reservations": {}
},
"RestartPolicy": {
"Condition": "any",
"Delay": 5000000000,
"MaxAttempts": 0
},
"Placement": {
"Platforms": [
{
"Architecture": "amd64",
"OS": "linux"
}
]
},
"ForceUpdate": 0,
"Runtime": "container"
},
"Mode": {
"Replicated": {
"Replicas": 3
}
},
"UpdateConfig": {
"Parallelism": 1,
"FailureAction": "pause",
"Monitor": 5000000000,
"MaxFailureRatio": 0,
"Order": "stop-first"
},
"RollbackConfig": {
"Parallelism": 1,
"FailureAction": "pause",
"Monitor": 5000000000,
"MaxFailureRatio": 0,
"Order": "stop-first"
},
"EndpointSpec": {
"Mode": "vip",
"Ports": [
{
"Protocol": "tcp",
"TargetPort": 80,
"PublishedPort": 80,
"PublishMode": "ingress"
}
]
}
},
"PreviousSpec": {
"Name": "nagios-server",
"Labels": {},
"TaskTemplate": {
"ContainerSpec": {
"Image": "localhost:5000/nagios-core:4.4.9@sha256:63190b0c0831f5af89168948085a841f4b23d01498e9edbf4a1f4033b85f2e3a",
"Init": false,
"Mounts": [
{
"Type": "bind",
"Source": "/opt/nagios-core-docker/etc",
"Target": "/usr/local/nagios/etc"
}
],
"DNSConfig": {},
"Isolation": "default"
},
"Resources": {
"Limits": {},
"Reservations": {}
},
"Placement": {
"Platforms": [
{
"Architecture": "amd64",
"OS": "linux"
}
]
},
"ForceUpdate": 0,
"Runtime": "container"
},
"Mode": {
"Replicated": {
"Replicas": 1
}
},
"EndpointSpec": {
"Mode": "vip",
"Ports": [
{
"Protocol": "tcp",
"TargetPort": 80,
"PublishedPort": 80,
"PublishMode": "ingress"
}
]
}
},
"Endpoint": {
"Spec": {
"Mode": "vip",
"Ports": [
{
"Protocol": "tcp",
"TargetPort": 80,
"PublishedPort": 80,
"PublishMode": "ingress"
}
]
},
"Ports": [
{
"Protocol": "tcp",
"TargetPort": 80,
"PublishedPort": 80,
"PublishMode": "ingress"
}
],
"VirtualIPs": [
{
"NetworkID": "vnw4s5xs0gr0bx19rwyy7gwea",
"Addr": "10.0.0.7/24"
}
]
}
}
]
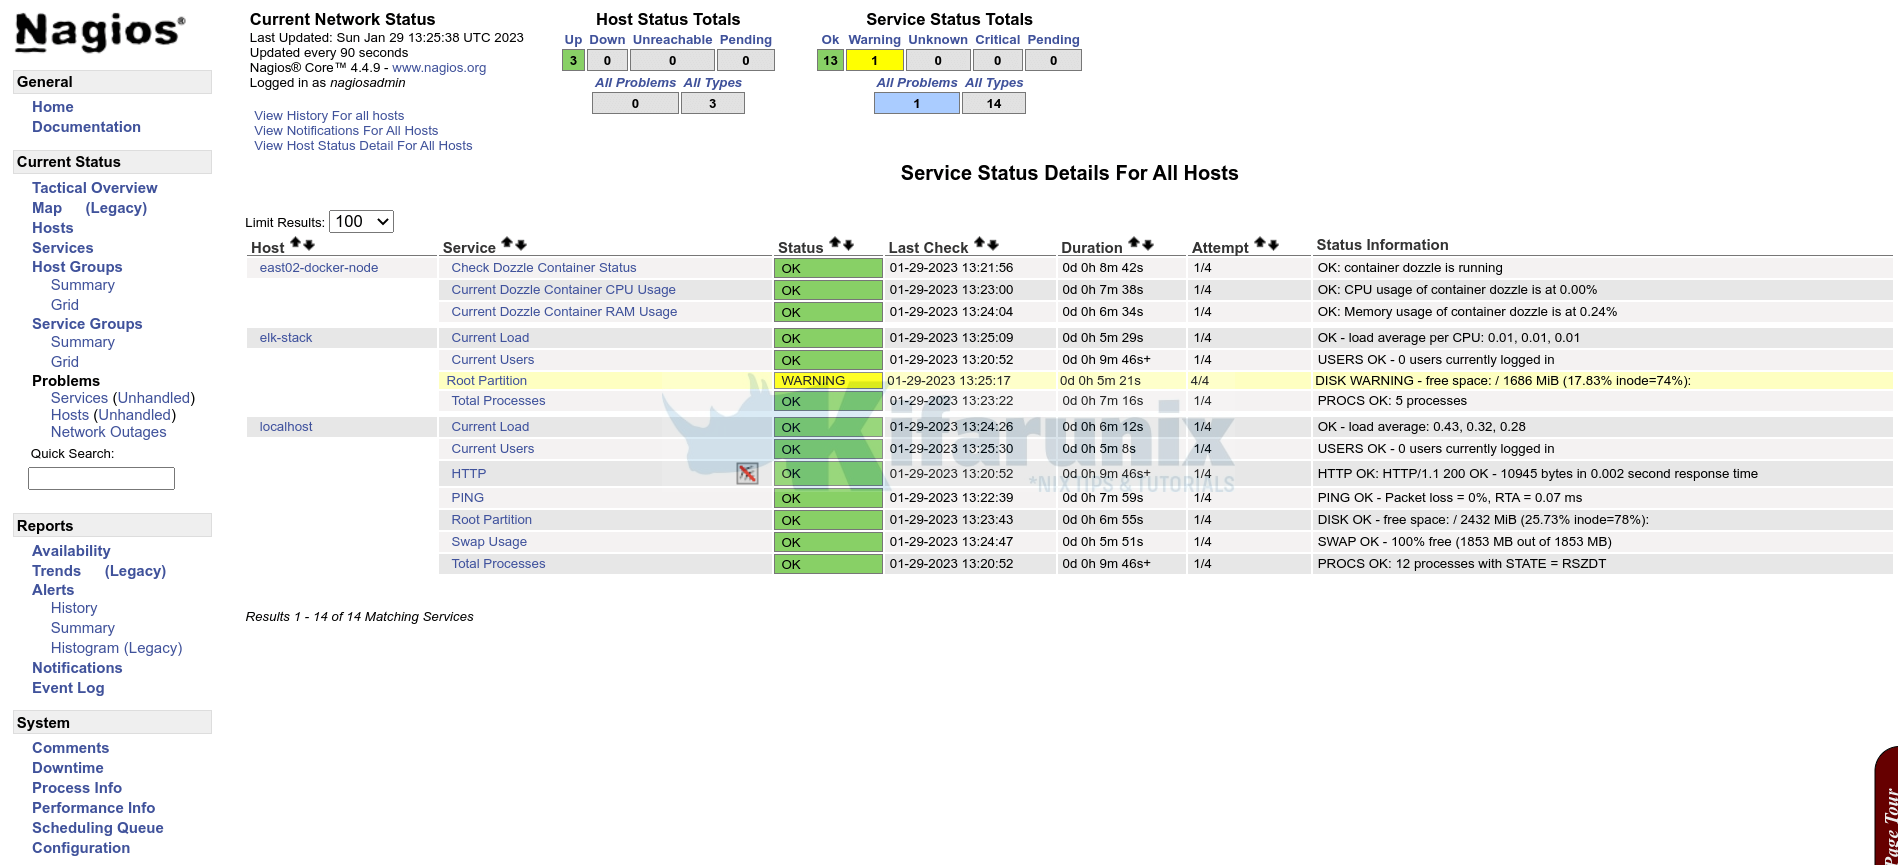
I am now able to access my Nagios server on any of the node in my cluster!
Simulate Auto-Reschedule on Node Failure
What happens to the services running on one of the swarm nodes if the node goes down?
Well, let us change the state of our swarm02 to drain. In drain state, a node is not accepting new tasks, but existing tasks will continue to run until completion.
docker node update --availability drain swarm02Next, check the status of the services;
docker service ps nagios-serverSee how services are rescheduled to other nodes;
ID             NAME                  IMAGE                              NODE      DESIRED STATE   CURRENT STATE                 ERROR     PORTS
2swi5yqeqwad   nagios-server.1       localhost:5000/nagios-core:4.4.9   swarm03   Running         Running 33 minutes ago
te8pgkeigcdv   nagios-server.2       localhost:5000/nagios-core:4.4.9   swarm01   Running         Running 23 minutes ago
dwb5m8x707ig   nagios-server.3       localhost:5000/nagios-core:4.4.9   swarm01   Running         Running about a minute ago
lf4bj1hq1crd    \_ nagios-server.3   localhost:5000/nagios-core:4.4.9   swarm02   Shutdown        Shutdown about a minute ago
rvofkkt34l4i   nagios-server.4       localhost:5000/nagios-core:4.4.9   swarm03   Running         Running about a minute ago
d8fq6ostem99    \_ nagios-server.4   localhost:5000/nagios-core:4.4.9   swarm02   Shutdown        Shutdown about a minute ago
ymie19t5cqq0   nagios-server.5       localhost:5000/nagios-core:4.4.9   swarm01   Running         Running about a minute ago
o6m2d84dzhig   nagios-server.6       localhost:5000/nagios-core:4.4.9   swarm03   Running         Running about a minute ago
Services on swarm02 node rescheduled to node 01 and 03.
You can bring back up the node;
docker node update --availability active swarm02Check node status;
docker node inspect swarm02 --prettyID: yzp9ppjxte94w3hk1bvy1bc6p
Hostname: swarm02
Joined at: 2023-01-28 10:57:08.345699794 +0000 utc
Status:
State: Ready
Availability: Active
Address: 192.168.10.20
Manager Status:
Address: 192.168.10.20:2377
Raft Status: Reachable
Leader: No
Platform:
So, when there are new tasks to be carried out, the node will be able to accept the instructions from the scheduler.
That concludes our guide on deploying an application in a Docker swarm cluster.
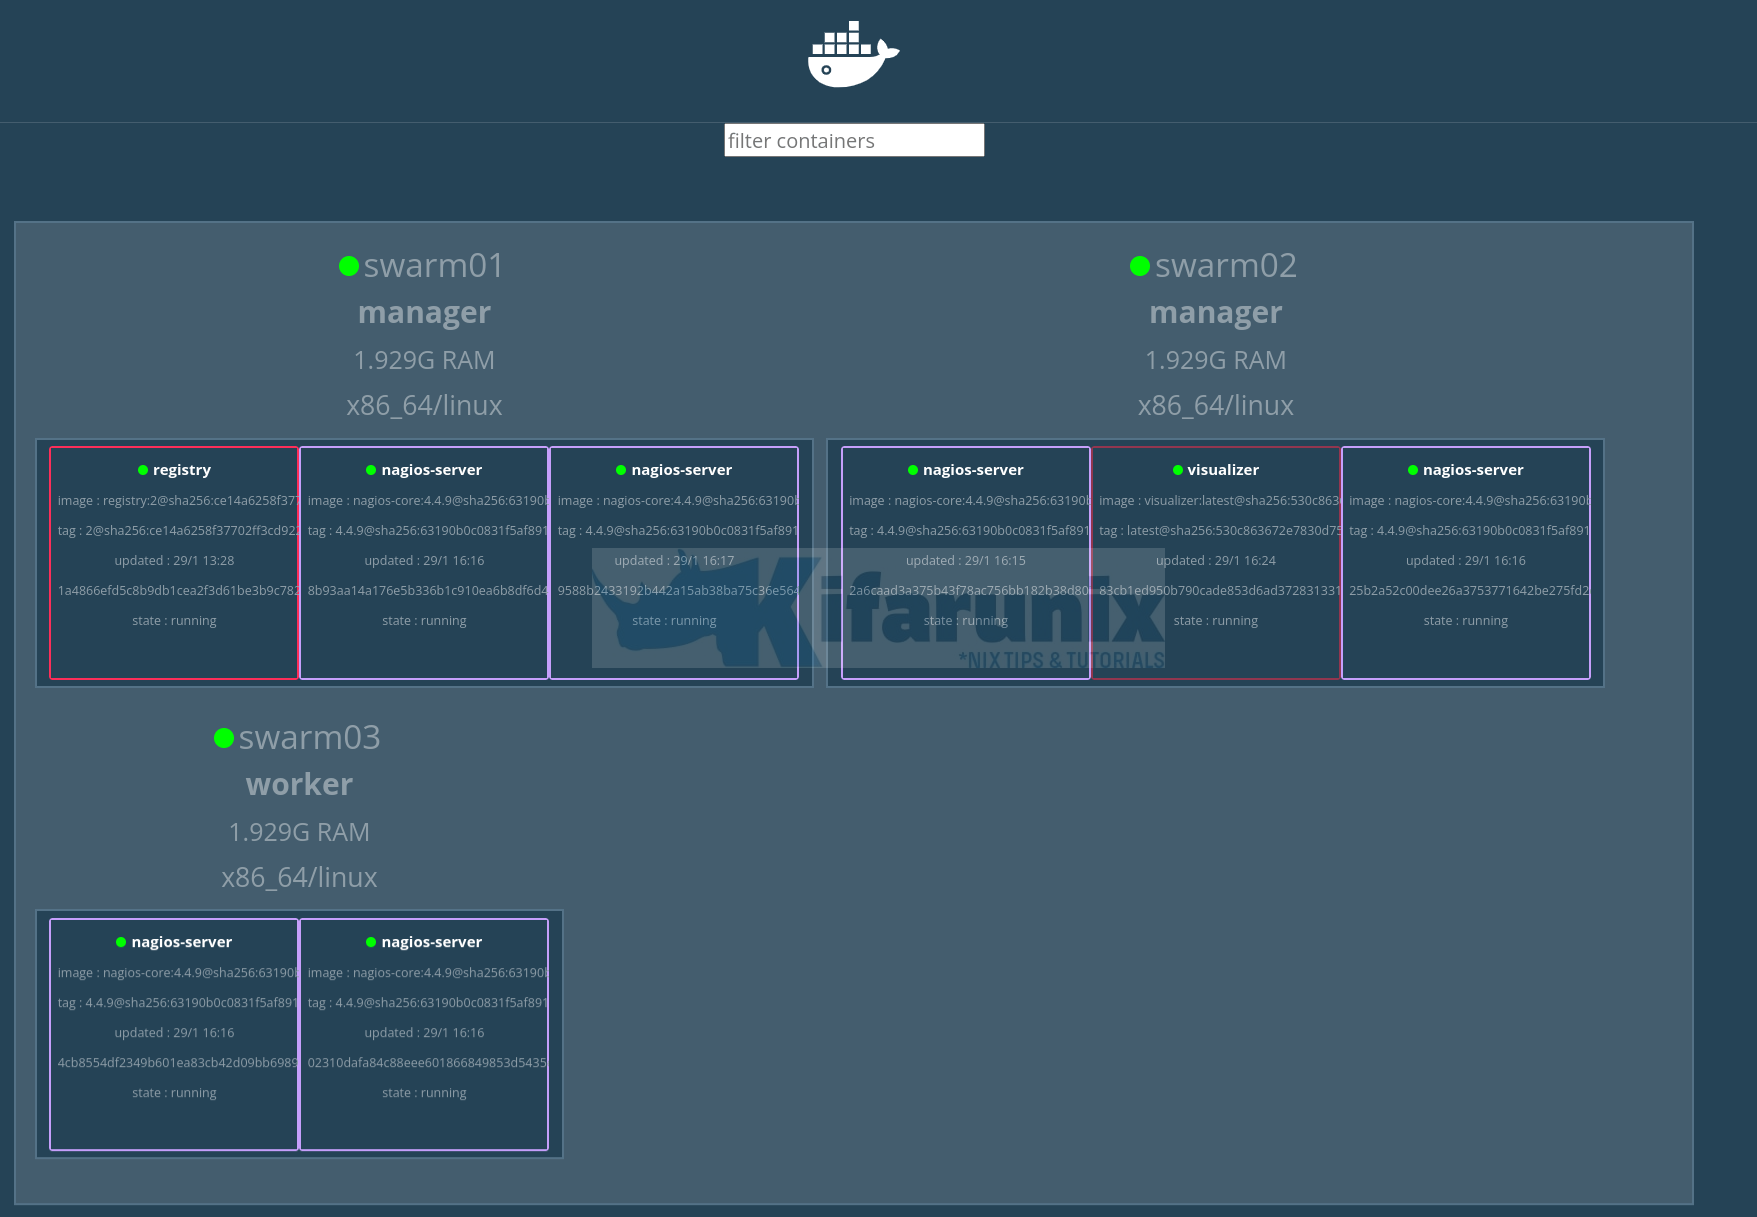
If you want, you can deploy the Docker visualizer. Somebody has made an opensource simple web UI application that shows basic information about nodes and containers in a Docker swarm.
To deploy this visualizer on your docker swarm manager nodes;
docker service create \
--name=visualizer \
--publish=8180:8080 \
--constraint=node.role==manager \
--mount=type=bind,src=/var/run/docker.sock,dst=/var/run/docker.sock \
dockersamples/visualizer
Confirm;
docker service lsID NAME MODE REPLICAS IMAGE PORTS
ptcbzei0vlex nagios-server replicated 6/6 localhost:5000/nagios-core:4.4.9 *:80->80/tcp
irngg0gn9pkk registry replicated 1/1 registry:2 *:5000->5000/tcp
z6701u6ggnty visualizer replicated 1/1 dockersamples/visualizer:latest *:8180->8080/tcp
Open port 8180 on firewall to allow you access the service externally.
http://<IP>:8180
And it is a wrap!
Read more on deploying docker swarm service.


