Welcome to our tutorial on how to install latest Apache Solr on CentOS 8. Apache Solr is the popular, blazing-fast, open source enterprise search platform built on Apache Lucene. It is highly reliable, scalable and fault tolerant, providing distributed indexing, replication and load-balanced querying, automated failover and recovery, centralized configuration and more. Solr powers the search and navigation features of many of the world’s largest internet sites. With Solr, you put documents in it (called “indexing”) via JSON, XML, CSV or binary over HTTP. You query it via HTTP GET and receive JSON, XML, CSV or binary results.
Solr Features as outlined on Apache Solr Features page.
- Advanced Full-Text Search Capabilities
- Optimized for High Volume Traffic
- Standards Based Open Interfaces – XML, JSON and HTTP
- Comprehensive Administration Interfaces
- Easy Monitoring
- Highly Scalable and Fault Tolerant
- Flexible and Adaptable with easy configuration
- Near Real-Time Indexing
- Extensible Plugin Architecture
Installing Apache Solr on CentOS 8
Follow through this guide to learn how to install Apache Solr on CentOS 8.
Update your system packages;
dnf updateInstall other tools that are required;
dnf install curl wget tar lsofInstall Java Runtime Environment (JRE) on CentOS 8
JRE is one of the requirements for installing latest Apache Solr on CentOS 8. JRE version 1.8 or higher. Hence, run the command below to install the latest JRE on CentOS 8;
dnf install epel-releasednf install java-latest-openjdkYou can verify the version of installed JRE by executing the command below;
java --versionopenjdk version "15" 2020-09-15
OpenJDK Runtime Environment 20.9 (build 15+36)
OpenJDK 64-Bit Server VM 20.9 (build 15+36, mixed mode, sharing)Install Apache Solr
Download latest Apache Solr release version
Solr 8.7.0 is the most recent Apache Solr release. Hence, navigate their downloads page and grab the latest release archive. You can simply obtain the download url and use wget to pull it down.
dnf install wget -ywget https://downloads.apache.org/lucene/solr/8.7.0/solr-8.7.0.tgzVerify Integrity of Apache Solr Archive
Once you have downloaded the archive, you need to verify its integrity. The downloaded archive can be verified using the PGP or SHA checksum. We use the later in this guide. Therefore, download the SHA512 checksum of the same version of the Apache Solr release you downloaded from the download page.
wget https://downloads.apache.org/lucene/solr/8.7.0/solr-8.7.0.tgz.sha512Once the download is done, calculate the SHA512 checksum of the Apache Solr archive downloaded;
gpg --print-md SHA512 solr-8.7.0.tgzgpg: directory '/root/.gnupg' created
gpg: keybox '/root/.gnupg/pubring.kbx' created
solr-8.7.0.tgz: 15A3AF83 997E2CBC 4BFED304 F7D43EFD 260674D9 80592416 05FF3CDE
0AE02D8B D1CCD569 73C6CBA1 CC118956 55BB76FC F1991BBB 94B004E5
17CE15F7 28FA163FCompare the hash value with the contents of the SHA512 file downloaded.
cat solr-8.7.0.tgz.sha51215a3af83997e2cbc4bfed304f7d43efd260674d98059241605ff3cde0ae02d8bd1ccd56973c6cba1cc11895655bb76fcf1991bbb94b004e517ce15f728fa163f *solr-8.7.0.tgzEnsure that the hashes match.
Extract Apache Solr Archive
Once you verify the integrity of the downloaded archive, extract it as follows;
tar xzf solr-8.7.0.tgzInstall Apache Solr on CentOS 8
From the current working directory, execute the command below to install Apache Solr ;
solr-8.7.0/bin/install_solr_service.sh solr-8.7.0.tgzid: ‘solr’: no such user
Creating new user: solr
Extracting solr-8.7.0.tgz to /opt
Installing symlink /opt/solr -> /opt/solr-8.7.0 ...
Installing /etc/init.d/solr script ...
Installing /etc/default/solr.in.sh ...
Service solr installed.
Customize Solr startup configuration in /etc/default/solr.in.sh
*** [WARN] *** Your open file limit is currently 1024.
It should be set to 65000 to avoid operational disruption.
If you no longer wish to see this warning, set SOLR_ULIMIT_CHECKS to false in your profile or solr.in.sh
*** [WARN] *** Your Max Processes Limit is currently 14980.
It should be set to 65000 to avoid operational disruption.
If you no longer wish to see this warning, set SOLR_ULIMIT_CHECKS to false in your profile or solr.in.sh
NOTE: Please install lsof as this script needs it to determine if Solr is listening on port 8983.
Started Solr server on port 8983 (pid=3609). Happy searching!
Found 1 Solr nodes:
Solr process 3609 running on port 8983
{
"solr_home":"/var/solr/data",
"version":"8.7.0 2dc63e901c60cda27ef3b744bc554f1481b3b067 - atrisharma - 2020-10-29 19:39:16",
"startTime":"2020-11-17T20:04:24.826Z",
"uptime":"0 days, 0 hours, 0 minutes, 17 seconds",
"memory":"56.6 MB (%11.1) of 512 MB"}You can fix the Max process and max number of open files warning by adding the lines below to the /etc/security/limits.conf file.
vim /etc/security/limits.conf...
* soft nofile 65000
* hard nofile 65000
* soft nproc 65000
* hard nproc 65000Then restart Apache Solr.
su - solr -c "/opt/solr/bin/solr restart"Sending stop command to Solr running on port 8983 ... waiting up to 180 seconds to allow Jetty process 4322 to stop gracefully.
Waiting up to 180 seconds to see Solr running on port 8983 [\]
Started Solr server on port 8983 (pid=4587). Happy searching!As you can see, Solr is now listening on port 8983;
ss -altnp | grep 8983LISTEN 0 50 *:8983 *:* users:(("java",pid=4587,fd=157))Accessing Apache Solr Admin Interface
You can access it via the http://server-ip-or-resolvable-hostname:8983/solr.
If you are not accessing Apache Solr on localhost, you need to allow external access to port 8983/tcp on Firewalld if it is running.
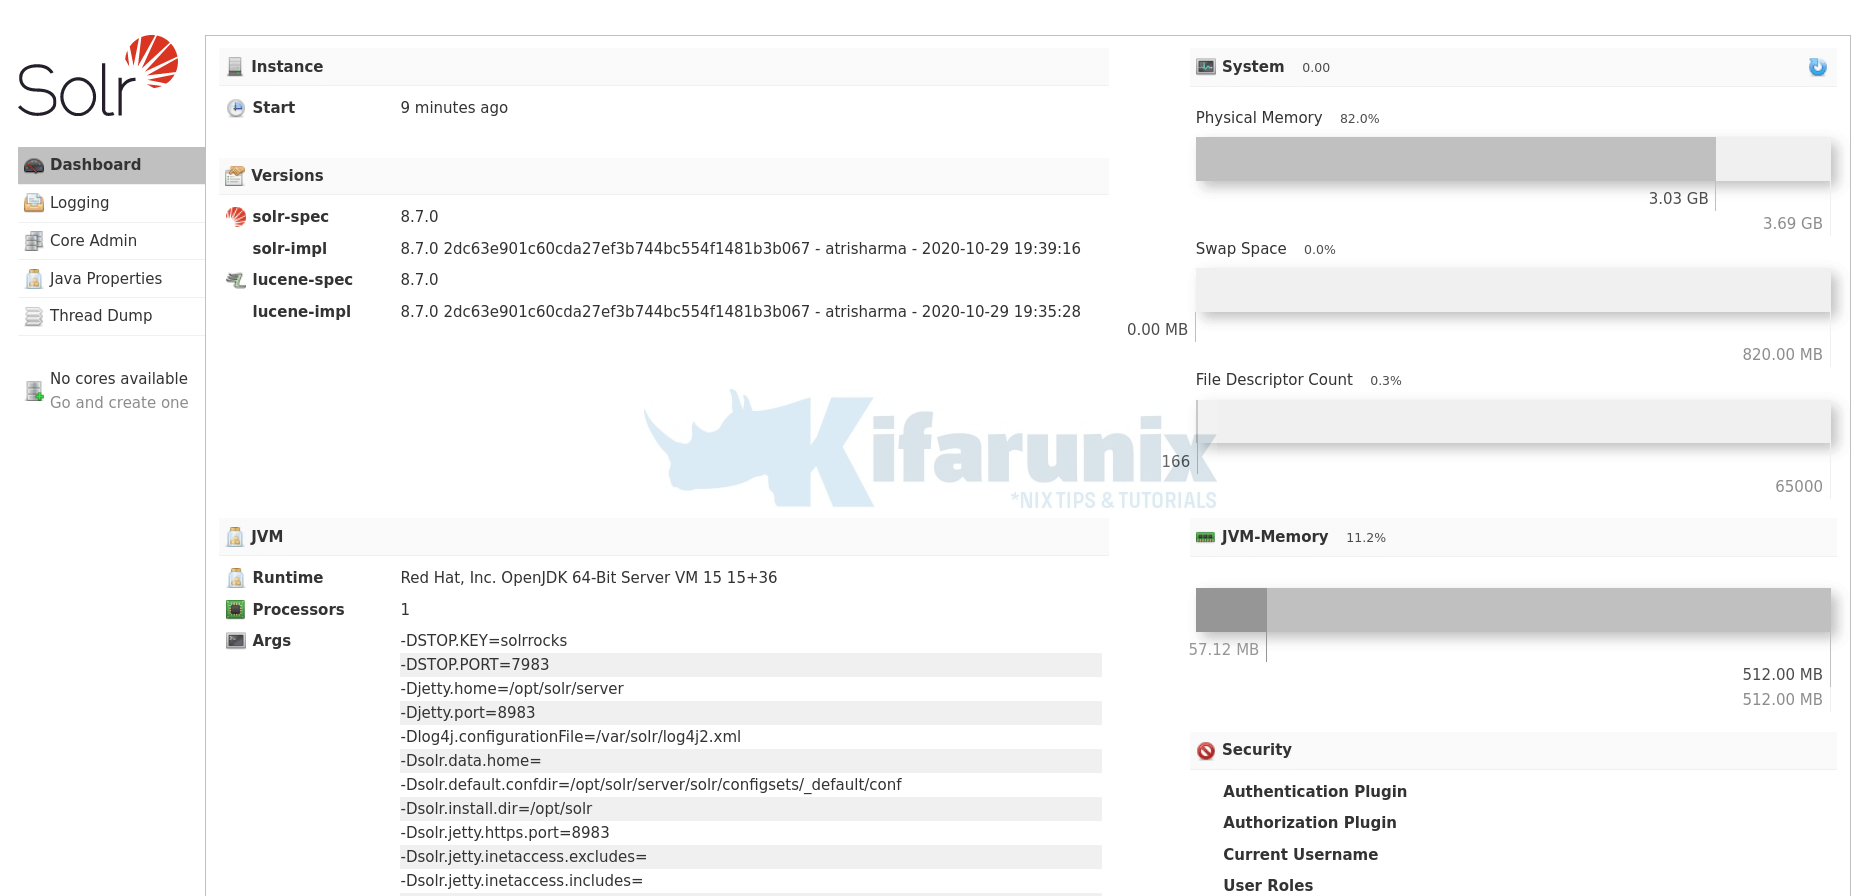
firewall-cmd --add-port=8983/tcp --permanentfirewall-cmd --reloadAnd the dashboard looks like as shown in the screenshot below;

Create Apache Solr Core/Collection
You can now create Solr Core to start indexing and analyzing your data.
You can create Solr core from the Core Admin interface or from command line using the /opt/solr/bin/solr command whose syntax is;
/opt/solr/bin/solr create [-c name] [-d confdir] [-n configName] [-shards #] [-replicationFactor #] [-p port] [-V]The command in short Create a core or collection depending on whether Solr is running in standalone (core) or SolrCloud mode (collection). In other words, this action detects which mode Solr is running in, and then takes the appropriate action (either create_core or create_collection).
You can obtain help by executing the commands;
/opt/solr/bin/solr create_core -helpOr
/opt/solr/bin/solr create_collection -helpRefer to Apache Solr create core and Apache Solr create collection pages.
That concludes our guide.
Further Reading
Apache Solr Deployment and Configurations
Taking Apache Solr to Production
Also Read;
Install latest Apache Solr on Ubuntu 20.04
Other Tutorials
Visualize WordPress User Activity Logs on ELK Stack
Quick Way to Install and Configure SNMP on Ubuntu 20.04

