

This tutorial provides a step by step guide on how to install Arkime with Elasticsearch 8 on Ubuntu 24.04. Arkime, formerly known as Moloch, is a powerful open-source solution for large-scale network traffic capture and indexing. It empowers security professionals to efficiently capture, store, and analyze vast amounts of network data. By leveraging Arkime’s capabilities, you can gain valuable insights into network activity, identify potential threats, and conduct thorough forensic investigations. Whether you’re a seasoned network security professional or just starting your journey in this field, Arkime offers a user-friendly and scalable platform for managing your network traffic analysis needs.
Table of Contents
Installing Arkime with Elasticsearch 8 on Ubuntu 24.04
Arkime Features
According to its Github repository page, some of the features of Arkime tool include;
- It stores and indexes network traffic in standard PCAP format, providing fast, indexed access.
- Provides an intuitive web interface for PCAP browsing, searching, and exporting.
- Exposes APIs which allow for PCAP data and JSON formatted session data to be downloaded and consumed directly.
- Stores and exports all packets in standard PCAP format, allowing you to also use your favorite PCAP ingesting tools, such as wireshark, during your analysis workflow.
Arkime Installation Methods
You can install Arkime on Ubuntu by either:
Install Elasticsearch 8
As a pre-requisite, irrespective of the installation method, you need to install Elasticsearch. Arkime uses Elasticsearch for storing, managing and indexing vast amounts of network traffic captured by Arkime. This enables efficient search and retrieval of specific packets or patterns within the captured data.
Arkime version 5.x are now compatible with Elasticsearch 8.x.
Thus, to install Elasticsearch 8.x on Ubuntu 24.04, you need to install the Elastic APT repositories as follows;
sudo apt install apt-transport-https \
	ca-certificates \
	curl \
	gnupg2 \
	software-properties-common
wget -qO - https://artifacts.elastic.co/GPG-KEY-elasticsearch | \
sudo gpg --dearmor -o /etc/apt/trusted.gpg.d/elastic.gpgecho "deb https://artifacts.elastic.co/packages/8.x/apt stable main" |\
sudo tee /etc/apt/sources.list.d/elastic-8.x.listRun system update;
sudo apt updateOnce the repos are in place, install Elasticsearch 8.x on all the cluster nodes using the command below;
sudo apt install elasticsearchSample installation output;
Reading package lists... Done
Building dependency tree... Done
Reading state information... Done
The following NEW packages will be installed:
  elasticsearch
0 upgraded, 1 newly installed, 0 to remove and 34 not upgraded.
Need to get 589 MB of archives.
After this operation, 1,149 MB of additional disk space will be used.
Get:1 https://artifacts.elastic.co/packages/8.x/apt stable/main amd64 elasticsearch amd64 8.14.0 [589 MB]
Fetched 589 MB in 5s (111 MB/s)
Selecting previously unselected package elasticsearch.
(Reading database ... 121440 files and directories currently installed.)
Preparing to unpack .../elasticsearch_8.14.0_amd64.deb ...
Creating elasticsearch group... OK
Creating elasticsearch user... OK
Unpacking elasticsearch (8.14.0) ...
Setting up elasticsearch (8.14.0) ...
--------------------------- Security autoconfiguration information ------------------------------

Authentication and authorization are enabled.
TLS for the transport and HTTP layers is enabled and configured.

The generated password for the elastic built-in superuser is : _nqt*3UnqvVuC3Qnai6l

If this node should join an existing cluster, you can reconfigure this with
'/usr/share/elasticsearch/bin/elasticsearch-reconfigure-node --enrollment-token '
after creating an enrollment token on your existing cluster.

You can complete the following actions at any time:

Reset the password of the elastic built-in superuser with
'/usr/share/elasticsearch/bin/elasticsearch-reset-password -u elastic'.

Generate an enrollment token for Kibana instances with
 '/usr/share/elasticsearch/bin/elasticsearch-create-enrollment-token -s kibana'.

Generate an enrollment token for Elasticsearch nodes with
'/usr/share/elasticsearch/bin/elasticsearch-create-enrollment-token -s node'.

-------------------------------------------------------------------------------------------------
### NOT starting on installation, please execute the following statements to configure elasticsearch service to start automatically using systemd
 sudo systemctl daemon-reload
 sudo systemctl enable elasticsearch.service
### You can start elasticsearch service by executing
 sudo systemctl start elasticsearch.service
Scanning processes...
Scanning candidates...
Scanning linux images...

Pending kernel upgrade!
Running kernel version:
  6.8.0-31-generic
Diagnostics:
  The currently running kernel version is not the expected kernel version 6.8.0-35-generic.

Restarting the system to load the new kernel will not be handled automatically, so you should consider rebooting.

Restarting services...

Service restarts being deferred:
 /etc/needrestart/restart.d/dbus.service
 systemctl restart systemd-logind.service
 systemctl restart unattended-upgrades.service

No containers need to be restarted.

User sessions running outdated binaries:
 kifarunix @ session #2: login[885], su[1059]
 kifarunix @ session #4: sshd[1384,1439]
 kifarunix @ user manager service: systemd[994]

No VM guests are running outdated hypervisor (qemu) binaries on this host.
Elasticsearch 8.x enables Authentication and use of TLS certificates (for both HTTP and Transport) by default.
Ensure you provide as much RAM for Elasticsearch.
NOTE: It is recommended that you run Elasticsearch on a different node apart from the one running Arkime. This is because Arkime capture and viewer will fail to start if Elasticsearch takes time to start. You can however update the Arkime capture and viewer services to run after ES service if you want to run everything on the same host.
Start and enable Elasticsearch to run on system boot;
sudo systemctl enable --now elasticsearchVerify if Elasticsearch is running;
curl https://localhost:9200 -k -u elastic -pelastic is a super user created by Elasticsearch during installation. The password is printed on the installation output.
Enter host password for user 'elastic':
{
  "name" : "lb-01",
  "cluster_name" : "elasticsearch",
  "cluster_uuid" : "DA8qokqkQz6xFinTwDXI4g",
  "version" : {
    "number" : "8.14.0",
    "build_flavor" : "default",
    "build_type" : "deb",
    "build_hash" : "8d96bbe3bf5fed931f3119733895458eab75dca9",
    "build_date" : "2024-06-03T10:05:49.073003402Z",
    "build_snapshot" : false,
    "lucene_version" : "9.10.0",
    "minimum_wire_compatibility_version" : "7.17.0",
    "minimum_index_compatibility_version" : "7.0.0"
  },
  "tagline" : "You Know, for Search"
}
You can also use OpenSearch instead of Elasticsearch if you want.
Install Arkime on Ubuntu using Prebuilt Binary
Download Arkime Binary Installer
Arkime 5.2.0 is the current stable release as per the releases page.
Navigate to the downloads page and grab the latest stable release Arkime binary installer for Ubuntu 24.04. Ensure the binary downloaded matches your respective system CPU architecture;
uname -p- x86_64: amd
- arm64/aarch64: arm
You can as well grab the link to the binary installer and pull it using curl or wget command.
For example, the command below downloads the current stable release version of Arkime binary installer for Ubuntu 24.04;
Replace the value of VER variable with the current latest stable release version number.
VER=5.2.0wget https://github.com/arkime/arkime/releases/download/v${VER}/arkime_${VER}-1.ubuntu2404_amd64.debRun System Update
Update your system package cache;
sudo apt update
Installing Arkime Ubuntu
Next, install Arkime using the downloaded binary installer.
sudo apt install ./arkime_${VER}-1.ubuntu2404_amd64.deb
Reading package lists... Done
Building dependency tree... Done
Reading state information... Done
Note, selecting 'arkime' instead of './arkime_5.2.0-1.ubuntu2404_amd64.deb'
The following additional packages will be installed:
  libauthen-sasl-perl libclone-perl libcommon-sense-perl libdata-dump-perl libencode-locale-perl libfile-listing-perl libfont-afm-perl libhtml-form-perl libhtml-format-perl libhtml-parser-perl
  libhtml-tagset-perl libhtml-tree-perl libhttp-cookies-perl libhttp-daemon-perl libhttp-date-perl libhttp-message-perl libhttp-negotiate-perl libio-html-perl libio-socket-ssl-perl libjson-perl libjson-xs-perl
  liblua5.4-0 liblwp-mediatypes-perl liblwp-protocol-https-perl libmailtools-perl libnet-http-perl libnet-smtp-ssl-perl libnet-ssleay-perl libpcre3 librdkafka1 libtimedate-perl libtry-tiny-perl
  libtypes-serialiser-perl liburi-perl libwww-perl libwww-robotrules-perl libyaml-dev libyara10 perl-openssl-defaults
Suggested packages:
  libdigest-hmac-perl libgssapi-perl libio-compress-brotli-perl libcrypt-ssleay-perl libsub-name-perl libbusiness-isbn-perl libregexp-ipv6-perl libauthen-ntlm-perl libyaml-doc debhelper
The following NEW packages will be installed:
  arkime libauthen-sasl-perl libclone-perl libcommon-sense-perl libdata-dump-perl libencode-locale-perl libfile-listing-perl libfont-afm-perl libhtml-form-perl libhtml-format-perl libhtml-parser-perl
  libhtml-tagset-perl libhtml-tree-perl libhttp-cookies-perl libhttp-daemon-perl libhttp-date-perl libhttp-message-perl libhttp-negotiate-perl libio-html-perl libio-socket-ssl-perl libjson-perl libjson-xs-perl
  liblua5.4-0 liblwp-mediatypes-perl liblwp-protocol-https-perl libmailtools-perl libnet-http-perl libnet-smtp-ssl-perl libnet-ssleay-perl libpcre3 librdkafka1 libtimedate-perl libtry-tiny-perl
  libtypes-serialiser-perl liburi-perl libwww-perl libwww-robotrules-perl libyaml-dev libyara10 perl-openssl-defaults
0 upgraded, 40 newly installed, 0 to remove and 34 not upgraded.
Need to get 3,192 kB/121 MB of archives.
After this operation, 393 MB of additional disk space will be used.
Do you want to continue? [Y/n] y
Install Arkime by Building it from the Source
If you want, you can as well install Arkime by building it from the source. Check the installation page for instructions.
Configuring Arkime
The default configuration file for Arkime is /opt/arkime/etc/config.ini.
All relevant configuration settings are stated on the settings page.
Configure Arkime
Once the installation is done, run the script below to configure Arkime;
Answer the script prompts accordingly;
sudo /opt/arkime/bin/ConfigureSelect an interface to monitor;
Found interfaces: lo;enp0s3;enp0s8
Semicolon ';' seperated list of interfaces to monitor [eth1] enp0s8
Choose whether to install Elasticsearch automatically or you want to install manually yourself.
(We have already installed Elasticsearch, hence choose no).
Install Elasticsearch server locally for demo, must have at least 3G of memory, NOT recommended for production use (yes or no) [no] no [or SIMPLY PRESS ENTER]Set Elasticsearch server URL, localhost:9200 in this setup. Just press Enter to accept the defaults.
OpenSearch/Elasticsearch server URL [https://localhost:9200] ENTERDefine Elasticsearch user and password. As stated before, Elasticsearch 8.x now enables authentication/authorization by default. We are using the default Elasticsearch super user created during installation.
OpenSearch/Elasticsearch user [empty is no user] elasticOpenSearch/Elasticsearch password [empty is no password] _nqt*3UnqvVuC3Qnai6lSet encryption password. Be sure to replace the password.
Password to encrypt S2S and other things [no-default] changemeThe configuration of Arkime then runs.
Arkime - Creating configuration files
Installing sample /opt/arkime/etc/config.ini
sed: can't read : No such file or directory
Arkime - Installing /etc/security/limits.d/99-arkime.conf to make core and memlock unlimited
Download GEO files? You'll need a MaxMind account https://arkime.com/faq#maxmind (yes or no) [yes] yes
Arkime - Downloading GEO files
2024-06-05 14:59:26 URL:https://www.iana.org/assignments/ipv4-address-space/ipv4-address-space.csv [23323/23323] -> "/tmp/tmp.vlBLa1rwrr" [1]
2024-06-05 14:59:27 URL:https://www.wireshark.org/download/automated/data/manuf [2767520/2767520] -> "/tmp/tmp.bbmKRi4bOU" [1]

Arkime - Configured - Now continue with step 4 in /opt/arkime/README.txt

 4) The Configure script can install OpenSearch/Elasticsearch for you or you can install yourself
 5) Initialize/Upgrade OpenSearch/Elasticsearch Arkime configuration
  a) If this is the first install, or want to delete all data
      /opt/arkime/db/db.pl http://ESHOST:9200 init
  b) If this is an update to an Arkime package
      /opt/arkime/db/db.pl http://ESHOST:9200 upgrade
 6) Add an admin user if a new install or after an init
      /opt/arkime/bin/arkime_add_user.sh admin "Admin User" THEPASSWORD --admin
 7) Start everything
      systemctl start arkimecapture.service
      systemctl start arkimeviewer.service
 8) Look at log files for errors
      /opt/arkime/logs/viewer.log
      /opt/arkime/logs/capture.log
 9) Visit http://arkimeHOST:8005 with your favorite browser.
      user: admin
      password: THEPASSWORD from step #6

If you want IP -> Geo/ASN to work, you need to setup a maxmind account and the geoipupdate program.
See https://arkime.com/faq#maxmind

Any configuration changes can be made to /opt/arkime/etc/config.ini
See https://arkime.com/faq#arkime-is-not-working for issues

Additional information can be found at:
  * https://arkime.com/install
  * https://arkime.com/faq
  * https://arkime.com/settings
Sample configuration file settings after configuring it.
cat /opt/arkime/etc/config.ini# Latest settings documentation: https://arkime.com/settings
#
# Arkime capture/viewer uses a tiered system for configuration variables. This allows Arkime
# to share one config file for many machines. The ordering of sections in this
# file doesn't matter.
#
# Order of config variables use:
# 1st) [optional] The section titled with the node name is used first.
# 2nd) [optional] If a node has a nodeClass variable, the section titled with
# the nodeClass name is used next. Sessions will be tagged with
# class: which may be useful if watching different networks.
# 3rd) The section titled "default" is used last.
[default]
# Comma seperated list of OpenSearch/Elasticsearch host:port combinations. If not using a
# Elasticsearch load balancer, a different OpenSearch/Elasticsearch node in the cluster can be
# specified for each Arkime node to help spread load on high volume clusters. For user/password
# use https://user:pass@host:port OR elasticsearchBasicAuth
elasticsearch=https://localhost:9200
elasticsearchBasicAuth=elastic:_nqt*3UnqvVuC3Qnai6l
# Where the user database is, the above is used if not set
# For user/password use https://user:pass@host:port OR usersElasticsearchBasicAuth
# usersElasticsearch=https://localhost:9200
# usersElasticsearchBasicAuth=
# How often to create a new OpenSearch/Elasticsearch index. hourly,hourly[23468],hourly12,daily,weekly,monthly
# See https://arkime.com/settings#rotateindex
rotateIndex=daily
# Uncomment if this node should process the cron queries and packet search jobs, only ONE node should
# process cron queries and packet search jobs
# cronQueries=true
# Cert file to use, comment out to use http instead
# certFile=/opt/arkime/etc/arkime.cert
# File with trusted roots/certs. WARNING! this replaces default roots
# Useful with self signed certs and can be set per node.
# caTrustFile=/opt/arkime/etc/roots.cert
# Private key file to use, comment out to use http instead
# keyFile=/opt/arkime/etc/arkime.key
# Password Hash Secret - Must be in default section. Since OpenSearch/Elasticsearch
# is wide open by default, we encrypt the stored password hashes with this
# so a malicous person can't insert a working new account.
# Comment out for no user authentication.
# Changing the value will make all previously stored passwords no longer work.
# Make this RANDOM, you never need to type in
passwordSecret=changme
# Use a different password for S2S communication then passwordSecret.
# Must be in default section. Make this RANDOM, you never need to type in
#serverSecret=
# HTTP Digest Realm - Must be in default section. Changing the value
# will make all previously stored passwords no longer work
httpRealm=Moloch
# Semicolon ';' seperated list of interfaces to listen on for traffic
interface=enp1s0
# Host to connect to for wiseService
#wiseHost=127.0.0.1
# Log viewer access requests to a different log file
#accessLogFile=/opt/arkime/logs/access.log
# Control the log format for access requests. This uses URI % encoding.
#accessLogFormat=:date :username %1b[1m:method%1b[0m %1b[33m:url%1b[0m :status :res[content-length] bytes :response-time ms
# The directory to save raw pcap files to
pcapDir=/opt/arkime/raw
# The max raw pcap file size in gigabytes, with a max value of 36G.
# The disk should have room for at least 10*maxFileSizeG
maxFileSizeG=12
# The max time in minutes between rotating pcap files. Default is 0, which means
# only rotate based on current file size and the maxFileSizeG variable
#maxFileTimeM=60
# TCP timeout value. Arkime writes a session record after this many seconds
# of inactivity.
tcpTimeout=600
# Arkime writes a session record after this many seconds, no matter if
# active or inactive
tcpSaveTimeout=720
# UDP timeout value. Arkime assumes the UDP session is ended after this
# many seconds of inactivity.
udpTimeout=30
# ICMP timeout value. Arkime assumes the ICMP session is ended after this
# many seconds of inactivity.
icmpTimeout=10
# An aproximiate maximum number of active sessions Arkime will try and monitor
maxStreams=1000000
# Arkime writes a session record after this many packets
maxPackets=10000
# Delete pcap files when free space is lower then this in gigabytes OR it can be
# expressed as a percentage (ex: 5%). This does NOT delete the session records in
# the database. It is recommended this value is between 5% and 10% of the disk.
# Database deletes are done by the db.pl expire script
freeSpaceG=5%
# The port to listen on, by default 8005
#viewPort=8005
# The host/ip to listen on, by default 0.0.0.0 which is ALL
#viewHost=localhost
# A MaxMind account is now required, Arkime checks several install locations, or
# will work without Geo files installed. See https://arkime.com/faq#maxmind
#geoLite2Country=/var/lib/GeoIP/GeoLite2-Country.mmdb;/usr/share/GeoIP/GeoLite2-Country.mmdb;/opt/arkime/etc/GeoLite2-Country.mmdb
#geoLite2ASN=/var/lib/GeoIP/GeoLite2-ASN.mmdb;/usr/share/GeoIP/GeoLite2-ASN.mmdb;/opt/arkime/etc/GeoLite2-ASN.mmdb
# Path of the rir assignments file
# https://www.iana.org/assignments/ipv4-address-space/ipv4-address-space.csv
rirFile=/opt/arkime/etc/ipv4-address-space.csv
# Path of the OUI file from whareshark
# https://raw.githubusercontent.com/wireshark/wireshark/release-4.0/manuf
ouiFile=/opt/arkime/etc/oui.txt
# Arkime rules to allow you specify actions to perform when criteria are met with certain fields or state.
# See https://arkime.com/rulesformat
#rulesFiles=/opt/arkime/etc/arkime.rules
# User to drop privileges to. The pcapDir must be writable by this user or group below
dropUser=nobody
# Group to drop privileges to. The pcapDir must be writable by this group or user above
dropGroup=daemon
# Header to use for determining the username to check in the database for instead of
# using http digest. Use this if apache or something else is doing the auth.
# Set viewHost to localhost or use iptables
# Might need something like this in the httpd.conf
# RewriteRule .* - [E=ENV_RU:%{REMOTE_USER}]
# RequestHeader set ARKIME_USER %{ENV_RU}e
#userNameHeader=arkime_user
#
# Headers to use to determine if user from `userNameHeader` is
# authorized to use the system, and if so create a new user
# in the Arkime user database. This implementation expects that
# the users LDAP/AD groups (or similar) are populated into an
# HTTP header by the Apache (or similar) referenced above.
# The JSON in userAutoCreateTmpl is used to insert the new
# user into the arkime database (if not already present)
# and additional HTTP headers can be sourced from the request
# to populate various fields.
#
# The example below pulls verifies that an HTTP header called `UserGroup`
# is present, and contains the value "ARKIME_ACCESS". If this authorization
# check passes, the user database is inspected for the user in `userNameHeader`
# and if it is not present it is created. The system uses the
# `arkime_user` and `http_auth_mail` headers from the
# request and uses them to populate `userId` and `userName`
# fields for the new user record.
#
# Once the user record is created, this functionaity
# neither updates nor deletes the data, though if the user is no longer
# reported to be in the group, access is denied regardless of the status
# in the arkime database.
#
#requiredAuthHeader="UserGroup"
#requiredAuthHeaderVal="ARKIME_ACCESS"
#userAutoCreateTmpl={"userId": "${this.arkime_user}", "userName": "${this.http_auth_mail}", "enabled": true, "webEnabled": true, "headerAuthEnabled": true, "emailSearch": true, "createEnabled": false, "removeEnabled": false, "packetSearch": true }
# Should we parse extra smtp traffic info
parseSMTP=true
# Should we parse extra smb traffic info
parseSMB=true
# Should we parse HTTP QS Values
parseQSValue=false
# Should we calculate sha256 for bodies
supportSha256=false
# Only index HTTP request bodies less than this number of bytes */
maxReqBody=64
# Only store request bodies that Utf-8?
reqBodyOnlyUtf8=true
# Semicolon ';' seperated list of SMTP Headers that have ips, need to have the terminating colon ':'
smtpIpHeaders=X-Originating-IP:;X-Barracuda-Apparent-Source-IP:
# Semicolon ';' seperated list of directories to load parsers from
parsersDir=/opt/arkime/parsers
# Semicolon ';' seperated list of directories to load plugins from
pluginsDir=/opt/arkime/plugins
# Semicolon ';' seperated list of plugins to load and the order to load in
# plugins=tagger.so; netflow.so
# Plugins to load as root, usually just readers
#rootPlugins=reader-pfring; reader-daq.so
# Semicolon ';' seperated list of viewer plugins to load and the order to load in
# viewerPlugins=wise.js
# NetFlowPlugin
# Input device id, 0 by default
#netflowSNMPInput=1
# Outout device id, 0 by default
#netflowSNMPOutput=2
# Netflow version 1,5,7 supported, 7 by default
#netflowVersion=1
# Semicolon ';' seperated list of netflow destinations
#netflowDestinations=localhost:9993
# Specify the max number of indices we calculate spidata for.
# ES will blow up if we allow the spiData to search too many indices.
spiDataMaxIndices=4
# Uncomment the following to allow direct uploads. This is experimental
#uploadCommand=/opt/arkime/bin/capture --copy -n {NODE} -r {TMPFILE} -c {CONFIG} {TAGS}
# Title Template
# _cluster_ = ES cluster name
# _userId_ = logged in User Id
# _userName_ = logged in User Name
# _page_ = internal page name
# _expression_ = current search expression if set, otherwise blank
# _-expression_ = " - " + current search expression if set, otherwise blank, prior spaces removed
# _view_ = current view if set, otherwise blank
# _-view_ = " - " + current view if set, otherwise blank, prior spaces removed
#titleTemplate=_cluster_ - _page_ _-view_ _-expression_
# Number of threads processing packets
packetThreads=2
# ADVANCED - Semicolon ';' seperated list of files to load for config. Files are loaded
# in order and can replace values set in this file or previous files.
#includes=
# ADVANCED - How is pcap written to disk
# simple = use O_DIRECT if available, writes in pcapWriteSize chunks,
# a file per packet thread.
# simple-nodirect = don't use O_DIRECT. Required for zfs and others
pcapWriteMethod=simple
# ADVANCED - Buffer size when writing pcap files. Should be a multiple of the raid 5 or xfs
# stripe size. Defaults to 256k
pcapWriteSize=262143
# ADVANCED - Max number of connections to OpenSearch/Elasticsearch
maxESConns=30
# ADVANCED - Max number of es requests outstanding in q
maxESRequests=500
# ADVANCED - Number of packets to ask libpcap to read per poll/spin
# Increasing may hurt stats and ES performance
# Decreasing may cause more dropped packets
packetsPerPoll=50000
# ADVANCED - The base path for Arkime web access. Must end with a / or bad things will happen
# Only set when using a reverse proxy
# webBasePath=/arkime/
# DEBUG - Write to stdout info every X packets.
# Set to -1 to never log status
logEveryXPackets=100000
# DEBUG - Write to stdout unknown protocols
logUnknownProtocols=false
# DEBUG - Write to stdout OpenSearch/Elasticsearch requests
logESRequests=true
# DEBUG - Write to stdout file creation information
logFileCreation=true
### High Performance settings
# https://arkime.com/settings#high-performance-settings
# magicMode=basic
# pcapReadMethod=tpacketv3
# tpacketv3NumThreads=2
# pcapWriteMethod=simple
# pcapWriteSize=2560000
# packetThreads=5
# maxPacketsInQueue=200000
### Low Bandwidth settings
# packetThreads=1
# pcapWriteSize=65536
##############################################################################
# override-ips is a special section that overrides the MaxMind databases for
# the fields set, but fields not set will still use MaxMind (example if you set
# tags but not country it will use MaxMind for the country)
# Spaces and capitalization is very important.
# IP Can be a single IP or a CIDR
# Up to 10 tags can be added
#
# ip=tag:TAGNAME1;tag:TAGNAME2;country:3LetterUpperCaseCountry;asn:ASN STRING
#[override-ips]
#10.1.0.0/16=tag:ny-office;country:USA;asn:AS0000 This is an ASN
##############################################################################
# It is possible to define in the config file extra http/email headers
# to index. They are accessed using the expression http. and
# email. with optional .cnt expressions
#
# Possible config atributes for all headers
# type: (string|integer|ip) = data type (default string)
# count: = index count of items (default false)
# unique: = only record unique items (default true)
# headers-http-request is used to configure request headers to index
snapLen=65536
[headers-http-request]
referer=type:string;count:true;unique:true
authorization=type:string;count:true
content-type=type:string;count:true
origin=type:string
# headers-http-response is used to configure http response headers to index
[headers-http-response]
location=type:string
server=type:string
content-type=type:string;count:true
# headers-email is used to configure email headers to index
[headers-email]
x-priority=type:integer
authorization=type:string
##############################################################################
# If you have multiple clusters and you want the ability to send sessions
# from one cluster to another either manually or with the cron feature fill out
# this section
#[remote-clusters]
#forensics=url:https://viewer1.host.domain:8005;serverSecret:password4arkime;name:Forensics Cluster
#shortname2=url:http://viewer2.host.domain:8123;serverSecret:password4arkime;name:Testing Cluster
# WARNING: This is an ini file with sections, most likely you don't want to put a setting here.
# New settings usually go near the top in the [default] section, or in [nodename] sections.
Update the maximum size of a packet Arkime will read off the interface
The default maximum size of a packet that Arkime can capture on an interface is 16384. This can be changed to fix the “Arkime requires full packet captures” error. We will change this to 65536.
You can update the size using the parameter snapLen and setting the value to 65536 (snapLen=65536) under the [default] configuration section.
sudo sed -i '/\[headers-http-request\]/i snapLen=65536' /opt/arkime/etc/config.iniIt is recommend that instead of changing this value that all the card “offline” features are turned off so that capture gets a picture of whats on the network instead of what the capture card has reassembled. For VMs, those features must be turned off on the physical interface and not the virtual interface. This setting can be used when changing the settings isn’t possible or desired.
Initialize Elasticsearch Arkime configuration
Run the command below to initialize Elasticsearch Arkime configuration.
sudo /opt/arkime/db/db.pl --esuser elastic:'_nqt*3UnqvVuC3Qnai6l' https://localhost:9200 init
Read more on;
/opt/arkime/db/db.pl --helpSample initialization output;
It is STRONGLY recommended that you stop ALL Arkime captures and viewers before proceeding.  Use 'db.pl https://localhost:9200 backup' to backup db first.

There is 1 OpenSearch/Elasticsearch data node, if you expect more please fix first before proceeding.

This is a fresh Arkime install
Erasing
Creating
Finished
Create Arkime Admin User Account
You can use the /opt/arkime/bin/arkime_add_user.sh script to create Arkime admin user account;
/opt/arkime/bin/arkime_add_user.sh -haddUser.js [<config options>] <user id> <user friendly name> <password> [<options>]
Options:
--admin Has admin privileges
--apionly Can only use api, not web pages
--email Can do email searches
--expression Forced user expression
--remove Can remove data (scrub, delete tags)
--webauth Can auth using the web auth header or password
--webauthonly Can auth using the web auth header only, password ignored
--packetSearch Can create a packet search job (hunt)
--createOnly Only create the user if it doesn't exist
--roles Comma seperated list of roles
Config Options:
-c, --config Where to fetch the config file from
-n Node name section to use in config file
--insecure Disable certificate verification for https calls
Run the command below to create Arkime admin user account.
Replace the username (admin) and password (changeme) accordingly.
sudo /opt/arkime/bin/arkime_add_user.sh admin "Arkime SuperAdmin" changeme --adminRunning Arkime Services
Arkime is made up of 3 components:
- capture – A threaded C application that monitors network traffic, writes PCAP formatted files to disk, parses the captured packets, and sends metadata (SPI data) to elasticsearch.
- viewer – A node.js application that runs per capture machine. It handles the web interface and transfer of PCAP files.
- elasticsearch – The search database technology powering Arkime.
We already started Elasticsearch.
systemctl status elasticsearch● elasticsearch.service - Elasticsearch
Loaded: loaded (/usr/lib/systemd/system/elasticsearch.service; enabled; preset: enabled)
Active: active (running) since Wed 2024-06-05 14:47:36 UTC; 25min ago
Docs: https://www.elastic.co
Main PID: 27505 (java)
Tasks: 92 (limit: 4614)
Memory: 2.4G (peak: 2.4G)
CPU: 54.642s
CGroup: /system.slice/elasticsearch.service
├─27505 /usr/share/elasticsearch/jdk/bin/java -Xms4m -Xmx64m -XX:+UseSerialGC -Dcli.name=server -Dcli.script=/usr/share/elasticsearch/bin/elasticsearch -Dcli.libs=lib/tools/server-cli -Des.path.hom>
├─27563 /usr/share/elasticsearch/jdk/bin/java -Des.networkaddress.cache.ttl=60 -Des.networkaddress.cache.negative.ttl=10 -Djava.security.manager=allow -XX:+AlwaysPreTouch -Xss1m -Djava.awt.headless>
└─27583 /usr/share/elasticsearch/modules/x-pack-ml/platform/linux-x86_64/bin/controller
Jun 05 14:47:22 lb-01 systemd[1]: Starting elasticsearch.service - Elasticsearch...
Jun 05 14:47:24 lb-01 systemd-entrypoint[27505]: Jun 05, 2024 2:47:24 PM sun.util.locale.provider.LocaleProviderAdapter
Jun 05 14:47:24 lb-01 systemd-entrypoint[27505]: WARNING: COMPAT locale provider will be removed in a future release
Jun 05 14:47:36 lb-01 systemd[1]: Started elasticsearch.service - Elasticsearch.
Now start and enable Arkime Capture and viewer services to run on system boot;
sudo systemctl enable --now arkimecapturesudo systemctl enable --now arkimeviewerCheck the status;
systemctl status arkimecapture● arkimecapture.service - Arkime Capture
Loaded: loaded (/etc/systemd/system/arkimecapture.service; enabled; preset: enabled)
Active: active (running) since Wed 2024-06-05 15:23:26 UTC; 27s ago
Main PID: 28525 (sh)
Tasks: 7 (limit: 4614)
Memory: 326.6M (peak: 328.3M)
CPU: 329ms
CGroup: /system.slice/arkimecapture.service
├─28525 /bin/sh -c "/opt/arkime/bin/capture -c /opt/arkime/etc/config.ini >> /opt/arkime/logs/capture.log 2>&1"
└─28526 /opt/arkime/bin/capture -c /opt/arkime/etc/config.ini
Jun 05 15:23:26 lb-01 systemd[1]: Starting arkimecapture.service - Arkime Capture...
Jun 05 15:23:26 lb-01 systemd[1]: Started arkimecapture.service - Arkime Capture.
Jun 05 15:23:26 lb-01 (sh)[28525]: arkimecapture.service: Referenced but unset environment variable evaluates to an empty string: OPTIONS
systemctl status arkimeviewer● arkimeviewer.service - Arkime Viewer
Loaded: loaded (/etc/systemd/system/arkimeviewer.service; enabled; preset: enabled)
Active: active (running) since Wed 2024-06-05 15:23:44 UTC; 1min 52s ago
Main PID: 28614 (sh)
Tasks: 12 (limit: 4614)
Memory: 111.7M (peak: 142.9M)
CPU: 1.305s
CGroup: /system.slice/arkimeviewer.service
├─28614 /bin/sh -c "/opt/arkime/bin/node viewer.js -c /opt/arkime/etc/config.ini >> /opt/arkime/logs/viewer.log 2>&1"
└─28616 /opt/arkime/bin/node viewer.js -c /opt/arkime/etc/config.ini
Jun 05 15:23:44 lb-01 systemd[1]: Started arkimeviewer.service - Arkime Viewer.
Jun 05 15:23:44 lb-01 (sh)[28614]: arkimeviewer.service: Referenced but unset environment variable evaluates to an empty string: OPTIONS
At this point, if you reboot your server, Arkime capture and viewer services may fail to start, due to slow starting of elasticsearch service.
Here is a temporary solution. Configure these services to start only when Elasticsearch starts. You may miss the traffic capture during the period when Elasticsearch is starting.
Add these lines;
After=network.target elasticsearch.service
Requires=network.target elasticsearch.service
You can use sed to update these services;
sudo sed -i 's/network.target/network.target elasticsearch.service/' /etc/systemd/system/arkimecapture.service /etc/systemd/system/arkimeviewer.servicesudo sed -i '/After=/a Requires=network.target elasticsearch.service' /etc/systemd/system/arkimecapture.service /etc/systemd/system/arkimeviewer.servicesudo systemctl daemon-reloadThis will ensure that Arkime capture and viewer will start only after Elasticsearch.
Log Files
You can find Arkime logs and Elasticsearch logs on the log files;
/opt/arkime/logs/viewer.log/opt/arkime/logs/capture.log/var/log/elasticsearch/*Adjusting Arkime configurations;
If you ever want to update Arkime configs, check the configuration file /opt/arkime/etc/config.ini. Ensure you restart the Capture/Viewer services after making changes.
Accessing Arkime Web Interface
Arkime is listening on port 8005/tcp by default.
ss -altnp | grep 8005LISTEN 0 511 *:8005 *:* users:(("node",pid=1021,fd=26))If UFW is running, open this port on it to allow external access.
ufw allow 8005/tcpYou can then access Arkime using the URL, http://ARKIMEHOST:8005 with your favorite browser.
Accessing Arkime with SSL/TLS
If you want to use SSL/TLS serts, update the lines below by uncommenting them and then specify the full paths to the files;
sudo vim /opt/arkime/etc/config.ini...
# Cert file to use, comment out to use http instead
#certFile=/opt/arkime/etc/arkime.cert
certFile=/opt/arkime/etc/arkime.cert
...
# Private key file to use, comment out to use http instead
#keyFile=/opt/arkime/etc/arkime.key
keyFile=/opt/arkime/etc/arkime.key
...
Save and exit the file.
Next, restart Arkime viewer;
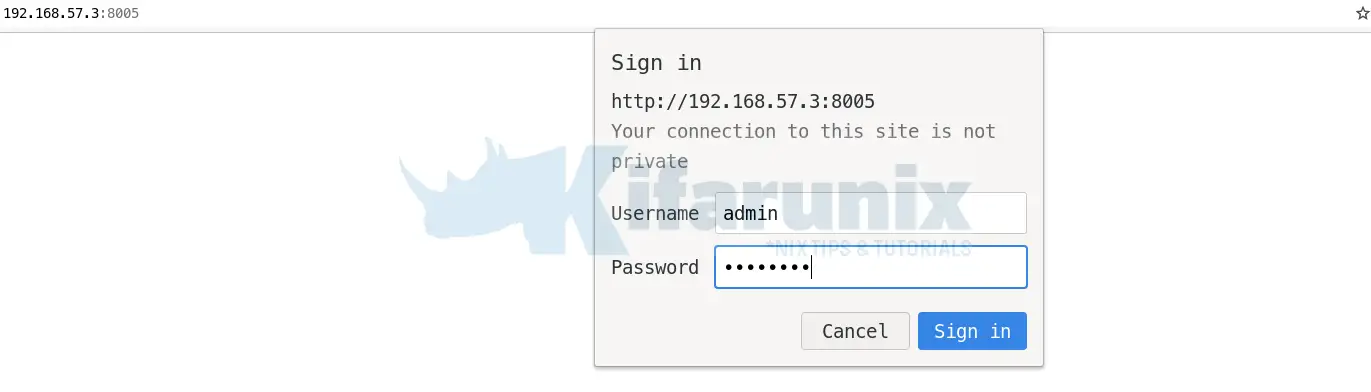
sudo systemctl restart arkimeviewerYou can then access your Arkime using the url: https://ARKIMEHOST-DOMAIN-NAME:8005
You will be prompted to enter the basic user authentication credentials you create above. We didnt enable SSL in our case (screenshot below).

Upon successful authentication, you land on Arkime Web interface.
Sample traffic sessions for last hour.

Arkime help page. Click the Arkime Icon at the top left corner.

And that is how simple it is to install Arkime on Debian.
You can now configure network traffic mirroring to Arkime for analysis.
Reference
Arkime Installation README.txt
Arkime Demo (Credentials: arkime:arkime)
