Can you run WordPress in a Docker container? Yes, follow this tutorial to learn how to deploy WordPress as a Docker container. WordPress is the world’s most popular, free and open source blogging tool and a content management system (CMS) which is based on PHP and MySQL/MariaDB databases. It is possible to run it as a Docker container.
Table of Contents
Deploying WordPress as a Docker Container
How can you Dockerize a WordPress app? Well, Docker has revolutionized how apps are currently being run! In this guide, you will learn how to Dockerize WordPress app by running it as a Docker container.
Install Docker Engine
You need to install Docker engine on your Docker host before you can proceed.
See our previous tutorials on how to install Docker engine.
sudo docker versionSample output;
Client: Docker Engine - Community
 Version:           20.10.22
 API version:       1.41
 Go version:        go1.18.9
 Git commit:        3a2c30b
 Built:             Thu Dec 15 22:28:04 2022
 OS/Arch:           linux/amd64
 Context:           default
 Experimental:      true

Server: Docker Engine - Community
 Engine:
  Version:          20.10.22
  API version:      1.41 (minimum version 1.12)
  Go version:       go1.18.9
  Git commit:       42c8b31
  Built:            Thu Dec 15 22:25:49 2022
  OS/Arch:          linux/amd64
  Experimental:     false
 containerd:
  Version:          1.6.14
  GitCommit:        9ba4b250366a5ddde94bb7c9d1def331423aa323
 runc:
  Version:          1.1.4
  GitCommit:        v1.1.4-0-g5fd4c4d
 docker-init:
  Version:          0.19.0
  GitCommit:        de40ad0
Build or Use Official WordPress Docker Image
At this point, you can choose whether you want to build your own WordPress Docker image or use the official Docker image for WordPress.
In this tutorial, we will use the official WordPress Docker image. This image comes bundled with Apache, PHP and required WordPress files.
Therefore, download the latest WordPress Docker image;
sudo mkdir /opt/wordpresscd /opt/wordpress sudo docker pull wordpressYou can see other relevant tags for specific versions of WordPress image.
Build or Use Official MySQL/MariaDB Database Docker Image
You will of course need a database for storing your WordPress site data. The most command databases to be used with WordPress are MySQL or its variant, MariaDB.
If you want to use MySQL official Docker image, download it as follows;
sudo docker pull mysqlOr if you want to use MariaDB official Docker image, use the command;
sudo docker pull mariadbThis will download the latest versions of the images. Check their official pages for relevant tags;
You can list Docker images using the command below;
sudo docker imagesREPOSITORY TAG IMAGE ID CREATED SIZE
wordpress latest fcd4967b9728 2 weeks ago 615MB
mariadb latest a748acbaccae 6 weeks ago 410MBCreate Custom Docker Network
In order to configure your WordPress app to use your MySQL or MariaDB database container, you will need to interconnect the two containers.
There are different ways of interconnecting Docker containers. One of the ways include connecting containers to same Docker Network. Any Docker containers connected to the same network can communicate with no issues.
Therefore, let’s create a custom network using docker network create command.
sudo docker network create [OPTIONS] <name>e.g
sudo docker network create wp-appThis creates a Docker network called wp-app.
For more [OPTIONS], do;
sudo docker network create --helpList available networks;
sudo docker network lsSample output;
NETWORK ID     NAME                         DRIVER    SCOPE
ec9dcea69a38   bridge                       bridge    local
948a8c9971f6   host                         host      local
326f211f2226   nagios-core-docker_default   bridge    local
e8a7ddcc85b4   none                         null      local
ce199041829e   wp-app                       bridge    local
So we will interconnect our WordPress app and DB using the wp-app network.
Create and Start MySQL/MariaDB Database Container
Since we already downloaded a MariaDB image, you can simply create and start a container using the same image.
Define MariaDB root password
To begin with, set the MariaDB root password. The password can be defined using the MARIADB_ROOT_PASSWORD environment variable (MySQL_ROOT_PASSWORD if using MySQL Docker image).
Note that you can also hash your password and use the MARIADB_ROOT_PASSWORD_HASH variable to specify your root user password hash.
Well, there are other environment variables you can use to adjust the initialization of the MariaDB container instance. We will only be using the above environment variable in this guide.
You can pass the environment variable with its value to the docker run command while starting the container using the -e or --env option e.g -e MARIADB_ROOT_PASSWORD=changemepassword. This specifies the password that will be set for the MariaDB root superuser account, (changemepassword, in this case).
Similarly, _FILE may be appended to the environment variables, e.g MARIADB_ROOT_PASSWORD_FILE to load the values for those variables from files.
For example, let’s put our MariaDB root user MD5 password hash in a file under our working directory, /opt/wordpress.
echo `openssl passwd` | sudo tee $PWD/.db-passSample output;
Password:
Verifying - Password:
$1$NwW95isi$th3jSpgHa883Wevk0GIf//
We put the password hash under /opt/wordpess/.db-pass file.
Create MariaDB Data Directory
To persistently store your database data on your host, create a data directory;
sudo mkdir /opt/wordpress/dataYou will have to mount this volume on to the MariaDB Docker container data directory, /var/lib/mysql.
Create and Run MariaDB Docker Container
Now, let’s create and start MariaDB container and connect it to the network created above;
sudo docker run -d \
--network=wp-app \
-e MARIADB_ROOT_PASSWORD_HASH=/opt/wordpress/.db-pass \
--restart unless-stopped \
-v '/opt/wordpress/data:/var/lib/mysql' \
--name wp-mariadb mariadb
List running containers;
sudo docker psSample output
CONTAINER ID   IMAGE                  COMMAND                  CREATED         STATUS        PORTS                                       NAMES
8d2a1aac1384   mariadb                "docker-entrypoint.s…"   2 seconds ago   Up 1 second   3306/tcp                                    wp-mariadb
Also check container logs;
sudo tail -f /var/lib/docker/containers/<container-ID>/<container-ID>-json.loge.g
sudo tail -f /var/lib/docker/containers/8d2a1aac138402f747d1fb681e8a475a3ff94cf8c6593665e94906649fbdfdbc/8d2a1aac138402f747d1fb681e8a475a3ff94cf8c6593665e94906649fbdfdbc-json.logSample logs;
{"log":"2023-01-26 19:19:50 0 [Note] InnoDB: File './ibtmp1' size is now 12.000MiB.\n","stream":"stderr","time":"2023-01-26T19:19:50.185971764Z"}
{"log":"2023-01-26 19:19:50 0 [Note] InnoDB: log sequence number 46790; transaction id 14\n","stream":"stderr","time":"2023-01-26T19:19:50.186995165Z"}
{"log":"2023-01-26 19:19:50 0 [Note] Plugin 'FEEDBACK' is disabled.\n","stream":"stderr","time":"2023-01-26T19:19:50.187218384Z"}
{"log":"2023-01-26 19:19:50 0 [Note] InnoDB: Loading buffer pool(s) from /var/lib/mysql/ib_buffer_pool\n","stream":"stderr","time":"2023-01-26T19:19:50.187343345Z"}
{"log":"2023-01-26 19:19:50 0 [Note] InnoDB: Cannot open '/var/lib/mysql/ib_buffer_pool' for reading: No such file or directory\n","stream":"stderr","time":"2023-01-26T19:19:50.187350811Z"}
{"log":"2023-01-26 19:19:50 0 [Warning] You need to use --log-bin to make --expire-logs-days or --binlog-expire-logs-seconds work.\n","stream":"stderr","time":"2023-01-26T19:19:50.190683332Z"}
{"log":"2023-01-26 19:19:50 0 [Note] Server socket created on IP: '0.0.0.0'.\n","stream":"stderr","time":"2023-01-26T19:19:50.19196571Z"}
{"log":"2023-01-26 19:19:50 0 [Note] Server socket created on IP: '::'.\n","stream":"stderr","time":"2023-01-26T19:19:50.191982038Z"}
{"log":"2023-01-26 19:19:50 0 [Note] mariadbd: ready for connections.\n","stream":"stderr","time":"2023-01-26T19:19:50.217115629Z"}
{"log":"Version: '10.10.2-MariaDB-1:10.10.2+maria~ubu2204'  socket: '/run/mysqld/mysqld.sock'  port: 3306  mariadb.org binary distribution\n","stream":"stderr","time":"2023-01-26T19:19:50.217135647Z"}
So MariaDB container is now running.
Similarly, MariaDB data should be available on the mounted volume;
ls -1 /opt/wordpress/data/
aria_log.00000001
aria_log_control
ddl_recovery-backup.log
ddl_recovery.log
ibdata1
ib_logfile0
ibtmp1
multi-master.info
mysql
mysql_upgrade_info
performance_schema
sys
wordpress
Create WordPress Database and Database User
Login into the MariaDB Docker container and create WordPress database and database user;
docker exec -it wp-mariadb bashEnable password based authentication (you notice that if you just type mysql, or mysql -u root and press enter, you get the MySQL shell without password); You can set the pass to the same password as you set before.
mysqlset password = password("P@sSw0Rd123");flush privileges;
quitIf you now try to login to MySQL, you will be prompted for password.
So, next, create WordPress database and database user with all privileges granted.
mysql -u root -pcreate database wordpress;
grant all on wordpress.* to wpadmin@'%' identified by 'PASSWORD';
flush privileges;
quitExit the MariaDB database container;
exitCreate and Start WordPress Database Container
Now, it is time to deploy WordPress as a Docker container and link it to the MariaDB database container.
While creating WordPress app Docker container, there available environment variables you use to define the database connection details.
WORDPRESS_DB_USERWORDPRESS_DB_PASSWORDWORDPRESS_DB_NAMEWORDPRESS_DB_HOST
You can put all these environment variable in a file;
echo 'WORDPRESS_DB_USER=wpadmin
WORDPRESS_DB_PASSWORD=PASSWORD
WORDPRESS_DB_NAME=wordpress
WORDPRESS_DB_HOST=wp-mariadb:3306' | sudo tee /opt/wordpress/.wp-db
While running WordPress Docker container, you can specify environment variables file using --env-file option.
We will also expose Apache on port 80/tcp.
To easily configure WordPress, let’s also create a directory to store WordPress configs on the Docker host;
sudo mkdir /opt/wordpress/wpWe will mount this directory to WordPress configs directory on the Docker container, /var/www/html.
To connect WordPress to Database container, ensure you connect it to the same network as the database container.
You can specify environment variables one by one;
sudo docker run -d \
--network=wp-app \
-e WORDPRESS_DB_NAME=wordpress \
-e WORDPRESS_DB_USER=wpadmin \
-e WORDPRESS_DB_PASSWORD=PASSWORD \
-e WORDPRESS_DB_HOST=wp-mariadb:3306 \
--restart unless-stopped \
-p 80:80 \
-v '/opt/wordpress/wp:/var/www/html' \
--name wordpress-app wordpress
You can also specify environment variables from a file;
sudo docker run -d \
--network=wp-app \
--env-file=/opt/wordpress/.wp-db \
--restart unless-stopped \
-p 80:80 \
-v '/opt/wordpress/wp:/var/www/html' \
--name wordpress-app wordpress
WordPress app should now be running;
docker ps
CONTAINER ID   IMAGE                  COMMAND                  CREATED              STATUS              PORTS                                       NAMES
517003ce9e57   wordpress              "docker-entrypoint.s…"   About a minute ago   Up About a minute   0.0.0.0:80->80/tcp, :::80->80/tcp           wordpress-app
8d2a1aac1384   mariadb                "docker-entrypoint.s…"   2 hours ago          Up 2 hours          3306/tcp                                    wp-mariadb
You can also check logs for both DB and APP just in case.
Also confirm that you can see WordPress config files on mounted volume, /opt/wordpress/wp;
ls -1 /opt/wordpress/wpOutput;
index.php
license.txt
readme.html
wp-activate.php
wp-admin
wp-blog-header.php
wp-comments-post.php
wp-config-docker.php
wp-config.php
wp-config-sample.php
wp-content
wp-cron.php
wp-includes
wp-links-opml.php
wp-load.php
wp-login.php
wp-mail.php
wp-settings.php
wp-signup.php
wp-trackback.php
xmlrpc.php
Accessing Containerized WordPress Site
You can now access your containerized WordPress app; http://IP_or_domain.
Choose the language of your site;
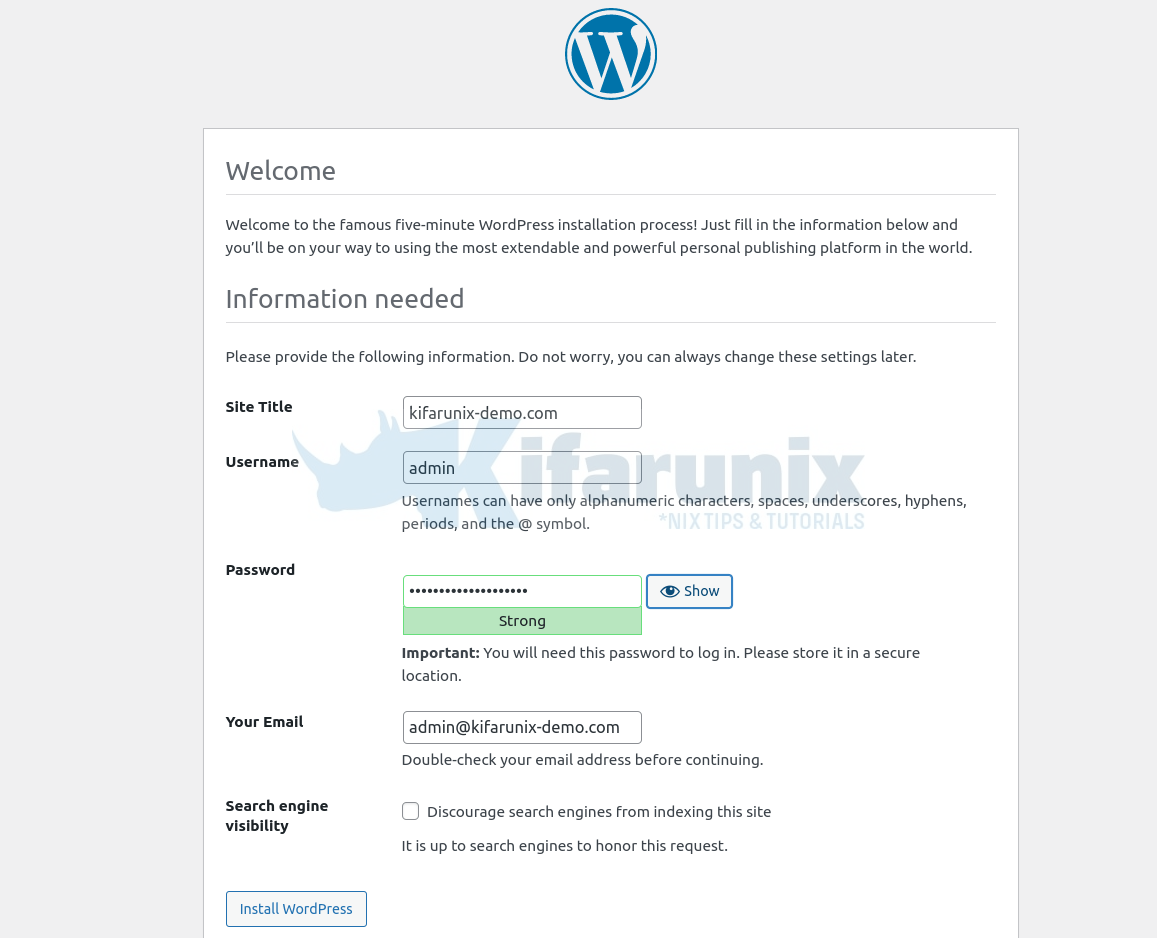
Set your WordPress sit information and proceed to finalize installation;
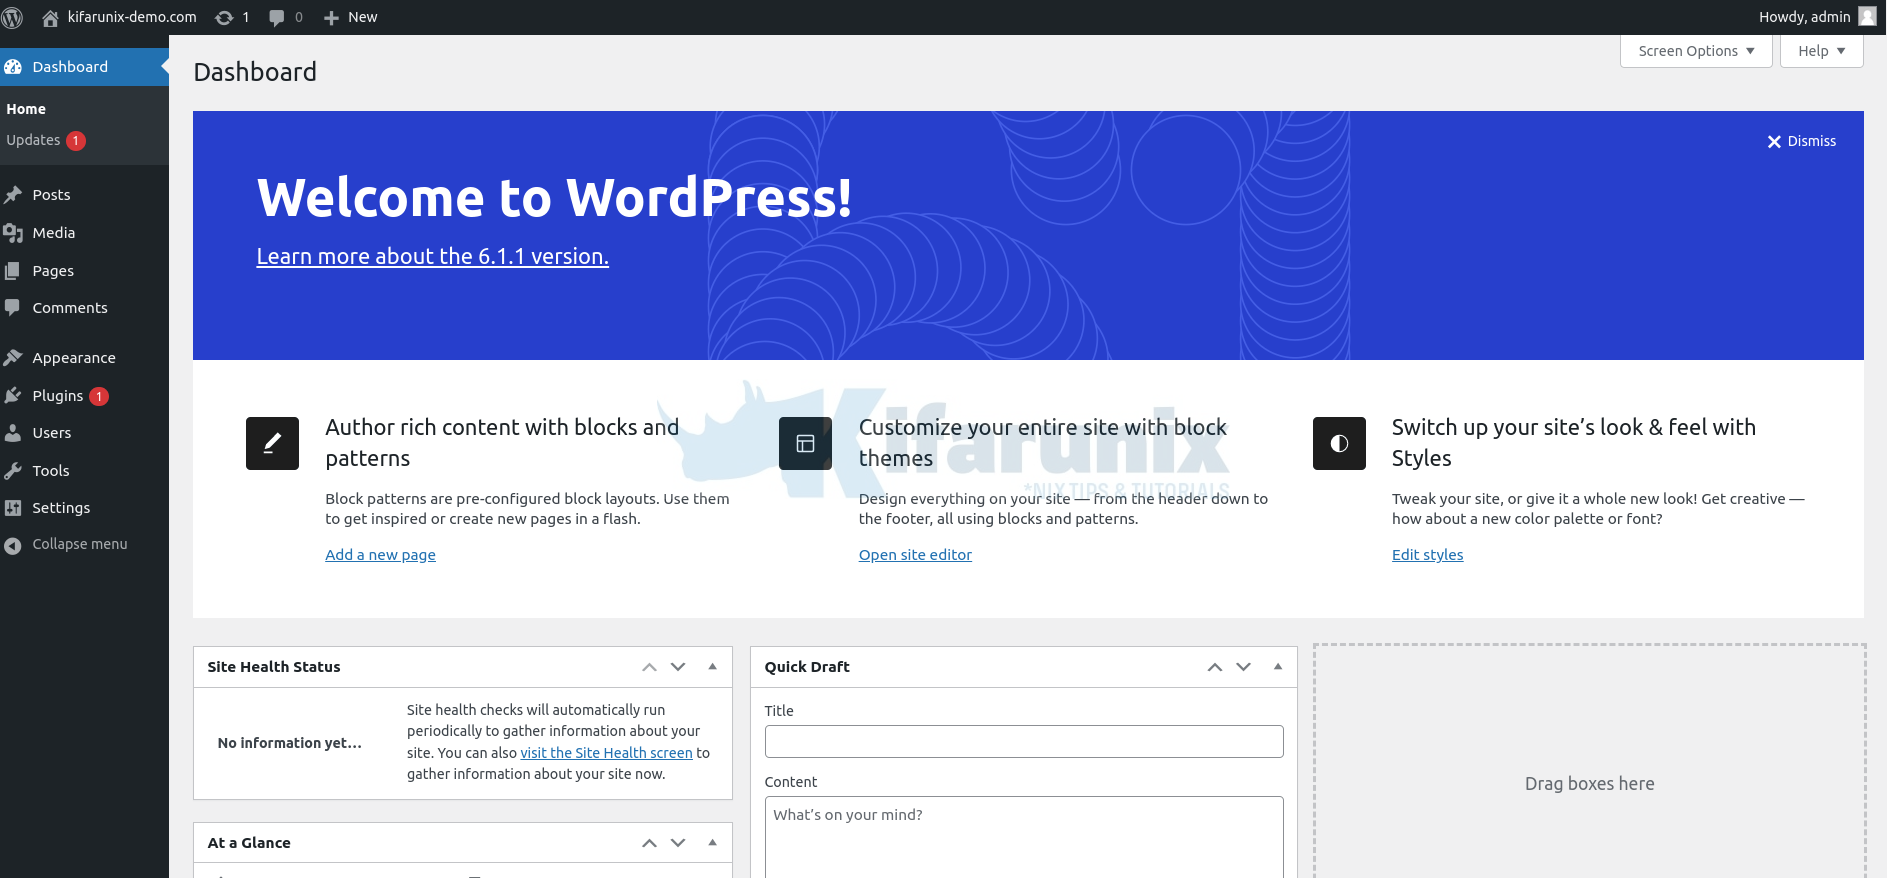
Install and Login to your site;
You have now Dockerized your WordPress app.
That brings us to the end of our tutorial on deploying WordPress as a Docker container.
Learn more about Docker commands from their help pages.


