In this tutorial, you will learn how to deploy WordPress using Docker compose. In an ever-evolving digital landscape, where websites serve as essential touch-points for businesses and individuals, ensuring a seamless and secure online presence has become paramount. Enter Docker and Docker Compose – two powerful tools that have revolutionized the way applications are packaged, shipped, and managed. If you’re seeking a streamlined solution to deploy WordPress with all its dependencies, look no further!
Table of Contents
Deploying WordPress using Docker Compose
WordPress and Docker compose
Well, as much as you can decouple each component (Database, Web Server (Apache by default), PHP) of a WordPress application and run each one of them as a separate container, it is much easier to deploy WordPress and its dependencies using Docker compose in as single file.
Docker Compose is a tool used to define and run multi-container applications using a simple configuration file in YAML format. Within the YAML configuration file, you can define the services, networks, and volumes required for your application. This makes it easy to manage complex application setups locally.
If you are running a Docker swarm in your environment setup, then you can deploy them as a Docker stack.
Install Docker Engine
You need Docker Engine for running and managing your Docker containers.
Thus, depending on the Linux distribution you are using, check our guides on how to install Docker;
How to install Docker engine on Linux
Install Docker Compose
You need Docker compose to manage multiple containers that work together as a single application.
Note that when you install Docker engine, it should also install the docker compose which you can use by typing;
docker compose --helpOn any Linux distro, the commands below should be able to get standalone Docker compose (docker-compose) installed.
(Check the current release version number releases page and replace the versions accordingly in the command below.)
curl -SL \
https://github.com/docker/compose/releases/download/v2.20.2/docker-compose-linux-x86_64 \
-o /usr/local/bin/docker-compose
Make it executable;
chmod +x /usr/local/bin/docker-composeYou can use it now by running docker-compose;
docker-compose versionCreate Project Directory
While it is optional, I find it easier to manage your application within custom directory. In this guide, I used a WordPress application directory, /opt/wordpress.
mkdir /opt/wordpressDefine WordPress Application Services
Next, create a docker-compose YAML/YML file with service definitions of your WordPress app.
In the most basic setup, you would only need a WordPress and database services in the compose file. WordPress Docker image usually comes bundled with a web server, PHP and commonly required PHP modules.
So, let’s create a docker-compose YAML/YML file for our WordPress app. Docker-compose command will interpret either of the file extension.
cd /opt/wordpressvim docker-compose.yamlThis is our WordPress app definition;
version: '3'

services:

  wordpress:
    image: wordpress
    container_name: wordpress
    restart: unless-stopped
    ports:
      - 8080:80
    environment:
      WORDPRESS_DB_HOST: db
      WORDPRESS_DB_USER: kifarunixuser
      WORDPRESS_DB_PASSWORD: ChangeME
      WORDPRESS_DB_NAME: kifarunixdb
    volumes:
      - wordpress:/var/www/html

  db:
    image: mariadb
    container_name: mariadb
    restart: unless-stopped
    environment:
      MYSQL_DATABASE: kifarunixdb
      MYSQL_USER: kifarunixuser
      MYSQL_PASSWORD: ChangeME
      MARIADB_ROOT_PASSWORD: ChangeME
    volumes:
      - db:/var/lib/mysql

volumes:
  wordpress:
  db:
Save and exit the file, of course after making your appropriate changes.
So, what makes up a compose file? Let’s demystify the above;
- Version: Specifies the version of the Docker Compose configuration. In this case, it’s version 3.
- Services: Defines the containers that make up the application.
- wordpress: The WordPress service container.
- image: Specifies the Docker image to use for the WordPress container. In this case, it’s the official WordPress image from Docker Hub.
- container_name: Defines custom-container-name of the container. It overrides the default container name that Docker Compose would generate based on the service name and a unique identifier.
- restart: Specifies that the container should restart unless explicitly stopped. This ensures that Docker will automatically restart the container if it stops for any reason, except when explicitly stopped by the user.
- ports: Maps port 8080 on the host to port 80 in the container, allowing you to access the WordPress site at
http://*:8080. - environment: Sets environment variables for the WordPress container, such as database host, user, password, and database name.
- volumes: Creates a volume called
wordpressthat’s mounted to/var/www/htmlin the container. This allows you to persist WordPress files and data even if the container is recreated.
- db: The MariaDB database service container.
- image: Specifies the Docker image to use for the database container. In this case, it’s the official MariaDB image from Docker Hub.
- restart: Specifies that the container should restart unless explicitly stopped, ensuring the database remains available.
- environment: Sets environment variables for the database container, including database name, user, passwords, and root password.
- wordpress: The WordPress service container.
- volumes: Creates a named volume named
dbthat’s mounted to/var/lib/mysqlin the container. This allows you to persist the database data even if the container is recreated.
Read more on compose-file reference page.
The above is enough to get you started.
Deploy WordPress App using Docker Compose
Once you have a docker compose yaml file, you can the command below to check the validity of the YAML file;
docker-compose configIf the YAML file is a different directory apart from the current directory, ensure to specify that path using -f option;
docker-compose -f wordpress/docker-compose.yaml configIf the contents of the YAML file are printed to stdout, then all is good. otherwise, if there is any error, it is also shown to you.
If all is good, you can launch the WordPress app containers using the command below.
docker-compose upSimilarly, specify the path to compose file using option -f.
The above command launches docker containers on foreground.
Sample output;
[+] Running 9/9
 ✔ db 8 layers [⣿⣿⣿⣿⣿⣿⣿⣿]      0B/0B      Pulled                                                                                                                       8.5s
   ✔ 9d19ee268e0d Pull complete                                                                                                                                        2.9s
   ✔ 718e898a86ff Pull complete                                                                                                                                        3.0s
   ✔ 43bd7a143a6c Pull complete                                                                                                                                        3.5s
   ✔ 80cdf483b70a Pull complete                                                                                                                                        3.5s
   ✔ 8c13b197eea7 Pull complete                                                                                                                                        3.6s
   ✔ fe76c18bf258 Pull complete                                                                                                                                        6.6s
   ✔ 67fa5c829e7f Pull complete                                                                                                                                        6.6s
   ✔ a5cb79f31ff6 Pull complete                                                                                                                                        6.7s
[+] Running 5/5
 ✔ Network wordpress_default        Created                                                                                                                            0.1s
 ✔ Volume "wordpress_wordpress"     Created                                                                                                                            0.0s
 ✔ Volume "wordpress_db"            Created                                                                                                                            0.0s
 ✔ Container mariadb         Created                                                                                                                            0.5s
 ✔ Container wordpress  Created                                                                                                                            0.5s
Attaching to mariadb, wordpress
wordpress  | WordPress not found in /var/www/html - copying now...
mariadb         | 2023-08-08 18:00:36+00:00 [Note] [Entrypoint]: Entrypoint script for MariaDB Server 1:11.0.2+maria~ubu2204 started.
mariadb         | 2023-08-08 18:00:36+00:00 [Note] [Entrypoint]: Switching to dedicated user 'mysql'
mariadb         | 2023-08-08 18:00:36+00:00 [Note] [Entrypoint]: Entrypoint script for MariaDB Server 1:11.0.2+maria~ubu2204 started.
mariadb         | 2023-08-08 18:00:37+00:00 [Note] [Entrypoint]: Initializing database files
wordpress  | Complete! WordPress has been successfully copied to /var/www/html
wordpress  | No 'wp-config.php' found in /var/www/html, but 'WORDPRESS_...' variables supplied; copying 'wp-config-docker.php' (WORDPRESS_DB_HOST WORDPRESS_DB_NAME WORDPRESS_DB_PASSWORD WORDPRESS_DB_USER)
wordpress  | AH00558: apache2: Could not reliably determine the server's fully qualified domain name, using 172.21.0.2. Set the 'ServerName' directive globally to suppress this message
wordpress  | AH00558: apache2: Could not reliably determine the server's fully qualified domain name, using 172.21.0.2. Set the 'ServerName' directive globally to suppress this message
wordpress  | [Tue Aug 08 18:00:39.426271 2023] [mpm_prefork:notice] [pid 1] AH00163: Apache/2.4.56 (Debian) PHP/8.0.29 configured -- resuming normal operations
wordpress  | [Tue Aug 08 18:00:39.428004 2023] [core:notice] [pid 1] AH00094: Command line: 'apache2 -D FOREGROUND'
mariadb         |
mariadb         |
mariadb         |
mariadb         |
mariadb         | PLEASE REMEMBER TO SET A PASSWORD FOR THE MariaDB root USER !
mariadb         | To do so, start the server, then issue the following command:
mariadb         |
mariadb         |
mariadb         | '/usr/bin/mariadb-secure-installation'
mariadb         |
mariadb         |
mariadb         | which will also give you the option of removing the test
mariadb         | databases and anonymous user created by default.  This is
mariadb         | strongly recommended for production servers.
mariadb         |
mariadb         |
mariadb         | See the MariaDB Knowledgebase at https://mariadb.com/kb
mariadb         |
mariadb         |
mariadb         | Please report any problems at https://mariadb.org/jira
mariadb         |
mariadb         |
mariadb         | The latest information about MariaDB is available at https://mariadb.org/.
mariadb         |
mariadb         |
mariadb         | Consider joining MariaDB's strong and vibrant community:
mariadb         | https://mariadb.org/get-involved/
mariadb         |
mariadb         |
mariadb         | 2023-08-08 18:00:41+00:00 [Note] [Entrypoint]: Database files initialized
mariadb         | 2023-08-08 18:00:41+00:00 [Note] [Entrypoint]: Starting temporary server
mariadb         | 2023-08-08 18:00:41+00:00 [Note] [Entrypoint]: Waiting for server startup
mariadb         | 2023-08-08 18:00:41 0 [Note] Starting MariaDB 11.0.2-MariaDB-1:11.0.2+maria~ubu2204 source revision 0005f2f06c8e1aea4915887decad67885108a929 as process 97
mariadb         | 2023-08-08 18:00:41 0 [Note] InnoDB: Compressed tables use zlib 1.2.11
mariadb         | 2023-08-08 18:00:41 0 [Note] InnoDB: Number of transaction pools: 1
mariadb         | 2023-08-08 18:00:41 0 [Note] InnoDB: Using crc32 + pclmulqdq instructions
mariadb         | 2023-08-08 18:00:41 0 [Note] mariadbd: O_TMPFILE is not supported on /tmp (disabling future attempts)
mariadb         | 2023-08-08 18:00:41 0 [Note] InnoDB: Using liburing
mariadb         | 2023-08-08 18:00:41 0 [Note] InnoDB: Initializing buffer pool, total size = 128.000MiB, chunk size = 2.000MiB
mariadb         | 2023-08-08 18:00:41 0 [Note] InnoDB: Completed initialization of buffer pool
mariadb         | 2023-08-08 18:00:41 0 [Note] InnoDB: File system buffers for log disabled (block size=512 bytes)
mariadb         | 2023-08-08 18:00:41 0 [Note] InnoDB: Opened 3 undo tablespaces
mariadb         | 2023-08-08 18:00:41 0 [Note] InnoDB: 128 rollback segments in 3 undo tablespaces are active.
mariadb         | 2023-08-08 18:00:41 0 [Note] InnoDB: Setting file './ibtmp1' size to 12.000MiB. Physically writing the file full; Please wait ...
mariadb         | 2023-08-08 18:00:41 0 [Note] InnoDB: File './ibtmp1' size is now 12.000MiB.
mariadb         | 2023-08-08 18:00:41 0 [Note] InnoDB: log sequence number 47243; transaction id 14
mariadb         | 2023-08-08 18:00:41 0 [Note] Plugin 'FEEDBACK' is disabled.
mariadb         | 2023-08-08 18:00:41 0 [Note] Plugin 'wsrep-provider' is disabled.
mariadb         | 2023-08-08 18:00:41 0 [Warning] 'user' entry 'root@8d74673d77aa' ignored in --skip-name-resolve mode.
mariadb         | 2023-08-08 18:00:41 0 [Warning] 'proxies_priv' entry '@% root@8d74673d77aa' ignored in --skip-name-resolve mode.
mariadb         | 2023-08-08 18:00:41 0 [Note] mariadbd: ready for connections.
mariadb         | Version: '11.0.2-MariaDB-1:11.0.2+maria~ubu2204'  socket: '/run/mysqld/mysqld.sock'  port: 0  mariadb.org binary distribution
mariadb         | 2023-08-08 18:00:42+00:00 [Note] [Entrypoint]: Temporary server started.
mariadb         | 2023-08-08 18:00:44+00:00 [Note] [Entrypoint]: Creating database kifarunixdb
mariadb         | 2023-08-08 18:00:44+00:00 [Note] [Entrypoint]: Creating user kifarunixuser
mariadb         | 2023-08-08 18:00:44+00:00 [Note] [Entrypoint]: Giving user kifarunixuser access to schema kifarunixdb
mariadb         | 2023-08-08 18:00:44+00:00 [Note] [Entrypoint]: Securing system users (equivalent to running mysql_secure_installation)
mariadb         |
mariadb         |
mariadb         | 2023-08-08 18:00:44+00:00 [Note] [Entrypoint]: Stopping temporary server
mariadb         | 2023-08-08 18:00:44 0 [Note] mariadbd (initiated by: unknown): Normal shutdown
mariadb         | 2023-08-08 18:00:44 0 [Note] InnoDB: FTS optimize thread exiting.
mariadb         | 2023-08-08 18:00:44 0 [Note] InnoDB: Starting shutdown...
mariadb         | 2023-08-08 18:00:44 0 [Note] InnoDB: Dumping buffer pool(s) to /var/lib/mysql/ib_buffer_pool
mariadb         | 2023-08-08 18:00:44 0 [Note] InnoDB: Buffer pool(s) dump completed at 230808 18:00:44
mariadb         | 2023-08-08 18:00:44 0 [Note] InnoDB: Removed temporary tablespace data file: "./ibtmp1"
mariadb         | 2023-08-08 18:00:44 0 [Note] InnoDB: Shutdown completed; log sequence number 47243; transaction id 15
mariadb         | 2023-08-08 18:00:44 0 [Note] mariadbd: Shutdown complete
mariadb         |
mariadb         |
mariadb         | 2023-08-08 18:00:44+00:00 [Note] [Entrypoint]: Temporary server stopped
mariadb         |
mariadb         |
mariadb         | 2023-08-08 18:00:44+00:00 [Note] [Entrypoint]: MariaDB init process done. Ready for start up.
mariadb         |
mariadb         |
mariadb         | 2023-08-08 18:00:45 0 [Note] Starting MariaDB 11.0.2-MariaDB-1:11.0.2+maria~ubu2204 source revision 0005f2f06c8e1aea4915887decad67885108a929 as process 1
mariadb         | 2023-08-08 18:00:45 0 [Note] InnoDB: Compressed tables use zlib 1.2.11
mariadb         | 2023-08-08 18:00:45 0 [Note] InnoDB: Number of transaction pools: 1
mariadb         | 2023-08-08 18:00:45 0 [Note] InnoDB: Using crc32 + pclmulqdq instructions
mariadb         | 2023-08-08 18:00:45 0 [Note] mariadbd: O_TMPFILE is not supported on /tmp (disabling future attempts)
mariadb         | 2023-08-08 18:00:45 0 [Note] InnoDB: Using liburing
mariadb         | 2023-08-08 18:00:45 0 [Note] InnoDB: Initializing buffer pool, total size = 128.000MiB, chunk size = 2.000MiB
mariadb         | 2023-08-08 18:00:45 0 [Note] InnoDB: Completed initialization of buffer pool
mariadb         | 2023-08-08 18:00:45 0 [Note] InnoDB: File system buffers for log disabled (block size=512 bytes)
mariadb         | 2023-08-08 18:00:45 0 [Note] InnoDB: Opened 3 undo tablespaces
mariadb         | 2023-08-08 18:00:45 0 [Note] InnoDB: 128 rollback segments in 3 undo tablespaces are active.
mariadb         | 2023-08-08 18:00:45 0 [Note] InnoDB: Setting file './ibtmp1' size to 12.000MiB. Physically writing the file full; Please wait ...
mariadb         | 2023-08-08 18:00:45 0 [Note] InnoDB: File './ibtmp1' size is now 12.000MiB.
mariadb         | 2023-08-08 18:00:45 0 [Note] InnoDB: log sequence number 47243; transaction id 14
mariadb         | 2023-08-08 18:00:45 0 [Note] Plugin 'FEEDBACK' is disabled.
mariadb         | 2023-08-08 18:00:45 0 [Note] Plugin 'wsrep-provider' is disabled.
mariadb         | 2023-08-08 18:00:45 0 [Note] InnoDB: Loading buffer pool(s) from /var/lib/mysql/ib_buffer_pool
mariadb         | 2023-08-08 18:00:45 0 [Note] Server socket created on IP: '0.0.0.0'.
mariadb         | 2023-08-08 18:00:45 0 [Note] Server socket created on IP: '::'.
mariadb         | 2023-08-08 18:00:45 0 [Note] InnoDB: Buffer pool(s) load completed at 230808 18:00:45
mariadb         | 2023-08-08 18:00:45 0 [Note] mariadbd: ready for connections.
mariadb         | Version: '11.0.2-MariaDB-1:11.0.2+maria~ubu2204'  socket: '/run/mysqld/mysqld.sock'  port: 3306  mariadb.org binary distribution
If you open another another terminal and check the running containers;
docker psSample output;
CONTAINER ID   IMAGE       COMMAND                  CREATED              STATUS              PORTS                                   NAMES
8aff673f761e   mariadb     "docker-entrypoint.s…"   About a minute ago   Up About a minute   3306/tcp                                mariadb
a85a0d0d0c57   wordpress   "docker-entrypoint.s…"   About a minute ago   Up About a minute   0.0.0.0:8080->80/tcp, :::8080->80/tcp   wordpress
To run the containers in background, simply press Ctrl+c and rerun the command with option -d.
docker-compose up -d
[+] Running 2/2
 ✔ Container mariadb    Started                                                                                                                                        0.6s
 ✔ Container wordpress  Started                                                                                                                                        0.4s
You should now be able to access your WordPress app using either IP or domain (http://<IP>|<domain>:8080) since none is enforced here.
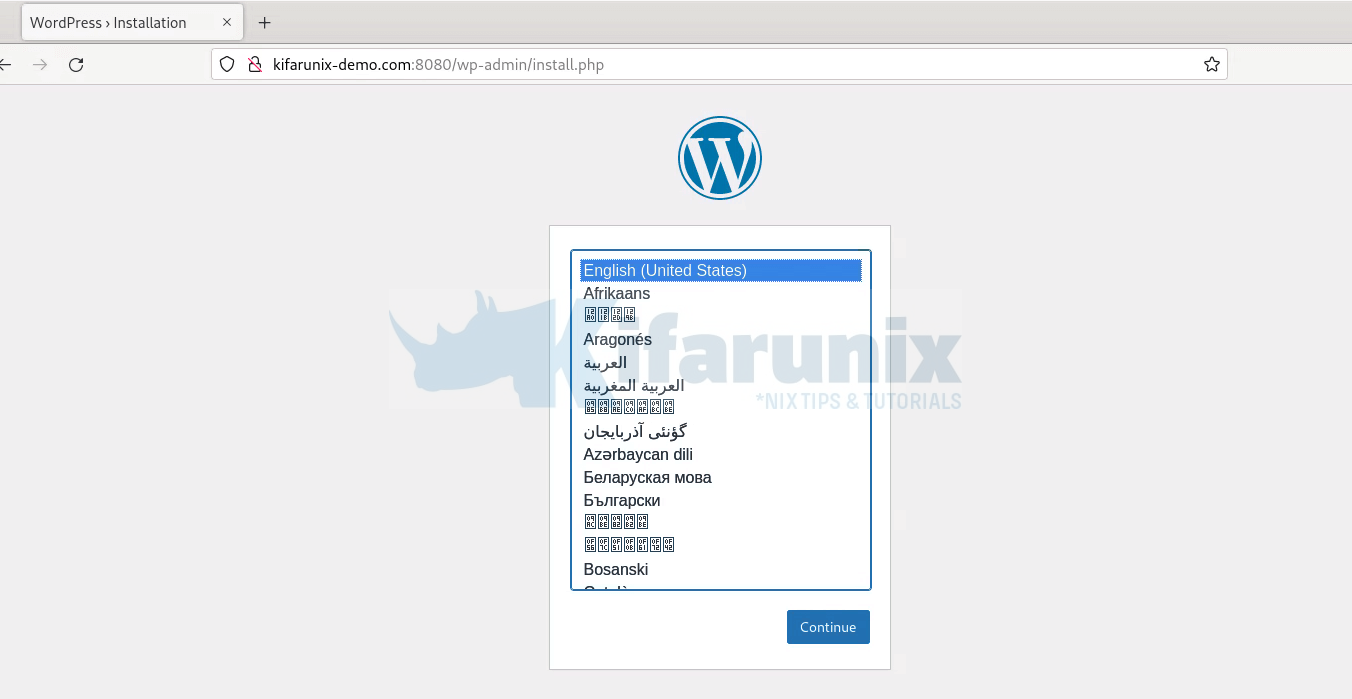
You can list the volumes created by the containers;
docker volume lsList the networks;
docker network lsDelete the containers and networks;
docker-compose downFor more docker-compose options, check;
docker-compose --helpWordPress Container Extra Configurations
There are other extra configs that you can use for the WordPress container apart from the basic environment variables that are usually used by default. Such extra configs can be defined using WORDPRESS_CONFIG_EXTRA variable.
See example options here;
WP_DEBUG: When set to true, this enables debugging mode in WordPress, providing more detailed error messages in case of issues.WP_POST_REVISIONS: Sets the maximum number of post revisions to be stored. In this case, it’s set to 5.WP_MEMORY_LIMIT: Defines the maximum amount of memory that WordPress can use. Here, it’s set to 256 megabytes.DISABLE_WP_CRON: When true, it disables the built-in WordPress cron system, which can be useful when using an external cron job system.AUTOMATIC_UPDATER_DISABLED: If true, this prevents WordPress from automatically updating itself.WP_CACHE: When true, it enables the use of caching for improved performance.WP_HOMEandWP_SITEURL: These define the base URLs for the WordPress installation.FS_METHOD: Sets the method used for file operations. ‘direct’ indicates direct file system access without FTP.FTP_USERandFTP_PASS: These are the FTP credentials used for file operations if FTP is required.FORCE_SSL_ADMIN: Enforces the use of SSL for the WordPress admin dashboard.DISALLOW_FILE_MODS: Prevents file modification through the WordPress admin interface.DISALLOW_FILE_EDIT: Disallows editing of theme and plugin files through the WordPress admin interface.
These are just but a few.
You would use them in the compose file as;
services:

  wordpress:
    image: wordpress
    container_name: wordpress
    restart: unless-stopped
    ports:
      - 8080:80
    environment:
      WORDPRESS_DB_HOST: db
      WORDPRESS_DB_USER: kifarunixuser
      WORDPRESS_DB_PASSWORD: ChangeME
      WORDPRESS_DB_NAME: kifarunixdb
      WORDPRESS_CONFIG_EXTRA: |
        define( 'WP_DEBUG', true );
        define( 'WP_POST_REVISIONS', 5 );
        define( 'WP_MEMORY_LIMIT', '256M' );
        define( 'DISABLE_WP_CRON', true );
        define( 'AUTOMATIC_UPDATER_DISABLED', true );
        define( 'WP_CACHE', true );
        define( 'WP_HOME', 'https://www.example.com' );
        define( 'WP_SITEURL', 'https://www.example.com' );
        define( 'FS_METHOD', 'direct' );
        define( 'FTP_USER', 'username' );
        define( 'FTP_PASS', 'password' );
        define( 'FORCE_SSL_ADMIN', true );
        define( 'DISALLOW_FILE_MODS', true );
        define( 'DISALLOW_FILE_EDIT', true );
    volumes:
      - wordpress:/var/www/html
...
...
That is just an example usage.
Run WordPress Container with Nginx
By default, WordPress uses Apache web server. You can confirm this by inspecting the wordpress container;
docker inspect wordpressTo configure it to use Nginx, edit the compose file as follows;
vim docker-compose.yaml
version: '3'

services:

  wordpress:
    image: wordpress
    container_name: wordpress
    restart: unless-stopped
#    ports:
#      - 8080:80
    environment:
      WORDPRESS_DB_HOST: db
      WORDPRESS_DB_USER: kifarunixuser
      WORDPRESS_DB_PASSWORD: ChangeME
      WORDPRESS_DB_NAME: kifarunixdb
      WORDPRESS_CONFIG_EXTRA: |
        define( 'WP_HOME', 'http://kifarunix-demo.com' );
        define( 'WP_SITEURL', 'http://kifarunix-demo.com' );
    volumes:
      - wordpress:/var/www/html

  db:
    image: mariadb
    container_name: mariadb
    restart: unless-stopped
    environment:
      MYSQL_DATABASE: kifarunixdb
      MYSQL_USER: kifarunixuser
      MYSQL_PASSWORD: ChangeME
      MARIADB_ROOT_PASSWORD: ChangeME
    volumes:
      - db:/var/lib/mysql

  nginx:
    image: nginx:latest
    container_name: nginx
    restart: always
    ports:
      - 80:80
    volumes:
      - ./nginx/conf.d:/etc/nginx/conf.d
    depends_on:
      - wordpress

volumes:
  wordpress:
  db:
Update compose file accordingly.
Ensure that Nginx configuration directory exists on the host;
mkdir -p nginx/conf.dAlso ensure that you have the site configuration;
vim nginx/conf.d/default.conf
server {
    listen 80;
    server_name kifarunix-demo.com;

    location / {
        proxy_pass http://wordpress:80;
        proxy_set_header Host $host;
        proxy_set_header X-Real-IP $remote_addr;
        proxy_set_header X-Forwarded-For $proxy_add_x_forwarded_for;
        proxy_set_header X-Forwarded-Proto $scheme;
    }

    location ~ /\.well-known/acme-challenge {
        allow all;
        root /var/www/html;
    }
}
Update the configs accordingly.
When done, start WordPress with Nginx web server.
docker-compose downdocker-compose up -dConfirm the services;
CONTAINER ID   IMAGE          COMMAND                  CREATED         STATUS         PORTS                               NAMES
38e4ac7cf507   nginx:latest   "/docker-entrypoint.…"   6 seconds ago   Up 5 seconds   0.0.0.0:80->80/tcp, :::80->80/tcp   nginx
5b0dc0ac47bc   mariadb        "docker-entrypoint.s…"   6 seconds ago   Up 6 seconds   3306/tcp                            mariadb
eac3752c9579   wordpress      "docker-entrypoint.s…"   6 seconds ago   Up 6 seconds   80/tcp                              wordpress
You can then access your wordpress using the address defined, http://kifarunix-demo.com.
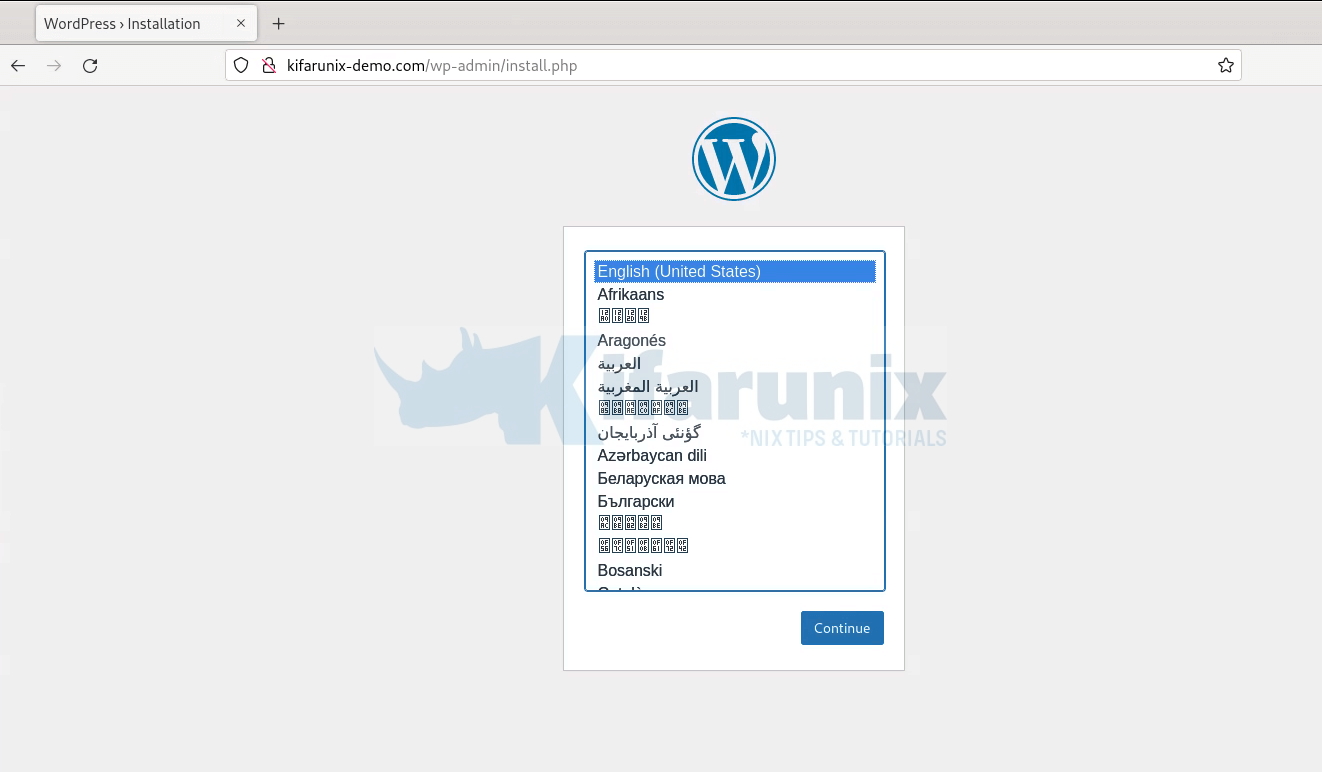
You can then proceed to complete the setup of your WordPress site.
Run WordPress Container with SSL/TLS
Configure SSL/TLS with the default Apache Web Server
If you want to run WordPress with SSL/TLS using the default Apache it is bundled with, then you have to rebuild the wordpress image to enable SSL modules.
vim DockerfileEnter;
FROM wordpress:latest

RUN a2enmod ssl rewrite
Save the file and recreate the WordPress image;
docker build -t wordpress:ssl .You should now have a custom WordPress image;
docker images
REPOSITORY            TAG       IMAGE ID       CREATED          SIZE
wordpress             ssl       c47a8aa8ec4b   58 seconds ago   664MB
wordpress             latest    b94fa4376c73   10 days ago      664MB
mariadb               latest    011343cf3ec3   5 weeks ago      403MB
Next, create your custom HTTP/HTTPS Apache configuration;
mkdir apachevim apache/kifarunix-demo.confSample config with redirection;
<VirtualHost *:80>
    ServerName kifarunix-demo.com
    Redirect permanent / https://kifarunix-demo.com/
</VirtualHost>

<VirtualHost *:443>
    ServerName kifarunix-demo.com
    DocumentRoot /var/www/html

    SSLEngine on
    SSLCertificateFile /etc/apache2/ssl/ssl.crt
    SSLCertificateKeyFile /etc/apache2/ssl/ssl.key

    <FilesMatch "\.(cgi|shtml|phtml|php)$">
        SSLOptions +StdEnvVars
    </FilesMatch>
    <Directory /usr/lib/cgi-bin>
        SSLOptions +StdEnvVars
    </Directory>
</VirtualHost>
Update your configs accordingly.
Provide SSL/TLS certs;
mkdir apache/sslI have put ssl certs in there;
ls -1 apache/ssl/ssl.crt
ssl.keyUpdate your compose file accordingly;
vim docker-compose.yaml
version: '3'

services:

  wordpress:
    image: wordpress:ssl
    container_name: wordpress
    restart: unless-stopped
    ports:
      - 80:80
      - 443:443
    environment:
      WORDPRESS_DB_HOST: db
      WORDPRESS_DB_USER: kifarunixuser
      WORDPRESS_DB_PASSWORD: ChangeME
      WORDPRESS_DB_NAME: kifarunixdb
      WORDPRESS_CONFIG_EXTRA: |
        define( 'WP_HOME', 'https://kifarunix-demo.com' );
        define( 'WP_SITEURL', 'https://kifarunix-demo.com');
    volumes:
      - wordpress:/var/www/html
      - ./apache/ssl:/etc/apache2/ssl
      - ./apache/kifarunix-demo.conf:/etc/apache2/sites-enabled/000-default.conf

  db:
    image: mariadb
    container_name: mariadb
    restart: unless-stopped
    environment:
      MYSQL_DATABASE: kifarunixdb
      MYSQL_USER: kifarunixuser
      MYSQL_PASSWORD: ChangeME
      MARIADB_ROOT_PASSWORD: ChangeME
    volumes:
      - db:/var/lib/mysql

volumes:
  wordpress:
  db:
See highlighted sections for what we changed/updated.
Save the compose file and bring up WordPress using Apache with SSL/TLS.
docker-compose downdocker-compose up -dConfirm;
docker ps
CONTAINER ID   IMAGE           COMMAND                  CREATED         STATUS         PORTS                                                                      NAMES
2b9f1b6dc1a8   wordpress:ssl   "docker-entrypoint.s…"   4 seconds ago   Up 2 seconds   0.0.0.0:80->80/tcp, :::80->80/tcp, 0.0.0.0:443->443/tcp, :::443->443/tcp   wordpress
ea763f9a7baa   mariadb         "docker-entrypoint.s…"   4 seconds ago   Up 2 seconds   3306/tcp                                                                   mariadb
Access your WordPress from browser. It should redirect HTTP to HTTPS;
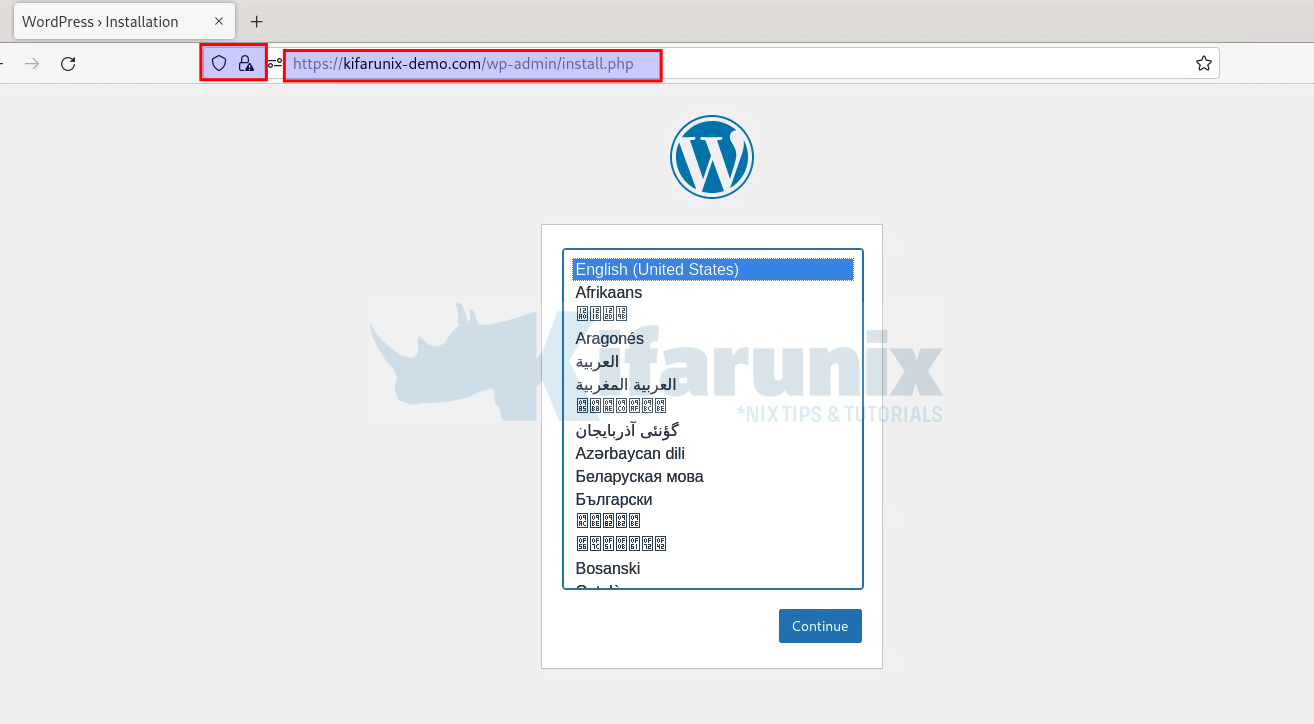
Awesome! You are now serving HTTPS.
Configure SSL/TLS with Nginx Web Server
If you dont want to update the WordPress image, then you can use Nginx image.
We will update Nginx configs above as follows.
mkdir nginx/sslPut your SSL certs there;
ls -1 nginx/ssl/ssl.crt
ssl.keyUpdate the default config.
vim nginx/conf.d/default.conf
server {
    listen 80;
    server_name kifarunix-demo;
    return 301 https://$host$request_uri;
}

server {
    listen 443 ssl;
    server_name kifarunix-demo;

    ssl_certificate /etc/nginx/certs/ssl.crt;
    ssl_certificate_key /etc/nginx/certs/ssl.key;

    location / {
        proxy_pass http://wordpress:80;
        proxy_set_header Host $host;
        proxy_set_header X-Real-IP $remote_addr;
        proxy_set_header X-Forwarded-For $proxy_add_x_forwarded_for;
        proxy_set_header X-Forwarded-Proto $scheme;
    }

    location ~ /\.well-known/acme-challenge {
        allow all;
        root /var/www/html;
    }
}
Update the compose file;
vim docker-compose.yaml
version: '3'

services:

  wordpress:
    image: wordpress
    container_name: wordpress
    restart: unless-stopped
#    ports:
#      - 8080:80
    environment:
      WORDPRESS_DB_HOST: db
      WORDPRESS_DB_USER: kifarunixuser
      WORDPRESS_DB_PASSWORD: ChangeME
      WORDPRESS_DB_NAME: kifarunixdb
    volumes:
      - wordpress:/var/www/html

  db:
    image: mariadb
    container_name: mariadb
    restart: unless-stopped
    environment:
      MYSQL_DATABASE: kifarunixdb
      MYSQL_USER: kifarunixuser
      MYSQL_PASSWORD: ChangeME
      MARIADB_ROOT_PASSWORD: ChangeME
      WORDPRESS_CONFIG_EXTRA: |
        define( 'WP_HOME', 'https://kifarunix-demo.com' );
        define( 'WP_SITEURL', 'https://kifarunix-demo.com' );
    volumes:
      - db:/var/lib/mysql

  nginx:
    image: nginx:latest
    container_name: nginx
    restart: always
    ports:
      - 80:80
      - 443:443
    volumes:
      - ./nginx/conf.d:/etc/nginx/conf.d
      - ./nginx/ssl:/etc/nginx/certs
    depends_on:
      - wordpress

volumes:
  wordpress:
  db:
Save and exit.
Run the WordPress container;
docker-compose downdocker-compose up -dYou should be able to access your WordPress site using HTTPS served by Nginx.
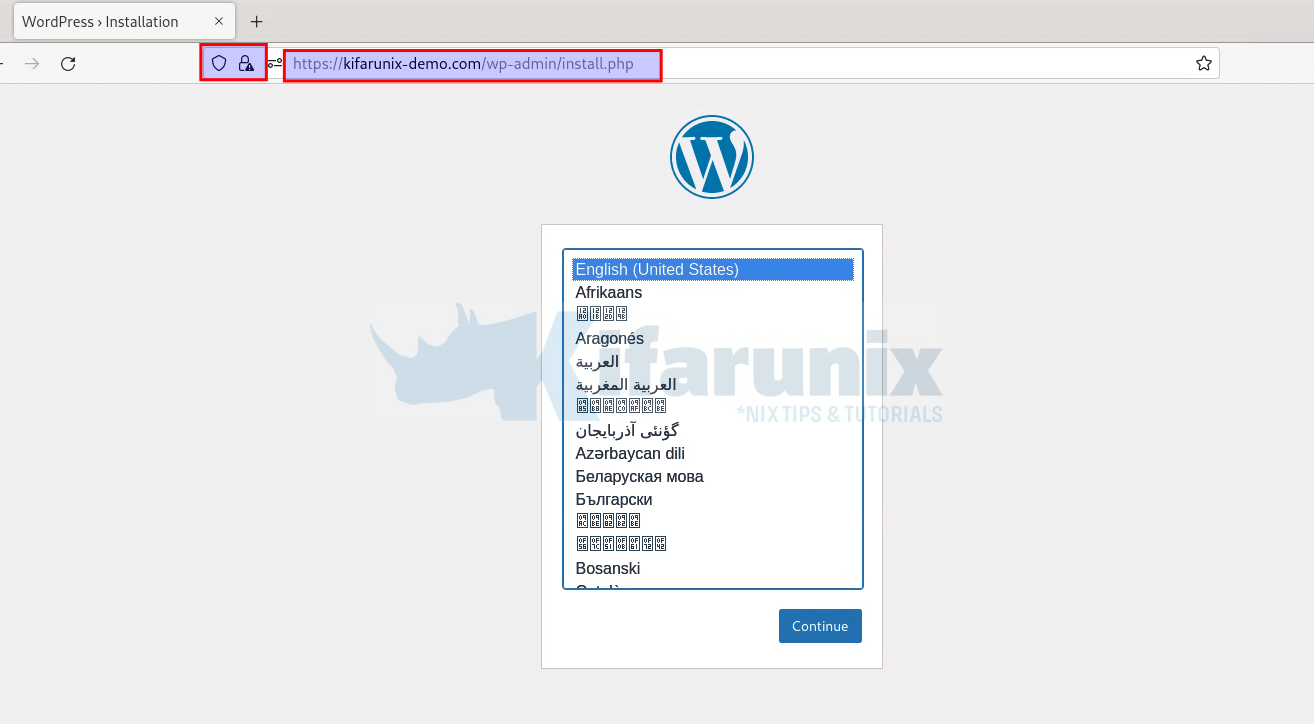
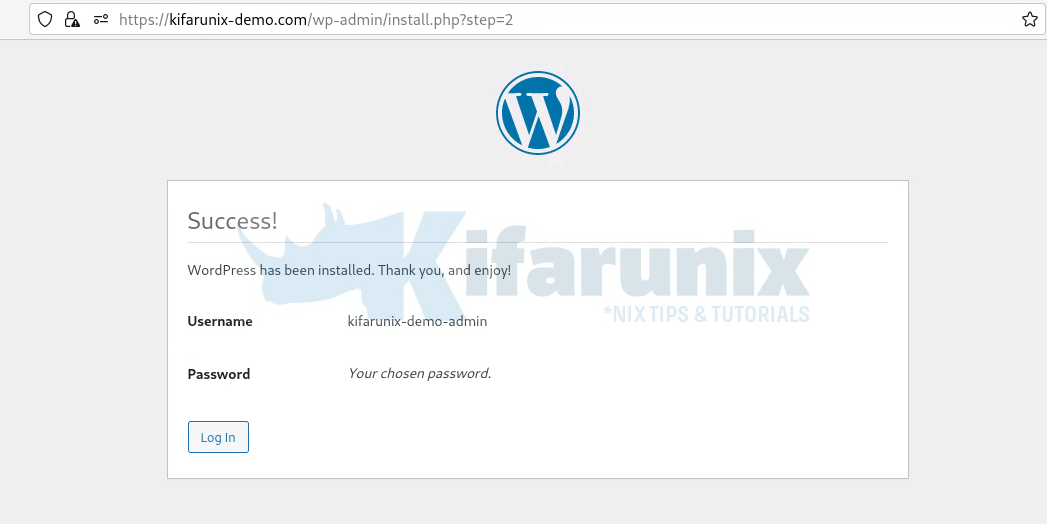
Setup success;
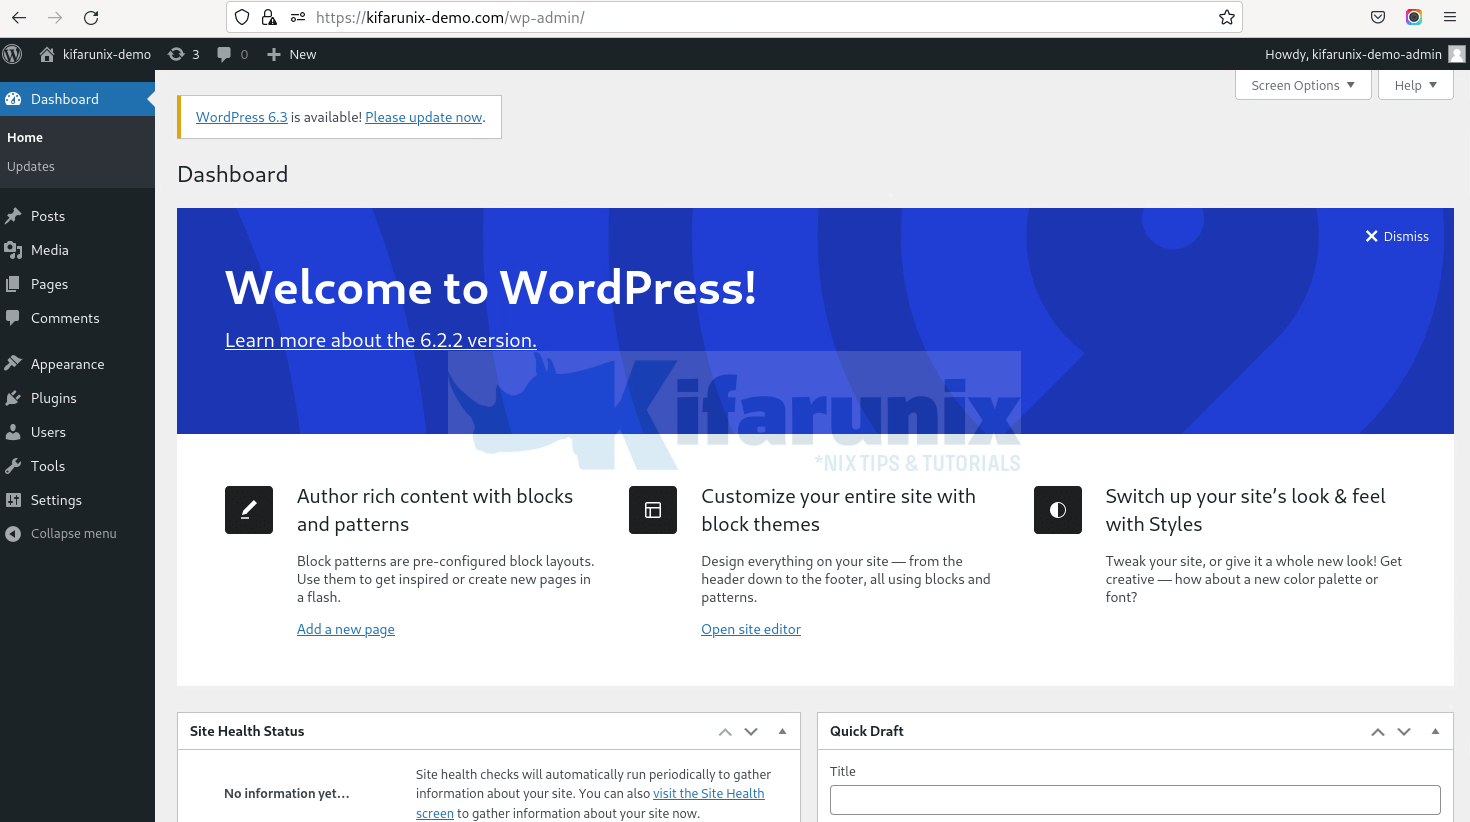
And finally!
Conclusion
You have successfully deployed WordPress app using docker compose.
That marks the end of our tutorial on deploying WordPress using Docker compose.

