In this tutorial, you will learn how to shrink Linux root filesystem by migrating to new disk. Shrinking the Linux root filesystem can be necessary for a variety of reasons, such as when you want to migrate the system to a smaller disk to save under-utilized disk space. However, shrinking the root filesystem can be a delicate operation, as it can damage the system and subsequently lead to loss of data if done incorrectly.
Table of Contents
Shrinking Linux Root Filesystem by Migrating to New Disk
As already stated, shrinking the root filesystem of a Linux can be a delicate and risky task as you might easily loose your data. One way to shrink the root filesystem is to migrate it to a new disk, that is relatively smaller. This is a relatively safe operation, as it does not involve modifying the existing filesystem. To migrate the root filesystem to a new disk, you will need to:
- Backup your data
- Power off and attach a new disk of smaller size to the system
- Create Bootable USB or simply attach Live bootable ISO to your Linux system
- Boot into Live System Environment
- Create relevant partitions and filesystems on the new disk.
- Copy the contents of the root filesystem to the new disk.
- Update the bootloader/Install grub to boot partition on the new disk.
For the purposes of demo, we will be using an Ubuntu 22.04 Virtual Machine running on KVM.
See the disk usage on my Ubuntu VM;
df -hTFilesystem Type Size Used Avail Use% Mounted on
tmpfs tmpfs 195M 1.2M 194M 1% /run
/dev/mapper/ubuntu--vg-ubuntu--lv ext4 105G 6.8G 94G 7% /
tmpfs tmpfs 972M 0 972M 0% /dev/shm
tmpfs tmpfs 5.0M 0 5.0M 0% /run/lock
/dev/vda2 ext4 2.0G 130M 1.7G 8% /boot
/dev/vda1 vfat 1.1G 6.1M 1.1G 1% /boot/efi
tmpfs tmpfs 195M 4.0K 195M 1% /run/user/1000
As you can see, I am only using ~7G out of 100G+ assigned to the system. This space is under utilized and we are looking at reducing it to 20G.
Backup your System Data
Before you can even think of attempting to play with resizing your system disk, ensure your have your backups done. Resizing filesystem can lead to system brick if a mistake arises during the process.
You can check various backup tutorials we have;
Attach New Disk to the System
Power off the Linux system and attach a new disk of smaller size. Smaller is used to mean your desired size.
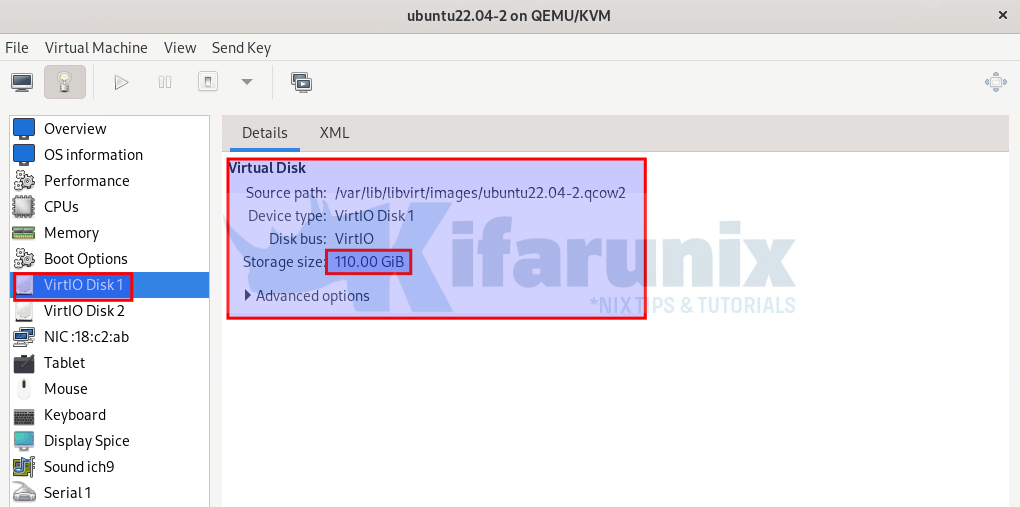
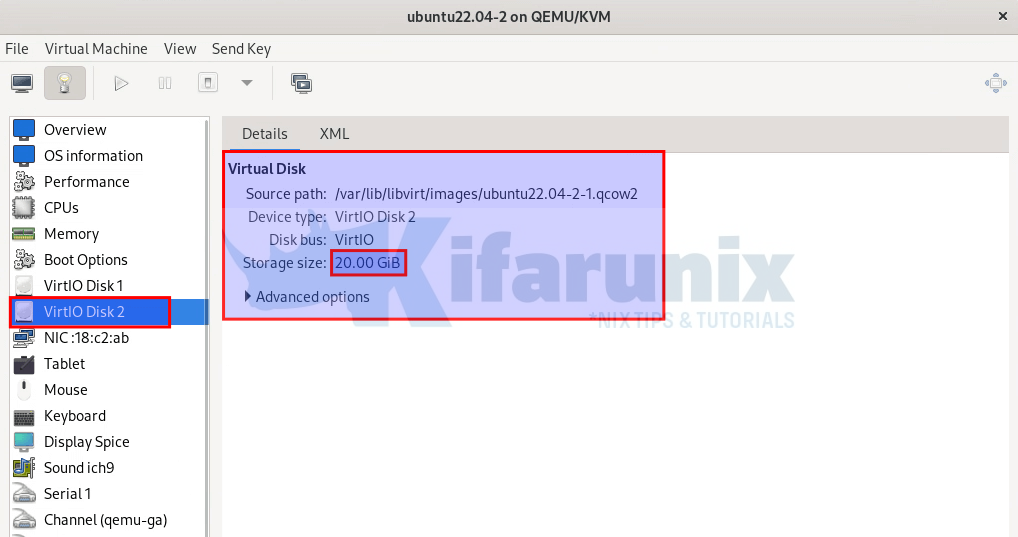
As already mentioned, am using an Ubuntu VM on KVM. See screenshot below.
First disk with current OS and data;
New smaller disk attached;
Attach Live Bootable Medium to the Linux system
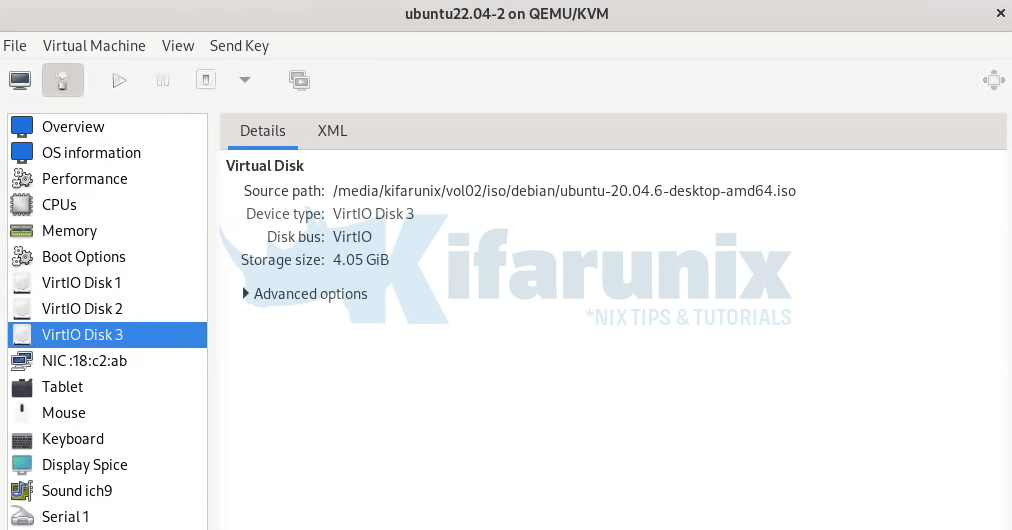
Next, attach a live bootable medium to your Linux system. Am using Ubuntu 20.04 live ISO file in this guide.
Boot into Live System Environment
Once you have attached a new disk and a Live bootable medium, you need to configure your Linux system to boot from the live bootable medium.
Thus, under the VM hardware details, click on Boot Options and select only the live ISO medium to boot from.
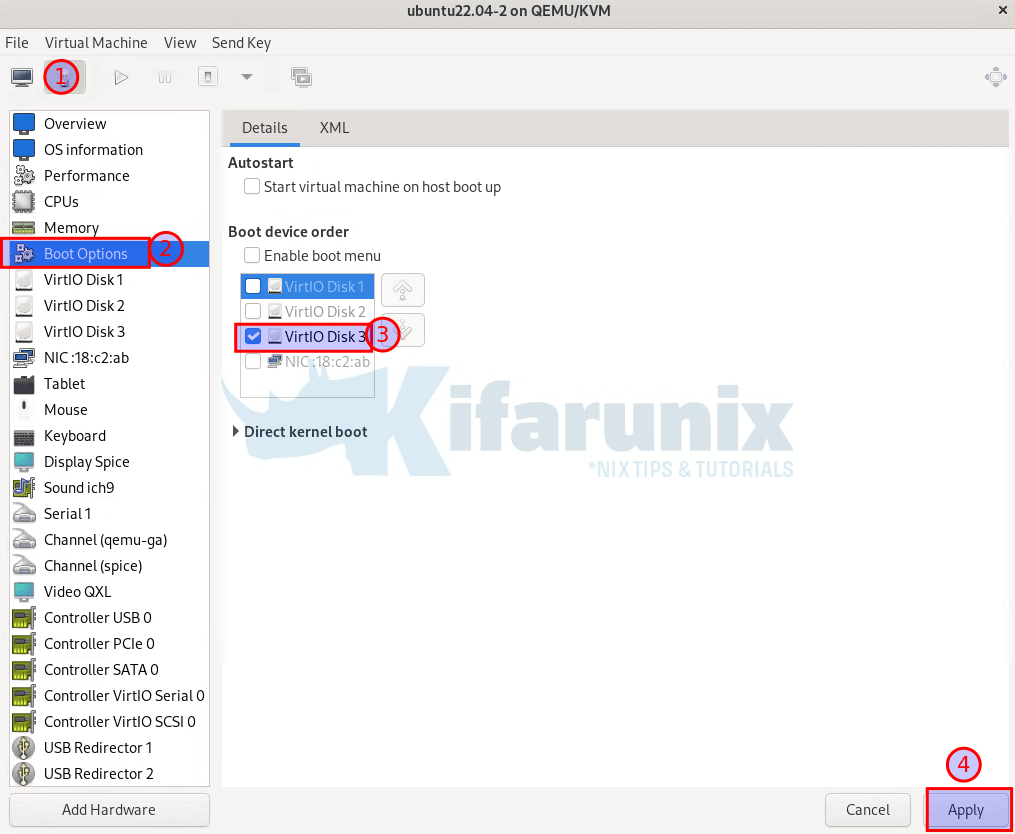
Apply the changes.
Start the machine.
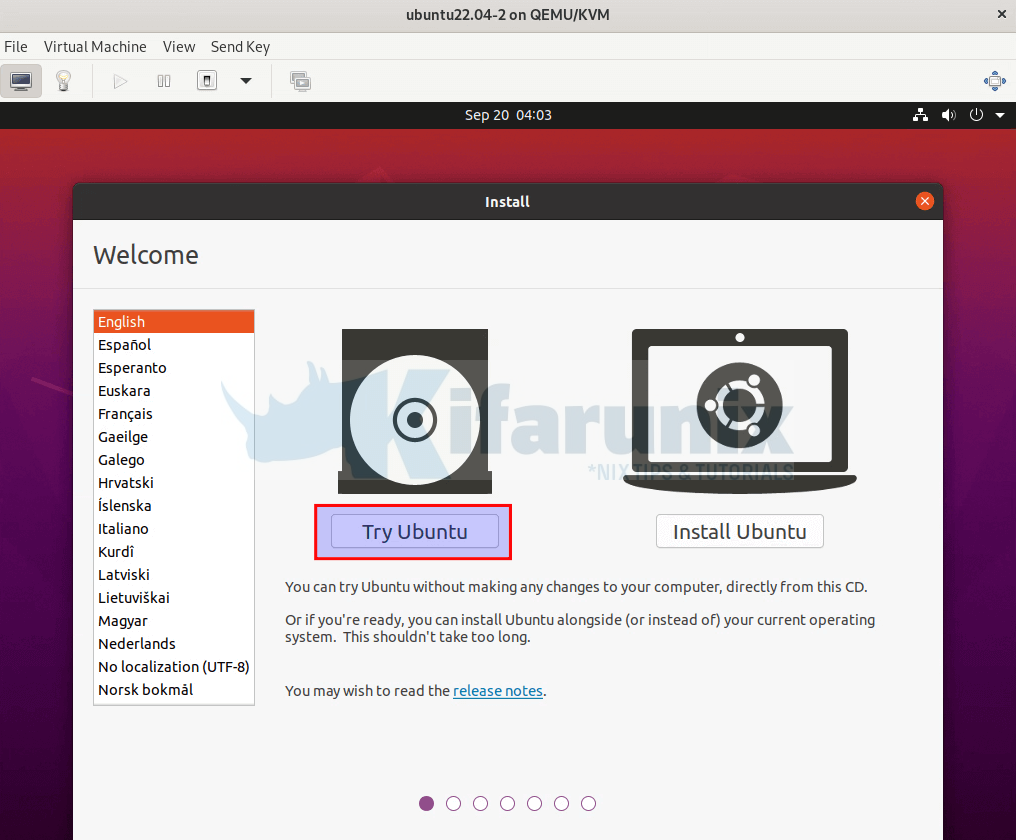
When the system boots completely, you are provided with two options, Try Ubuntu or Install Ubuntu.
Click Try Ubuntu. This could be different and may vary from distro to distro. Ensure you trying from Live ISO.
Create Relevant Partitions and Filesystems on the New Disk
Get Information about Available Block Devices
Once you boot into the live system, open the terminal run the command below to get some information about the attached block devices.
sudo su -lsblk | grep -v loopSample output;
NAME                      MAJ:MIN RM   SIZE RO TYPE MOUNTPOINT
vda                       252:0    0   110G  0 disk
├─vda1                    252:1    0   1.1G  0 part
├─vda2                    252:2    0     2G  0 part
└─vda3                    252:3    0   107G  0 part
  └─ubuntu--vg-ubuntu--lv 253:0    0   107G  0 lvm
vdb                       252:16   0    20G  0 disk
vdc                       252:32   0   4.1G  0 disk
├─vdc1                    252:33   0   4.1G  0 part /cdrom
└─vdc2                    252:34   0     4M  0 part
As can be see in the output above, we have three disk/devices attached.
- vda: this is our main disk with our data
- vdb: this is the new small disk we want to use in our system.
- vdc: this is the bootable medium we are booting live system from.
Also, you can see that the system was using LVM partition for the root disk.
Logical volume details;
lvs LV VG Attr LSize Pool Origin Data% Meta% Move Log Cpy%Sync Convert
ubuntu-lv ubuntu-vg -wi-a----- <106.95g
Volume group;
vgs VG #PV #LV #SN Attr VSize VFree
ubuntu-vg 1 1 0 wz--n- <106.95g 0
Physical volume;
pvs PV VG Fmt Attr PSize PFree
/dev/vda3 ubuntu-vg lvm2 a-- <106.95g 0
Check Disk Partition Scheme and Firmware Interface Type
Another important step is to find out the current partition scheme of the disk with your current OS and data as well as the firmware interface whether it is BIOS or UEFI based system.
If you have already noticed, we have three partitions:
- vda1: This is the EFI/EFI system partition which contains bootloaders. It is known as BIOS partition for the BIOS based systems. Usually, it has to be FAT32 formatted.
- vda2: This now is the boot partition which contains the kernel and other files such as vmlinuz, initial ram disk e.t.c that are needed to start the operating system.
- vda3: This is the main root partition.
How to check if a Linux system is using BIOS or UEFI firmware interface has been extensively discussed in the guide below;
Quickly Check If Linux System is Using BIOS or UEFI
Partition New Disk
Next, partition the new disk to match how the old disk is partitioned. Ensure the partition scheme and firmware interfaces are same.
In my system, the firmware interface for the old disk is UEFI, with GPT partition table.
parted /dev/vda pModel: Virtio Block Device (virtblk)
Disk /dev/vda: 118GB
Sector size (logical/physical): 512B/512B
Partition Table: gpt
Disk Flags:
Number Start End Size File system Name Flags
1 1049kB 1128MB 1127MB fat32 boot, esp
2 1128MB 3276MB 2147MB ext4
3 3276MB 118GB 115GB
The new disk has no partitions yet;
parted /dev/vdb pError: /dev/vdb: unrecognised disk label
Model: Virtio Block Device (virtblk)
Disk /dev/vdb: 21.5GB
Sector size (logical/physical): 512B/512B
Partition Table: unknown
Disk Flags:
So, let's partition it. You can use gdisk/fdisk or parted command. Let's use parted command here.
Initialize the disk to GPT partition;
parted /dev/vdb mklabel gptCreate EFI partition. We set it to 512MiB.
parted /dev/vdb mkpart primary fat32 1MiB 513MiBInitialize the ESP partition;
parted /dev/vdb set 1 esp onCreate Boot partition of 1GB;
parted /dev/vdb mkpart primary ext4 513MiB 1537MiBCreate the root partition;
parted /dev/vdb mkpart primary ext4 1537MiB 100%Create filesystems on the partitions;
EFI parition should be set to FAT32
mkfs.fat -F32 /dev/vdb1Boot device, set to EXT4;
mkfs.ext4 /dev/vdb2Create Logical Volume on the Root Filesystem
As seen above, the old disk had an LVM the root filesystem.
lvs LV VG Attr LSize Pool Origin Data% Meta% Move Log Cpy%Sync Convert
ubuntu-lv ubuntu-vg -wi-a----- <106.95g
So, we have to create a logical volume on the new disk root filesystem;
pvcreate /dev/vdb3vgcreate ubuntu-vg-01 /dev/vdb3lvcreate -n ubuntu-vg-01 -l +100%FREE ubuntu-vg-01Confirm;
lvs LV VG Attr LSize Pool Origin Data% Meta% Move Log Cpy%Sync Convert
ubuntu-lv ubuntu-vg -wi-a----- <106.95g
ubuntu-vg-01 ubuntu-vg-01 -wi-a----- <18.50g
Create Filesystem on the new root disk logical volume;
mkfs.ext4 /dev/ubuntu-vg-01/ubuntu-vg-01Confirm the changes;
parted /dev/vdb pModel: Virtio Block Device (virtblk)
Disk /dev/vdb: 21.5GB
Sector size (logical/physical): 512B/512B
Partition Table: gpt
Disk Flags:
Number Start End Size File system Name Flags
1 1049kB 538MB 537MB fat32 fat32 boot, esp
2 538MB 1612MB 1074MB ext4 ext4
3 1612MB 21.5GB 19.9GB ext4
Copy Data from Old Disk to New Disk
Mount Old and New Disks
To copy data from the old disk to the new disk, you have to first mount both devices and respective partitions. So, create the mount directories.
mkdir -p /mnt/{vda,vdb}Mount the old disk onto /mnt/vda and new disk on /mnt/vdb.
Mounting old disk;
mount /dev/ubuntu-vg/ubuntu-lv /mnt/vda/Mount the boot partition;
mount /dev/vda2 /mnt/vda/boot/Mount EFI partition;
mount /dev/vda1 /mnt/vda/boot/efi/Mount the new disk;
mount /dev/ubuntu-vg-01/ubuntu-vg-01 /mnt/vdb/Create boot directory on the new disk;
mkdir /mnt/vdb/bootMount the new disk boot and EFI partition;
mount /dev/vdb2 /mnt/vdb/boot/Create EFI directory and mount EFI partition;
mkdir /mnt/vdb/boot/efimount /dev/vdb1 /mnt/vdb/boot/efiConfirm the mounting;
df -hT | grep -E "vda|vdb"/dev/mapper/ubuntu--vg-ubuntu--lv ext4 105G 6.8G 94G 7% /mnt/vda
/dev/vda2 ext4 2.0G 130M 1.7G 8% /mnt/vda/boot
/dev/vda1 vfat 1.1G 6.1M 1.1G 1% /mnt/vda/boot/efi
/dev/mapper/ubuntu--vg--01-ubuntu--vg--01 ext4 19G 32K 18G 1% /mnt/vdb
/dev/vdb2 ext4 974M 28K 907M 1% /mnt/vdb/boot
/dev/vdb1 vfat 511M 4.0K 511M 1% /mnt/vdb/boot/efi
Copy Data from Old Disk to New Disk
Now that the partitions are created and mounted, copy the data from the old disk to new disk. To ensure that proper permissions and ownership are retained, use rsync command.
You can exclude unnecessary directories such as /tmp, /proc, /dev, /sys, e.tc
rsync -avhP --exclude={"/dev/*","/proc/*","/sys/*","/tmp/*","/run/*","/mnt/*","/media/*","/lost+found"} /mnt/vda/ /mnt/vdb/The rsync options, -avhP used are explained below:
-a: Stands for "archive" and is used to preserve the file attributes and permissions during the synchronization. It's a shorthand for several other flags like-rlptgoD.-v: Stands for "verbose" and makesrsyncdisplay detailed information about the files being copied, which can be helpful for tracking progress.-h: Stands for "human-readable" and makes the output more easily understandable for humans by using units like "K" (kilobytes), "M" (megabytes), etc.-P: Combines two options:--progress: Displays progress information during the transfer, including the percentage of completion.--partial: Allows resuming partially transferred files.
Once the data copying is done, you can confirm the sizes;
du -hd1 /mnt/Sample output;
7.1G	/mnt/vdb
6.9G	/mnt/vda
14G	/mnt/
Also try to verify permissions and ownerships;
ls -alh /mnt/vda/home/total 12K
drwxr-xr-x 3 root root 4.0K Sep 19 19:45 .
drwxr-xr-x 19 root root 4.0K Sep 19 19:52 ..
drwxr-x--- 4 1000 1000 4.0K Sep 19 19:59 kifarunixls -alh /mnt/vdb/home/total 12K
drwxr-xr-x 3 root root 4.0K Sep 19 19:45 .
drwxr-xr-x 18 root root 4.0K Sep 19 19:52 ..
drwxr-x--- 4 1000 1000 4.0K Sep 19 19:59 kifarunixAll seems good!
Install GRUB Bootloader
Now, it is time to install the GRUB bootloader on to the new disk. Proceed as follows;
mount --bind /dev /mnt/vdb/devmount --bind /dev/pts /mnt/vdb/dev/ptsmount --bind /proc /mnt/vdb/procmount --bind /sys /mnt/vdb/sysIf your system was on UEFI, then ensure that you mount the /sys with --rbind option. This enables grub-install command to manipulate the EFI variables.
mount --rbind /sys /mnt/vdb/sysChroot into your system disk and install bootloader:
chroot /mnt/vdb/Run the command below to install GRUB on the specified device's boot sector or EFI System Partition (ESP) if it's an EFI system;
grub-install /dev/vdbIf using GRUB 2, then update the command above accordingly.
Sample output;
Installing for x86_64-efi platform.
Installation finished. No error reported.
If you get the warnings below;
grub-install: warning: EFI variables cannot be set on this system.
grub-install: warning: You will have to complete the GRUB setup manually.
Ensure /sys is mounted with --rbind option.
Verify GRUB installation;
grub-install --recheck /dev/vdbNext, run the command below to generate the GRUB configuration file, grub.cfg. This configuration file contains information about the installed operating systems and their boot options.
update-grubSample output;
Sourcing file `/etc/default/grub'
Sourcing file `/etc/default/grub.d/init-select.cfg'
Generating grub configuration file ...
Found linux image: /boot/vmlinuz-5.15.0-84-generic
Found initrd image: /boot/initrd.img-5.15.0-84-generic
Warning: os-prober will not be executed to detect other bootable partitions.
Systems on them will not be added to the GRUB boot configuration.
Check GRUB_DISABLE_OS_PROBER documentation entry.
Adding boot menu entry for UEFI Firmware Settings ...
done
Update the Filesystem Table (FSTAB)
FSTAB (/etc/fstab) defines how storage devices and partitions are mounted into the file system hierarchy at system boot.
First, let's get the old system fstab configurations (note that we are still within chroot!);
grep -vE "^$|^#" etc/fstab/dev/disk/by-id/dm-uuid-LVM-awWizgiQ7tshV7Kq5lenkb7e9vSxyqCZvwOqKFNl6b4A6q08Fn17iBEq1xwurcqh / ext4 defaults 0 1
/dev/disk/by-uuid/fb4ed301-cac4-491d-a5fa-00f9b1aa88ea /boot ext4 defaults 0 1
/dev/disk/by-uuid/8597-8981 /boot/efi vfat defaults 0 1
/swap.img none swap sw 0 0
You have to update the device UUIDS to match your new device UUIDS.
You can get UUIDs using blkid command;
blkid | grep vdb/dev/vdb2: UUID="7bec7baf-5297-4c56-8f76-21c4a88181ce" BLOCK_SIZE="4096" TYPE="ext4" PARTLABEL="ext4" PARTUUID="38e2e473-f5b1-4aa6-ac83-168255158552"
/dev/vdb3: UUID="z7VMXq-SEwc-xfb9-k1mq-8HWy-hMaw-LjCnjm" TYPE="LVM2_member" PARTLABEL="ext4" PARTUUID="18b0aaed-3b6c-4eca-9d71-a5ed39707e4d"
/dev/vdb1: UUID="A27D-CDB9" BLOCK_SIZE="512" TYPE="vfat" PARTLABEL="fat32" PARTUUID="cc769272-7d22-4c21-b80b-61054c4ac0c7"
The update fstab as follows (we excluded swap. We can work on that later on).
cat > etc/fstab << 'EOL'
UUID=z7VMXq-SEwc-xfb9-k1mq-8HWy-hMaw-LjCnjm / ext4 defaults 0 1
UUID=7bec7baf-5297-4c56-8f76-21c4a88181ce /boot ext4 defaults 0 1
/dev/disk/by-uuid/A27D-CDB9 /boot/efi vfat defaults 0 1
EOL
At this point, you are now almost done.
Exit Chroot and Reboot the System
Exit the chroot environment and umount the /dev, /sys, /proc directories;
exitumount /mnt/vdb/sys
umount /mnt/vdb/proc
umount /mnt/vdb/dev/pts
umount /mnt/vdb/dev
Shutdown the system and configure it to boot from the new disk. Detach the old disk and the bootable medium.
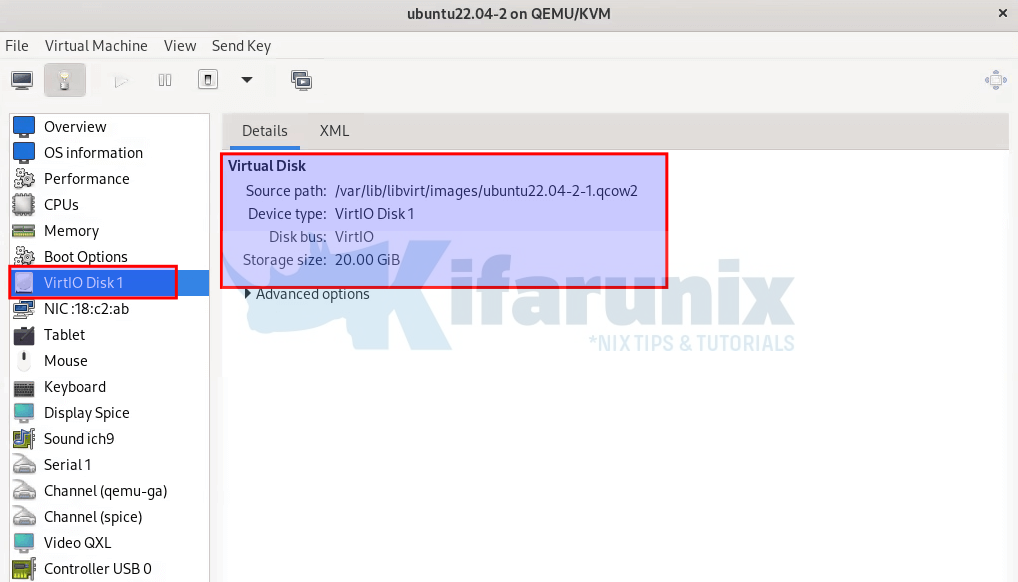
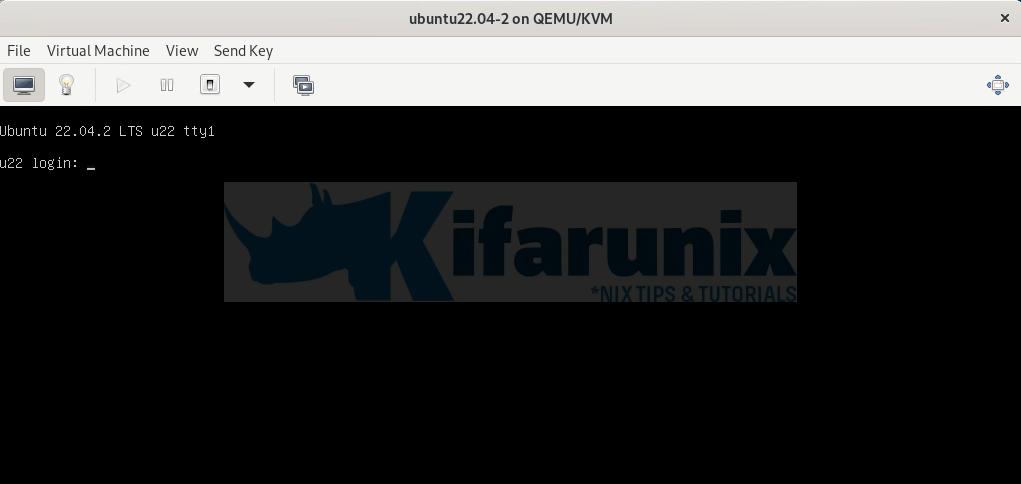
Power on the system and hold your breath! Check if the system boots;
And voila!!
Confirm disk usage;
df -hTroot@u22:~# df -hT
Filesystem Type Size Used Avail Use% Mounted on
tmpfs tmpfs 195M 1.2M 194M 1% /run
/dev/mapper/ubuntu--vg--01-ubuntu--vg--01 ext4 19G 7.1G 11G 42% /
tmpfs tmpfs 972M 0 972M 0% /dev/shm
tmpfs tmpfs 5.0M 0 5.0M 0% /run/lock
/dev/vda2 ext4 974M 130M 777M 15% /boot
/dev/vda1 vfat 511M 6.1M 505M 2% /boot/efi
tmpfs tmpfs 195M 4.0K 195M 1% /run/user/1000
And that is it! You have successfully shrinked your Linux root filesystem (110G to 20G) without damaging the system itself.
That marks the end of our tutorial on how to shrink Linux root filesystem by migrating to new disk.

