Welcome to our guide on how to install Kolide Fleet Osquery fleet manager on Debian 10. Kolide Fleet is an opensource Osquery manager that expands the capabilities of osquery by enabling you to track, manage, and monitor entire osquery fleet.
Kolide Fleet has retired. Check the new replacement, the Fleetdm Fleet.
Install Fleet Osquery Manager on Ubuntu 20.04
Installing Kolide Fleet Osquery Fleet Manager on Debian
Kolide Fleet is available as binary that can be just downloaded and installed by placing it on the binaries directory.
Download Kolide Fleet
Run the command below to download Kolide Fleet zipped binary.
wget https://github.com/kolide/fleet/releases/latest/download/fleet.zip -P /tmp Once the download is complete, extract the Kolide Fleet binaries for Linux platform.
cd /tmp
unzip fleet.zip 'linux/*' -d fleet
Install Kolide Fleet Binaries
The Kolide FLeet binaries, the fleet and fleetctl binaries are extracted to fleet/linux directory.
ls /tmp/fleet/linux/
 fleet  fleetctl
To install Kolide Fleet binaries, copy the binaries to /usr/bin directory.
cp /tmp/fleet/linux/{fleet,fleetctl} /usr/bin/The Kolide Fleet binaries is now installed.
ls /usr/bin/fleet*
/usr/bin/fleet    /usr/bin/fleetctl
Install and Configure Kolide Fleet Dependencies
Kolide Fleet requires MySQL for its database and Redis server for ingesting and queueing the results of distributed queries, cache data, etc.
Install MySQL Database
Run the command install MySQL/MariaDB server.
apt install mariadb-server mariadb-clientRunning MariaDB
MariaDB server is set to run and enabled to run on system boot upon installation. You can check the status;
systemctl status mariadbsystemctl is-enabled mariadbRun the initial MySQL security script, mysql_secure_installation, to remove anonymous database users, test tables, disable remote root login.
Create Kolide Fleet Database and Database User
By default, MariaDB 10.3 uses unix_socket for authentication and hence, can login by just running, mysql -u root. If have however enabled password authentication, simply run;
mysql -u root -pNext, create the Kolide database and user with all grants on Kollide DB.
create database kolide;
grant all on kolide.* to kolideadmin@localhost identified by 'StrongP@SS';
flush privileges;
exit
Install Redis
Run the command below to install Redis.
apt install redisRedis is set to start and enabled on system boot upon installation.
Running Kolide Fleet Server
Once you have installed and setup all the prerequisites for Kolide Fleet, you need to initializing Fleet infrastructure using the fleet prepare db as follows;
fleet prepare db --mysql_address=127.0.0.1:3306 --mysql_database=kolide --mysql_username=kolideadmin --mysql_password=StrongP@SSIf the initialization is complete, you should get the output,
Migrations completed.Fleet serve is used to run the main HTTPS server. Hence, run the command below to generate self-signed certificates.
DO NOT use wildcards certificate if you are using Self signed certificates as it causes enrollment issues.
openssl req -x509 -nodes -days 365 -newkey rsa:2048 -keyout /etc/ssl/private/kolide.key -out /etc/ssl/certs/kolide.certIf you can, use the commercial TLS certificates.
Generate a random Json Web Token key for signing and verify session tokens. This will be required when running the fleet serve command for use with –auth_jwt_key option. It is however auto-generated when you do not provide this option with a random key value.
Testing Kolide Fleet
Kolide Fleet is setup and thus you need to run the command below to verify that it can run successfully using the fleet serve command as shown below
fleet serve --mysql_address=127.0.0.1:3306 --mysql_database=kolide --mysql_username=kolideadmin \
   --mysql_password=StrongP@SS --server_cert=/etc/ssl/certs/kolide.cert --server_key=/etc/ssl/private/kolide.key \
   --logging_json --auth_jwt_key=yi+/uPJ0XvdrcEvTsZYKWz4oagO+8o57
If all is well, you should see that Fleet server is now running on 0.0.0.0:8080 and hence can be accessed on https://<server-IP>:8080.
{"component":"service","err":null,"method":"ListUsers","took":"433.897µs","ts":"2019-08-12T18:00:49.89214441Z","user":"none"}
{"address":"0.0.0.0:8080","msg":"listening","transport":"https","ts":"2019-08-12T18:00:49.894679501Z"}
Create Kolide Fleet Systemd Service Unit
Once you have verified that Kolide Fleet is running fine, create a systemd service file.
vim /etc/systemd/system/kolide-fleet.service[Unit]
Description=Kolide Fleet Osquery Fleet Manager
After=network.target
[Service]
LimitNOFILE=8192
ExecStart=/usr/bin/fleet serve \
--mysql_address=127.0.0.1:3306 \
--mysql_database=kolide \
--mysql_username=kolideadmin \
--mysql_password=StrongP@SS \
--redis_address=127.0.0.1:6379 \
--server_cert=/etc/ssl/certs/kolide.cert \
--server_key=/etc/ssl/private/kolide.key \
--auth_jwt_key=yi+/uPJ0XvdrcEvTsZYKWz4oagO+8o57 \
--logging_json
ExecStop=kill -15 $(ps aux | grep "fleet serve" | grep -v grep | awk '{print$2}')
[Install]
WantedBy=multi-user.targetSave the file and reload systemd configurations.
systemctl daemon-reloadStart and enable Kolide Fleet service.
systemctl start kolide-fleet.service
systemctl enable kolide-fleet.service
Check the status;
systemctl status kolide-fleet.service● kolide-fleet.service - Kolide Fleet Osquery Fleet Manager
Loaded: loaded (/etc/systemd/system/kolide-fleet.service; enabled; vendor preset: enabled)
Active: active (running) since Mon 2019-08-12 21:16:32 EAT; 7min ago
Main PID: 14406 (fleet)
Tasks: 7 (limit: 1150)
Memory: 14.1M
CGroup: /system.slice/kolide-fleet.service
└─14406 /usr/bin/fleet serve --mysql_address=127.0.0.1:3306 --mysql_database=kolide --mysql_username=kolideadmin --mysql_password=StrongP@SS --redis_address=127.0.
Aug 12 21:16:32 debian10.example.com systemd[1]: Started Kolide Fleet Osquery Fleet Manager.
Aug 12 21:16:32 debian10.example.com fleet[14406]: {"component":"service","err":null,"method":"ListUsers","took":"272.605µs","ts":"2019-08-12T18:16:32.206172973Z","user":
Aug 12 21:16:32 debian10.example.com fleet[14406]: {"address":"0.0.0.0:8080","msg":"listening","transport":"https","ts":"2019-08-12T18:16:32.208622615Z"}Access Kolide Fleet
Now that Kolide Fleet is running, you can access it on the browser using the URL https://<server-IP>:8080.
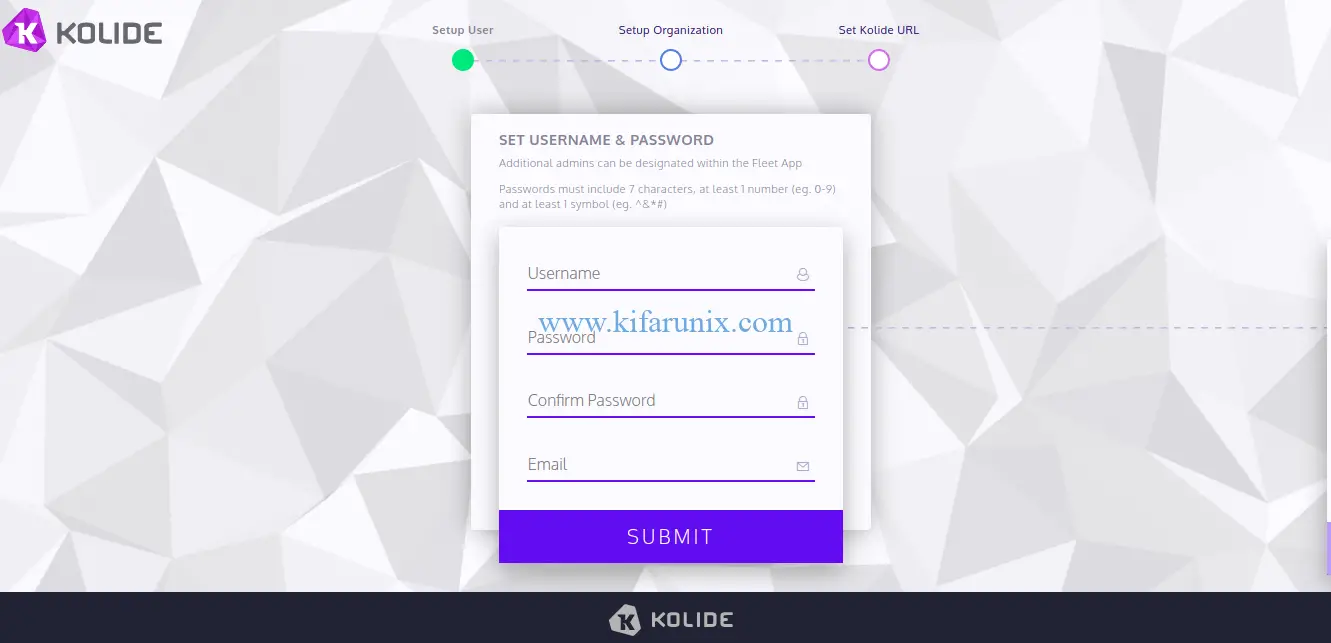
Create your fist Fleet account and by providing the username, password, email, organization name, confirm the fleet web address. Click submit and login to your Kolide Fleet server.
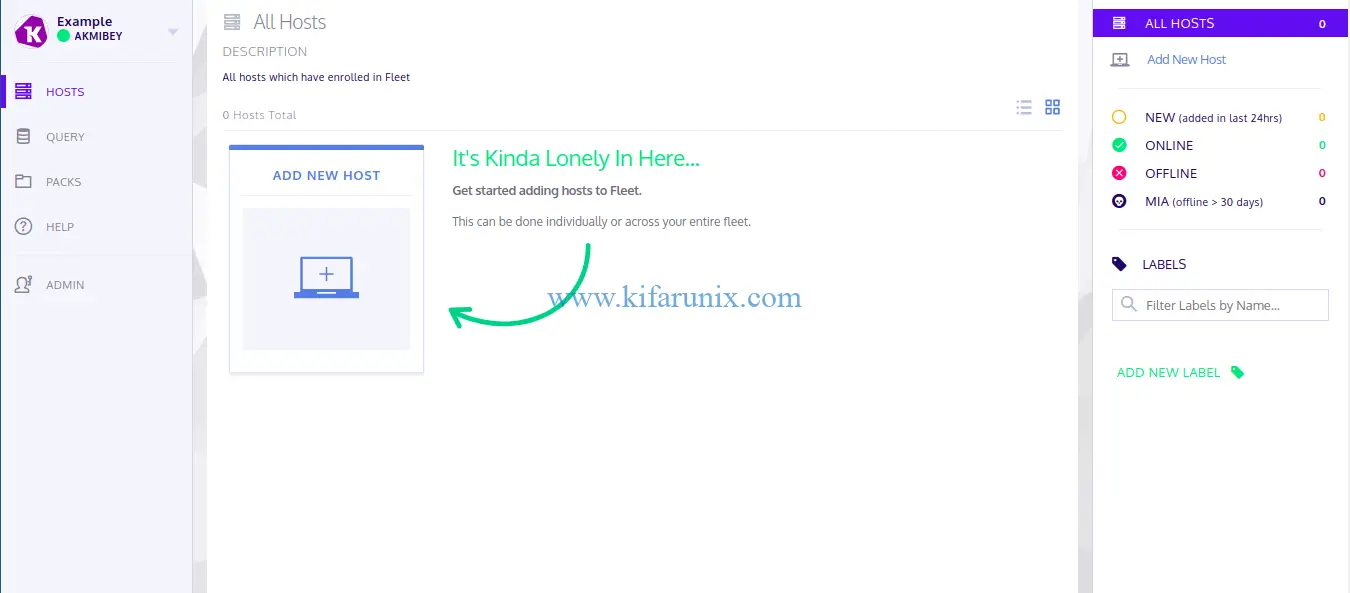
Adding New Hosts to Kolide
Next, you can begin by installing osquery on your Kolide Fleet server. We have already covered the installation of osquery on Debian 10 in our previous guide, see the link below;
Install Osquery on Debian 10 Buster
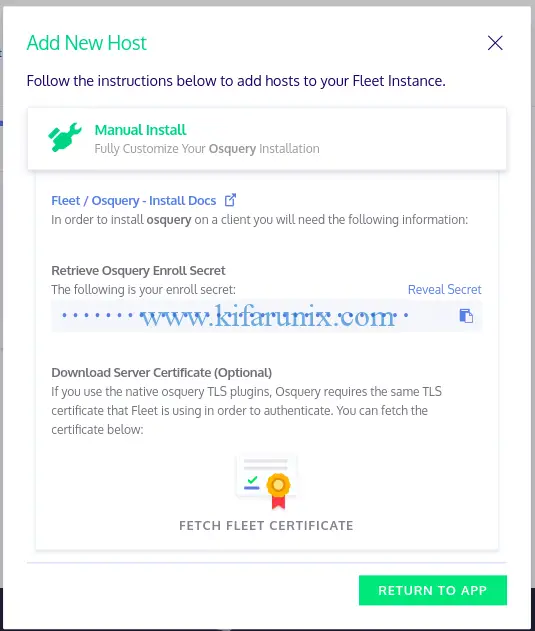
Once osquery is installed, add your host to Kolide by navigating to Hosts > Add New Hosts. When you click Add new host, a wizard like in below pops with the instructions on how to add hosts to flight instance.
To enroll your osquery, you need the secret key and the TLS certificate. Hence, click reveal secret to see the key and click fetch flee certificate to download and install the certificate on the host as follows;
NOTE that we are enrolling a localhost (Host running Kolide Fleet server itselft).
echo "t3wa+W7C2S47AZ24/ETi8xPXK2BuiLWO" > /var/osquery/secretcp 192.168.43.62_8080.pem /var/osquery/server.pemNext, stop the osqueryd if it is running;
systemctl stop osquerydRun osqueryd with the following options, replacing the –enroll_secret_path and –tls_server_certs accordingly.
/usr/bin/osqueryd --enroll_secret_path=/var/osquery/enroll_secret \
--tls_server_certs=/var/osquery/server.pem \
--tls_hostname=localhost:8080 \
--host_identifier=uuid \
--enroll_tls_endpoint=/api/v1/osquery/enroll \
--config_plugin=tls \
--config_tls_endpoint=/api/v1/osquery/config \
--config_refresh=10 \
--disable_distributed=false \
--distributed_plugin=tls \
--distributed_interval=3 \
--distributed_tls_max_attempts=3 \
--distributed_tls_read_endpoint=/api/v1/osquery/distributed/read \
--distributed_tls_write_endpoint=/api/v1/osquery/distributed/write \
--logger_plugin=tls \
--logger_tls_endpoint=/api/v1/osquery/log \
--logger_tls_period=10
If all goes well, your host should be enrolled.
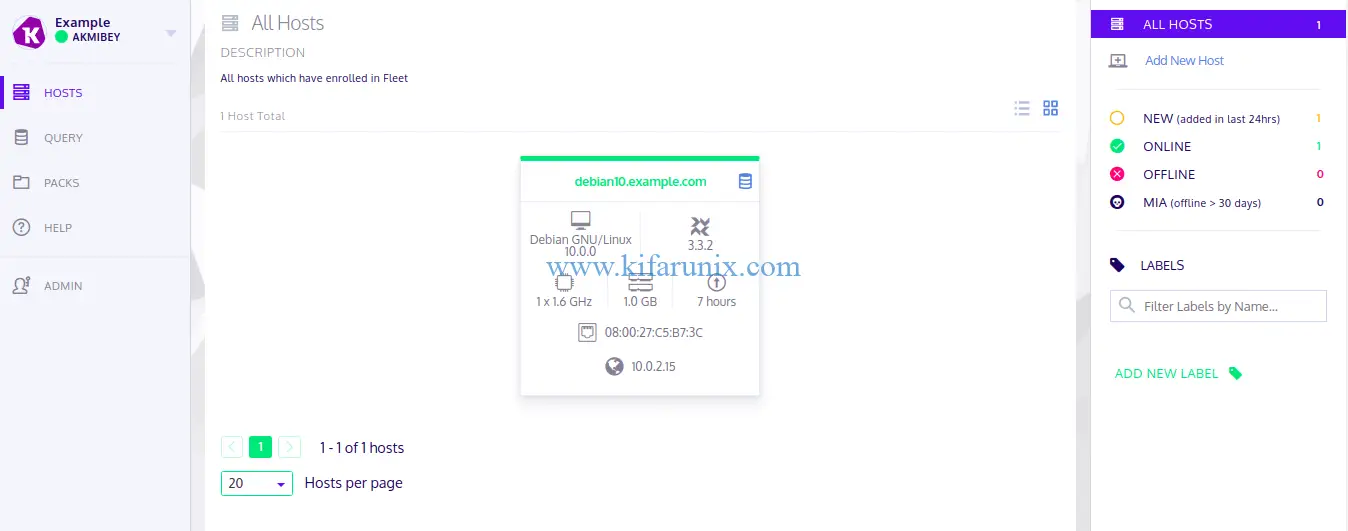
Next, edit osqueryd service and add the options used above such such that the service configuration file looks like;
cat /lib/systemd/system/osqueryd.service[Unit]
Description=The osquery Daemon
After=network.service syslog.service
[Service]
TimeoutStartSec=0
EnvironmentFile=/etc/default/osqueryd
ExecStartPre=/bin/sh -c "if [ ! -f $FLAG_FILE ]; then touch $FLAG_FILE; fi"
ExecStartPre=/bin/sh -c "if [ -f $LOCAL_PIDFILE ]; then mv $LOCAL_PIDFILE $PIDFILE; fi"
ExecStart=/usr/bin/osqueryd \
--flagfile $FLAG_FILE \
--config_path $CONFIG_FILE \
--enroll_secret_path=/var/osquery/enroll_secret \
--tls_server_certs=/var/osquery/server.pem \
--tls_hostname=localhost:8080 \
--host_identifier=uuid \
--enroll_tls_endpoint=/api/v1/osquery/enroll \
--config_plugin=tls \
--config_tls_endpoint=/api/v1/osquery/config \
--config_refresh=10 \
--disable_distributed=false \
--distributed_plugin=tls \
--distributed_interval=3 \
--distributed_tls_max_attempts=3 \
--distributed_tls_read_endpoint=/api/v1/osquery/distributed/read \
--distributed_tls_write_endpoint=/api/v1/osquery/distributed/write \
-logger_plugin=tls \
--logger_tls_endpoint=/api/v1/osquery/log \
--logger_tls_period=10
Restart=on-failure
KillMode=process
KillSignal=SIGTERM
[Install]
WantedBy=multi-user.targetReload system daemons.
systemctl daemon-reloadStart osqueryd.
systemctl start osquerydYou can now query your host from Kolide Fleet server. For example, to query non system users with the query, select username,directory,uid,gid,shell from users where uid >= 1000;
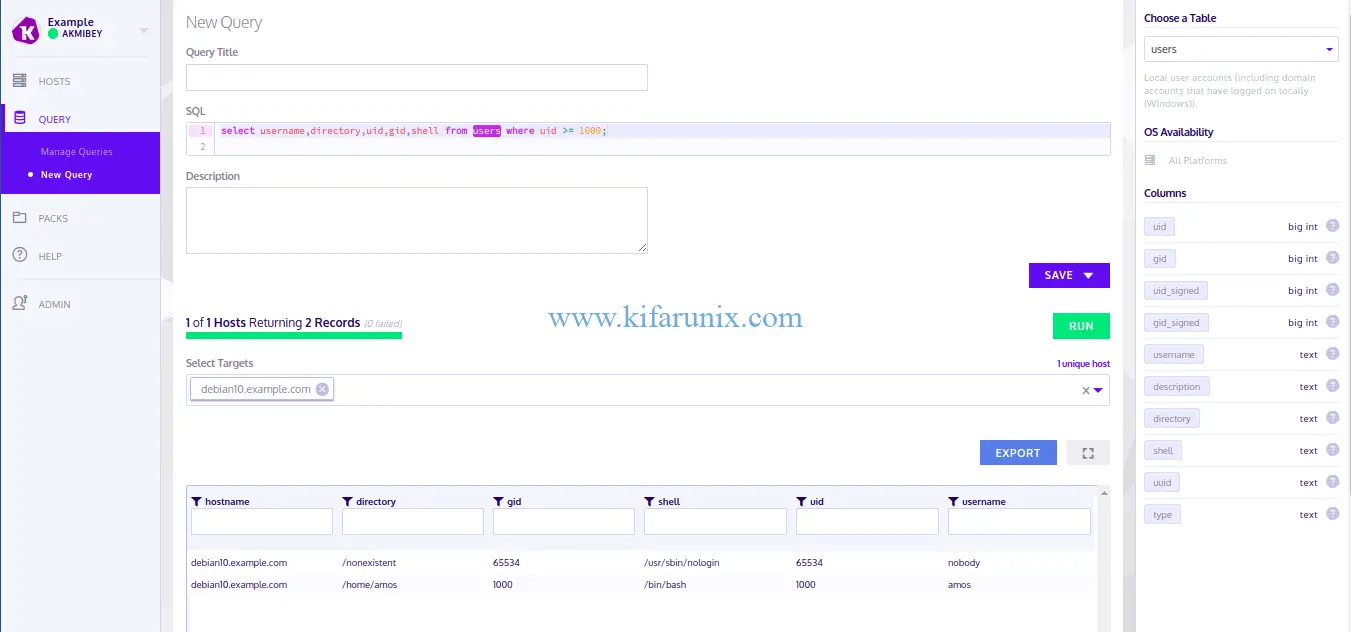
There you go. You have successfully setup Kolide Fleet Osquery Fleet Manager on Debian 10 Buster and you now add other fleets so that you can manage the querying from a single dashboard. Enjoy.


Excellent writeup!! I only noticed one mistake, but again to not deflect why I posted this -> you helped me out a lot, thank you.
Minor typo: When you record the secret on the client part you call it “secret” then the lines after you call it “enroll_secret” so enrollment failed for me – until i created the secret with the referenced file name.
Unrelated to the write up when i grab the cert from the Fleet website its only the last hop of the chain, and my chain was largely unknown (Chain of Trust broken) when i only used the last member enrollment failed.
So ended up using the whole chain from /etc/ssl/certs/kolide.cert -> then it enrolled on service restart without issue.
Thanks for sharing that, Daniel.
My osqueryd failed to enroll, i got the following error:
W0412 03:36:16.180008 9545 tls_enroll.cpp:76] Failed enrollment request to https://localhost:8080/api/v1/osquery/enroll (Request error: certificate verify failed) retrying…
Any advice?
Hello ensure that the certificate path is correct (–tls_server_certs) and that you are not using the wildcard SSL/TLS certs.
Path is correct. I followed the instructions and I used “openssl req -x509 -nodes -days 365 -newkey rsa:2048 -keyout /etc/ssl/private/kolide.key -out /etc/ssl/certs/kolide.cert” to generate the cert. Any advice?
Well, how about the domain names used in the cert, like the common Name used, does it match the hostname of the host being enrolled?
Be sure to substitute the hostname, –tls_hostname=localhost:8080, accordingly.
All the best
i need to add custom table along with kolide flags is it possible ??
ExecStart=/usr/bin/osqueryd \
–flagfile $FLAG_FILE \
–config_path /tmp/osquery_chrome_atc_table.conf
–enroll_secret_path=/var/osquery/enroll_secret \
–tls_server_certs=/var/osquery/server.pem \
–tls_hostname=localhost:8080 \
–host_identifier=uuid \
–enroll_tls_endpoint=/api/v1/osquery/enroll \
–config_plugin=tls \
–config_tls_endpoint=/api/v1/osquery/config \
–config_refresh=10 \
–disable_distributed=false \
–distributed_plugin=tls \
–distributed_interval=3 \
–distributed_tls_max_attempts=3 \
–distributed_tls_read_endpoint=/api/v1/osquery/distributed/read \
–distributed_tls_write_endpoint=/api/v1/osquery/distributed/write \
-logger_plugin=tls \
–logger_tls_endpoint=/api/v1/osquery/log \
–logger_tls_period=10
cat /tmp/osquery_chrome_atc_table.conf
{
“auto_table_construction”: {
“chrome_history”: {
“query”:”SELECT datetime(last_visit_time/1000000-11644473600, \”unixepoch\”) as last_visited, url, title, visit_count FROM urls”,
“path”:”/home/%/.config/google-chrome-beta/Default/History”,
“columns”:[“last_visited”,”url”,”title”,”visit_count”]
}
}
}