Welcome to our tutorial on how to install and setup LEMP stack on Ubuntu 20.04. LEMP Stack is a group of open source tools commonly used for developing and deploying web applications. It consists of the Linux Operating System (Ubuntu 20.04 in this case), lightweight and powerful Nginx (Engine-X) web server, MySQL/MariaDB RDBMS and the server-side scripting language, PHP.
Installing LEMP Stack on Ubuntu 20.04
Run system update
apt updateapt upgradeInstall Nginx Web Server on Ubuntu 20.04
Nginx is available on the default Ubuntu 20.04 repos. It can simply be installed by executing the command below;
apt install nginxRunning Apache
Once the installation is done, Nginx is started and enabled to run on system boot.
To check the status;
systemctl status nginx
● nginx.service - A high performance web server and a reverse proxy server
     Loaded: loaded (/lib/systemd/system/nginx.service; enabled; vendor preset: enabled)
     Active: active (running) since Tue 2020-07-14 05:35:51 UTC; 17s ago
       Docs: man:nginx(8)
   Main PID: 64530 (nginx)
      Tasks: 3 (limit: 2282)
     Memory: 6.4M
     CGroup: /system.slice/nginx.service
             ├─64530 nginx: master process /usr/sbin/nginx -g daemon on; master_process on;
             ├─64531 nginx: worker process
             └─64532 nginx: worker process

Jul 14 05:35:51 ubuntu20 systemd[1]: Starting A high performance web server and a reverse proxy server...
Jul 14 05:35:51 ubuntu20 systemd[1]: Started A high performance web server and a reverse proxy server.
Check if it is enabled to run on system boot.
systemctl is-enabled nginxenabledAllow Web Server External Access on Firewall
You can allow external access to Nginx using the ports or the Nginx application name. For example, to allow access to both Nginx HTTP and HTTPs traffic;
ufw allow 80,443/tcpSimilarly, you can use Nginx app, Nginx Full, to allow both HTTP and HTTPs;
ufw allow "Nginx Full"For HTTP or HTPPS, simple use Nginx HTTP or Nginx HTTPS respectively as the app names.
Verify access to Nginx from browser by using the address, http://Server.IP_or_hostname. You should land on Nginx HTTP server test page which basically shows that nginx web server is successfully installed and working.

Install MySQL/MariaDB Database Server on Ubuntu 20.04
You can choose to use MySQL or MariaDB for your RDMS. In this tutorial, we are using MariaDB 10.5 as our database system.
Install MariaDB 10.5 on Ubuntu 20.04
Import MariaDB GPG signing key
apt-key adv --fetch-keys 'https://mariadb.org/mariadb_release_signing_key.asc'Install MariaDB APT repository
add-apt-repository 'deb [arch=amd64] http://mariadb.mirror.globo.tech/repo/10.5/ubuntu focal main'Install MariaDB 10.5 on Ubuntu 20.04
apt update
apt install mariadb-server mariadb-client
When installed, MariaDB is started and enabled to run on system boot.
systemctl status mariadb
● mariadb.service - MariaDB 10.5.4 database server
     Loaded: loaded (/lib/systemd/system/mariadb.service; enabled; vendor preset: enabled)
    Drop-In: /etc/systemd/system/mariadb.service.d
             └─migrated-from-my.cnf-settings.conf
     Active: active (running) since Wed 2020-07-15 05:20:26 UTC; 6min ago
       Docs: man:mariadbd(8)
             https://mariadb.com/kb/en/library/systemd/
   Main PID: 3207 (mariadbd)
     Status: "Taking your SQL requests now..."
      Tasks: 9 (limit: 2282)
     Memory: 68.9M
     CGroup: /system.slice/mariadb.service
             └─3207 /usr/sbin/mariadbd

Jul 15 05:23:06 ubuntu20 /etc/mysql/debian-start[3229]: Processing databases
Jul 15 05:23:06 ubuntu20 /etc/mysql/debian-start[3229]: information_schema
Jul 15 05:23:06 ubuntu20 /etc/mysql/debian-start[3229]: mysql
Jul 15 05:23:06 ubuntu20 /etc/mysql/debian-start[3229]: performance_schema
Jul 15 05:23:06 ubuntu20 /etc/mysql/debian-start[3229]: Phase 6/7: Checking and upgrading tables
Jul 15 05:23:06 ubuntu20 /etc/mysql/debian-start[3229]: Processing databases
Jul 15 05:23:06 ubuntu20 /etc/mysql/debian-start[3229]: information_schema
Jul 15 05:23:06 ubuntu20 /etc/mysql/debian-start[3229]: performance_schema
Jul 15 05:23:06 ubuntu20 /etc/mysql/debian-start[3229]: Phase 7/7: Running 'FLUSH PRIVILEGES'
Jul 15 05:23:06 ubuntu20 /etc/mysql/debian-start[3229]: OK
Securing MariaDB
MariaDB ships with some initial security script called mysql_secure_installation. When run, this script removes all test databases, disables remote root account login and remove test user accounts as part of the initial security checks.
mysql_secure_installationYou can now login and create a database and database user as required by whatever application you want to run.
Install PHP 7.4 and Other Required PHP Modules on Ubuntu 20.04
Next, install PHP 7.4 on Ubuntu 20.04. By default, Ubuntu 20.04 ships with PHP 7.4 in its default repos. Hence, installation of PHP 7.4 is as simple as running the command below;
apt install php php-fpm php-mysqlThis will install alongside itself other default PHP modules.
Install Other Required PHP Modules
If any other required modules needs to be installed, you can simply install it by running the command, apt install php-extension, where extension is the name of the PHP module. For example;
apt install php-{bcmath,bz2,imap,intl,mbstring,soap,sybase,xml,zip}Configure Nginx for PHP Processing
For Nginx to process PHP pages, you need to include index.php as a value for the index parameter. Since we are using the default configuration for testing, edit the it as follows;
vim /etc/nginx/sites-enabled/default...
root /var/www/html;
# Add index.php to the list if you are using PHP
index index.php index.html index.htm index.nginx-debian.html;
...Also, you need to configure Nginx to pass PHP scripts to FastCGI server. Uncomment the line location ~ \.php$ and configure it as shown below
        location ~ \.php$ {
                include snippets/fastcgi-php.conf;
                fastcgi_pass unix:/run/php/php7.4-fpm.sock;
        }
Save and exit the file,
Test Nginx configuration syntax.
nginx -tnginx: the configuration file /etc/nginx/nginx.conf syntax is ok
nginx: configuration file /etc/nginx/nginx.conf test is successfulRestart Nginx and FastCGI process manager, if there is no configuration syntax.
systemctl restart nginx php7.4-fpmTesting Nginx PHP Processing on Ubuntu 20.04
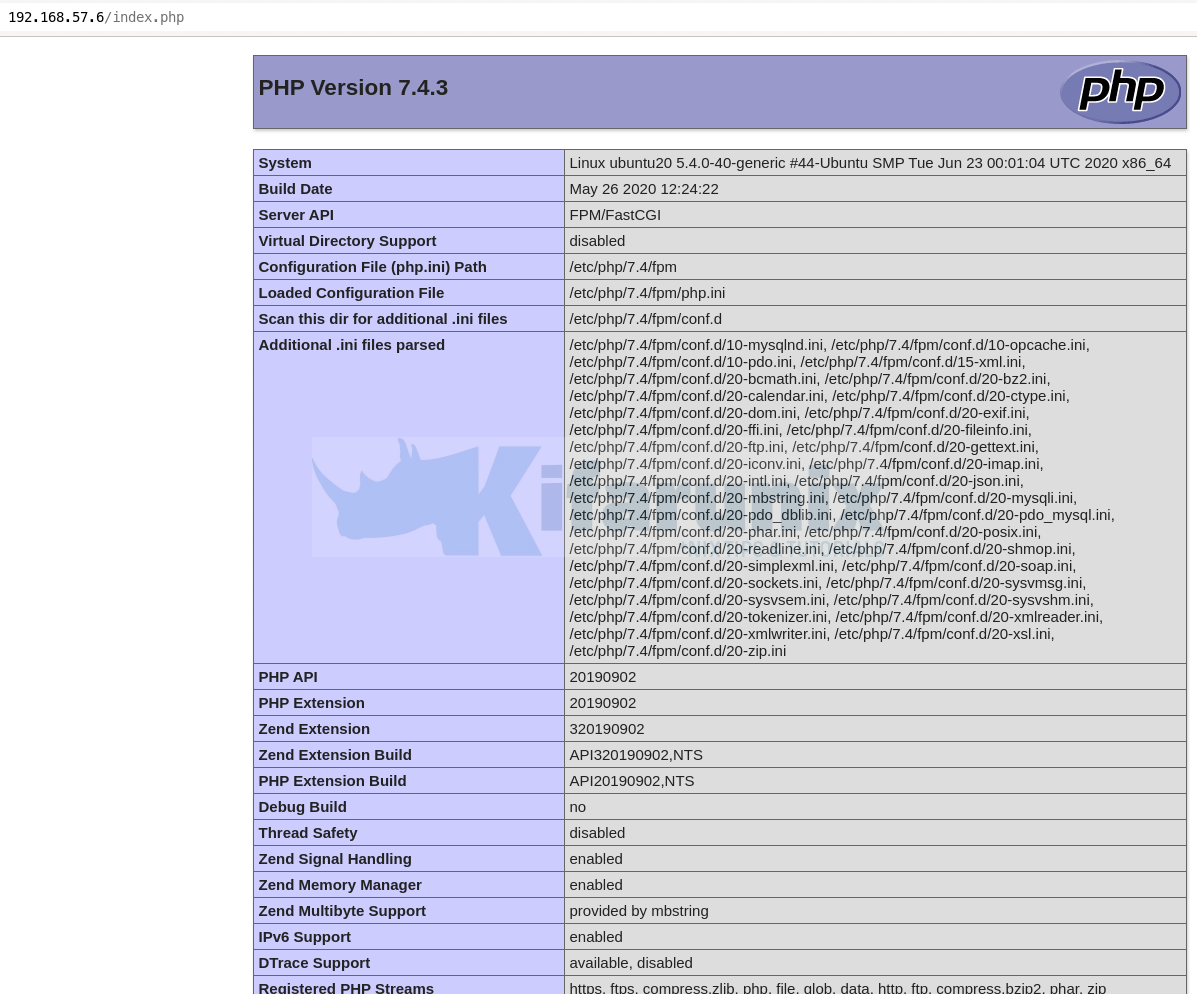
You can test Nginx PHP processing to confirm that is working as required as well check the version and installed modules using the simple PHP info script.
echo "<?php phpinfo(); ?>" > /var/www/html/index.phpNext, navigate to the browser and enter the address, http://<server-IP-or-hostname>/index.php

And there you go. Your LEMP stack is installed and setup on Ubuntu 20.04. Ensure that all the required php modules for the specific application you want to deploy are met.
Once you have verified Nginx PHP processing, remove the PHP info file;
rm -rf /var/www/html/index.phpOther Related Tutorials
Install LEMP Stack on CentOS 8
Install LEMP Stack on Debian 10 Buster
Install LEMP Stack with MySQL 8 on Fedora 30/Fedora 29
How To Setup LEMP Stack (Nginx, MariaDB, PHP 7.2) on Ubuntu 18.04

