In this guide, we are going learn how to install and configure BackupPC on CentOS 8. BackupPC is a high-performance enterprise-grade backup software suite with a web-based frontend that can be used for backing up Linux, Windows and mac OSXs PCs and laptops to a server’s disk.
Some of the features of BackupPC include;
- Provides a web interface which allows administrators to view log files, configuration, current status and allows users to initiate and cancel backups and browse and restore files from backups.
- It supports Data deduplication: Identical files across multiple backups of the same or different PCs are stored only once resulting in substantial savings in disk storage and disk I/O.
- It supports data Compression: Since only new files (not already pooled) need to be compressed, there is only a modest impact on CPU time.
- It is Open-source: BackupPC is hosted on Github, and is distributed under a GPL license.
- No client-side software is needed.
Read more about BackupPC features on About BackupPC page.
Installing BackupPC on CentOS 8
Run System Update
Update your system packages.
dnf updateInstall BackupPC on CentOS 8
BackupPC 4 is available on EPEL repos. Therefore, install the EPEL repos on CentOS 8 by running the command;
dnf install epel-releaseEPEL repos provided BackupPC 4.3.2, which is the current stable release as of this writing.
dnf info backuppcAvailable Packages
Name : BackupPC
Version : 4.3.2
Release : 1.el8
Architecture : x86_64
Size : 479 k
Source : BackupPC-4.3.2-1.el8.src.rpm
Repository : epel
Summary : High-performance backup system
URL : http://backuppc.github.io/backuppc/index.html
License : GPLv2+
Description : BackupPC is a high-performance, enterprise-grade system for backing up Linux
: and WinXX and Mac OS X PCs and laptops to a server's disk. BackupPC is highly
: configurable and easy to install and maintain.
:
: NOTE: Proper configuration is required after install, see README.setup for more
: information.Also, enable PowerTool Repos;
dnf config-manager –set-enabled PowerToolsYou can simply install BackupPC and all its required dependencies by executing the command below;
dnf install -y backuppcConfigure BackupPC Server on CentOS 8
Define BackupPC Backup Protocol
BackupPC supports different protocols to get backup data from devices being backed up:
- smb – used for backing up windows machines
- tar – used for backing up Linux/Unix/Mac OSX systems
- rsync – used for backing up Linux/Unix/Mac OSX systems. This can also be used to backup Windows systems.
It also supports the use of ftp protocol. The use FTP is however not a recommended method of backup.
To define your preferred BackupPC backup protocol, open the BackupPC configuration file, /etc/BackupPC/config.pl and navigate to the section of the specific backup protocol you want to use.
vim /etc/BackupPC/config.plFor instance, the Rsync{d} protocol configuration section begins at;
...
###########################################################################
# Rsync/Rsyncd Configuration
# (can be overwritten in the per-PC log file)
###########################################################################
...
and ends at where FTP configuration starts;
...
...
###########################################################################
# FTP Configuration
# (can be overwritten in the per-PC log file)
##########################################################################
...
To use rsync protocol for backup, ensure that rsync is installed on a client being backed up and that the correct path is defined for the parameter, $Conf{RsyncClientPath.
You can find the absolute path for rsync using which command.
which rsync
/usr/bin/rsync
$Conf{RsyncClientPath} = "/usr/bin/rsync";Also ensure that the backup transfer method, $Conf{XferMethod, for the client is set to rsync.
Define BackupPC Client Backup User
By default, BackupPC uses the root user on the backup clients for backup purposes.
$Conf{RsyncSshArgs} = [
        '-e', '$sshPath -l root',
];
It is more secure to allow backup via a low-privileged user. In this demo, we will create a non-privileged user, backuppc, on every client to backup which is only allowed to run rsync command with sudo rights for backup purposes. Therefore, change this user accordingly.
$Conf{RsyncSshArgs} = [
        '-e', '$sshPath -l backuppc',
];
We will leave other Rsync settings with the default options. Note that all these are overwritable via the per-PC configuration.
Configure BackupPC Administrative User
Default Administrative user for BackupPC is defined under CGI user interface configuration settings section. Normal users can only access information specific to their host. They can also start/stop/browse/restore backups. Administrative users have full access to all hosts, plus overall status and log information. In this demo, we set the kifarunixadmin user as BackupPC admin.
$Conf{CgiAdminUsers} = 'kifarunixadmin';Change Backup Data Directory
By default, BackupPC writes backup data into /var/lib/BackupPC directory.
$Conf{TopDir} = '/var/lib/BackupPC/';Just in case you need to change the location where backup data is stored to an external hard drive for example, it is recommended that instead of changing TopDir path create a symbolic link to the new location, or mount the new BackupPC store at the existing $Conf{TopDir} path.
For example, assuming you have an empty drive, /dev/sdb1 as in our case, then you can simply mount it under, /var/lib/BackupPC/.
mount /dev/sdb1 /var/lib/BackupPC/To automount on boot, update the /etc/fstab with the entry with the line below;
/dev/sdb1 /var/lib/BackupPC xfs defaults 1 2Update the file-system accordingly.
Configure BackupPC Apache Authentication
BackupPC uses Apache as the Web server by default and it is installed along with BackupPC itself. It also implements restricted access to the BackupPC web interface via Apache basic authentication.
Therefore, you can open BackupPC Apache configuration, /etc/httpd/conf.d/BackupPC.conf, which is created by default and make your preferred changes. For example, these are a few changes we made, AuthUserFile and AuthName.
vim /etc/httpd/conf.d/BackupPC.conf...
AuthType Basic
AuthUserFile /etc/BackupPC/.backuppc
AuthName "Kifarunix BackupPC Restricted Access"
<IfModule mod_authz_core.c>
...To allow external access to BackupPC, change the line, Require local to Require all granted.
...
<IfModule mod_authz_core.c>
  # Apache 2.4
  <RequireAll>
    Require valid-user
    <RequireAny>
      #Require local
      Require all granted
    </RequireAny>
  </RequireAll>
</IfModule>
...
Save and quit the configuration file.
Create the BackupPC authentication user and password and store them in the file specified by the value of the AuthUserFile parameter above. For example, to create web authentication user called kifarunixadmin;
htpasswd -c /etc/BackupPC/.backuppc kifarunixadminYou can add another user, say kifarunixuser.
htpasswd /etc/BackupPC/.backuppc kifarunixuserAdjust the permissions of the auth user file;
chmod 666 /etc/BackupPC/.backuppcChange the user under which Apache runs as from apache to backuppc and leave the group as apache;
vim /etc/httpd/conf/httpd.conf...
User backuppc
Group apache
...Disable Apache Welcome Page;
mv /etc/httpd/conf.d/welcome.conf /etc/httpd/conf.d/welcome.conf.oldDisable directory listing;
sed -i 's/Options Indexes FollowSymLinks/Options -Indexes +FollowSymLinks/' /etc/httpd/conf/httpd.confCheck Apache for any errors;
httpd -tSyntax OKStart and enable Apache to run on system boot;
systemctl enable --now httpdRunning BackupPC
Once done with the configurations, start and enable BackupPC to run on system boot;
systemctl enable --now backuppcTo check the status;
systemctl status backuppc● backuppc.service - BackupPC server
Loaded: loaded (/usr/lib/systemd/system/backuppc.service; enabled; vendor preset: disabled)
Active: active (running) since Sat 2020-03-28 18:21:28 EAT; 21s ago
Main PID: 10186 (BackupPC)
Tasks: 1 (limit: 11499)
Memory: 8.8M
CGroup: /system.slice/backuppc.service
└─10186 /usr/bin/perl /usr/share/BackupPC/bin/BackupPC
Mar 28 18:21:28 vpnr.kifarunix-demo.com systemd[1]: Started BackupPC server.You can also verify if BackupPC is running using the BackupPC_serverMesg. All BackupPC programs should be run as BackupPC user, which is backuppc by default as defined by the $Conf{BackupPCUser} parameter.
The backuppc user shell is set to /sbin/nologin by default, to run the BackupPC programs as backuppc user, see how the commands below are ran.
sudo -u backuppc /usr/share/BackupPC/bin/BackupPC_serverMesg status infosudo -u backuppc /usr/share/BackupPC/bin/BackupPC_serverMesg status hostssudo -u backuppc /usr/share/BackupPC/bin/BackupPC_serverMesg status jobsAccording to BackupPC documentation, if the output of these commands doesn’t “look cryptic and confusing, and the output doesn't look like an error message, then all is ok“.
Accessing BackupPC Web User Interface
To access BackupPC from the browser, you need to first allow Apache external access on firewall, if firewall is enabled;
firewall-cmd --add-service={http,https} --permanentfirewall-cmd --reloadYou can now access BackupPC via the URL http://server_IP_OR_hostname/backuppc.
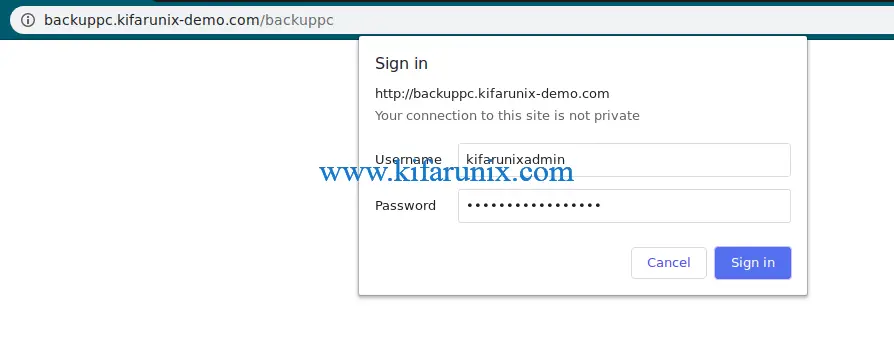
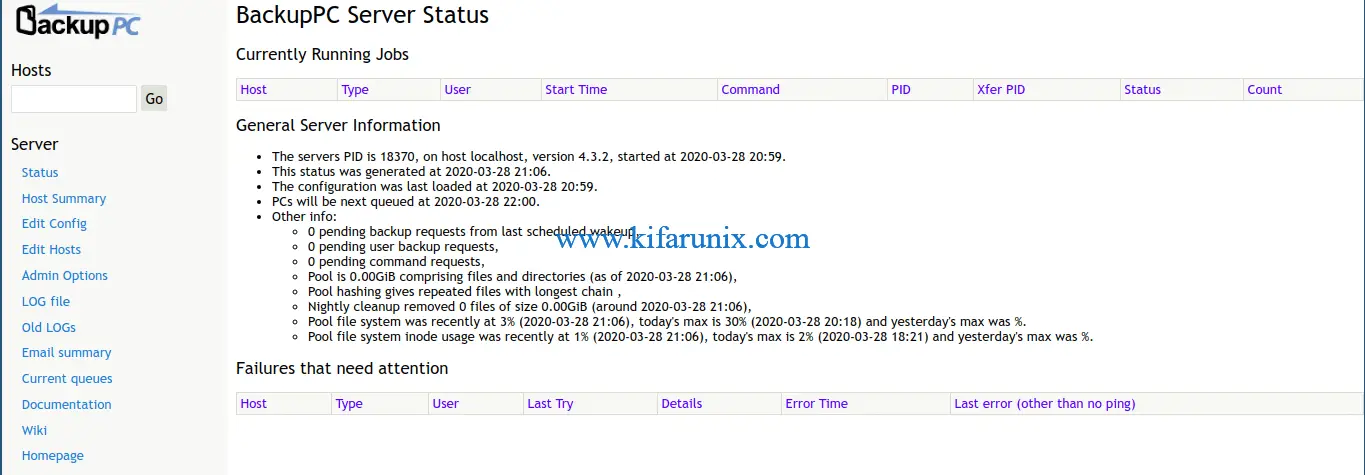
Authenticate and proceed to BackupPC web dashboard.

BackupPC web dashboard.

If you authenticate to BackupPC web interface as non admin user, for instance, kifarunixuser in this demo, you can see such an interface.

You have successfully installed BackupPC 4.3.2. That brings us to the end of our guide on how to install and configure BackupPC.
In our next guides, we will learn how to backup Linux systems with BackupPC server.
Reference
BackupPC Documentation: Installing BackupPC
Other Related Tutorials
Backup Windows System via SMB Using BackupPC
Backup Windows System with BackupPC Using Rsyncd
Install and Configure BackupPC on Debian 10
How to Install and Configure BackupPC as a Backup Server on Ubuntu 18.04


Great tuturial, only missing the powertools repo:
dnf config-manager –set-enabled PowerTools
Otherwise I get the error: Problem: package BackupPC-4.3.1-3.el8.x86_64 requires perl(XML::RSS), but none of the providers can be installed
Thank you for that Rick, cheers!
Great write up but, needs a slight adjustment.
I have been using BackupPC for years and I am so glad to find one of the linux distro that has made BackupPC v4 (any version) part of their repo offering.
Now, regarding “Set Apache user to backuppc and leave the group as apache;” . . . your tutorial does not indicate where (what file) to make this change? And as such, does not allow BackupPC webgui to “run” properly.
Hello Bob. Thank you for your feedback. This has been updated.
Article page is not loading completely. Circles “spinning” (along right side) where (I assume) are the links to advertising loading. Article images (near the bottom) do not complete “loading.”