Nessus Scan policy template is a set of predefined configuration options related to performing a scan. They define specific actions that are performed during a scan. To create custom Nessus scan policy templates, you need to select the existing templates and modify them to suit your scan requirements. After that, they can be selected from the list of scan templates when new scan is created under the user defined tab. Note that it is more useful to create scan policy templates because they can be reused over and over for creating scans
In our previous article, we learnt how to create a new Nessus scan. In the same tutorial, we selected a template specific to that scan only. Well, in this guide, we are going to learn how to create simple scan policy templates and use them to create scans.
Create Policy Template
To create a policy template, login to Nessus and under Scans tab, Resources on the left pane, click Policies.
When a new page opens up, click “New Policy” button to create a new policy template.
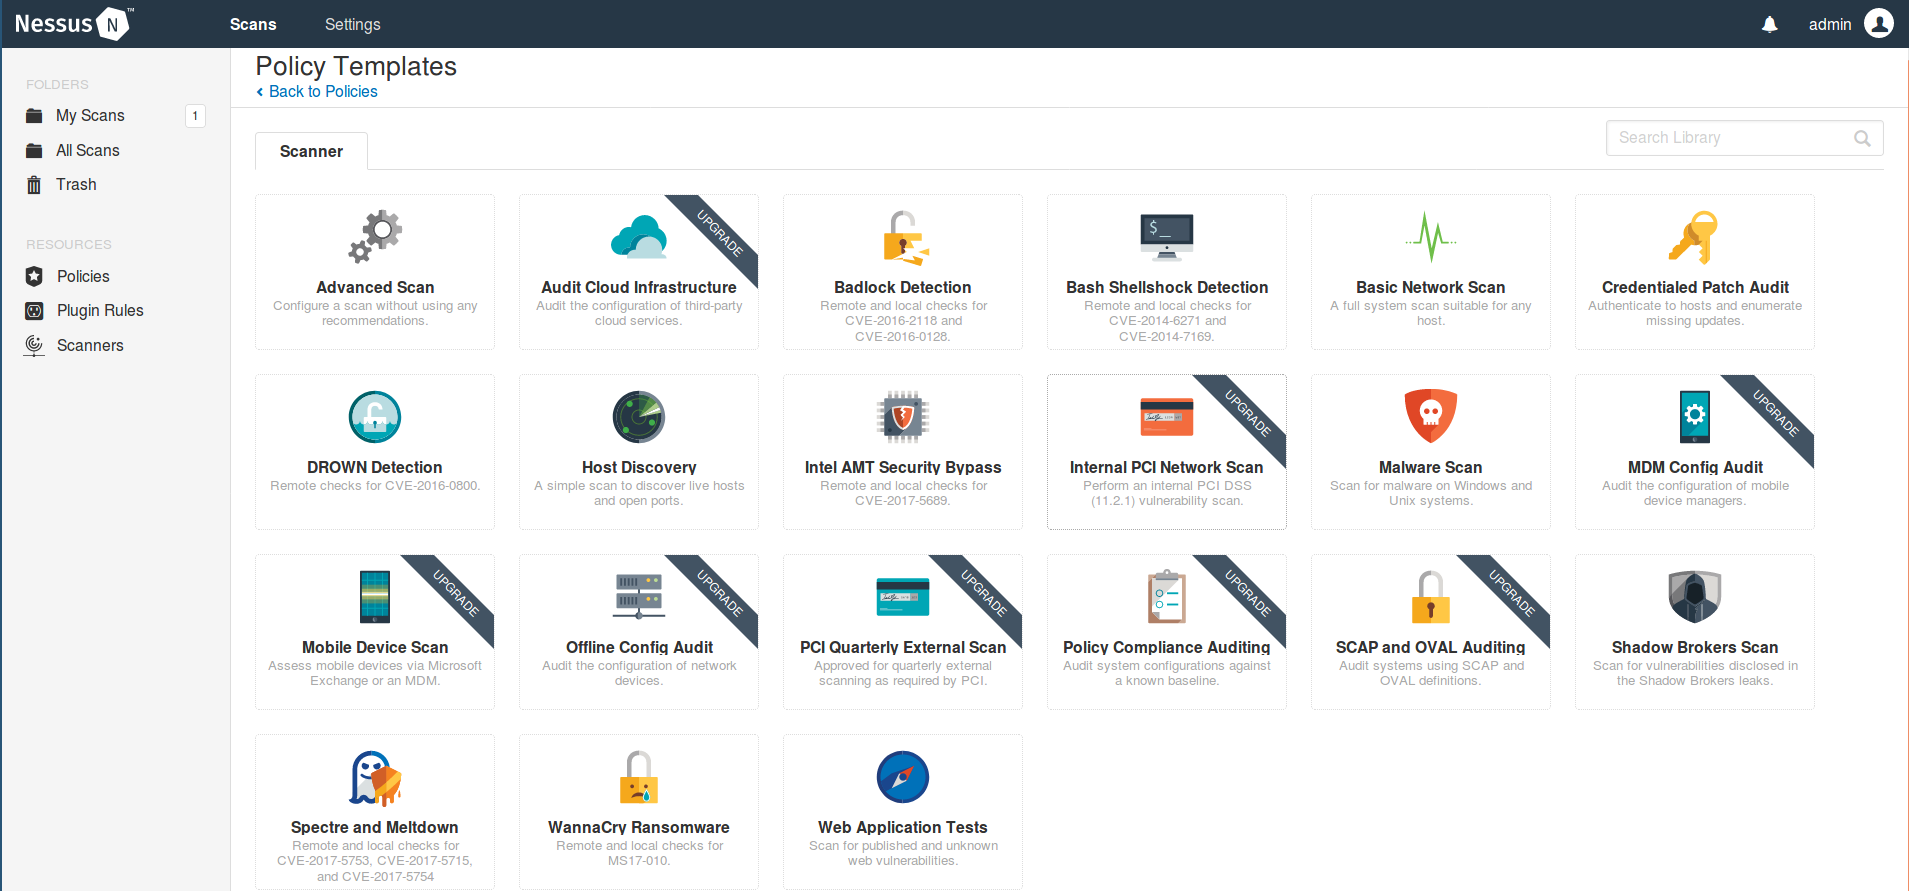
When you click on New Policy, scanner policy templates page will open up.
Select a template to modify from the list as shown above. The templates with upgrade banner are only available with the commercially licensed version of Nessus.
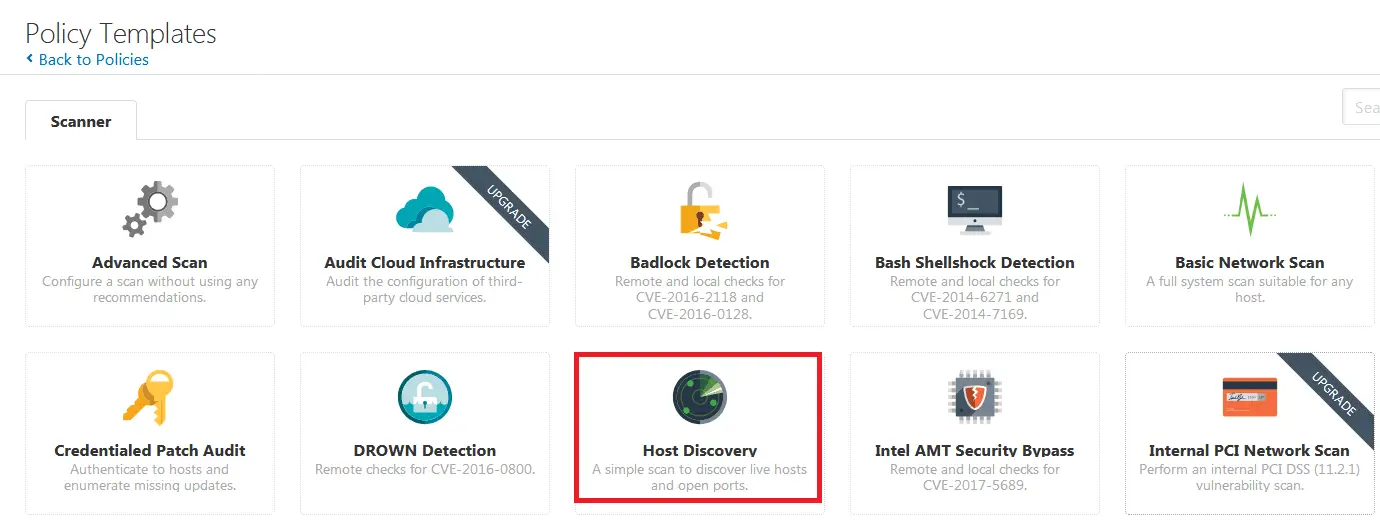
As an example, let us assume that you want to create a Nessus scan policy template to do basic host enumeration to discover live hosts and open ports in your local environment. Therefore click on Host Discovery template.
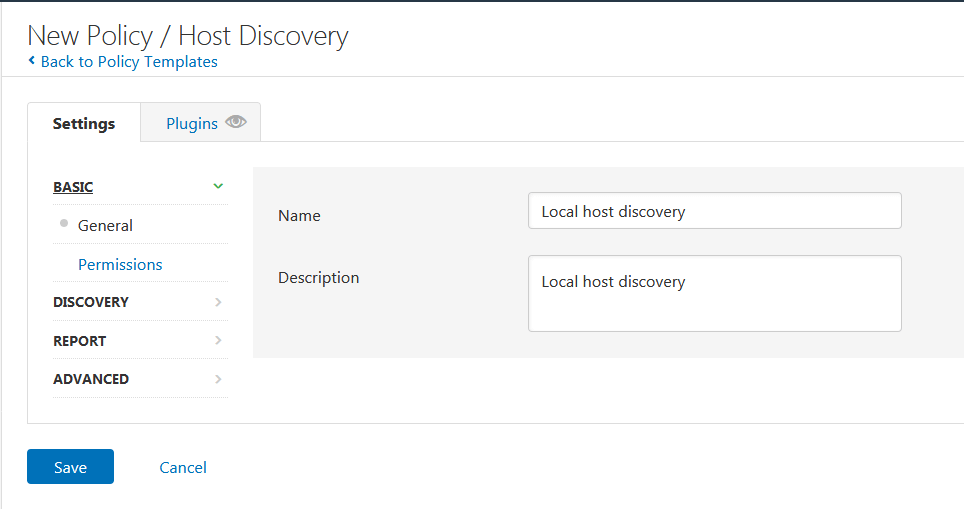
Under the Basic Settings tab, define the name and the description of the custom template.
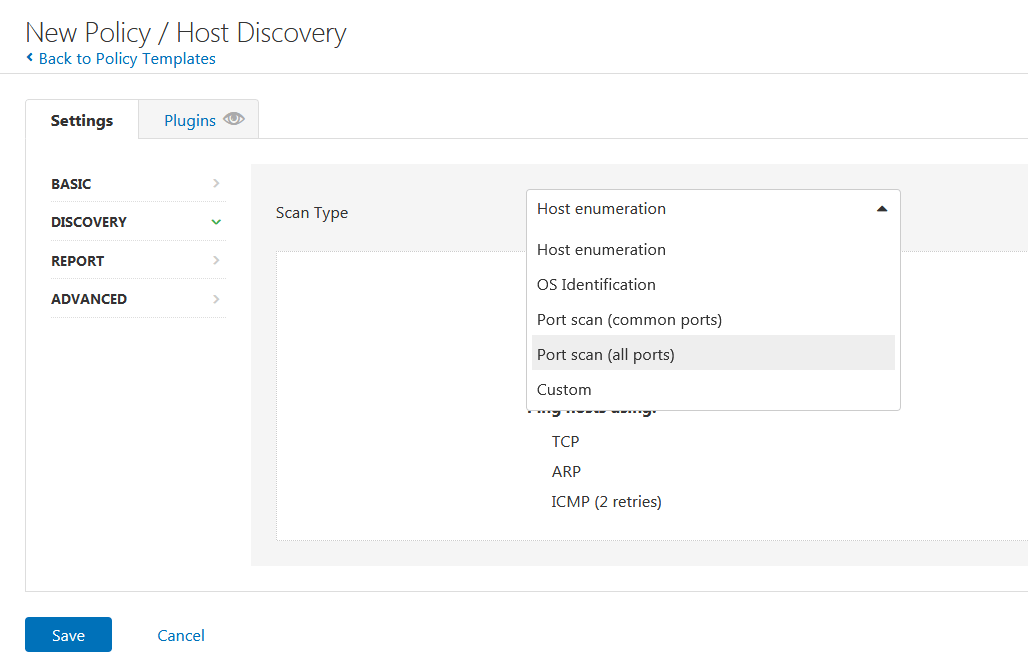
Under DISCOVERY settings, you can select the type of scan you want to perform. There are multiple scan types; host enumeration, OS Identification, Port Scan (all ports and custom ports), or custom scan where you can customize the default options for Host Discovery and Port Scanning.
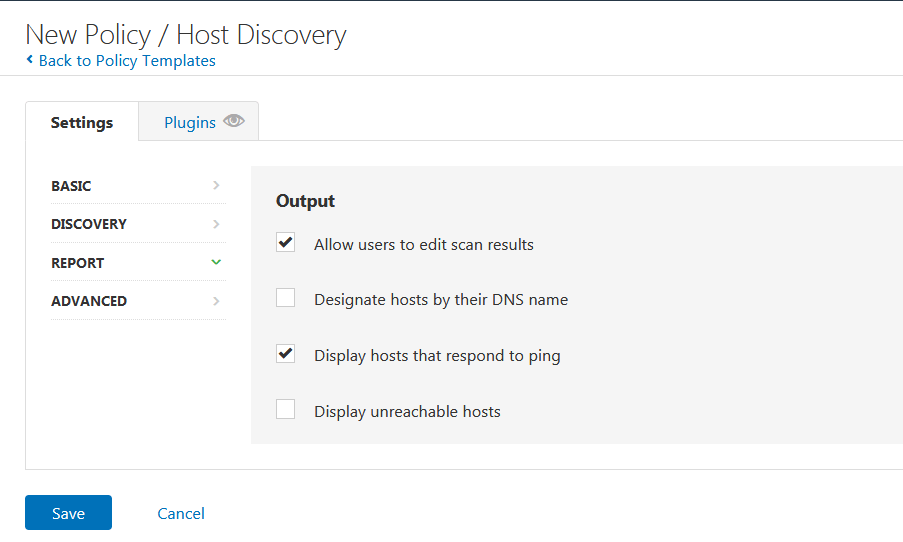
On the REPORT settings, you can choose to allow or disallow a user to delete items from the report, designate hosts by their DNS names, display hosts that respond to ping or display unreachable hosts.
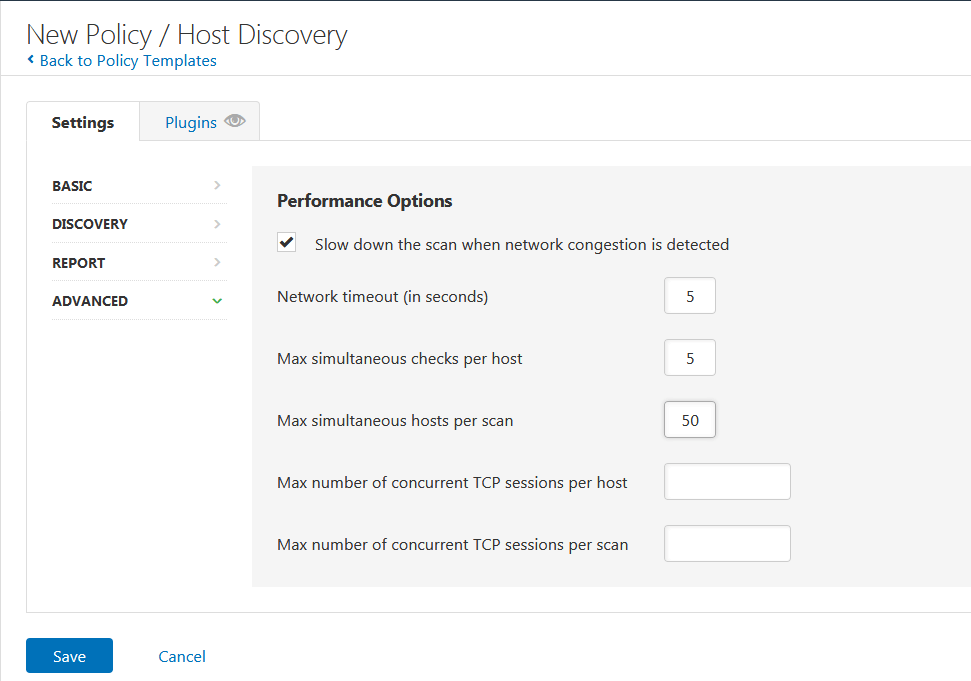
On the ADVANCED settings, you can opt to;
- enable or disable Nessus to slow down the scan when network congestion is detected
- specify the time that Nessus waits for a response from a host
- specify the maximum number of checks a Nessus scanner will perform against a single host at one time
- specify the maximum number of hosts that a Nessus scanner will scan at the same time
- specify the maximum number of established TCP sessions for a single host
- specify the maximum number of established TCP sessions for the entire scan, regardless of the number of hosts being scanned
Once you are done configuring the Nessus scan policy template, click save. The customized scan policy templates should now be available under the User Defined tab.
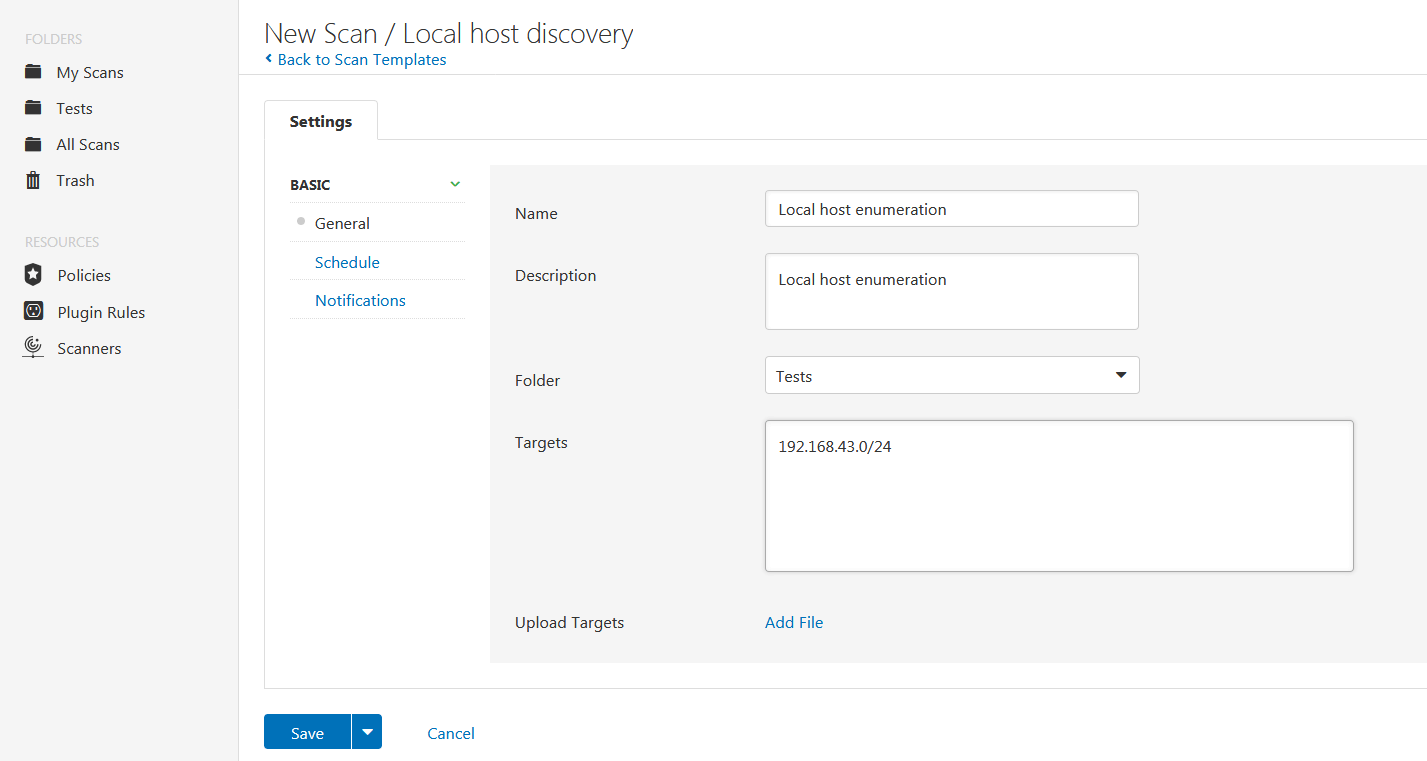
Whenever you need to run host enumeration scan on your local environment and want to use the customized, just click New Scan from the scans page and select your template from the User Defined tab.
You can then enter the basic details of the scan; the name, description, the network to scan, folder to save the results, whether to schedule or run the scan once, email the results after scanning.
Basically, that is what it takes to create a custom Nessus scan policy template. Feel free to explore and customize other templates to suit your scan requirements.


